There are many people who use UNIX or Linux but who IMHO do not understand
UNIX. UNIX is not just an operating system, it is a way of doing things,
and the shell plays a key role by providing the glue that makes it work.
The UNIX methodology relies heavily on reuse of a set of tools rather
than on building monolithic applications. Even perl programmers
often miss the point, writing the heart and soul of the application as perl
script without making use of the UNIX toolkit.
IMHO there are three Unix tools that can spell the difference between
really good programmer or sysadmin and just above average one (even if the latter
has solid knowledge of shell and Perl, knowledge of shell and Perl is necessary
but not sufficient):
OFM (Midnight Commander, Deco, XNC) - a unique class of file
managers that greatly accelirate working with the classic command line Unix
tools. Paradoxically came to Unix from DOS. See
The Orthodox File Manager(OFM) Paradigm.
Chapter 4.
Expect - a unique Unix tool (that is now available for Windows too).
BTW one of the earlier names for Expect was "sex" as it related to "intercourse"
of programs ;-). I strongly recommend to learn how to use it. See
TCL, TK & Expect for more
information
TCL -- Tool command language. This is a unique language that
permits automating tasks that neither shell not Perl can do. It is used in Expect
(see above). Unfortunately politics of Unix (forking
efforts of Richard Stallman (see
Guile,
a Scheme-based GNU macro language :-( ) and, especially, Sun fascination with
Java) prevented TCL from becoming a standard Unix macro language. As Wikipedia
noted " Despite the enthusiasm of its users and developers, many novice programmers
find Scheme intimidating - and the average skill level of scripting language
programmers is substantially lower than for system and application programmers.
Hence Guile, despite its many benefits, struggles for mainstream acceptance
in the
Linux/Unix
world. ". For the dark side of RMS see
The Tcl War
and the second part of my
RMS biography
This two tools can also be used as a fine text in interviews
on advanced Unix-related positions if you have several similar candidates. Other
things equal, their knowledge definitely demonstrate the level of Unix culture superior
to the average "command line junkies" level ;-)
Overview of books about GNU/open source tools can be found
in Unix tools bibliography.
There not that much good books on the subject, still even average books can provide
you with insight in usage of the tool that you might never get via daily practice.
Please note that Unix is a pretty complex system and some aspects of it are non-obvious
even for those who have more than ten years of experience.
20210523 : Basics of HTTP Requests with cURL- An In-Depth Tutorial - ByteXD by default . So, it will not perform any HTTPS redirects. As our website bytexd.com uses HTTPS redirect, cURL cannot fetch the data over the HTTP protocol. Now let's try running the command again but this time we add https:// : Now let's try running the command again but this time we add https:// : https:// :
"
00:00 Use the -L Flag to Follow Redirects This is a good time to learn about the This is a good time to learn about the redirect option with the curl command : curl -L bytexd. com Notice how we didn't have to specify https:// like we did previously. curl -L bytexd. com Notice how we didn't have to specify https:// like we did previously. Notice how we didn't have to specify https:// like we did previously. https:// like we did previously. The -L flag or --location option follows the redirects. Use this to display the contents of any website you want. By default, the curl command with the -L flag The -L flag or --location option follows the redirects. Use this to display the contents of any website you want. By default, the curl command with the -L flag -L flag or --location option follows the redirects. Use this to display the contents of any website you want. By default, the curl command with the -L flag will follow up to 50 redirects .
"
00:00 Save outputs to a file Now that you know how to display website contents on your terminal, you may be wondering why anybody would want to do this. A bunch of HTML is indeed difficult to read when you're looking at it in the command line. But that's where outputting them to a file becomes super helpful. You can save the file in different formats that'll make them easier to read. What can be even more more useful is some cURL script pulling up contents from the website and performing some tasks with the content automatically. For now, let's see how to save the output of a curl command into a file: curl -L -o file bytexd. com The flag -o or --output will save the content of bytexd.com to the file. Now that you know how to display website contents on your terminal, you may be wondering why anybody would want to do this. A bunch of HTML is indeed difficult to read when you're looking at it in the command line. But that's where outputting them to a file becomes super helpful. You can save the file in different formats that'll make them easier to read. What can be even more more useful is some cURL script pulling up contents from the website and performing some tasks with the content automatically. For now, let's see how to save the output of a curl command into a file: curl -L -o file bytexd. com The flag -o or --output will save the content of bytexd.com to the file. But that's where outputting them to a file becomes super helpful. You can save the file in different formats that'll make them easier to read. What can be even more more useful is some cURL script pulling up contents from the website and performing some tasks with the content automatically. For now, let's see how to save the output of a curl command into a file: curl -L -o file bytexd. com The flag -o or --output will save the content of bytexd.com to the file. But that's where outputting them to a file becomes super helpful. You can save the file in different formats that'll make them easier to read. What can be even more more useful is some cURL script pulling up contents from the website and performing some tasks with the content automatically. For now, let's see how to save the output of a curl command into a file: curl -L -o file bytexd. com The flag -o or --output will save the content of bytexd.com to the file. What can be even more more useful is some cURL script pulling up contents from the website and performing some tasks with the content automatically. For now, let's see how to save the output of a curl command into a file: curl -L -o file bytexd. com The flag -o or --output will save the content of bytexd.com to the file. What can be even more more useful is some cURL script pulling up contents from the website and performing some tasks with the content automatically. For now, let's see how to save the output of a curl command into a file: curl -L -o file bytexd. com The flag -o or --output will save the content of bytexd.com to the file. For now, let's see how to save the output of a curl command into a file: curl -L -o file bytexd. com The flag -o or --output will save the content of bytexd.com to the file. For now, let's see how to save the output of a curl command into a file: curl -L -o file bytexd. com The flag -o or --output will save the content of bytexd.com to the file. curl -L -o file bytexd. com The flag -o or --output will save the content of bytexd.com to the file. The flag -o or --output will save the content of bytexd.com to the file. -o or --output will save the content of bytexd.com to the file. You can open this file with your browser, and you'll see the homepage of bytexd.com . Now if the URL you used has some page with a name or some file you can use the -O or --remote-name flag to save the page/file with its original name. Let's see this in action You can open this file with your browser, and you'll see the homepage of bytexd.com . Now if the URL you used has some page with a name or some file you can use the -O or --remote-name flag to save the page/file with its original name. Let's see this in action Now if the URL you used has some page with a name or some file you can use the -O or --remote-name flag to save the page/file with its original name. Let's see this in action Now if the URL you used has some page with a name or some file you can use the -O or --remote-name flag to save the page/file with its original name. Let's see this in action -O or --remote-name flag to save the page/file with its original name. Let's see this in action
"
00:00 Here, I downloaded an executable file which is the Rufus tool . The file name will be rufus-3.14p.exe . Here, I downloaded an executable file which is the Rufus tool . The file name will be rufus-3.14p.exe . rufus-3.14p.exe . lowercase ) lets you save the file with a custom name. Let's understand this a bit more: curl -L -O bytexd. com curl -L -O bytexd.com curl: Remote file name has no length! curl: try 'curl help' or 'curl manual' for more information Now it's clear that the -O flag cannot be used where there is no page/filename. Whereas: Let's understand this a bit more: curl -L -O bytexd. com curl -L -O bytexd.com curl: Remote file name has no length! curl: try 'curl help' or 'curl manual' for more information Now it's clear that the -O flag cannot be used where there is no page/filename. Whereas: curl -L -O bytexd. com curl -L -O bytexd.com curl: Remote file name has no length! curl: try 'curl help' or 'curl manual' for more information Now it's clear that the -O flag cannot be used where there is no page/filename. Whereas: Now it's clear that the -O flag cannot be used where there is no page/filename. Whereas: -O flag cannot be used where there is no page/filename. Whereas:
"
00:00 Downloading Multiple files You can download multiple files together using multiple -O flags. Here's an example where we download both of the files we used as examples previously: You can download multiple files together using multiple -O flags. Here's an example where we download both of the files we used as examples previously: -O flags. Here's an example where we download both of the files we used as examples previously:
"
00:00 Resuming Downloads If you cancel some downloads midway, you can resume them by using the -C - option: If you cancel some downloads midway, you can resume them by using the -C - option: -C - option: Basics of HTTP Requests & Responses We need to learn some basics of the HTTP Requests & Responses before we can perform them with cURL efficiently. We need to learn some basics of the HTTP Requests & Responses before we can perform them with cURL efficiently. HTTP Requests & Responses before we can perform them with cURL efficiently. Whenever your browser is loading a page from any website, it performs HTTP requests. It is a client-server model.
Your browser is the client here, and it requests the server to send back its content.
The server provides the requested resources with the response.
The request your browser sent is called an HTTP request. The response from the server is the HTTP response. The request your browser sent is called an HTTP request. The response from the server is the HTTP response. The response from the server is the HTTP response. The response from the server is the HTTP response. HTTP Requests In the HTTP request-response model, the request is sent first. These requests can be of different types In the HTTP request-response model, the request is sent first. These requests can be of different types These requests can be of different types These requests can be of different types which are called HTTP request methods . The HTTP protocol establishes a group of methods that signals what action is required for the specific resources. Let's look at some of the HTTP request methods: The HTTP protocol establishes a group of methods that signals what action is required for the specific resources. Let's look at some of the HTTP request methods: The HTTP protocol establishes a group of methods that signals what action is required for the specific resources. Let's look at some of the HTTP request methods: Let's look at some of the HTTP request methods: Let's look at some of the HTTP request methods:
GET Method: This request method does exactly as its name implies. It fetches the requested resources from the server. When a webpage is shown, the browser requests the server with this method.
HEAD Method: This method is used when the client requests only for the HTTP Header. It does not retrieve other resources along with the header.
POST Method: This method sends data and requests the server to accept it. The server might store it and use the data. Some common examples for this request method would be when you fill out a form and submit the data. This method would also be used when you're uploading a photo, possibly a profile picture.
PUT Method: This method is similar to the POST method, but it only affects the URI specified. It requests the server to create or replace the existing data. One key difference between this method and the post is that the PUT method always produces the same result when performed multiple times. The user decides the URI of the resource.
DELETE Method: This method requests the server to delete the specified resources.
Now that you know some of the HTTP request methods, can you tell which request did you perform with curl in the previous sections? Now that you know some of the HTTP request methods, can you tell which request did you perform with curl in the previous sections? The GET requests . We only requested the server to send the specified data and retrieved it. We'll shortly go through the ways to perform other requests with cURL. Let's quickly go over the HTTP responses before that. We'll shortly go through the ways to perform other requests with cURL. Let's quickly go over the HTTP responses before that. We'll shortly go through the ways to perform other requests with cURL. Let's quickly go over the HTTP responses before that. HTTP Responses The server responds to the HTTP requests by sending back some responses. The server responds to the HTTP requests by sending back some responses. Whether the request was successful or not, the server will always send back the Status code. The status code indicates different types of messages including success or error messages. The structure of the HTTP response is as follows: The status code indicates different types of messages including success or error messages. The structure of the HTTP response is as follows: The status code indicates different types of messages including success or error messages. The structure of the HTTP response is as follows: The status code indicates different types of messages including success or error messages. The structure of the HTTP response is as follows: The structure of the HTTP response is as follows:
Status code: This is the first line of an HTTP response. See all the codes here . ( Another way to remember status codes is by seeing each code associated with a picture of silly cats https://http.cat )
Response Header: The response will have a header section revealing some more information about the request and the server.
Message Body: The response might have an additional message-body attached to it. It is optional. The message body is just below the Response Header, separated by an empty line.
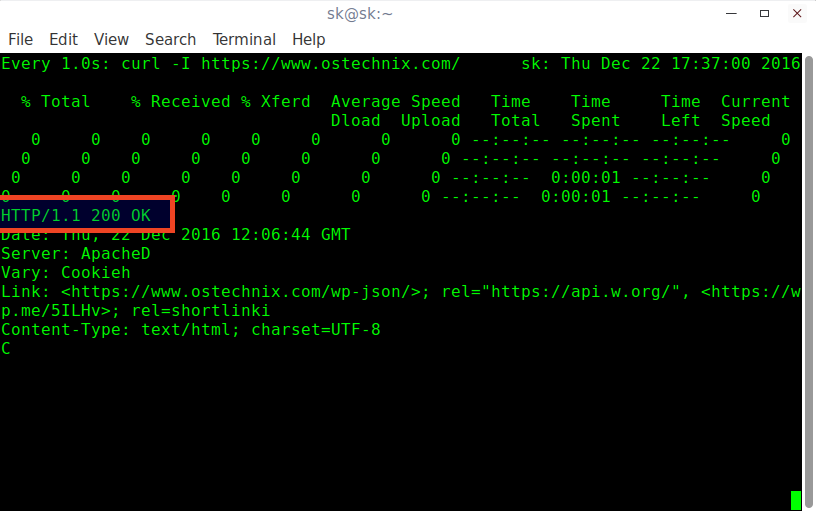
Let's take a look at an example HTTP response. We'll use cURL to generate a GET request and see what response the server sends back: curl -i example. com Don't worry about the -i flag. It just tells cURL to show the response including the header. Here is the response: curl -i example.com HTTP/1.1 200 OK Age: 525920 Cache-Control: max-age=604800 Content-Type: text/html; charset=UTF-8 Date: Sun, 16 May 2021 17:07:42 GMT Etag: "3147526947+ident" Expires: Sun, 23 May 2021 17:07:42 GMT Last-Modified: Thu, 17 Oct 2019 07:18:26 GMT Server: ECS (dcb/7F81) Vary: Accept-Encoding X-Cache: HIT Content-Length: 1256 <!doctype html> < html > < head > < title > Example Domain </ title > < meta charset = "utf-8" /> < meta http-equiv = "Content-type" content = "text/html; charset=utf-8" /> < meta name = "viewport" content = "width=device-width, initial-scale=1" /> < style type = "text/css" > body { background-color: #f0f0f2; margin: 0; padding: 0; font-family: -apple-system, system-ui, BlinkMacSystemFont, "Segoe UI", "Open Sans", "Helvetica Neue", Helvetica, Arial, sans-serif; } div { width: 600px; margin: 5em auto; padding: 2em; background-color: #fdfdff; border-radius: 0.5em; box-shadow: 2px 3px 7px 2px rgba(0,0,0,0.02); } a:link, a:visited { color: #38488f; text-decoration: none; } @media (max-width: 700px) { div { margin: 0 auto; width: auto; } } </ style > </ head > < body > < div > < h1 > Example Domain </ h1 > < p > This domain is for use in illustrative examples in documents. You may use this domain in literature without prior coordination or asking for permission. </ p > < p >< a href = "https://www.iana.org/domains/example" > More information... </ a ></ p > </ div > </ body > </ html > Can you break down the response? Let's take a look at an example HTTP response. We'll use cURL to generate a GET request and see what response the server sends back: curl -i example. com Don't worry about the -i flag. It just tells cURL to show the response including the header. Here is the response: curl -i example.com HTTP/1.1 200 OK Age: 525920 Cache-Control: max-age=604800 Content-Type: text/html; charset=UTF-8 Date: Sun, 16 May 2021 17:07:42 GMT Etag: "3147526947+ident" Expires: Sun, 23 May 2021 17:07:42 GMT Last-Modified: Thu, 17 Oct 2019 07:18:26 GMT Server: ECS (dcb/7F81) Vary: Accept-Encoding X-Cache: HIT Content-Length: 1256 <!doctype html> < html > < head > < title > Example Domain </ title > < meta charset = "utf-8" /> < meta http-equiv = "Content-type" content = "text/html; charset=utf-8" /> < meta name = "viewport" content = "width=device-width, initial-scale=1" /> < style type = "text/css" > body { background-color: #f0f0f2; margin: 0; padding: 0; font-family: -apple-system, system-ui, BlinkMacSystemFont, "Segoe UI", "Open Sans", "Helvetica Neue", Helvetica, Arial, sans-serif; } div { width: 600px; margin: 5em auto; padding: 2em; background-color: #fdfdff; border-radius: 0.5em; box-shadow: 2px 3px 7px 2px rgba(0,0,0,0.02); } a:link, a:visited { color: #38488f; text-decoration: none; } @media (max-width: 700px) { div { margin: 0 auto; width: auto; } } </ style > </ head > < body > < div > < h1 > Example Domain </ h1 > < p > This domain is for use in illustrative examples in documents. You may use this domain in literature without prior coordination or asking for permission. </ p > < p >< a href = "https://www.iana.org/domains/example" > More information... </ a ></ p > </ div > </ body > </ html > Can you break down the response? curl -i example. com Don't worry about the -i flag. It just tells cURL to show the response including the header. Here is the response: curl -i example.com HTTP/1.1 200 OK Age: 525920 Cache-Control: max-age=604800 Content-Type: text/html; charset=UTF-8 Date: Sun, 16 May 2021 17:07:42 GMT Etag: "3147526947+ident" Expires: Sun, 23 May 2021 17:07:42 GMT Last-Modified: Thu, 17 Oct 2019 07:18:26 GMT Server: ECS (dcb/7F81) Vary: Accept-Encoding X-Cache: HIT Content-Length: 1256 <!doctype html> < html > < head > < title > Example Domain </ title > < meta charset = "utf-8" /> < meta http-equiv = "Content-type" content = "text/html; charset=utf-8" /> < meta name = "viewport" content = "width=device-width, initial-scale=1" /> < style type = "text/css" > body { background-color: #f0f0f2; margin: 0; padding: 0; font-family: -apple-system, system-ui, BlinkMacSystemFont, "Segoe UI", "Open Sans", "Helvetica Neue", Helvetica, Arial, sans-serif; } div { width: 600px; margin: 5em auto; padding: 2em; background-color: #fdfdff; border-radius: 0.5em; box-shadow: 2px 3px 7px 2px rgba(0,0,0,0.02); } a:link, a:visited { color: #38488f; text-decoration: none; } @media (max-width: 700px) { div { margin: 0 auto; width: auto; } } </ style > </ head > < body > < div > < h1 > Example Domain </ h1 > < p > This domain is for use in illustrative examples in documents. You may use this domain in literature without prior coordination or asking for permission. </ p > < p >< a href = "https://www.iana.org/domains/example" > More information... </ a ></ p > </ div > </ body > </ html > Can you break down the response? Don't worry about the -i flag. It just tells cURL to show the response including the header. Here is the response: curl -i example.com HTTP/1.1 200 OK Age: 525920 Cache-Control: max-age=604800 Content-Type: text/html; charset=UTF-8 Date: Sun, 16 May 2021 17:07:42 GMT Etag: "3147526947+ident" Expires: Sun, 23 May 2021 17:07:42 GMT Last-Modified: Thu, 17 Oct 2019 07:18:26 GMT Server: ECS (dcb/7F81) Vary: Accept-Encoding X-Cache: HIT Content-Length: 1256 <!doctype html> < html > < head > < title > Example Domain </ title > < meta charset = "utf-8" /> < meta http-equiv = "Content-type" content = "text/html; charset=utf-8" /> < meta name = "viewport" content = "width=device-width, initial-scale=1" /> < style type = "text/css" > body { background-color: #f0f0f2; margin: 0; padding: 0; font-family: -apple-system, system-ui, BlinkMacSystemFont, "Segoe UI", "Open Sans", "Helvetica Neue", Helvetica, Arial, sans-serif; } div { width: 600px; margin: 5em auto; padding: 2em; background-color: #fdfdff; border-radius: 0.5em; box-shadow: 2px 3px 7px 2px rgba(0,0,0,0.02); } a:link, a:visited { color: #38488f; text-decoration: none; } @media (max-width: 700px) { div { margin: 0 auto; width: auto; } } </ style > </ head > < body > < div > < h1 > Example Domain </ h1 > < p > This domain is for use in illustrative examples in documents. You may use this domain in literature without prior coordination or asking for permission. </ p > < p >< a href = "https://www.iana.org/domains/example" > More information... </ a ></ p > </ div > </ body > </ html > Can you break down the response? -i flag. It just tells cURL to show the response including the header. Here is the response: curl -i example.com HTTP/1.1 200 OK Age: 525920 Cache-Control: max-age=604800 Content-Type: text/html; charset=UTF-8 Date: Sun, 16 May 2021 17:07:42 GMT Etag: "3147526947+ident" Expires: Sun, 23 May 2021 17:07:42 GMT Last-Modified: Thu, 17 Oct 2019 07:18:26 GMT Server: ECS (dcb/7F81) Vary: Accept-Encoding X-Cache: HIT Content-Length: 1256 <!doctype html> < html > < head > < title > Example Domain </ title > < meta charset = "utf-8" /> < meta http-equiv = "Content-type" content = "text/html; charset=utf-8" /> < meta name = "viewport" content = "width=device-width, initial-scale=1" /> < style type = "text/css" > body { background-color: #f0f0f2; margin: 0; padding: 0; font-family: -apple-system, system-ui, BlinkMacSystemFont, "Segoe UI", "Open Sans", "Helvetica Neue", Helvetica, Arial, sans-serif; } div { width: 600px; margin: 5em auto; padding: 2em; background-color: #fdfdff; border-radius: 0.5em; box-shadow: 2px 3px 7px 2px rgba(0,0,0,0.02); } a:link, a:visited { color: #38488f; text-decoration: none; } @media (max-width: 700px) { div { margin: 0 auto; width: auto; } } </ style > </ head > < body > < div > < h1 > Example Domain </ h1 > < p > This domain is for use in illustrative examples in documents. You may use this domain in literature without prior coordination or asking for permission. </ p > < p >< a href = "https://www.iana.org/domains/example" > More information... </ a ></ p > </ div > </ body > </ html > Can you break down the response? Here is the response: curl -i example.com HTTP/1.1 200 OK Age: 525920 Cache-Control: max-age=604800 Content-Type: text/html; charset=UTF-8 Date: Sun, 16 May 2021 17:07:42 GMT Etag: "3147526947+ident" Expires: Sun, 23 May 2021 17:07:42 GMT Last-Modified: Thu, 17 Oct 2019 07:18:26 GMT Server: ECS (dcb/7F81) Vary: Accept-Encoding X-Cache: HIT Content-Length: 1256 <!doctype html> < html > < head > < title > Example Domain </ title > < meta charset = "utf-8" /> < meta http-equiv = "Content-type" content = "text/html; charset=utf-8" /> < meta name = "viewport" content = "width=device-width, initial-scale=1" /> < style type = "text/css" > body { background-color: #f0f0f2; margin: 0; padding: 0; font-family: -apple-system, system-ui, BlinkMacSystemFont, "Segoe UI", "Open Sans", "Helvetica Neue", Helvetica, Arial, sans-serif; } div { width: 600px; margin: 5em auto; padding: 2em; background-color: #fdfdff; border-radius: 0.5em; box-shadow: 2px 3px 7px 2px rgba(0,0,0,0.02); } a:link, a:visited { color: #38488f; text-decoration: none; } @media (max-width: 700px) { div { margin: 0 auto; width: auto; } } </ style > </ head > < body > < div > < h1 > Example Domain </ h1 > < p > This domain is for use in illustrative examples in documents. You may use this domain in literature without prior coordination or asking for permission. </ p > < p >< a href = "https://www.iana.org/domains/example" > More information... </ a ></ p > </ div > </ body > </ html > Can you break down the response? Here is the response: curl -i example.com HTTP/1.1 200 OK Age: 525920 Cache-Control: max-age=604800 Content-Type: text/html; charset=UTF-8 Date: Sun, 16 May 2021 17:07:42 GMT Etag: "3147526947+ident" Expires: Sun, 23 May 2021 17:07:42 GMT Last-Modified: Thu, 17 Oct 2019 07:18:26 GMT Server: ECS (dcb/7F81) Vary: Accept-Encoding X-Cache: HIT Content-Length: 1256 <!doctype html> < html > < head > < title > Example Domain </ title > < meta charset = "utf-8" /> < meta http-equiv = "Content-type" content = "text/html; charset=utf-8" /> < meta name = "viewport" content = "width=device-width, initial-scale=1" /> < style type = "text/css" > body { background-color: #f0f0f2; margin: 0; padding: 0; font-family: -apple-system, system-ui, BlinkMacSystemFont, "Segoe UI", "Open Sans", "Helvetica Neue", Helvetica, Arial, sans-serif; } div { width: 600px; margin: 5em auto; padding: 2em; background-color: #fdfdff; border-radius: 0.5em; box-shadow: 2px 3px 7px 2px rgba(0,0,0,0.02); } a:link, a:visited { color: #38488f; text-decoration: none; } @media (max-width: 700px) { div { margin: 0 auto; width: auto; } } </ style > </ head > < body > < div > < h1 > Example Domain </ h1 > < p > This domain is for use in illustrative examples in documents. You may use this domain in literature without prior coordination or asking for permission. </ p > < p >< a href = "https://www.iana.org/domains/example" > More information... </ a ></ p > </ div > </ body > </ html > Can you break down the response? curl -i example.com HTTP/1.1 200 OK Age: 525920 Cache-Control: max-age=604800 Content-Type: text/html; charset=UTF-8 Date: Sun, 16 May 2021 17:07:42 GMT Etag: "3147526947+ident" Expires: Sun, 23 May 2021 17:07:42 GMT Last-Modified: Thu, 17 Oct 2019 07:18:26 GMT Server: ECS (dcb/7F81) Vary: Accept-Encoding X-Cache: HIT Content-Length: 1256 <!doctype html> < html > < head > < title > Example Domain </ title > < meta charset = "utf-8" /> < meta http-equiv = "Content-type" content = "text/html; charset=utf-8" /> < meta name = "viewport" content = "width=device-width, initial-scale=1" /> < style type = "text/css" > body { background-color: #f0f0f2; margin: 0; padding: 0; font-family: -apple-system, system-ui, BlinkMacSystemFont, "Segoe UI", "Open Sans", "Helvetica Neue", Helvetica, Arial, sans-serif; } div { width: 600px; margin: 5em auto; padding: 2em; background-color: #fdfdff; border-radius: 0.5em; box-shadow: 2px 3px 7px 2px rgba(0,0,0,0.02); } a:link, a:visited { color: #38488f; text-decoration: none; } @media (max-width: 700px) { div { margin: 0 auto; width: auto; } } </ style > </ head > < body > < div > < h1 > Example Domain </ h1 > < p > This domain is for use in illustrative examples in documents. You may use this domain in literature without prior coordination or asking for permission. </ p > < p >< a href = "https://www.iana.org/domains/example" > More information... </ a ></ p > </ div > </ body > </ html > Can you break down the response? Can you break down the response? The first line, which is highlighted, is the Status code . It means the request was successful, and we get a standard response. Lines 2 to 12 represent the HTTP header . You can see some information like content type, date, etc. The header ends before the empty line. Below the empty line, the message body is received. Now you know extensive details about how the HTTP request and response work. Let's move on to learning how to perform some requests with the curl command. The header ends before the empty line. Below the empty line, the message body is received. Now you know extensive details about how the HTTP request and response work. Let's move on to learning how to perform some requests with the curl command. The header ends before the empty line. Below the empty line, the message body is received. Now you know extensive details about how the HTTP request and response work. Let's move on to learning how to perform some requests with the curl command. Now you know extensive details about how the HTTP request and response work. Let's move on to learning how to perform some requests with the curl command. Now you know extensive details about how the HTTP request and response work. Let's move on to learning how to perform some requests with the curl command. Let's move on to learning how to perform some requests with the curl command. Let's move on to learning how to perform some requests with the curl command. curl command. HTTP requests with the curl command From this section, you'll see different HTTP requests made by cURL. We'll show you some example commands and explain them along the way. From this section, you'll see different HTTP requests made by cURL. We'll show you some example commands and explain them along the way. GET Request By default, cURL performs the GET requests when no other methods are specified. We saw some basic commands with cURL at the beginning of the article. All of those commands sent GET requests to the server, retrieved the data, and showed them in your terminal. Here are some examples in the context of the GET requests: curl example. com As we mentioned before, the -L flag enables cURL to follow redirects. By default, cURL performs the GET requests when no other methods are specified. We saw some basic commands with cURL at the beginning of the article. All of those commands sent GET requests to the server, retrieved the data, and showed them in your terminal. Here are some examples in the context of the GET requests: curl example. com As we mentioned before, the -L flag enables cURL to follow redirects. We saw some basic commands with cURL at the beginning of the article. All of those commands sent GET requests to the server, retrieved the data, and showed them in your terminal. Here are some examples in the context of the GET requests: curl example. com As we mentioned before, the -L flag enables cURL to follow redirects. We saw some basic commands with cURL at the beginning of the article. All of those commands sent GET requests to the server, retrieved the data, and showed them in your terminal. Here are some examples in the context of the GET requests: curl example. com As we mentioned before, the -L flag enables cURL to follow redirects. Here are some examples in the context of the GET requests: curl example. com As we mentioned before, the -L flag enables cURL to follow redirects. Here are some examples in the context of the GET requests: curl example. com As we mentioned before, the -L flag enables cURL to follow redirects. curl example. com As we mentioned before, the -L flag enables cURL to follow redirects. As we mentioned before, the -L flag enables cURL to follow redirects. -L flag enables cURL to follow redirects. HEAD Request We can extract the HTTP headers from the response of the server . Why? Because sometimes you might want to take a look at the headers for some debugging or monitoring purposes. Why? Because sometimes you might want to take a look at the headers for some debugging or monitoring purposes. Extract the HTTP Header with curl The header is not shown when you perform GET requests with cURL. For example, shis command will only output the message body without the HTTP header. curl example. com To see only the header, we use the -I flag or the --head option. The header is not shown when you perform GET requests with cURL. For example, shis command will only output the message body without the HTTP header. curl example. com To see only the header, we use the -I flag or the --head option. For example, shis command will only output the message body without the HTTP header. curl example. com To see only the header, we use the -I flag or the --head option. For example, shis command will only output the message body without the HTTP header. curl example. com To see only the header, we use the -I flag or the --head option. curl example. com To see only the header, we use the -I flag or the --head option. To see only the header, we use the -I flag or the --head option. -I flag or the --head option. Debugging with the HTTP Headers Now let's find out why you might want to look at the headers. We'll run the following command: curl -I bytexd. com Remember we Now let's find out why you might want to look at the headers. We'll run the following command: curl -I bytexd. com Remember we curl -I bytexd. com Remember we Remember we couldn't redirect to bytexd.com without the -L flag? If you didn't include the -I flag there would've been no outputs. -L flag? If you didn't include the -I flag there would've been no outputs. With the -I flag you'll get the header of the response, which offers us some information: With the -I flag you'll get the header of the response, which offers us some information: -I flag you'll get the header of the response, which offers us some information: The code is 301 which indicates a redirect is necessary. As we mentioned before you can check HTTP status codes and their meanings here ( Wikipedia ) or here ( status codes associated with silly cat pictures ) If you want to see the communication between cURL and the server then turn on the verbose option with the -v flag: If you want to see the communication between cURL and the server then turn on the verbose option with the -v flag: If you want to see the communication between cURL and the server then turn on the verbose option with the -v flag: -v flag: HTTP Header with the Redirect option Now you might wonder what will happen if we use the redirect option -L with the Header only -I option. Let's try it out: Now you might wonder what will happen if we use the redirect option -L with the Header only -I option. Let's try it out: -L with the Header only -I option. Let's try it out: POST Requests We already mentioned that cURL performs the GET request method by default. For using other request methods need to use the -X or --request flag followed by the request method. We already mentioned that cURL performs the GET request method by default. For using other request methods need to use the -X or --request flag followed by the request method. -X or --request flag followed by the request method. Let's see an example: curl -X [ method ] [ more options ] [ URI ] For using the POST method we'll use: curl -X POST [ more options ] [ URI ] Let's see an example: curl -X [ method ] [ more options ] [ URI ] For using the POST method we'll use: curl -X POST [ more options ] [ URI ] curl -X [ method ] [ more options ] [ URI ] For using the POST method we'll use: curl -X POST [ more options ] [ URI ] For using the POST method we'll use: curl -X POST [ more options ] [ URI ] curl -X POST [ more options ] [ URI ] Sending data using POST method You can use the -d or --data option to specify the data you want to send to the server. You can use the -d or --data option to specify the data you want to send to the server. -d or --data option to specify the data you want to send to the server. This flag sends data with the content type of application/x-www-form-urlencoded . This flag sends data with the content type of application/x-www-form-urlencoded . application/x-www-form-urlencoded . httpbin.org is free service HTTP request & response service and httpbin.org/post accepts POST requests and will help us better understand how requests are made. Here's an example with the -d flag: Here's an example with the -d flag: -d flag: Uploading files with curl Multipart data can be sent with the -F or --form flag which uses the multipart/form-data or form content type. Multipart data can be sent with the -F or --form flag which uses the multipart/form-data or form content type. -F or --form flag which uses the multipart/form-data or form content type. You can also send files using this flag, and you'll also need to attach the @ prefix to attach a whole file. You can also send files using this flag, and you'll also need to attach the @ prefix to attach a whole file. @ prefix to attach a whole file. Modify the HTTP Header with curl You can use the -H or --header flag to change the header content when sending data to a server. This will allow us to send custom-made requests to the server. You can use the -H or --header flag to change the header content when sending data to a server. This will allow us to send custom-made requests to the server. -H or --header flag to change the header content when sending data to a server. This will allow us to send custom-made requests to the server. ( May 23, 2021 , bytexd.com )
We can display the formatted date from the date string provided by the user using the -d or
""date option to the command. It will not affect the system date, it only parses the requested
date from the string. For example,
$ date -d "Feb 14 1999"
Parsing string to date.
$ date --date="09/10/1960"
Parsing string to date.
Displaying Upcoming Date & Time With -d Option
Aside from parsing the date, we can also display the upcoming date using the -d option with
the command. The date command is compatible with words that refer to time or date values such
as next Sun, last Friday, tomorrow, yesterday, etc. For examples,
Displaying Next Monday
Date
$ date -d "next Mon"
Displaying upcoming date.
Displaying Past Date & Time With -d Option
Using the -d option to the command we can also know or view past date. For
examples,
Displaying Last Friday Date
$ date -d "last Fri"
Displaying past date
Parse Date From File
If you have a record of the static date strings in the file we can parse them in the
preferred date format using the -f option with the date command. In this way, you can format
multiple dates using the command. In the following example, I have created the file that
contains the list of date strings and parsed it with the command.
$ date -f datefile.txt
Parse date from the file.
Setting Date & Time on Linux
We can not only view the date but also set the system date according to your preference. For
this, you need a user with Sudo access and you can execute the command in the following
way.
$ sudo date -s "Sun 30 May 2021 07:35:06 PM PDT"
Display File Last Modification Time
We can check the file's last modification time using the date command, for this we need to
add the -r option to the command. It helps in tracking files when it was last modified. For
example,
Moreover you just choose those relevant and not all options. E.g.,
ls -l --time-style=+%H
will show only hour.
ls -l --time-style=+%H:%M:%D
will show Hour, Minute and date.
# ls -l --time-style=full-iso
ls Command Full Time Style
# ls -l --time-style=long-iso
Long Time Style Listing
# ls -l --time-style=iso
Time Style Listing
# ls -l --time-style=locale
Locale Time Style Listing
# ls -l --time-style=+%H:%M:%S:%D
Date and Time Style Listing
# ls --full-time
Full Style Time Listing
2. Output the contents of a directory in various formats such as separated by commas, horizontal, long, vertical, across, etc.
Contents of directory can be listed using
ls command
in various format as suggested below.
across
comma
horizontal
long
single-column
verbose
vertical
# ls ""-format=across
# ls --format=comma
# ls --format=horizontal
# ls --format=long
# ls --format=single-column
# ls --format=verbose
# ls --format=vertical
Listing Formats of ls Command
3. Use ls command to append indicators like (/=@|) in output to the contents of the directory.
The option
-p
with "
ls
" command will server the purpose.
It will append one of the above indicator, based upon the type of file.
# ls -p
Append Indicators to Content
4. Sort the contents of directory on the basis of extension, size, time and version.
We can use options like
--extension
to sort the output by extension, size by extension
--size
, time by using extension
-t
and version using extension
-v
.
Also we can use option
--none
which will output in general way without any sorting in actual.
# ls --sort=extension
# ls --sort=size
# ls --sort=time
# ls --sort=version
# ls --sort=none
Sort Listing of Content by Options
5. Print numeric UID and GID for every contents of a directory using ls command.
The above scenario can be achieved using flag
-n
(Numeric-uid-gid) along with
ls
command.
# ls -n
Print Listing of Content by UID and GID
6. Print the contents of a directory on standard output in more columns than specified by default.
Well
ls
command output the contents of a directory
according to the size of the screen automatically.
We can however manually assign the value of screen width and control number of columns appearing. It can be done using switch "
--width
".
# ls --width 80
# ls --width 100
# ls --width 150
List Content Based on Window Sizes
Note
: You can experiment what value
you should pass with
width
flag.
7. Include manual tab size at the contents of directory listed by ls command instead of default 8.
If you have to delete the fourth line from the file then you have to substitute
N=4
.
$ sed '4d' testfile.txt
Delete
Line from File
How to Delete First and Last Line from a File
You can delete the first line from a file using the same syntax as described in the previous example. You have to put
N=1
which
will remove the first line.
$ sed '1d' testfile.txt
To delete the last line from a file using the below command with
($)
sign
that denotes the last line of a file.
$ sed '$d' testfile.txt
Delete
First and Last Lines from File
How to Delete Range of Lines from a File
You can delete a range of lines from a file. Let's say you want to delete lines from 3 to 5, you can use the below syntax.
M
starting line number
N
Ending line number
$ sed 'M,Nd' testfile.txt
To actually delete, use the following command to do it.
$ sed '3,5d' testfile.txt
Delete
Range of Lines from-File
You can use
!
symbol
to negate the delete operation. This will delete all lines except the given range(3-5).
$ sed '3,5!d' testfile.txt
Negate
Operation
How to Blank Lines from a File
To delete all blank lines from a file run the following command. An important point to note is using this command, empty lines with
spaces will not be deleted. I have added empty lines and empty lines with spaces in my test file.
$ cat testfile.txt

First line

second line
Third line

Fourth line
Fifth line

Sixth line
SIXTH LINE
$ sed '/^$/d' testfile.txt
Lines
with Spaces Not Removed
From the above image, you can see empty lines are deleted but lines that have spaces are not deleted. To delete all lines including
spaces you can run the following command.
$ sed '/^[[:space:]]*$/d' testfile.txt
Lines
with Spaces Removed
How to Delete Lines Starting with Words in a File
To delete a line that starts with a certain word run the following command with
^
symbol
represents the start of the word followed by the actual word.
$ sed '/^First/d' testfile.txt
To delete a line that ends with a certain word run the following command. The word to be deleted followed by the
$
symbol
will delete lines.
$ sed '/LINE$/d' testfile.txt
Delete
Line Start with Words in File
How to Make Changes Directly into a File
To make the changes directly in the file using
sed
you
have to pass
-i
flag
which will make the changes directly in the file.
$ sed -i '/^[[:space:]]*$/d' testfile.txt
We have come to the end of the article. The
sed
command
will play a major part when you are working on manipulating any files. When combined with other Linux utilities like
awk
,
grep
you
can do more things with
sed
.
[May 23, 2021] Basics of HTTP Requests with cURL- An In-Depth Tutorial - ByteXD by default . So, it will not perform any HTTPS redirects. As our website bytexd.com uses HTTPS redirect, cURL cannot fetch the data over the HTTP protocol. Now let's try running the command again but this time we add https:// : Now let's try running the command again but this time we add https:// : https:// :
"
00:00 Use the -L Flag to Follow Redirects This is a good time to learn about the This is a good time to learn about the redirect option with the curl command : curl -L bytexd. com Notice how we didn't have to specify https:// like we did previously. curl -L bytexd. com Notice how we didn't have to specify https:// like we did previously. Notice how we didn't have to specify https:// like we did previously. https:// like we did previously. The -L flag or --location option follows the redirects. Use this to display the contents of any website you want. By default, the curl command with the -L flag The -L flag or --location option follows the redirects. Use this to display the contents of any website you want. By default, the curl command with the -L flag -L flag or --location option follows the redirects. Use this to display the contents of any website you want. By default, the curl command with the -L flag will follow up to 50 redirects .
"
00:00 Save outputs to a file Now that you know how to display website contents on your terminal, you may be wondering why anybody would want to do this. A bunch of HTML is indeed difficult to read when you're looking at it in the command line. But that's where outputting them to a file becomes super helpful. You can save the file in different formats that'll make them easier to read. What can be even more more useful is some cURL script pulling up contents from the website and performing some tasks with the content automatically. For now, let's see how to save the output of a curl command into a file: curl -L -o file bytexd. com The flag -o or --output will save the content of bytexd.com to the file. Now that you know how to display website contents on your terminal, you may be wondering why anybody would want to do this. A bunch of HTML is indeed difficult to read when you're looking at it in the command line. But that's where outputting them to a file becomes super helpful. You can save the file in different formats that'll make them easier to read. What can be even more more useful is some cURL script pulling up contents from the website and performing some tasks with the content automatically. For now, let's see how to save the output of a curl command into a file: curl -L -o file bytexd. com The flag -o or --output will save the content of bytexd.com to the file. But that's where outputting them to a file becomes super helpful. You can save the file in different formats that'll make them easier to read. What can be even more more useful is some cURL script pulling up contents from the website and performing some tasks with the content automatically. For now, let's see how to save the output of a curl command into a file: curl -L -o file bytexd. com The flag -o or --output will save the content of bytexd.com to the file. But that's where outputting them to a file becomes super helpful. You can save the file in different formats that'll make them easier to read. What can be even more more useful is some cURL script pulling up contents from the website and performing some tasks with the content automatically. For now, let's see how to save the output of a curl command into a file: curl -L -o file bytexd. com The flag -o or --output will save the content of bytexd.com to the file. What can be even more more useful is some cURL script pulling up contents from the website and performing some tasks with the content automatically. For now, let's see how to save the output of a curl command into a file: curl -L -o file bytexd. com The flag -o or --output will save the content of bytexd.com to the file. What can be even more more useful is some cURL script pulling up contents from the website and performing some tasks with the content automatically. For now, let's see how to save the output of a curl command into a file: curl -L -o file bytexd. com The flag -o or --output will save the content of bytexd.com to the file. For now, let's see how to save the output of a curl command into a file: curl -L -o file bytexd. com The flag -o or --output will save the content of bytexd.com to the file. For now, let's see how to save the output of a curl command into a file: curl -L -o file bytexd. com The flag -o or --output will save the content of bytexd.com to the file. curl -L -o file bytexd. com The flag -o or --output will save the content of bytexd.com to the file. The flag -o or --output will save the content of bytexd.com to the file. -o or --output will save the content of bytexd.com to the file. You can open this file with your browser, and you'll see the homepage of bytexd.com . Now if the URL you used has some page with a name or some file you can use the -O or --remote-name flag to save the page/file with its original name. Let's see this in action You can open this file with your browser, and you'll see the homepage of bytexd.com . Now if the URL you used has some page with a name or some file you can use the -O or --remote-name flag to save the page/file with its original name. Let's see this in action Now if the URL you used has some page with a name or some file you can use the -O or --remote-name flag to save the page/file with its original name. Let's see this in action Now if the URL you used has some page with a name or some file you can use the -O or --remote-name flag to save the page/file with its original name. Let's see this in action -O or --remote-name flag to save the page/file with its original name. Let's see this in action
"
00:00 Here, I downloaded an executable file which is the Rufus tool . The file name will be rufus-3.14p.exe . Here, I downloaded an executable file which is the Rufus tool . The file name will be rufus-3.14p.exe . rufus-3.14p.exe . lowercase ) lets you save the file with a custom name. Let's understand this a bit more: curl -L -O bytexd. com curl -L -O bytexd.com curl: Remote file name has no length! curl: try 'curl help' or 'curl manual' for more information Now it's clear that the -O flag cannot be used where there is no page/filename. Whereas: Let's understand this a bit more: curl -L -O bytexd. com curl -L -O bytexd.com curl: Remote file name has no length! curl: try 'curl help' or 'curl manual' for more information Now it's clear that the -O flag cannot be used where there is no page/filename. Whereas: curl -L -O bytexd. com curl -L -O bytexd.com curl: Remote file name has no length! curl: try 'curl help' or 'curl manual' for more information Now it's clear that the -O flag cannot be used where there is no page/filename. Whereas: Now it's clear that the -O flag cannot be used where there is no page/filename. Whereas: -O flag cannot be used where there is no page/filename. Whereas:
"
00:00 Downloading Multiple files You can download multiple files together using multiple -O flags. Here's an example where we download both of the files we used as examples previously: You can download multiple files together using multiple -O flags. Here's an example where we download both of the files we used as examples previously: -O flags. Here's an example where we download both of the files we used as examples previously:
"
00:00 Resuming Downloads If you cancel some downloads midway, you can resume them by using the -C - option: If you cancel some downloads midway, you can resume them by using the -C - option: -C - option: Basics of HTTP Requests & Responses We need to learn some basics of the HTTP Requests & Responses before we can perform them with cURL efficiently. We need to learn some basics of the HTTP Requests & Responses before we can perform them with cURL efficiently. HTTP Requests & Responses before we can perform them with cURL efficiently. Whenever your browser is loading a page from any website, it performs HTTP requests. It is a client-server model.
Your browser is the client here, and it requests the server to send back its content.
The server provides the requested resources with the response.
The request your browser sent is called an HTTP request. The response from the server is the HTTP response. The request your browser sent is called an HTTP request. The response from the server is the HTTP response. The response from the server is the HTTP response. The response from the server is the HTTP response. HTTP Requests In the HTTP request-response model, the request is sent first. These requests can be of different types In the HTTP request-response model, the request is sent first. These requests can be of different types These requests can be of different types These requests can be of different types which are called HTTP request methods . The HTTP protocol establishes a group of methods that signals what action is required for the specific resources. Let's look at some of the HTTP request methods: The HTTP protocol establishes a group of methods that signals what action is required for the specific resources. Let's look at some of the HTTP request methods: The HTTP protocol establishes a group of methods that signals what action is required for the specific resources. Let's look at some of the HTTP request methods: Let's look at some of the HTTP request methods: Let's look at some of the HTTP request methods:
GET Method: This request method does exactly as its name implies. It fetches the requested resources from the server. When a webpage is shown, the browser requests the server with this method.
HEAD Method: This method is used when the client requests only for the HTTP Header. It does not retrieve other resources along with the header.
POST Method: This method sends data and requests the server to accept it. The server might store it and use the data. Some common examples for this request method would be when you fill out a form and submit the data. This method would also be used when you're uploading a photo, possibly a profile picture.
PUT Method: This method is similar to the POST method, but it only affects the URI specified. It requests the server to create or replace the existing data. One key difference between this method and the post is that the PUT method always produces the same result when performed multiple times. The user decides the URI of the resource.
DELETE Method: This method requests the server to delete the specified resources.
Now that you know some of the HTTP request methods, can you tell which request did you perform with curl in the previous sections? Now that you know some of the HTTP request methods, can you tell which request did you perform with curl in the previous sections? The GET requests . We only requested the server to send the specified data and retrieved it. We'll shortly go through the ways to perform other requests with cURL. Let's quickly go over the HTTP responses before that. We'll shortly go through the ways to perform other requests with cURL. Let's quickly go over the HTTP responses before that. We'll shortly go through the ways to perform other requests with cURL. Let's quickly go over the HTTP responses before that. HTTP Responses The server responds to the HTTP requests by sending back some responses. The server responds to the HTTP requests by sending back some responses. Whether the request was successful or not, the server will always send back the Status code. The status code indicates different types of messages including success or error messages. The structure of the HTTP response is as follows: The status code indicates different types of messages including success or error messages. The structure of the HTTP response is as follows: The status code indicates different types of messages including success or error messages. The structure of the HTTP response is as follows: The status code indicates different types of messages including success or error messages. The structure of the HTTP response is as follows: The structure of the HTTP response is as follows:
Status code: This is the first line of an HTTP response. See all the codes here . ( Another way to remember status codes is by seeing each code associated with a picture of silly cats https://http.cat )
Response Header: The response will have a header section revealing some more information about the request and the server.
Message Body: The response might have an additional message-body attached to it. It is optional. The message body is just below the Response Header, separated by an empty line.
Let's take a look at an example HTTP response. We'll use cURL to generate a GET request and see what response the server sends back: curl -i example. com Don't worry about the -i flag. It just tells cURL to show the response including the header. Here is the response: curl -i example.com HTTP/1.1 200 OK Age: 525920 Cache-Control: max-age=604800 Content-Type: text/html; charset=UTF-8 Date: Sun, 16 May 2021 17:07:42 GMT Etag: "3147526947+ident" Expires: Sun, 23 May 2021 17:07:42 GMT Last-Modified: Thu, 17 Oct 2019 07:18:26 GMT Server: ECS (dcb/7F81) Vary: Accept-Encoding X-Cache: HIT Content-Length: 1256 <!doctype html> < html > < head > < title > Example Domain </ title > < meta charset = "utf-8" /> < meta http-equiv = "Content-type" content = "text/html; charset=utf-8" /> < meta name = "viewport" content = "width=device-width, initial-scale=1" /> < style type = "text/css" > body { background-color: #f0f0f2; margin: 0; padding: 0; font-family: -apple-system, system-ui, BlinkMacSystemFont, "Segoe UI", "Open Sans", "Helvetica Neue", Helvetica, Arial, sans-serif; } div { width: 600px; margin: 5em auto; padding: 2em; background-color: #fdfdff; border-radius: 0.5em; box-shadow: 2px 3px 7px 2px rgba(0,0,0,0.02); } a:link, a:visited { color: #38488f; text-decoration: none; } @media (max-width: 700px) { div { margin: 0 auto; width: auto; } } </ style > </ head > < body > < div > < h1 > Example Domain </ h1 > < p > This domain is for use in illustrative examples in documents. You may use this domain in literature without prior coordination or asking for permission. </ p > < p >< a href = "https://www.iana.org/domains/example" > More information... </ a ></ p > </ div > </ body > </ html > Can you break down the response? Let's take a look at an example HTTP response. We'll use cURL to generate a GET request and see what response the server sends back: curl -i example. com Don't worry about the -i flag. It just tells cURL to show the response including the header. Here is the response: curl -i example.com HTTP/1.1 200 OK Age: 525920 Cache-Control: max-age=604800 Content-Type: text/html; charset=UTF-8 Date: Sun, 16 May 2021 17:07:42 GMT Etag: "3147526947+ident" Expires: Sun, 23 May 2021 17:07:42 GMT Last-Modified: Thu, 17 Oct 2019 07:18:26 GMT Server: ECS (dcb/7F81) Vary: Accept-Encoding X-Cache: HIT Content-Length: 1256 <!doctype html> < html > < head > < title > Example Domain </ title > < meta charset = "utf-8" /> < meta http-equiv = "Content-type" content = "text/html; charset=utf-8" /> < meta name = "viewport" content = "width=device-width, initial-scale=1" /> < style type = "text/css" > body { background-color: #f0f0f2; margin: 0; padding: 0; font-family: -apple-system, system-ui, BlinkMacSystemFont, "Segoe UI", "Open Sans", "Helvetica Neue", Helvetica, Arial, sans-serif; } div { width: 600px; margin: 5em auto; padding: 2em; background-color: #fdfdff; border-radius: 0.5em; box-shadow: 2px 3px 7px 2px rgba(0,0,0,0.02); } a:link, a:visited { color: #38488f; text-decoration: none; } @media (max-width: 700px) { div { margin: 0 auto; width: auto; } } </ style > </ head > < body > < div > < h1 > Example Domain </ h1 > < p > This domain is for use in illustrative examples in documents. You may use this domain in literature without prior coordination or asking for permission. </ p > < p >< a href = "https://www.iana.org/domains/example" > More information... </ a ></ p > </ div > </ body > </ html > Can you break down the response? curl -i example. com Don't worry about the -i flag. It just tells cURL to show the response including the header. Here is the response: curl -i example.com HTTP/1.1 200 OK Age: 525920 Cache-Control: max-age=604800 Content-Type: text/html; charset=UTF-8 Date: Sun, 16 May 2021 17:07:42 GMT Etag: "3147526947+ident" Expires: Sun, 23 May 2021 17:07:42 GMT Last-Modified: Thu, 17 Oct 2019 07:18:26 GMT Server: ECS (dcb/7F81) Vary: Accept-Encoding X-Cache: HIT Content-Length: 1256 <!doctype html> < html > < head > < title > Example Domain </ title > < meta charset = "utf-8" /> < meta http-equiv = "Content-type" content = "text/html; charset=utf-8" /> < meta name = "viewport" content = "width=device-width, initial-scale=1" /> < style type = "text/css" > body { background-color: #f0f0f2; margin: 0; padding: 0; font-family: -apple-system, system-ui, BlinkMacSystemFont, "Segoe UI", "Open Sans", "Helvetica Neue", Helvetica, Arial, sans-serif; } div { width: 600px; margin: 5em auto; padding: 2em; background-color: #fdfdff; border-radius: 0.5em; box-shadow: 2px 3px 7px 2px rgba(0,0,0,0.02); } a:link, a:visited { color: #38488f; text-decoration: none; } @media (max-width: 700px) { div { margin: 0 auto; width: auto; } } </ style > </ head > < body > < div > < h1 > Example Domain </ h1 > < p > This domain is for use in illustrative examples in documents. You may use this domain in literature without prior coordination or asking for permission. </ p > < p >< a href = "https://www.iana.org/domains/example" > More information... </ a ></ p > </ div > </ body > </ html > Can you break down the response? Don't worry about the -i flag. It just tells cURL to show the response including the header. Here is the response: curl -i example.com HTTP/1.1 200 OK Age: 525920 Cache-Control: max-age=604800 Content-Type: text/html; charset=UTF-8 Date: Sun, 16 May 2021 17:07:42 GMT Etag: "3147526947+ident" Expires: Sun, 23 May 2021 17:07:42 GMT Last-Modified: Thu, 17 Oct 2019 07:18:26 GMT Server: ECS (dcb/7F81) Vary: Accept-Encoding X-Cache: HIT Content-Length: 1256 <!doctype html> < html > < head > < title > Example Domain </ title > < meta charset = "utf-8" /> < meta http-equiv = "Content-type" content = "text/html; charset=utf-8" /> < meta name = "viewport" content = "width=device-width, initial-scale=1" /> < style type = "text/css" > body { background-color: #f0f0f2; margin: 0; padding: 0; font-family: -apple-system, system-ui, BlinkMacSystemFont, "Segoe UI", "Open Sans", "Helvetica Neue", Helvetica, Arial, sans-serif; } div { width: 600px; margin: 5em auto; padding: 2em; background-color: #fdfdff; border-radius: 0.5em; box-shadow: 2px 3px 7px 2px rgba(0,0,0,0.02); } a:link, a:visited { color: #38488f; text-decoration: none; } @media (max-width: 700px) { div { margin: 0 auto; width: auto; } } </ style > </ head > < body > < div > < h1 > Example Domain </ h1 > < p > This domain is for use in illustrative examples in documents. You may use this domain in literature without prior coordination or asking for permission. </ p > < p >< a href = "https://www.iana.org/domains/example" > More information... </ a ></ p > </ div > </ body > </ html > Can you break down the response? -i flag. It just tells cURL to show the response including the header. Here is the response: curl -i example.com HTTP/1.1 200 OK Age: 525920 Cache-Control: max-age=604800 Content-Type: text/html; charset=UTF-8 Date: Sun, 16 May 2021 17:07:42 GMT Etag: "3147526947+ident" Expires: Sun, 23 May 2021 17:07:42 GMT Last-Modified: Thu, 17 Oct 2019 07:18:26 GMT Server: ECS (dcb/7F81) Vary: Accept-Encoding X-Cache: HIT Content-Length: 1256 <!doctype html> < html > < head > < title > Example Domain </ title > < meta charset = "utf-8" /> < meta http-equiv = "Content-type" content = "text/html; charset=utf-8" /> < meta name = "viewport" content = "width=device-width, initial-scale=1" /> < style type = "text/css" > body { background-color: #f0f0f2; margin: 0; padding: 0; font-family: -apple-system, system-ui, BlinkMacSystemFont, "Segoe UI", "Open Sans", "Helvetica Neue", Helvetica, Arial, sans-serif; } div { width: 600px; margin: 5em auto; padding: 2em; background-color: #fdfdff; border-radius: 0.5em; box-shadow: 2px 3px 7px 2px rgba(0,0,0,0.02); } a:link, a:visited { color: #38488f; text-decoration: none; } @media (max-width: 700px) { div { margin: 0 auto; width: auto; } } </ style > </ head > < body > < div > < h1 > Example Domain </ h1 > < p > This domain is for use in illustrative examples in documents. You may use this domain in literature without prior coordination or asking for permission. </ p > < p >< a href = "https://www.iana.org/domains/example" > More information... </ a ></ p > </ div > </ body > </ html > Can you break down the response? Here is the response: curl -i example.com HTTP/1.1 200 OK Age: 525920 Cache-Control: max-age=604800 Content-Type: text/html; charset=UTF-8 Date: Sun, 16 May 2021 17:07:42 GMT Etag: "3147526947+ident" Expires: Sun, 23 May 2021 17:07:42 GMT Last-Modified: Thu, 17 Oct 2019 07:18:26 GMT Server: ECS (dcb/7F81) Vary: Accept-Encoding X-Cache: HIT Content-Length: 1256 <!doctype html> < html > < head > < title > Example Domain </ title > < meta charset = "utf-8" /> < meta http-equiv = "Content-type" content = "text/html; charset=utf-8" /> < meta name = "viewport" content = "width=device-width, initial-scale=1" /> < style type = "text/css" > body { background-color: #f0f0f2; margin: 0; padding: 0; font-family: -apple-system, system-ui, BlinkMacSystemFont, "Segoe UI", "Open Sans", "Helvetica Neue", Helvetica, Arial, sans-serif; } div { width: 600px; margin: 5em auto; padding: 2em; background-color: #fdfdff; border-radius: 0.5em; box-shadow: 2px 3px 7px 2px rgba(0,0,0,0.02); } a:link, a:visited { color: #38488f; text-decoration: none; } @media (max-width: 700px) { div { margin: 0 auto; width: auto; } } </ style > </ head > < body > < div > < h1 > Example Domain </ h1 > < p > This domain is for use in illustrative examples in documents. You may use this domain in literature without prior coordination or asking for permission. </ p > < p >< a href = "https://www.iana.org/domains/example" > More information... </ a ></ p > </ div > </ body > </ html > Can you break down the response? Here is the response: curl -i example.com HTTP/1.1 200 OK Age: 525920 Cache-Control: max-age=604800 Content-Type: text/html; charset=UTF-8 Date: Sun, 16 May 2021 17:07:42 GMT Etag: "3147526947+ident" Expires: Sun, 23 May 2021 17:07:42 GMT Last-Modified: Thu, 17 Oct 2019 07:18:26 GMT Server: ECS (dcb/7F81) Vary: Accept-Encoding X-Cache: HIT Content-Length: 1256 <!doctype html> < html > < head > < title > Example Domain </ title > < meta charset = "utf-8" /> < meta http-equiv = "Content-type" content = "text/html; charset=utf-8" /> < meta name = "viewport" content = "width=device-width, initial-scale=1" /> < style type = "text/css" > body { background-color: #f0f0f2; margin: 0; padding: 0; font-family: -apple-system, system-ui, BlinkMacSystemFont, "Segoe UI", "Open Sans", "Helvetica Neue", Helvetica, Arial, sans-serif; } div { width: 600px; margin: 5em auto; padding: 2em; background-color: #fdfdff; border-radius: 0.5em; box-shadow: 2px 3px 7px 2px rgba(0,0,0,0.02); } a:link, a:visited { color: #38488f; text-decoration: none; } @media (max-width: 700px) { div { margin: 0 auto; width: auto; } } </ style > </ head > < body > < div > < h1 > Example Domain </ h1 > < p > This domain is for use in illustrative examples in documents. You may use this domain in literature without prior coordination or asking for permission. </ p > < p >< a href = "https://www.iana.org/domains/example" > More information... </ a ></ p > </ div > </ body > </ html > Can you break down the response? curl -i example.com HTTP/1.1 200 OK Age: 525920 Cache-Control: max-age=604800 Content-Type: text/html; charset=UTF-8 Date: Sun, 16 May 2021 17:07:42 GMT Etag: "3147526947+ident" Expires: Sun, 23 May 2021 17:07:42 GMT Last-Modified: Thu, 17 Oct 2019 07:18:26 GMT Server: ECS (dcb/7F81) Vary: Accept-Encoding X-Cache: HIT Content-Length: 1256 <!doctype html> < html > < head > < title > Example Domain </ title > < meta charset = "utf-8" /> < meta http-equiv = "Content-type" content = "text/html; charset=utf-8" /> < meta name = "viewport" content = "width=device-width, initial-scale=1" /> < style type = "text/css" > body { background-color: #f0f0f2; margin: 0; padding: 0; font-family: -apple-system, system-ui, BlinkMacSystemFont, "Segoe UI", "Open Sans", "Helvetica Neue", Helvetica, Arial, sans-serif; } div { width: 600px; margin: 5em auto; padding: 2em; background-color: #fdfdff; border-radius: 0.5em; box-shadow: 2px 3px 7px 2px rgba(0,0,0,0.02); } a:link, a:visited { color: #38488f; text-decoration: none; } @media (max-width: 700px) { div { margin: 0 auto; width: auto; } } </ style > </ head > < body > < div > < h1 > Example Domain </ h1 > < p > This domain is for use in illustrative examples in documents. You may use this domain in literature without prior coordination or asking for permission. </ p > < p >< a href = "https://www.iana.org/domains/example" > More information... </ a ></ p > </ div > </ body > </ html > Can you break down the response? Can you break down the response? The first line, which is highlighted, is the Status code . It means the request was successful, and we get a standard response. Lines 2 to 12 represent the HTTP header . You can see some information like content type, date, etc. The header ends before the empty line. Below the empty line, the message body is received. Now you know extensive details about how the HTTP request and response work. Let's move on to learning how to perform some requests with the curl command. The header ends before the empty line. Below the empty line, the message body is received. Now you know extensive details about how the HTTP request and response work. Let's move on to learning how to perform some requests with the curl command. The header ends before the empty line. Below the empty line, the message body is received. Now you know extensive details about how the HTTP request and response work. Let's move on to learning how to perform some requests with the curl command. Now you know extensive details about how the HTTP request and response work. Let's move on to learning how to perform some requests with the curl command. Now you know extensive details about how the HTTP request and response work. Let's move on to learning how to perform some requests with the curl command. Let's move on to learning how to perform some requests with the curl command. Let's move on to learning how to perform some requests with the curl command. curl command. HTTP requests with the curl command From this section, you'll see different HTTP requests made by cURL. We'll show you some example commands and explain them along the way. From this section, you'll see different HTTP requests made by cURL. We'll show you some example commands and explain them along the way. GET Request By default, cURL performs the GET requests when no other methods are specified. We saw some basic commands with cURL at the beginning of the article. All of those commands sent GET requests to the server, retrieved the data, and showed them in your terminal. Here are some examples in the context of the GET requests: curl example. com As we mentioned before, the -L flag enables cURL to follow redirects. By default, cURL performs the GET requests when no other methods are specified. We saw some basic commands with cURL at the beginning of the article. All of those commands sent GET requests to the server, retrieved the data, and showed them in your terminal. Here are some examples in the context of the GET requests: curl example. com As we mentioned before, the -L flag enables cURL to follow redirects. We saw some basic commands with cURL at the beginning of the article. All of those commands sent GET requests to the server, retrieved the data, and showed them in your terminal. Here are some examples in the context of the GET requests: curl example. com As we mentioned before, the -L flag enables cURL to follow redirects. We saw some basic commands with cURL at the beginning of the article. All of those commands sent GET requests to the server, retrieved the data, and showed them in your terminal. Here are some examples in the context of the GET requests: curl example. com As we mentioned before, the -L flag enables cURL to follow redirects. Here are some examples in the context of the GET requests: curl example. com As we mentioned before, the -L flag enables cURL to follow redirects. Here are some examples in the context of the GET requests: curl example. com As we mentioned before, the -L flag enables cURL to follow redirects. curl example. com As we mentioned before, the -L flag enables cURL to follow redirects. As we mentioned before, the -L flag enables cURL to follow redirects. -L flag enables cURL to follow redirects. HEAD Request We can extract the HTTP headers from the response of the server . Why? Because sometimes you might want to take a look at the headers for some debugging or monitoring purposes. Why? Because sometimes you might want to take a look at the headers for some debugging or monitoring purposes. Extract the HTTP Header with curl The header is not shown when you perform GET requests with cURL. For example, shis command will only output the message body without the HTTP header. curl example. com To see only the header, we use the -I flag or the --head option. The header is not shown when you perform GET requests with cURL. For example, shis command will only output the message body without the HTTP header. curl example. com To see only the header, we use the -I flag or the --head option. For example, shis command will only output the message body without the HTTP header. curl example. com To see only the header, we use the -I flag or the --head option. For example, shis command will only output the message body without the HTTP header. curl example. com To see only the header, we use the -I flag or the --head option. curl example. com To see only the header, we use the -I flag or the --head option. To see only the header, we use the -I flag or the --head option. -I flag or the --head option. Debugging with the HTTP Headers Now let's find out why you might want to look at the headers. We'll run the following command: curl -I bytexd. com Remember we Now let's find out why you might want to look at the headers. We'll run the following command: curl -I bytexd. com Remember we curl -I bytexd. com Remember we Remember we couldn't redirect to bytexd.com without the -L flag? If you didn't include the -I flag there would've been no outputs. -L flag? If you didn't include the -I flag there would've been no outputs. With the -I flag you'll get the header of the response, which offers us some information: With the -I flag you'll get the header of the response, which offers us some information: -I flag you'll get the header of the response, which offers us some information: The code is 301 which indicates a redirect is necessary. As we mentioned before you can check HTTP status codes and their meanings here ( Wikipedia ) or here ( status codes associated with silly cat pictures ) If you want to see the communication between cURL and the server then turn on the verbose option with the -v flag: If you want to see the communication between cURL and the server then turn on the verbose option with the -v flag: If you want to see the communication between cURL and the server then turn on the verbose option with the -v flag: -v flag: HTTP Header with the Redirect option Now you might wonder what will happen if we use the redirect option -L with the Header only -I option. Let's try it out: Now you might wonder what will happen if we use the redirect option -L with the Header only -I option. Let's try it out: -L with the Header only -I option. Let's try it out: POST Requests We already mentioned that cURL performs the GET request method by default. For using other request methods need to use the -X or --request flag followed by the request method. We already mentioned that cURL performs the GET request method by default. For using other request methods need to use the -X or --request flag followed by the request method. -X or --request flag followed by the request method. Let's see an example: curl -X [ method ] [ more options ] [ URI ] For using the POST method we'll use: curl -X POST [ more options ] [ URI ] Let's see an example: curl -X [ method ] [ more options ] [ URI ] For using the POST method we'll use: curl -X POST [ more options ] [ URI ] curl -X [ method ] [ more options ] [ URI ] For using the POST method we'll use: curl -X POST [ more options ] [ URI ] For using the POST method we'll use: curl -X POST [ more options ] [ URI ] curl -X POST [ more options ] [ URI ] Sending data using POST method You can use the -d or --data option to specify the data you want to send to the server. You can use the -d or --data option to specify the data you want to send to the server. -d or --data option to specify the data you want to send to the server. This flag sends data with the content type of application/x-www-form-urlencoded . This flag sends data with the content type of application/x-www-form-urlencoded . application/x-www-form-urlencoded . httpbin.org is free service HTTP request & response service and httpbin.org/post accepts POST requests and will help us better understand how requests are made. Here's an example with the -d flag: Here's an example with the -d flag: -d flag: Uploading files with curl Multipart data can be sent with the -F or --form flag which uses the multipart/form-data or form content type. Multipart data can be sent with the -F or --form flag which uses the multipart/form-data or form content type. -F or --form flag which uses the multipart/form-data or form content type. You can also send files using this flag, and you'll also need to attach the @ prefix to attach a whole file. You can also send files using this flag, and you'll also need to attach the @ prefix to attach a whole file. @ prefix to attach a whole file. Modify the HTTP Header with curl You can use the -H or --header flag to change the header content when sending data to a server. This will allow us to send custom-made requests to the server. You can use the -H or --header flag to change the header content when sending data to a server. This will allow us to send custom-made requests to the server. -H or --header flag to change the header content when sending data to a server. This will allow us to send custom-made requests to the server.
7. Sort the contents of file ' lsl.txt ' on the basis of 2nd column (which represents number
of symbolic links).
$ sort -nk2 lsl.txt
Note: The ' -n ' option in the above example sort the contents numerically. Option ' -n '
must be used when we wanted to sort a file on the basis of a column which contains numerical
values.
8. Sort the contents of file ' lsl.txt ' on the basis of 9th column (which is the name of
the files and folders and is non-numeric).
$ sort -k9 lsl.txt
9. It is not always essential to run sort command on a file. We can pipeline it directly on
the terminal with actual command.
$ ls -l /home/$USER | sort -nk5
10. Sort and remove duplicates from the text file tecmint.txt . Check if the duplicate has
been removed or not.
$ cat tecmint.txt
$ sort -u tecmint.txt
Rules so far (what we have observed):
Lines starting with numbers are preferred in the list and lies at the top until otherwise
specified ( -r ).
Lines starting with lowercase letters are preferred in the list and lies at the top until
otherwise specified ( -r ).
Contents are listed on the basis of occurrence of alphabets in dictionary until otherwise
specified ( -r ).
Sort command by default treat each line as string and then sort it depending upon
dictionary occurrence of alphabets (Numeric preferred; see rule – 1) until otherwise
specified.
11. Create a third file ' lsla.txt ' at the current location and populate it with the output
of ' ls -lA ' command.
$ ls -lA /home/$USER > /home/$USER/Desktop/tecmint/lsla.txt
$ cat lsla.txt
Those having understanding of ' ls ' command knows that ' ls -lA'='ls -l ' + Hidden files.
So most of the contents on these two files would be same.
12. Sort the contents of two files on standard output in one go.
$ sort lsl.txt lsla.txt
Notice the repetition of files and folders.
13. Now we can see how to sort, merge and remove duplicates from these two files.
$ sort -u lsl.txt lsla.txt
Notice that duplicates has been omitted from the output. Also, you can write the output to a
new file by redirecting the output to a file.
14. We may also sort the contents of a file or the output based upon more than one column.
Sort the output of ' ls -l ' command on the basis of field 2,5 (Numeric) and 9
(Non-Numeric).
$ ls -l /home/$USER | sort -t "," -nk2,5 -k9
That's all for now. In the next article we will cover a few more examples of ' sort '
command in detail for you. Till then stay tuned and connected to Tecmint. Keep sharing. Keep
commenting. Like and share us and help us get spread.
GNU Screen's basic usage is simple. Launch it with the screen command, and
you're placed into the zeroeth window in a Screen session. You may hardly notice anything's
changed until you decide you need a new prompt.
When one terminal window is occupied with an activity (for instance, you've launched a text
editor like Vim or Jove ,
or you're processing video or audio, or running a batch job), you can just open a new one. To
open a new window, press Ctrl+A , release, and then press c . This creates a new window on top
of your existing window.
You'll know you're in a new window because your terminal appears to be clear of anything
aside from its default prompt. Your other terminal still exists, of course; it's just hiding
behind the new one. To traverse through your open windows, press Ctrl+A , release, and then n
for next or p for previous . With just two windows open, n and p functionally do
the same thing, but you can always open more windows ( Ctrl+A then c ) and walk through
them.
Split screen
GNU Screen's default behavior is more like a mobile device screen than a desktop: you can
only see one window at a time. If you're using GNU Screen because you love to multitask, being
able to focus on only one window may seem like a step backward. Luckily, GNU Screen lets you
split your terminal into windows within windows.
To create a horizontal split, press Ctrl+A and then s . This places one window above
another, just like window panes. The split space is, however, left unpurposed until you tell it
what to display. So after creating a split, you can move into the split pane with Ctrl+A and
then Tab . Once there, use Ctrl+A then n to navigate through all your available windows until
the content you want to be displayed is in the split pane.
You can also create vertical splits with Ctrl+A then | (that's a pipe character, or the
Shift option of the \ key on most keyboards).
Before using the
locate
command you should
check if it is installed in your machine. A
locate
command
comes with GNU findutils or GNU mlocate packages. You can simply run the following command to check if
locate
is
installed or not.
$ which locate
Check
locate Command
If
locate
is not installed by default then
you can run the following commands to install.
Once the installation is completed you need to run the following command to update the
locate
database
to quickly get the file location. That's how your result is faster when you use the
locate
command
to find files in Linux.
$ sudo updatedb
The
mlocate
db file is located at
/var/lib/mlocate/mlocate.db
.
$ ls -l /var/lib/mlocate/mlocate.db
mlocate
database
A good place to start and get to know about
locate
command
is using the man page.
$ man locate
locate
command manpage
How to Use locate Command to Find Files Faster in Linux
To search for any files simply pass the file name as an argument to
locate
command.
$ locate .bashrc
Locate
Files in Linux
If you wish to see how many matched items instead of printing the location of the file you can pass the
-c
flag.
$ sudo locate -c .bashrc
Find
File Count Occurrence
By default
locate
command is set to be case
sensitive. You can make the search to be case insensitive by using the
-i
flag.
$ sudo locate -i file1.sh
Find
Files Case Sensitive in Linux
You can limit the search result by using the
-n
flag.
$ sudo locate -n 3 .bashrc
Limit
Search Results
When you
delete
a file
and if you did not update the
mlocate
database
it will still print the deleted file in output. You have two options now either to update
mlocate
db
periodically or use
-e
flag
which will skip the deleted files.
$ locate -i -e file1.sh
Skip
Deleted Files
You can check the statistics of the
mlocate
database
by running the following command.
$ locate -S
mlocate
database stats
If your
db
file is in a different location
then you may want to use
-d
flag
followed by
mlocate
db path and filename to
be searched for.
$ locate -d [ DB PATH ] [ FILENAME ]
Sometimes you may encounter an error, you can suppress the error messages by running the command with the
-q
flag.
$ locate -q [ FILENAME ]
That's it for this article. We have shown you all the basic operations you can do with
locate
command.
It will be a handy tool for you when working on the command line.
7zip is a wildly popular Windows program that is used to create archives. By default it uses 7z format which it claims is
30-70% better than the normal zip format. It also claims to compress to the regular zip format 2-10% more effectively than
other zip compatible programs. It supports a wide variety of archive formats including (but not limited to) zip, gzip, bzip2,
tar
,
and rar. Linux has had p7zip for a long time. However, this is the first time 7Zip developers have provided native Linux
support.
Linux has has p7zip for some time now. The p7zip is a port of the Windows 7zip package over to Linux/Unix. For the average
user there is no difference. The p7zip package is a direct port from 7zip.
Why Bother Using 7zip if p7zip is available?
The main reason to use the new native Linux version of 7Zip is updates. The p7zip package that comes with my Fedora
installation is version 16.02 from 2016. However, the newly installed 7zip version is 21.01 (alpha) which was released just a
few days ago.
If you have previously has the p7zip package installed you now have two similar commands. The p7zip package provides the
7z
command.
While the new native version of 7Zip provides the
7zz
command.
Using Native 7Zip (7zz) in Linux
7Zip comes with a great deal of options. This full suite of options are beyond the scope of this article. Here we will cover
basic archive creation and extraction.
Creating a 7z Archive with Native Linux 7Zip (7zz)
To create a 7z archive, we will call the newly install 7zz utiltiy and pass the
a
(add
files to archive) command. We will then supply the name of the archive, and the files we want added.
[gbaremmi@putor ~]$ 7zz a words.7z dict-words/*

7-Zip (z) 21.01 alpha (x64) : Copyright (c) 1999-2021 Igor Pavlov : 2021-03-09
 compiler: 9.3.0 GCC 9.3.0 64-bit locale=en_US.UTF-8 Utf16=on HugeFiles=on CPUs:4 Intel(R) Core(TM) i7-4600U CPU @ 2.10GHz (40651),ASM,AES

Scanning the drive:
25192 files, 6650099 bytes (6495 KiB)

Creating archive: words.7z
Add new data to archive: 25192 files, 6650099 bytes (6495 KiB)

Files read from disk: 25192
Archive size: 2861795 bytes (2795 KiB)
Everything is Ok
In the above example we are adding all the files in the
dict-words
directory
to the
words.7z
archive.
Extracting Files from an Archive with Native Linux 7Zip (7zz)
Extracting an archive is very similar. Here we are using the
e
(extract)
command.
File compression is an integral part of system
administration. Finding the best compression method requires significant determination. Luckily, there are many robust
compression tools for Linux that make backing up system data easier. Here, we present ten of the best Linux compression
tools that can be useful to enterprises and users in this regard.
1. LZ4
LZ4
is the compression tool of choice for admins who need lightning-fast compression and decompression speed. It
utilizes the LZ4 lossless algorithm, which belongs to the family of LZ77 byte-oriented compression algorithms. Moreover,
LZ4 comes coupled with a high-speed decoder, making it one of the best Linux compression tools for enterprises.
Zstandard
is another fast compression tool for Linux that can be used for personal and enterprise projects. It's backed
by Facebook and offers excellent compression ratios. Some of its most compelling features include the adaptive mode, which
can control compression ratios based on I/O, the ability to trade speed for better compression, and the dictionary
compression scheme. Zstandard also has a rich API with keybindings for all major programming languages.
3. lzop
lzop
is a robust compression tool that utilizes the Lempel-Ziv-Oberhumer(LZO) compression algorithm. It provides
breakneck compression speed by trading compression ratios. For example, it produces slightly larger files compared to gzip
but requires only 10 percenr CPU runtime. Moreover, lzop can deal with system backups in multiple ways, including backup
mode, single file mode, archive mode, and pipe mode.
4. Gzip
Gzip
is certainly one of the most widely used compression tools for Linux admins. It is compatible with every GNU
software, making it the perfect compression tool for remote engineers. Gzip leverages the Lempel-Ziv coding in deflate mode
for file compression. It can reduce the size of source codes by up to 90 percent. Overall, this is an excellent choice for
seasoned Linux users as well as software developers.
5. bzip2
bzip2
, a free compression tool for Linux, compresses files using the Burrows-Wheeler block-sorting compression
algorithm and Huffman coding. It also supports several additional compression methods, such as run-length encoding, delta
encoding, sparse bit array, and Huffman tables. It can also
recover
data from media drives
in some cases. Overall, bzip2 is a suitable compression tool for everyday usage due to its
robust compression abilities and fast decompression speed.
6. p7zip
p7zip
is the port of 7-zip's command-line utility. It is a high-performance archiving tool with solid compression
ratios and support for many popular formats, including tar, xz, gzip, bzip2, and zip. It uses the 7z format by default,
which provides
30
to 50 percent better compression than standard zip compression
. Moreover, you can use this tool for creating
self-extracting and dynamically-sized volume archives.
7. pigz
pigz
or
parallel
implementation of gzip
is a reliable replacement for the gzip compression tool. It leverages multiple CPU cores to
increase the compression speed dramatically. It utilizes the zlib and pthread libraries for implementing the
multi-threading compression process. However, pigz can't decompress archives in parallel. Hence, you will not be able to
get similar speeds during compression and decompression.
8. pixz
pixz
is a parallel implementation of the XZ compressor with support for data indexing. Instead of producing one big
block of compressed data like xz, it creates a set of smaller blocks. This makes randomly accessing the original data
straightforward. Moreover, pixz also makes sure that the file permissions are preserved the way they were during
compression and decompression.
plzip
is a lossless data compressor tool that makes creative use of the multi-threading capabilities supported by
modern CPUs. It is built on top of the lzlib library and provides a command-line interface similar to gzip and bzip2. One
key benefit of plzip is its ability to fully leverage multiprocessor machines. plzip definitely warrants a try for admins
who need a high-performance Linux compression tool to support parallel compression.
10. XZ Utils
XZ Utils
is a suite of compression tools for Linux that can compress and decompress .xz and .lzma files. It primarily
uses the LZMA2 algorithm for compression and can perform integrity checks of compressed data at ease. Since this tool is
available to
popular
Linux distributions
by default, it can be a viable choice for compression in many situations.
Wrapping Up
A plethora of reliable Linux compression tools
makes it easy to archive and
back
up essential data
. You can choose from many lossless compressors with high compression ratios such as LZ4, lzop, and
bzip2. On the other hand, tools like Zstandard and plzip allow for more advanced compression workflows.
When you call
date with +%s option, it shows the current system clock in
seconds since 1970-01-01 00:00:00 UTC. Thus, with this option, you can easily calculate
time difference in seconds between two clock measurements.
start_time=$(date +%s)
# perform a task
end_time=$(date +%s)

# elapsed time with second resolution
elapsed=$(( end_time - start_time ))
Another (preferred) way to measure elapsed time in seconds in bash is to use a built-in bash
variable called SECONDS . When you access SECONDS variable in a bash
shell, it returns the number of seconds that have passed so far since the current shell was
launched. Since this method does not require running the external date command in
a subshell, it is a more elegant solution.
This will display elapsed time in terms of the number of seconds. If you want a more
human-readable format, you can convert $elapsed output as follows.
eval "echo Elapsed time: $(date -ud "@$elapsed" +'$((%s/3600/24)) days %H hr %M min %S sec')"
Rather than trying to limit yourself to just one session or remembering what is running on
which screen, you can set a name for the session by using the -S argument:
[root@rhel7dev ~]# screen -S "db upgrade"
[detached from 25778.db upgrade]

[root@rhel7dev ~]# screen -ls
There are screens on:
    25778.db upgrade    (Detached)
    25706.pts-0.rhel7dev    (Detached)
    25693.pts-0.rhel7dev    (Detached)
    25665.pts-0.rhel7dev    (Detached)
4 Sockets in /var/run/screen/S-root.

[root@rhel7dev ~]# screen -x "db upgrade"
[detached from 25778.db upgrade]

[root@rhel7dev ~]#
To exit a screen session, you can type exit or hit Ctrl+A and then D .
Now that you know how to start, stop, and label screen sessions let's get a
little more in-depth. To split your screen session in half vertically hit Ctrl+A and then the |
key ( Shift+Backslash ). At this point, you'll have your screen session with the prompt on the
left:
Image
To switch to your screen on the right, hit Ctrl+A and then the Tab key. Your cursor is now
in the right session, but there's no prompt. To get a prompt hit Ctrl+A and then C . I can do
this multiple times to get multiple vertical splits to the screen:
Image
You can now toggle back and forth between the two screen panes by using Ctrl+A+Tab .
What happens when you cat out a file that's larger than your console can
display and so some content scrolls past? To scroll back in the buffer, hit Ctrl+A and then Esc
. You'll now be able to use the cursor keys to move around the screen and go back in the
buffer.
There are other options for screen , so to see them, hit Ctrl , then A , then
the question mark :
Further reading can be found in the man page for screen . This article is a
quick introduction to using the screen command so that a disconnected remote
session does not end up killing a process accidentally. Another program that is similar to
screen is tmux and you can read about tmux in this article .
Some data sources present unique logging challenges, leaving organizations vulnerable to
attack. Here's how to navigate each one to reduce risk and increase visibility.
$ colordiff attendance-2020 attendance-2021
10,12c10
< Monroe Landry
< Jonathan Moody
< Donnell Moore
---
< Sandra Henry-Stocker
If you add a -u option, those lines that are included in both files will appear in your
normal font color.
wdiff
The wdiff command uses a different strategy. It highlights the lines that are only in the
first or second files using special characters. Those surrounded by square brackets are only in
the first file. Those surrounded by braces are only in the second file.
$ wdiff attendance-2020 attendance-2021
Alfreda Branch
Hans Burris
Felix Burt
Ray Campos
Juliet Chan
Denver Cunningham
Tristan Day
Kent Farmer
Terrie Harrington
[-Monroe Landry                 <== lines in file 1 start
Jonathon Moody
Donnell Moore-]                 <== lines only in file 1 stop
{+Sandra Henry-Stocker+}        <== line only in file 2
Leanne Park
Alfredo Potter
Felipe Rush
vimdiff
The vimdiff command takes an entirely different approach. It uses the vim editor to open the
files in a side-by-side fashion. It then highlights the lines that are different using
background colors and allows you to edit the two files and save each of them separately.
Unlike the commands described above, it runs on the desktop, not in a terminal
window.
This webinar will discuss key trends and strategies, identified by Forrester Research, for
digital CX and customer self-service in 2021 and beyond. Register now
On Debian systems, you can install vimdiff with this command:
$ sudo apt install vim
vimdiff.jpg <=====================
kompare
The kompare command, like vimdifff , runs on your desktop. It displays differences between
files to be viewed and merged and is often used by programmers to see and manage differences in
their code. It can compare files or folders. It's also quite customizable.
The kdiff3 tool allows you to compare up to three files and not only see the differences
highlighted, but merge the files as you see fit. This tool is often used to manage changes and
updates in program code.
Like vimdiff and kompare , kdiff3 runs on the desktop.
You can find more information on kdiff3 at sourceforge .
Patch
is a command that is used to apply patch files to the files like source code, configuration. Patch files holds the
difference between original file and new file. In order to get the difference or patch we use
diff
tool.
Software is consist of a bunch of source code. The source code is developed by developers and changes in time. Getting
whole new file for each change is not a practical and fast way. So distributing only changes is the best way. The changes
applied to the old file and than new file or patched file is compiled for new version of software.
Now
we will create patch file in this step but we need some simple source code with two different version. We call the source
code file name as
myapp.c
.
#include <stdio.h>

void main(){

printf("Hi poftut");

printf("This is new line as a patch");

}
Now
we will create a patch file named
myapp.patch
.
$ diff -u myapp_old.c myapp.c > myapp.patch
Create
Patch File
We can print
myapp.patch
file
with following command
$ cat myapp.patch
Apply Patch File
Now
we have a patch file and we assume we have transferred this patch file to the system which holds the old source code which
is named
myapp_old.patch
.
We will simply apply this patch file. Here is what the patch file contains
the name of the patched file
the different content
$ patch < myapp.patch
Apply
Patch File
Take Backup Before Applying Patch
One
of the useful feature is taking backups before applying patches. We will use
-b
option
to take backup. In our example we will patch our source code file with
myapp.patch
.
$ patch -b < myapp.patch
Take
Backup Before Applying Patch
The backup name will be the same as source code file just adding the
.orig
extension.
So backup file name will be
myapp.c.orig
Set Backup File Version
While
taking backup there may be all ready an backup file. So we need to save multiple backup files without overwriting. There
is
-V
option
which will set the versioning mechanism of the original file. In this example we will use
numbered
versioning.
$ patch -b -V numbered < myapp.patch
Set
Backup File Version
As we can see from screenshot the new backup file is named as number like
myapp.c.~1~
Validate Patch File Without Applying or Dry run
We
may want to only validate or see the result of the patching. There is a option for this feature. We will use
--dry-run
option
to only emulate patching process but not change any file really.
$ patch --dry-run < myapp.patch
Reverse Patch
Some
times we may need to patch in reverse order. So the apply process will be in reverse. We can use
-R
parameter
for this operation. In the example we will patch
myapp_old.c
rather
than
myapp.c
First, make a copy of the source tree: ## Original source code is in lighttpd-1.4.35/ directory ##
$ cp -R lighttpd-1.4.35/ lighttpd-1.4.35-new/
Cd to lighttpd-1.4.35-new directory and make changes as per your requirements: $ cd lighttpd-1.4.35-new/
$ vi geoip-mod.c
$ vi Makefile
Finally, create a patch with the following command: $ cd ..
$ diff -rupN lighttpd-1.4.35/ lighttpd-1.4.35-new/ > my.patch
You can use my.patch file to patch lighttpd-1.4.35 source code on a different computer/server
using patch command as discussed above: patch -p1
See the man page of patch and other command for more information and usage - bash(1)
Patch
is a command that is used to apply patch files to the files like source code, configuration. Patch files holds the
difference between original file and new file. In order to get the difference or patch we use
diff
tool.
Software is consist of a bunch of source code. The source code is developed by developers and changes in time. Getting
whole new file for each change is not a practical and fast way. So distributing only changes is the best way. The changes
applied to the old file and than new file or patched file is compiled for new version of software.
Now
we will create patch file in this step but we need some simple source code with two different version. We call the source
code file name as
myapp.c
.
#include <stdio.h>

void main(){

printf("Hi poftut");

printf("This is new line as a patch");

}
Now
we will create a patch file named
myapp.patch
.
$ diff -u myapp_old.c myapp.c > myapp.patch
Create
Patch File
We can print
myapp.patch
file
with following command
$ cat myapp.patch
Apply Patch File
Now
we have a patch file and we assume we have transferred this patch file to the system which holds the old source code which
is named
myapp_old.patch
.
We will simply apply this patch file. Here is what the patch file contains
the name of the patched file
the different content
$ patch < myapp.patch
Apply
Patch File
Take Backup Before Applying Patch
One
of the useful feature is taking backups before applying patches. We will use
-b
option
to take backup. In our example we will patch our source code file with
myapp.patch
.
$ patch -b < myapp.patch
Take
Backup Before Applying Patch
The backup name will be the same as source code file just adding the
.orig
extension.
So backup file name will be
myapp.c.orig
Set Backup File Version
While
taking backup there may be all ready an backup file. So we need to save multiple backup files without overwriting. There
is
-V
option
which will set the versioning mechanism of the original file. In this example we will use
numbered
versioning.
$ patch -b -V numbered < myapp.patch
Set
Backup File Version
As we can see from screenshot the new backup file is named as number like
myapp.c.~1~
Validate Patch File Without Applying or Dry run
We
may want to only validate or see the result of the patching. There is a option for this feature. We will use
--dry-run
option
to only emulate patching process but not change any file really.
$ patch --dry-run < myapp.patch
Reverse Patch
Some
times we may need to patch in reverse order. So the apply process will be in reverse. We can use
-R
parameter
for this operation. In the example we will patch
myapp_old.c
rather
than
myapp.c
Screen or as I like to refer to it "Admin's little helper" Screen is a window
manager that multiplexes a physical terminal between several processes
here are a couple quick reasons you'd might use screen
Lets say you have a unreliable internet connection you can use screen and if you get knocked
out from your current session you can always connect back to your session.
Or let's say you need more terminals, instead of opening a new terminal or a new tab just
create a new terminal inside of screen
Here are the screen shortcuts to help you on your way Screen shortcuts
and here are some of the Top 10 Awesome Linux Screen tips urfix.com uses all the time if not
daily.
1) Attach screen over ssh
ssh -t remote_host screen -r
Directly attach a remote screen session (saves a useless parent bash process)
This command starts screen with 'htop', 'nethogs' and 'iotop' in split-screen. You have to
have these three commands (of course) and specify the interface for nethogs – mine is
wlan0, I could have acquired the interface from the default route extending the command but
this way is simpler.
htop is a wonderful top replacement with many interactive commands and configuration
options. nethogs is a program which tells which processes are using the most bandwidth. iotop
tells which processes are using the most I/O.
The command creates a temporary "screenrc" file which it uses for doing the
triple-monitoring. You can see several examples of screenrc files here:
http://www.softpanorama.org/Utilities/Screen/screenrc_examples.shtml
4) Share a
'screen'-session
screen -x
Ater person A starts his screen-session with `screen`, person B can attach to the srceen of
person A with `screen -x`. Good to know, if you need or give support from/to others.
5)
Start screen in detached mode
screen -d -m [<command>]
Start screen in detached mode, i.e., already running on background. The command is optional,
but what is the purpose on start a blank screen process that way?
It's useful when invoking from a script (I manage to run many wget downloads in parallel, for
example).
6) Resume a detached screen session, resizing to fit the current terminal
screen -raAd.
By default, screen tries to restore its old window sizes when attaching to resizable
terminals. This command is the command-line equivalent to typing ^A F to fit an open screen
session to the window
7) use screen as a terminal emulator to connect to serial
consoles
screen /dev/tty<device> 9600
Use GNU/screen as a terminal emulator for anything serial console related.
screen /dev/tty
eg.
screen /dev/ttyS0 9600
8) ssh and attach to a screen in one line.
ssh -t user@host screen -x <screen name>
If you know the benefits of screen, then this might come in handy for you. Instead of
ssh'ing into a machine and then running a screen command, this can all be done on one line
instead. Just have the person on the machine your ssh'ing into run something like screen -S debug
Then you would run ssh -t user@host screen -x debug
and be attached to the same screen session.
491k
109 965 1494 asked Aug 22 '14 at 9:40 SHW 7,341 3 31 69
> ,
1
Christian Severin , 2017-09-29 09:47:52
You can use e.g. date --set='-2 years' to set the clock back two years, leaving
all other elements identical. You can change month and day of month the same way. I haven't
checked what happens if that calculation results in a datetime that doesn't actually exist,
e.g. during a DST switchover, but the behaviour ought to be identical to the usual "set both
date and time to concrete values" behaviour. – Christian Severin Sep 29 '17
at 9:47
Run that as root or under sudo . Changing only one of the year/month/day is
more of a challenge and will involve repeating bits of the current date. There are also GUI
date tools built in to the major desktop environments, usually accessed through the
clock.
To change only part of the time, you can use command substitution in the date string:
date -s "2014-12-25 $(date +%H:%M:%S)"
will change the date, but keep the time. See man date for formatting details to
construct other combinations: the individual components are %Y , %m
, %d , %H , %M , and %S .
There's no option to do that. You can use date -s "2014-12-25 $(date +%H:%M:%S)"
to change the date and reuse the current time, though. – Michael Homer Aug 22 '14 at
9:55
chaos , 2014-08-22 09:59:58
System time
You can use date to set the system date. The GNU implementation of
date (as found on most non-embedded Linux-based systems) accepts many different
formats to set the time, here a few examples:
set only the year:
date -s 'next year'
date -s 'last year'
set only the month:
date -s 'last month'
date -s 'next month'
set only the day:
date -s 'next day'
date -s 'tomorrow'
date -s 'last day'
date -s 'yesterday'
date -s 'friday'
set all together:
date -s '2009-02-13 11:31:30' #that's a magical timestamp
Hardware time
Now the system time is set, but you may want to sync it with the hardware clock:
Use --show to print the hardware time:
hwclock --show
You can set the hardware clock to the current system time:
hwclock --systohc
Or the system time to the hardware clock
hwclock --hctosys
> ,
2
garethTheRed , 2014-08-22 09:57:11
You change the date with the date command. However, the command expects a full
date as the argument:
# date -s "20141022 09:45"
Wed Oct 22 09:45:00 BST 2014
To change part of the date, output the current date with the date part that you want to
change as a string and all others as date formatting variables. Then pass that to the
date -s command to set it:
# date -s "$(date +'%Y12%d %H:%M')"
Mon Dec 22 10:55:03 GMT 2014
changes the month to the 12th month - December.
The date formats are:
%Y - Year
%m - Month
%d - Day
%H - Hour
%M - Minute
Balmipour , 2016-03-23 09:10:21
For ones like me running ESXI 5.1, here's what the system answered me
~ # date -s "2016-03-23 09:56:00"
date: invalid date '2016-03-23 09:56:00'
I had to uses a specific ESX command instead :
esxcli system time set -y 2016 -M 03 -d 23 -H 10 -m 05 -s 00
Hope it helps !
> ,
1
Brook Oldre , 2017-09-26 20:03:34
I used the date command and time format listed below to successfully set the date from the
terminal shell command performed on Android Things which uses the Linux Kernal.
Use
the Bash shell in Linux to manage foreground and background processes. You can use Bash's job control functions and
signals to give you more flexibility in how you run commands. We show you how.
How to Speed Up a Slow PC
https://imasdk.googleapis.com/js/core/bridge3.401.2_en.html#goog_863166184
All About Processes
Whenever a program is executed in a Linux or Unix-like operating
system, a process is started. "Process" is the name for the internal representation of the executing program in the
computer's memory. There is a process for every active program. In fact, there is a process for nearly everything that
is running on your computer. That includes the components of your
graphical
desktop environment
(GDE) such as
GNOME
or
KDE
,
and system
daemons
that
are launched at start-up.
Why
nearly
everything
that is running? Well, Bash built-ins such as
cd
,
pwd
,
and
alias
do
not need to have a process launched (or "spawned") when they are run. Bash executes these commands within the instance
of the Bash shell that is running in your terminal window. These commands are fast precisely because they don't need to
have a process launched for them to execute. (You can type
help
in
a terminal window to see the list of Bash built-ins.)
Processes can be running in the foreground, in which case they take
over your terminal until they have completed, or they can be run in the background. Processes that run in the background
don't dominate the terminal window and you can continue to work in it. Or at least, they don't dominate the terminal
window if they don't generate screen output.
A Messy Example
We'll start a simple
ping
trace
running
. We're going to
ping
the
How-To Geek domain. This will execute as a foreground process.
ping www.howtogeek.com
We get the expected results, scrolling down the terminal window. We
can't do anything else in the terminal window while
ping
is
running. To terminate the command hit
Ctrl+C
.
Ctrl+C
The visible effect of the
Ctrl+C
is
highlighted in the screenshot.
ping
gives
a short summary and then stops.
Let's repeat that. But this time we'll hit
Ctrl+Z
instead
of
Ctrl+C
.
The task won't be terminated. It will become a background task. We get control of the terminal window returned to us.
ping www.howtogeek.com
Ctrl+Z
The visible effect of hitting
Ctrl+Z
is
highlighted in the screenshot.
This time we are told the process is stopped. Stopped doesn't mean
terminated. It's like a car at a stop sign. We haven't scrapped it and thrown it away. It's still on the road,
stationary, waiting to go. The process is now a background
job
.
The
jobs
command
will
list the jobs
that have been started in the current terminal session. And because jobs are (inevitably) processes,
we can also use the
ps
command
to see them. Let's use both commands and compare their outputs. We'll use the
T
option
(terminal) option to only list the processes that are running in this terminal window. Note that there is no need to use
a hyphen
-
with
the
T
option.
jobs
ps
            T
The
jobs
command
tells us:
[1]
:
The number in square brackets is the job number. We can use this to refer to the job when we need to control it with
job control commands.
+
:
The plus sign
+
shows
that this is the job that will be acted upon if we use a job control command without a specific job number. It is
called the default job. The default job is always the one most recently added to the list of jobs.
Stopped
:
The process is not running.
ping
www.howtogeek.com
: The command line that launched the process.
The
ps
command
tells us:
PID
:
The process ID of the process. Each process has a unique ID.
TTY
:
The pseudo-teletype (terminal window) that the process was executed from.
STAT
:
The status of the process.
TIME
:
The amount of CPU time consumed by the process.
COMMAND
:
The command that launched the process.
These are common values for the STAT column:
D
:
Uninterruptible sleep. The process is in a waiting state, usually waiting for input or output, and cannot be
interrupted.
I
:
Idle.
R
:
Running.
S
:
Interruptible sleep.
T
:
Stopped by a job control signal.
Z
:
A zombie process. The process has been terminated but hasn't been "cleaned down" by its parent process.
The value in the STAT column can be followed by one of these extra
indicators:
<
:
High-priority task (not nice to other processes).
N
:
Low-priority (nice to other processes).
L
:
process has pages locked into memory (typically used by real-time processes).
s
:
A session leader. A session leader is a process that has launched process groups. A shell is a session leader.
l
:
Multi-thread process.
+
:
A foreground process.
We can see that Bash has a state of
Ss
.
The uppercase "S" tell us the Bash shell is sleeping, and it is interruptible. As soon as we need it, it will respond.
The lowercase "s" tells us that the shell is a session leader.
The ping command has a state of
T
.
This tells us that
ping
has
been stopped by a job control signal. In this example, that was the
Ctrl+Z
we
used to put it into the background.
The
ps
            T
command has a state of
R
,
which stands for running. The
+
indicates
that this process is a member of the foreground group. So the
ps
T
command is running in the foreground.
The bg Command
The
bg
command
is used to resume a background process. It can be used with or without a job number. If you use it without a job number
the default job is brought to the foreground. The process still runs in the background. You cannot send any input to it.
If we issue the
bg
command,
we will resume our
ping
command:
bg
The
ping
command
resumes and we see the scrolling output in the terminal window once more. The name of the command that has been
restarted is displayed for you. This is highlighted in the screenshot.
But we have a problem. The task is running in the background and
won't accept input. So how do we stop it?
Ctrl+C
doesn't
do anything. We can see it when we type it but the background task doesn't receive those keystrokes so it keeps pinging
merrily away.
In fact, we're now in a strange blended mode. We can type in the
terminal window but what we type is quickly swept away by the scrolling output from the
ping
command.
Anything we type takes effect in the foregound.
To stop our background task we need to bring it to the foreground
and then stop it.
The fg Command
The
fg
command
will bring a background task into the foreground. Just like the
bg
command,
it can be used with or without a job number. Using it with a job number means it will operate on a specific job. If it
is used without a job number the last command that was sent to the background is used.
If we type
fg
our
ping
command
will be brought to the foreground. The characters we type are mixed up with the output from the
ping
command,
but they are operated on by the shell as if they had been entered on the command line as usual. And in fact, from the
Bash shell's point of view, that is exactly what has happened.
fg
And now that we have the
ping
command
running in the foreground once more, we can use
Ctrl+C
to
kill it.
Ctrl+C
We Need to Send the Right Signals
That wasn't exactly pretty. Evidently running a process in the
background works best when the process doesn't produce output and doesn't require input.
But, messy or not, our example did accomplish:
Putting a process into the background.
Restoring the process to a running state in the background.
Returning the process to the foreground.
Terminating the process.
When you use
Ctrl+C
and
Ctrl+Z
,
you are sending signals to the process. These are
shorthand
ways
of using the
kill
command.
There are
64
different signals
that
kill
can
send. Use
kill
            -l
at the command line to list them.
kill
isn't
the only source of these signals. Some of them are raised automatically by other processes within the system
Here are some of the commonly used ones.
SIGHUP
:
Signal 1. Automatically sent to a process when the terminal it is running in is closed.
SIGINT
:
Signal 2. Sent to a process you hit
Ctrl+C
.
The process is interrupted and told to terminate.
SIGQUIT
:
Signal 3. Sent to a process if the user sends a quit signal
Ctrl+D
.
SIGKILL
:
Signal 9. The process is immediately killed and will not attempt to close down cleanly. The process does not go down
gracefully.
SIGTERM
: Signal
15. This is the default signal sent by
kill
.
It is the standard program termination signal.
SIGTSTP
: Signal
20. Sent to a process when you use
Ctrl+Z
.
It stops the process and puts it in the background.
We must use the
kill
command
to issue signals that do not have key combinations assigned to them.
Further Job Control
A process moved into the background by using
Ctrl+Z
is
placed in the stopped state. We have to use the
bg
command
to start it running again. To launch a program as a running background process is simple. Append an ampersand
&
to
the end of the command line.
Although it is best that background processes do not write to the
terminal window, we're going to use examples that do. We need to have something in the screenshots that we can refer to.
This command will start an endless loop as a background process:
while true; do echo "How-To Geek Loop
Process"; sleep 3; done &
We are told the job number and process ID id of the process. Our
job number is 1, and the process id is 1979. We can use these identifiers to control the process.
The output from our endless loop starts to appear in the terminal
window. As before, we can use the command line but any commands we issue are interspersed with the output from the loop
process.
ls
To stop our process we can use
jobs
to
remind ourselves what the job number is, and then use
kill
.
jobs
reports that our process is job number 1. To use that number with
kill
we
must precede it with a percent sign
%
.
jobs
kill %1
kill
sends the
SIGTERM
signal,
signal number 15, to the process and it is terminated. When the Enter key is next pressed, a status of the job is shown.
It lists the process as "terminated." If the process does not respond to the
kill
command
you can take it up a notch. Use
kill
with
SIGKILL
,
signal number 9. Just put the number 9 between the
kill
command
the job number.
kill 9 %1
Things We've Covered
Ctrl+C
:
Sends
SIGINT
,
signal 2, to the process -- if it is accepting input -- and tells it to terminate.
Ctrl+D
: Sends
SISQUIT
,
signal 3, to the process -- if it is accepting input -- and tells it to quit.
Ctrl+Z
: Sends
SIGSTP
,
signal 20, to the process and tells it to stop (suspend) and become a background process.
jobs
:
Lists the background jobs and shows their job number.
bg
job_number
:
Restarts a background process. If you don't provide a job number the last process that was turned into a background
task is used.
fg
job_number
:
brings a background process into the foreground and restarts it. If you don't provide a job number the last process
that was turned into a background task is used.
commandline
&
:
Adding an ampersand
&
to
the end of a command line executes that command as a background task, that is running.
kill %
job_number
:
Sends
SIGTERM
,
signal 15, to the process to terminate it.
kill 9
%
job_number
:
Sends
SIGKILL
,
signal 9, to the process and terminates it abruptly.
When you do this, the obvious result is that tmux launches a new shell in the same window
with a status bar along the bottom. There's more going on, though, and you can see it with this
little experiment. First, do something in your current terminal to help you tell it apart from
another empty terminal:
$ echo hello
hello
Now press Ctrl+B followed by C on your keyboard. It might look like your work has vanished,
but actually, you've created what tmux calls a window (which can be, admittedly,
confusing because you probably also call the terminal you launched a window ). Thanks to
tmux, you actually have two windows open, both of which you can see listed in the status bar at
the bottom of tmux. You can navigate between these two windows by index number. For instance,
press Ctrl+B followed by 0 to go to the initial window:
$ echo hello
hello
Press Ctrl+B followed by 1 to go to the first new window you created.
You can also "walk" through your open windows using Ctrl+B and N (for Next) or P (for
Previous).
The tmux trigger and commands More Linux resources
The keyboard shortcut Ctrl+B is the tmux trigger. When you press it in a tmux session, it
alerts tmux to "listen" for the next key or key combination that follows. All tmux shortcuts,
therefore, are prefixed with Ctrl+B .
You can also access a tmux command line and type tmux commands by name. For example, to
create a new window the hard way, you can press Ctrl+B followed by : to enter the tmux command
line. Type new-window and press Enter to create a new window. This does exactly
the same thing as pressing Ctrl+B then C .
Splitting windows into panes
Once you have created more than one window in tmux, it's often useful to see them all in one
window. You can split a window horizontally (meaning the split is horizontal, placing one
window in a North position and another in a South position) or vertically (with windows located
in West and East positions).
To create a horizontal split, press Ctrl+B followed by " (that's a double-quote).
To create a vertical split, press Ctrl+B followed by % (percent).
You can split windows that have been split, so the layout is up to you and the number of
lines in your terminal.
Sometimes things can get out of hand. You can adjust a terminal full of haphazardly split
panes using these quick presets:
Ctrl+B Alt+1 : Even horizontal splits
Ctrl+B Alt+2 : Even vertical splits
Ctrl+B Alt+3 : Horizontal span for the main pane, vertical splits for lesser panes
Ctrl+B Alt+3 : Vertical span for the main pane, horizontal splits for lesser panes
Ctrl+B Alt+5 : Tiled layout
Switching between panes
To get from one pane to another, press Ctrl+B followed by O (as in other ). The
border around the pane changes color based on your position, and your terminal cursor changes
to its active state. This method "walks" through panes in order of creation.
Alternatively, you can use your arrow keys to navigate to a pane according to your layout.
For example, if you've got two open panes divided by a horizontal split, you can press Ctrl+B
followed by the Up arrow to switch from the lower pane to the top pane. Likewise, Ctrl+B
followed by the Down arrow switches from the upper pane to the lower one.
Running a
command on multiple hosts with tmux
Now that you know how to open many windows and divide them into convenient panes, you know
nearly everything you need to know to run one command on multiple hosts at once. Assuming you
have a layout you're happy with and each pane is connected to a separate host, you can
synchronize the panes such that the input you type on your keyboard is mirrored in all
panes.
To synchronize panes, access the tmux command line with Ctrl+B followed by : , and then type
setw synchronize-panes .
Now anything you type on your keyboard appears in each pane, and each pane responds
accordingly.
Download our cheat sheet
It's relatively easy to remember Ctrl+B to invoke tmux features, but the keys that follow
can be difficult to remember at first. All built-in tmux keyboard shortcuts are available by
pressing Ctrl+B followed by ? (exit the help screen with Q ). However, the help screen can be a
little overwhelming for all its options, none of which are organized by task or topic. To help
you remember the basic features of tmux, as well as many advanced functions not covered in this
article, we've developed a tmux cheatsheet . It's free to
download, so get your copy today.
In this quick tutorial, I want to look at
the
jobs
command
and a few of the ways that we can manipulate the jobs running on our systems. In short, controlling jobs lets you
suspend and resume processes started in your Linux shell.
Jobs
The
jobs
command
will list all jobs on the system; active, stopped, or otherwise. Before I explore the command and output, I'll create
a job on my system.
I will use the
sleep
job
as it won't change my system in any meaningful way.
First, I issued the
sleep
command,
and then I received the
Job number
[1].
I
then immediately stopped the job by using
Ctl+Z
.
Next, I run the
jobs
command
to view the newly created job:
[tcarrigan@rhel ~]$ jobs
[1]+  Stopped                 sleep 500
You can see that I have a single stopped job
identified by the job number
[1]
.
Other options to know for this command
include:
-l - list PIDs in addition to default info
-n - list only processes that have changed since the last notification
-p - list PIDs only
-r - show only running jobs
-s - show only stopped jobs
Background
Next, I'll resume the
sleep
job
in the background. To do this, I use the
bg
command.
Now, the
bg
command
has a pretty simple syntax, as seen here:
bg [JOB_SPEC]
Where JOB_SPEC can be any of the following:
%n - where
n
is the job number
%abc - refers to a job started by a command beginning with
abc
%?abc - refers to a job started by a command containing
abc
%- - specifies the previous job
NOTE
:
bg
and
fg
operate
on the current job if no JOB_SPEC is provided.
I can move this job to the background by
using the job number
[1]
.
[tcarrigan@rhel ~]$ bg %1
[1]+ sleep 500 &
You can see now that I have a single running
job in the background.
[tcarrigan@rhel ~]$ jobs
[1]+  Running                 sleep 500 &
Foreground
Now, let's look at how to move a background
job into the foreground. To do this, I use the
fg
command.
The command syntax is the same for the foreground command as with the background command.
fg [JOB_SPEC]
Refer to the above bullets for details on
JOB_SPEC.
I have started a new
sleep
in
the background:
[tcarrigan@rhel ~]$ sleep 500 &
[2] 5599
Now, I'll move it to the foreground by using
the following command:
[tcarrigan@rhel ~]$ fg %2
sleep 500
The
fg
command
has now brought my system back into a sleep state.
The end
While I realize that the jobs presented here
were trivial, these concepts can be applied to more than just the
sleep
command.
If you run into a situation that requires it, you now have the knowledge to move running or stopped jobs from the
foreground to background and back again.
Navigating the Bash shell with pushd and popdPushd and popd are the fastest
navigational commands you've never heard of. 07 Aug 2019 Seth Kenlon (Red Hat) Feed 71
up 7 comments Image by : Opensource.com x Subscribe now
The pushd and popd commands are built-in features of the Bash shell to help you "bookmark"
directories for quick navigation between locations on your hard drive. You might already feel
that the terminal is an impossibly fast way to navigate your computer; in just a few key
presses, you can go anywhere on your hard drive, attached storage, or network share. But that
speed can break down when you find yourself going back and forth between directories, or when
you get "lost" within your filesystem. Those are precisely the problems pushd and popd can help
you solve.
pushd
At its most basic, pushd is a lot like cd . It takes you from one directory to another.
Assume you have a directory called one , which contains a subdirectory called two , which
contains a subdirectory called three , and so on. If your current working directory is one ,
then you can move to two or three or anywhere with the cd command:
$ pwd
one
$ cd two / three
$ pwd
three
You can do the same with pushd :
$ pwd
one
$ pushd two / three
~ / one / two / three ~ / one
$ pwd
three
The end result of pushd is the same as cd , but there's an additional intermediate result:
pushd echos your destination directory and your point of origin. This is your directory
stack , and it is what makes pushd unique.
Stacks
A stack, in computer terminology, refers to a collection of elements. In the context of this
command, the elements are directories you have recently visited by using the pushd command. You
can think of it as a history or a breadcrumb trail.
You can move all over your filesystem with pushd ; each time, your previous and new
locations are added to the stack:
$ pushd four
~ / one / two / three / four ~ / one / two / three ~ / one
$ pushd five
~ / one / two / three / four / five ~ / one / two / three / four ~ / one / two / three ~ / one
Navigating the stack
Once you've built up a stack, you can use it as a collection of bookmarks or fast-travel
waypoints. For instance, assume that during a session you're doing a lot of work within the
~/one/two/three/four/five directory structure of this example. You know you've been to one
recently, but you can't remember where it's located in your pushd stack. You can view your
stack with the +0 (that's a plus sign followed by a zero) argument, which tells pushd not to
change to any directory in your stack, but also prompts pushd to echo your current stack:
$
pushd + 0
~ / one / two / three / four ~ / one / two / three ~ / one ~ / one / two / three / four / five
Alternatively, you can view the stack with the dirs command, and you can see the index
number for each directory by using the -v option:
$ dirs -v
0 ~ / one / two / three / four
1 ~ / one / two / three
2 ~ / one
3 ~ / one / two / three / four / five
The first entry in your stack is your current location. You can confirm that with pwd as
usual:
$ pwd
~ / one / two / three / four
Starting at 0 (your current location and the first entry of your stack), the second
element in your stack is ~/one , which is your desired destination. You can move forward in
your stack using the +2 option:
$ pushd + 2
~ / one ~ / one / two / three / four / five ~ / one / two / three / four ~ / one / two /
three
$ pwd
~ / one
This changes your working directory to ~/one and also has shifted the stack so that your new
location is at the front.
You can also move backward in your stack. For instance, to quickly get to ~/one/two/three
given the example output, you can move back by one, keeping in mind that pushd starts with
0:
$ pushd -0
~ / one / two / three ~ / one ~ / one / two / three / four / five ~ / one / two / three / four
Adding to the stack
You can continue to navigate your stack in this way, and it will remain a static listing of
your recently visited directories. If you want to add a directory, just provide the directory's
path. If a directory is new to the stack, it's added to the list just as you'd expect:
$
pushd / tmp
/ tmp ~ / one / two / three ~ / one ~ / one / two / three / four / five ~ / one / two / three /
four
But if it already exists in the stack, it's added a second time:
$ pushd ~ / one
~ / one / tmp ~ / one / two / three ~ / one ~ / one / two / three / four / five ~ / one / two /
three / four
While the stack is often used as a list of directories you want quick access to, it is
really a true history of where you've been. If you don't want a directory added redundantly to
the stack, you must use the +N and -N notation.
Removing directories from the stack
Your stack is, obviously, not immutable. You can add to it with pushd or remove items from
it with popd .
For instance, assume you have just used pushd to add ~/one to your stack, making ~/one your
current working directory. To remove the first (or "zeroeth," if you prefer) element:
$
pwd
~ / one
$ popd + 0
/ tmp ~ / one / two / three ~ / one ~ / one / two / three / four / five ~ / one / two / three /
four
$ pwd
~ / one
Of course, you can remove any element, starting your count at 0:
$ pwd ~ / one
$ popd + 2
/ tmp ~ / one / two / three ~ / one / two / three / four / five ~ / one / two / three /
four
$ pwd ~ / one
You can also use popd from the back of your stack, again starting with 0. For example, to
remove the final directory from your stack:
$ popd -0
/ tmp ~ / one / two / three ~ / one / two / three / four / five
When used like this, popd does not change your working directory. It only manipulates your
stack.
Navigating with popd
The default behavior of popd , given no arguments, is to remove the first (zeroeth) item
from your stack and make the next item your current working directory.
This is most useful as a quick-change command, when you are, for instance, working in two
different directories and just need to duck away for a moment to some other location. You don't
have to think about your directory stack if you don't need an elaborate history:
$ pwd
~ / one
$ pushd ~ / one / two / three / four / five
$ popd
$ pwd
~ / one
You're also not required to use pushd and popd in rapid succession. If you use pushd to
visit a different location, then get distracted for three hours chasing down a bug or doing
research, you'll find your directory stack patiently waiting (unless you've ended your terminal
session):
$ pwd ~ / one
$ pushd / tmp
$ cd { / etc, / var, / usr } ; sleep 2001
[ ... ]
$ popd
$ pwd
~ / one Pushd and popd in the real world
The pushd and popd commands are surprisingly useful. Once you learn them, you'll find
excuses to put them to good use, and you'll get familiar with the concept of the directory
stack. Getting comfortable with pushd was what helped me understand git stash , which is
entirely unrelated to pushd but similar in conceptual intangibility.
Using pushd and popd in shell scripts can be tempting, but generally, it's probably best to
avoid them. They aren't portable outside of Bash and Zsh, and they can be obtuse when you're
re-reading a script ( pushd +3 is less clear than cd $HOME/$DIR/$TMP or similar).
Thank you for the write up for pushd and popd. I gotta remember to use these when I'm
jumping around directories a lot. I got a hung up on a pushd example because my development
work using arrays differentiates between the index and the count. In my experience, a
zero-based array of A, B, C; C has an index of 2 and also is the third element. C would not
be considered the second element cause that would be confusing it's index and it's count.
Interesting point, Matt. The difference between count and index had not occurred to me,
but I'll try to internalise it. It's a great distinction, so thanks for bringing it up!
It can be, but start out simple: use pushd to change to one directory, and then use popd
to go back to the original. Sort of a single-use bookmark system.
Then, once you're comfortable with pushd and popd, branch out and delve into the
stack.
A tcsh shell I used at an old job didn't have pushd and popd, so I used to have functions
in my .cshrc to mimic just the back-and-forth use.
Thanks for that tip, Jake. I arguably should have included that in the article, but I
wanted to try to stay focused on just the two {push,pop}d commands. Didn't occur to me to
casually mention one use of dirs as you have here, so I've added it for posterity.
There's so much in the Bash man and info pages to talk about!
other_Stu on 11 Aug 2019
I use "pushd ." (dot for current directory) quite often. Like a working directory bookmark
when you are several subdirectories deep somewhere, and need to cd to couple of other places
to do some work or check something.
And you can use the cd command with your DIRSTACK as well, thanks to tilde expansion.
cd ~+3 will take you to the same directory as pushd +3 would.
I/O reporting from the Linux command line Learn the iostat tool, its common command-line flags and options, and how to
use it to better understand input/output performance in Linux.
If you have followed my posts here at Enable Sysadmin, you know that I previously worked as a storage support engineer. One of
my many tasks in that role was to help customers replicate backups from their production environments to dedicated backup storage
arrays. Many times, customers would contact me concerned about the speed of the data transfer from production to storage.
Now, if you have ever worked in support, you know that there can be many causes for a symptom. However, the throughput of a system
can have huge implications for massive data transfers. If all is well, we are talking hours, if not... I have seen a single replication
job take months.
We know that Linux is loaded full of helpful tools for all manner of issues. For input/output monitoring, we use the iostat
command. iostat is a part of the sysstat package and is not loaded on all distributions by default.
Installation and base run
I am using Red Hat Enterprise Linux 8 here and have included the install output below.
[ Want to try out Red Hat Enterprise Linux?
Download it now for free. ]
NOTE : the command runs automatically after installation.
[root@rhel ~]# iostat
bash: iostat: command not found...
Install package 'sysstat' to provide command 'iostat'? [N/y] y


 * Waiting in queue...
The following packages have to be installed:
lm_sensors-libs-3.4.0-21.20180522git70f7e08.el8.x86_64    Lm_sensors core libraries
sysstat-11.7.3-2.el8.x86_64    Collection of performance monitoring tools for Linux
Proceed with changes? [N/y] y


 * Waiting in queue...
 * Waiting for authentication...
 * Waiting in queue...
 * Downloading packages...
 * Requesting data...
 * Testing changes...
 * Installing packages...
Linux 4.18.0-193.1.2.el8_2.x86_64 (rhel.test)     06/17/2020     _x86_64_    (4 CPU)

avg-cpu:  %user   %nice %system %iowait  %steal   %idle
           2.17    0.05    4.09    0.65    0.00   83.03

Device             tps    kB_read/s    kB_wrtn/s    kB_read    kB_wrtn
sda             206.70      8014.01      1411.92    1224862     215798
sdc               0.69        20.39         0.00       3116          0
sdb               0.69        20.39         0.00       3116          0
dm-0            215.54      7917.78      1449.15    1210154     221488
dm-1              0.64        14.52         0.00       2220          0
If you run the base command without options, iostat displays CPU usage information. It also displays I/O stats for
each partition on the system. The output includes totals, as well as per second values for both read and write operations. Also,
note that the tps field is the total number of Transfers per second issued to a specific device.
The practical application is this: if you know what hardware is used, then you know what parameters it should be operating within.
Once you combine this knowledge with the output of iostat , you can make changes to your system accordingly.
Interval runs
It can be useful in troubleshooting or data gathering phases to have a report run at a given interval. To do this, run the command
with the interval (in seconds) at the end:
-p allows you to specify a particular device to focus in on. You can combine this option with the -m
for a nice and tidy look at a particularly concerning device and its partitions.
avgqu-sz - average queue length of a request issued to the device
await - average time for I/O requests issued to the device to be served (milliseconds)
r_await - average time for read requests to be served (milliseconds)
w_await - average time for write requests to be served (milliseconds)
There are other values present, but these are the ones to look out for.
Shutting down
This article covers just about everything you need to get started with iostat . If you have other questions or need
further explanations of options, be sure to check out the man page or your preferred search engine. For other Linux tips and tricks,
keep an eye on Enable Sysadmin!
"... The -I option shows the header information and the -s option silences the response body. Checking the endpoint of your database from your local desktop: ..."
curl transfers a URL. Use this command to test an application's endpoint or
connectivity to an upstream service endpoint. c url can be useful for determining if
your application can reach another service, such as a database, or checking if your service is
healthy.
As an example, imagine your application throws an HTTP 500 error indicating it can't reach a
MongoDB database:
The -I option shows the header information and the -s option silences the
response body. Checking the endpoint of your database from your local desktop:
$ curl -I -s
database: 27017
HTTP / 1.0 200 OK
So what could be the problem? Check if your application can get to other places besides the
database from the application host:
This indicates that your application cannot resolve the database because the URL of the
database is unavailable or the host (container or VM) does not have a nameserver it can use to
resolve the hostname.
In part one, How to setup Linux chroot jails,
I covered the chroot command and you learned to use the chroot wrapper in sshd to isolate the sftpusers
group. When you edit sshd_config to invoke the chroot wrapper and give it matching characteristics, sshd
executes certain commands within the chroot jail or wrapper. You saw how this technique could potentially be useful to implement
contained, rather than secure, access for remote users.
Expanded example
I'll start by expanding on what I did before, partly as a review. Start by setting up a custom directory for remote users. I'll
use the sftpusers group again.
Start by creating the custom directory that you want to use, and setting the ownership:
This time, make root the owner, rather than the sftpusers group. This way, when you add users, they don't start out
with permission to see the whole directory.
Next, create the user you want to restrict (you need to do this for each user in this case), add the new user to the sftpusers
group, and deny a login shell because these are sftp users:
Match Group sftpusers
ChrootDirectory /sftpusers/chroot/
ForceCommand internal-sftp
X11Forwarding no
AllowTCPForwarding no
Note that you're back to specifying a directory, but this time, you have already set the ownership to prevent sanjay
from seeing anyone else's stuff. That trailing / is also important.
Then, restart sshd and test:
[skipworthy@milo ~]$ sftp sanjay@showme
sanjay@showme's password:
Connected to sanjay@showme.
sftp> ls
sanjay
sftp> pwd
Remote working directory: /
sftp> cd ..
sftp> ls
sanjay
sftp> touch test
Invalid command.
So. Sanjay can only see his own folder and needs to cd into it to do anything useful.
Isolating a service or specific user
Now, what if you want to provide a usable shell environment for a remote user, or create a chroot jail environment for a specific
service? To do this, create the jailed directory and the root filesystem, and then create links to the tools and libraries that you
need. Doing all of this is a bit involved, but Red Hat provides a script and basic instructions that make the process easier.
Note: I've tested the following in Red Hat Enterprise Linux 7 and 8, though my understanding is that this capability was available
in Red Hat Enterprise Linux 6. I have no reason to think that this script would not work in Fedora, CentOS or any other Red Hat distro,
but your mileage (as always) may vary.
First, make your chroot directory:
# mkdir /chroot
Then run the script from yum that installs the necessary bits:
# yum --releasever=/ --installroot=/chroot install iputils vim python
The --releasever=/ flag passes the current local release info to initialize a repo in the new --installroot
, defines where the new install location is. In theory, you could make a chroot jail that was based on any version of the
yum or dnf repos (the script will, however, still start with the current system repos).
With this tool, you install basic networking utilities like the VIM editor and Python. You could add other things initially if
you want to, including whatever service you want to run inside this jail. This is also one of the cool things about yum
and dependencies. As part of the dependency resolution, yum makes the necessary additions to the filesystem tree
along with the libraries. It does, however, leave out a couple of things that you need to add next. I'll will get to that in a moment.
By now, the packages and the dependencies have been installed, and a new GPG key was created for this new repository in relation
to this new root filesystem. Next, mount your ephemeral filesystems:
# mount -t proc proc /chroot/proc/
# mount -t sysfs sys /chroot/sys/
And set up your dev bindings:
# mount -o bind /dev/pts /chroot/dev/pts
# mount -o bind /dev/pts /chroot/dev/pts
Note that these mounts will not survive a reboot this way, but this setup will let you test and play with a chroot jail
environment.
Now, test to check that everything is working as you expect:
# chroot /chroot
bash-4.2# ls
bin dev home lib64 mnt proc run srv tmp var boot etc lib media opt root sbin sys usr
You can see that the filesystem and libraries were successfully added:
bash-4.2# pwd
/
bash-4.2# cd ..
From here, you see the correct root and can't navigate up:
bash-4.2# exit
exit
#
Now you've exited the chroot wrapper, which is expected because you entered it from a local login shell as root. Normally, a remote
user should not be able to do this, as you saw in the sftp example:
Note that these directories were all created by root, so that's who owns them. Now, add this chroot to the sshd_config
, because this time you will match just this user:
Match User leo
ChrootDirectory /chroot
Then, restart sshd .
You also need to copy the /etc/passwd and /etc/group files from the host system to the /chroot
directory:
Note: If you skip the step above, you can log in, but the result will be unreliable and you'll be prone to errors related to conflicting
logins
Now for the test:
[skipworthy@milo ~]$ ssh leo@showme
leo@showme's password:
Last login: Thu Jan 30 19:35:36 2020 from 192.168.0.20
-bash-4.2$ ls
-bash-4.2$ pwd
/home/leo
It looks good. Now, can you find something useful to do? Let's have some fun:
You could drop the releasever=/ , but I like to leave that in because it leaves fewer chances for unexpected
results.
[root@showme1 ~]# chroot /chroot
bash-4.2# ls /etc/httpd
conf conf.d conf.modules.d logs modules run
bash-4.2# python
Python 2.7.5 (default, Aug 7 2019, 00:51:29)
So, httpd is there if you want it, but just to demonstrate you can use a quick one-liner from Python, which you also
installed:
bash-4.2# python -m SimpleHTTPServer 8000
Serving HTTP on 0.0.0.0 port 8000 ...
And now you have a simple webserver running in a chroot jail. In theory, you can run any number of services from inside the chroot
jail and keep them 'contained' and away from other services, allowing you to expose only a part of a larger resource environment
without compromising your user's experience.
New to Linux containers? Download the
Containers Primer and
learn the basics.
Configure Lsyncd to Synchronize Remote Directories
In this section, we will configure Lsyncd to synchronize /etc/ directory on the local system
to the /opt/ directory on the remote system. Advertisements
Before starting, you will need to setup SSH key-based authentication between the local
system and remote server so that the local system can connect to the remote server without
password.
On the local system, run the following command to generate a public and private key:
ssh-keygen -t rsa
You should see the following output:
Generating public/private rsa key pair.
Enter file in which to save the key (/root/.ssh/id_rsa):
Enter passphrase (empty for no passphrase):
Enter same passphrase again:
Your identification has been saved in /root/.ssh/id_rsa
Your public key has been saved in /root/.ssh/id_rsa.pub
The key fingerprint is:
SHA256:c7fhjjhAamFjlk6OkKPhsphMnTZQFutWbr5FnQKSJjE root@ubuntu20
The key's randomart image is:
+---[RSA 3072]----+
| E ..            |
|  ooo            |
| oo= +           |
|=.+ % o . .      |
|[email protected] oSo. o    |
|ooo=B o .o o o   |
|=o.... o    o    |
|+.    o .. o     |
|     .  ... .    |
+----[SHA256]-----+
The above command will generate a private and public key inside ~/.ssh directory.
Next, you will need to copy the public key to the remote server. You can copy it with the
following command: Advertisements
ssh-copy-id root@remote-server-ip
You will be asked to provide the password of the remote root user as shown below:
[email protected]'s password:

Number of key(s) added: 1

Now try logging into the machine, with:   "ssh '[email protected]'"
and check to make sure that only the key(s) you wanted were added.
Once the user is authenticated, the public key will be appended to the remote user
authorized_keys file and connection will be closed.
Now, you should be able log in to the remote server without entering password.
To test it just try to login to your remote server via SSH:
ssh root@remote-server-ip
If everything went well, you will be logged in immediately.
Next, you will need to edit the Lsyncd configuration file and define the rsyncssh and target
host variables:
In the above guide, we learned how to install and configure Lsyncd for local synchronization
and remote synchronization. You can now use Lsyncd in the production environment for backup
purposes. Feel free to ask me if you have any questions.
Lsyncd uses a filesystem event interface (inotify or fsevents) to watch for changes to local files and directories.
Lsyncd collates these events for several seconds and then spawns one or more processes to synchronize the changes to a
remote filesystem. The default synchronization method is
rsync
. Thus, Lsyncd is a
light-weight live mirror solution. Lsyncd is comparatively easy to install and does not require new filesystems or block
devices. Lysncd does not hamper local filesystem performance.
As an alternative to rsync, Lsyncd can also push changes via rsync+ssh. Rsync+ssh allows for much more efficient
synchronization when a file or direcotry is renamed or moved to a new location in the local tree. (In contrast, plain rsync
performs a move by deleting the old file and then retransmitting the whole file.)
Fine-grained customization can be achieved through the config file. Custom action configs can even be written from
scratch in cascading layers ranging from shell scripts to code written in the
Lua language
.
Thus, simple, powerful and flexible configurations are possible.
Lsyncd 2.2.1 requires rsync >= 3.1 on all source and target machines.
Lsyncd is designed to synchronize a slowly changing local directory tree to a remote mirror. Lsyncd is especially useful
to sync data from a secure area to a not-so-secure area.
Other synchronization tools
DRBD
operates on block device level. This makes it useful for synchronizing systems
that are under heavy load. Lsyncd on the other hand does not require you to change block devices and/or mount points,
allows you to change uid/gid of the transferred files, separates the receiver through the one-way nature of rsync. DRBD is
likely the better option if you are syncing databases.
GlusterFS
and
BindFS
use a FUSE-Filesystem to
interject kernel/userspace filesystem events.
Mirror
is an asynchronous synchronisation tool that takes use of the
inotify notifications much like Lsyncd. The main differences are: it is developed specifically for master-master use, thus
running on a daemon on both systems, uses its own transportation layer instead of rsync and is Java instead of Lsyncd's C
core with Lua scripting.
Lsyncd usage examples
lsyncd -rsync /home remotehost.org::share/
This watches and rsyncs the local directory /home with all sub-directories and transfers them to 'remotehost' using the
rsync-share 'share'.
This will also rsync/watch '/home', but it uses a ssh connection to make moves local on the remotehost instead of
re-transmitting the moved file over the wire.
Disclaimer
Besides the usual disclaimer in the license, we want to specifically emphasize that neither the authors, nor any
organization associated with the authors, can or will be held responsible for data-loss caused by possible malfunctions of
Lsyncd.
I would like to change the default log file name of teraterm terminal log. What I would like
to do automatically create/append log in a file name like "loggedinhost-teraterm.log"
I found following ini setting for log file. It also uses strftime to format
log filename.
    ; Default Log file name. You can specify strftime format to here.
    LogDefaultName=teraterm "%d %b %Y" .log
    ; Default path to save the log file.
    LogDefaultPath=
    ; Auto start logging with default log file name.
    LogAutoStart=on
I have modified it to include date.
Is there any way to prefix hostname in logfile name
I had the same issue, and was able to solve my problem by adding &h like below;
; Default Log file name. You can specify strftime format to here.
      LogDefaultName=teraterm &h %d %b %y.log ; Default path to save the log file.
      LogDefaultPath=C:\Users\Logs ; Auto start logging with default log file name.
      LogAutoStart=on
Specify the editor that is used for display log file
Default log file name(strftime format)
Specify default log file name. It can include a format of strftime.
&h      Host name(or empty when not connecting)
&p      TCP port number(or empty when not connecting, not TCP connection)
&u      Logon user name
%a      Abbreviated weekday name
%A      Full weekday name
%b      Abbreviated month name
%B      Full month name
%c      Date and time representation appropriate for locale
%d      Day of month as decimal number (01 - 31)
%H      Hour in 24-hour format (00 - 23)
%I      Hour in 12-hour format (01 - 12)
%j      Day of year as decimal number (001 - 366)
%m      Month as decimal number (01 - 12)
%M      Minute as decimal number (00 -  59)
%p      Current locale's A.M./P.M. indicator for 12-hour clock
%S      Second as decimal number (00 - 59)
%U      Week of year as decimal number, with Sunday as first day of week (00 - 53)
%w      Weekday as decimal number (0 - 6; Sunday is 0)
%W      Week of year as decimal number, with Monday as first day of week (00 - 53)
%x      Date representation for current locale
%X      Time representation for current locale
%y      Year without century, as decimal number (00 - 99)
%Y      Year with century, as decimal number
%z, %Z  Either the time-zone name or time zone abbreviation, depending on registry settings;
    no characters if time zone is unknown
%%      Percent sign
# rsync -avz -e ssh [email protected]:/root/2daygeek.tar.gz /root/backup
The authenticity of host 'jump.2daygeek.com (jump.2daygeek.com)' can't be established.
RSA key fingerprint is 6f:ad:07:15:65:bf:54:a6:8c:5f:c4:3b:99:e5:2d:34.
Are you sure you want to continue connecting (yes/no)? yes
Warning: Permanently added 'jump.2daygeek.com' (RSA) to the list of known hosts.
[email protected]'s password:
receiving file list ... done
2daygeek.tar.gz

sent 42 bytes  received 23134545 bytes  1186389.08 bytes/sec
total size is 23126674  speedup is 1.00
You can see the file copied using the
ls command .
# ls -h /root/backup/*.tar.gz
total 125M
-rw-------   1 root root  23M Oct 26 01:00 2daygeek.tar.gz
2) How to Use rsync Command in Reverse Mode with Non-Standard Port
We will copy the "2daygeek.tar.gz" file from the "Remote Server" to the "Jump Server" using the reverse rsync command with the
non-standard port.
# rsync -avz -e "ssh -p 11021" [email protected]:/root/backup/weekly/2daygeek.tar.gz /root/backup
The authenticity of host '[jump.2daygeek.com]:11021 ([jump.2daygeek.com]:11021)' can't be established.
RSA key fingerprint is 9c:ab:c0:5b:3b:44:80:e3:db:69:5b:22:ba:d6:f1:c9.
Are you sure you want to continue connecting (yes/no)? yes
Warning: Permanently added '[jump.2daygeek.com]:11021' (RSA) to the list of known hosts.
[email protected]'s password:
receiving incremental file list
2daygeek.tar.gz

sent 30 bytes  received 23134526 bytes  1028202.49 bytes/sec
total size is 23126674  speedup is 1.00
3) How to Use scp Command in Reverse Mode on Linux
We will copy the "2daygeek.tar.gz" file from the "Remote Server" to the "Jump Server" using the reverse scp command.
There are many ways to change text on the Linux command line from lowercase to uppercase
and vice versa. In fact, you have an impressive set of commands to choose from. This post
examines some of the best commands for the job and how you can get them to do just what you
want.
Using tr
The tr (translate) command is one of the easiest to use on the command line or within a
script. If you have a string that you want to be sure is in uppercase, you just pass it
through a tr command like this:
$ echo Hello There | tr [:lower:] [:upper:]
HELLO THERE
Below is an example of using this kind of command in a script when you want to be sure
that all of the text that is added to a file is in uppercase for consistency:
The granddaddy of HTML tools, with support for modern standards.
There used to be a fork called tidy-html5 which since became the official thing. Here is
its GitHub repository .
Tidy is a console application for Mac OS X, Linux, Windows, UNIX, and more. It corrects
and cleans up HTML and XML documents by fixing markup errors and upgrading legacy code to
modern standards.
For your needs, here is the command line to call Tidy:
tidy inputfile.html
Paul Brit ,
Update 2018: The homebrew/dupes is now deprecated, tidy-html5 may be directly
installed.
brew install tidy-html5
Original reply:
Tidy from OS X doesn't support HTML5 . But there is experimental
branch on Github which does.
To get it:
 brew tap homebrew/dupes
 brew install tidy --HEAD
 brew untap homebrew/dupes
That's it! Have fun!
Boris , 2019-11-16 01:27:35
Error: No available formula with the name "tidy" . brew install
tidy-html5 works. – Pysis Apr 4 '17 at 13:34
Example of my second to day, hour, minute, second converter:
# convert seconds to day-hour:min:sec
convertsecs2dhms() {
 ((d=${1}/(60*60*24)))
 ((h=(${1}%(60*60*24))/(60*60)))
 ((m=(${1}%(60*60))/60))
 ((s=${1}%60))
 printf "%02d-%02d:%02d:%02d\n" $d $h $m $s
 # PRETTY OUTPUT: uncomment below printf and comment out above printf if you want prettier output
 # printf "%02dd %02dh %02dm %02ds\n" $d $h $m $s
}
# setting test variables: testing some constant variables & evaluated variables
TIME1="36"
TIME2="1036"
TIME3="91925"
# one way to output results
((TIME4=$TIME3*2)) # 183850
((TIME5=$TIME3*$TIME1)) # 3309300
((TIME6=100*86400+3*3600+40*60+31)) # 8653231 s = 100 days + 3 hours + 40 min + 31 sec
# outputting results: another way to show results (via echo & command substitution with         backticks)
echo $TIME1 - `convertsecs2dhms $TIME1`
echo $TIME2 - `convertsecs2dhms $TIME2`
echo $TIME3 - `convertsecs2dhms $TIME3`
echo $TIME4 - `convertsecs2dhms $TIME4`
echo $TIME5 - `convertsecs2dhms $TIME5`
echo $TIME6 - `convertsecs2dhms $TIME6`

# OUTPUT WOULD BE LIKE THIS (If none pretty printf used):
# 36 - 00-00:00:36
# 1036 - 00-00:17:16
# 91925 - 01-01:32:05
# 183850 - 02-03:04:10
# 3309300 - 38-07:15:00
# 8653231 - 100-03:40:31
# OUTPUT WOULD BE LIKE THIS (If pretty printf used):
# 36 - 00d 00h 00m 36s
# 1036 - 00d 00h 17m 16s
# 91925 - 01d 01h 32m 05s
# 183850 - 02d 03h 04m 10s
# 3309300 - 38d 07h 15m 00s
# 1000000000 - 11574d 01h 46m 40s
Basile Starynkevitch ,
If $i represents some date in second since the Epoch, you could display it with
date -u -d @$i +%H:%M:%S
but you seems to suppose that $i is an interval (e.g. some duration) not a
date, and then I don't understand what you want.
Shilv , 2016-11-24 09:18:57
I use C shell, like this:
#! /bin/csh -f

set begDate_r = `date +%s`
set endDate_r = `date +%s`

set secs = `echo "$endDate_r - $begDate_r" | bc`
set h = `echo $secs/3600 | bc`
set m = `echo "$secs/60 - 60*$h" | bc`
set s = `echo $secs%60 | bc`

echo "Formatted Time: $h HOUR(s) - $m MIN(s) - $s SEC(s)"
Continuing @Daren`s answer, just to be clear: If you want to use the conversion to your time
zone , don't use the "u" switch , as in: date -d @$i +%T or in some cases
date -d @"$i" +%T
Rsync provides many options for altering the default behavior of the utility. We have
already discussed some of the more necessary flags.
If you are transferring files that have not already been compressed, like text files, you
can reduce the network transfer by adding compression with the -z option:
rsync -az source destination
The
-P
 flag is very helpful. It combines the flags
–progress
 and
–partial
.
            The first of these gives you a progress bar for the transfers and the second allows you to resume interrupted transfers:
rsync -azP source destination
If we run the command again, we will get a shorter output, because no changes have been made. This illustrates
            rsync's ability to use modification times to determine if changes have been made.
rsync -azP source destination
We can update the modification time on some of the files and see that rsync intelligently re-copies only the changed
            files:
touch dir1/file{1..10}
rsync -azP source destination
In order to keep two directories truly in sync, it is necessary to delete files from the destination directory if
            they are removed from the source. By default, rsync does not delete anything from the destination directory.


We can change this behavior with the
–delete
 option. Before using this option, use the

            –dry-run
 option and do testing to prevent data loss:
rsync -a --delete source destination
If you wish to exclude certain files or directories located inside a directory you are syncing, you can do so by
            specifying them in a comma-separated list following the
–exclude=
 option:
rsync -a --exclude= pattern_to_exclude source destination
If we have specified a pattern to exclude, we can override that exclusion for files that match a different pattern by
            using the
–include=
 option.
rsync -a --exclude= pattern_to_exclude --include=
pattern_to_include source destination
Finally, rsync's
--backup
 --backup-dir
rsync -a --delete --backup --backup-dir= /path/to/backups
                                    /path/to/source destination
Watch is a great utility that automatically refreshes data. Some of the more common uses for this command involve
monitoring system processes or logs, but it can be used in combination with pipes for more versatility.
Using watch command without any options will use the default parameter of 2.0 second refresh intervals.
As I mentioned before, one of the more common uses is monitoring system processes. Let's use it with the
free command
. This will give you up to date information about our system's memory usage.
watch free
Yes, it is that simple my friends.
Every 2.0s: free                                pop-os: Wed Dec 25 13:47:59 2019

              total        used        free      shared  buff/cache   available
Mem:       32596848     3846372    25571572      676612     3178904    27702636
Swap:             0           0           0
Adjust refresh rate of watch command
You can easily change how quickly the output is updated using the
-n
flag.
watch -n 10 free
Every 10.0s: free                               pop-os: Wed Dec 25 13:58:32 2019

              total        used        free      shared  buff/cache   available
Mem:       32596848     4522508    24864196      715600     3210144    26988920
Swap:             0           0           0
This changes from the default 2.0 second refresh to 10.0 seconds as you can see in the top left corner of our
output.
Remove title or header info from watch command output
watch -t free
The -t flag removes the title/header information to clean up output. The information will still refresh every 2
seconds but you can change that by combining the -n option.
              total        used        free      shared  buff/cache   available
Mem:       32596848     3683324    25089268     1251908     3824256    27286132
Swap:             0           0           0
Highlight the changes in watch command output
You can add the
-d
option and watch will automatically highlight changes for us. Let's take a
look at this using the date command. I've included a screen capture to show how the highlighting behaves.
<img src="https://i2.wp.com/linuxhandbook.com/wp-content/uploads/watch_command.gif?ssl=1" alt="Watch Command" data-recalc-dims="1"/>
Using pipes with watch
You can combine items using pipes. This is not a feature exclusive to watch, but it enhances the functionality of
this software. Pipes rely on the
|
symbol. Not coincidentally, this is called a pipe symbol or
sometimes a vertical bar symbol.
watch "cat /var/log/syslog | tail -n 3"
While this command runs, it will list the last 3 lines of the syslog file. The list will be refreshed every 2
seconds and any changes will be displayed.
Every 2.0s: cat /var/log/syslog | tail -n 3                                                      pop-os: Wed Dec 25 15:18:06 2019

Dec 25 15:17:24 pop-os dbus-daemon[1705]: [session uid=1000 pid=1705] Successfully activated service 'org.freedesktop.Tracker1.Min
er.Extract'
Dec 25 15:17:24 pop-os systemd[1591]: Started Tracker metadata extractor.
Dec 25 15:17:45 pop-os systemd[1591]: tracker-extract.service: Succeeded.
Conclusion
Watch is a simple, but very useful utility. I hope I've given you ideas that will help you improve your workflow.
This is a straightforward command, but there are a wide range of potential uses. If you have any interesting uses
that you would like to share, let us know about them in the comments.
Mastering the Command Line: Use timedatectl to Control System Time and Date in Linux
By Himanshu Arora
– Posted on Nov 11, 2014 Nov 9, 2014 in Linux
The timedatectl command in Linux allows you to query and change the system
clock and its settings. It comes as part of systemd, a replacement for the sysvinit daemon used
in the GNU/Linux and Unix systems.
In this article, we will discuss this command and the features it provides using relevant
examples.
Timedatectl examples
Note – All examples described in this article are tested on GNU bash, version
4.3.11(1).
Display system date/time information
Simply run the command without any command line options or flags, and it gives you
information on the system's current date and time, as well as time-related settings. For
example, here is the output when I executed the command on my system:
$ timedatectl
      Local time: Sat 2014-11-08 05:46:40 IST
  Universal time: Sat 2014-11-08 00:16:40 UTC
        Timezone: Asia/Kolkata (IST, +0530)
     NTP enabled: yes
NTP synchronized: yes
 RTC in local TZ: no
      DST active: n/a
So you can see that the output contains information on LTC, UTC, and time zone, as well as
settings related to NTP, RTC and DST for the localhost.
Update the system date or time
using the set-time option
To set the system clock to a specified date or time, use the set-time option
followed by a string containing the new date/time information. For example, to change the
system time to 6:40 am, I used the following command:
$ sudo timedatectl set-time "2014-11-08 06:40:00"
and here is the output:
$ timedatectl
      Local time: Sat 2014-11-08 06:40:02 IST
  Universal time: Sat 2014-11-08 01:10:02 UTC
        Timezone: Asia/Kolkata (IST, +0530)
     NTP enabled: yes
NTP synchronized: no
 RTC in local TZ: no
      DST active: n/a
Observe that the Local time field now shows the updated time. Similarly, you can update the
system date, too.
Update the system time zone using the set-timezone option
To set the system time zone to the specified value, you can use the
set-timezone option followed by the time zone value. To help you with the task,
the timedatectl command also provides another useful option.
list-timezones provides you with a list of available time zones to choose
from.
For example, here is the scrollable list of time zones the timedatectl command
produced on my system:
To change the system's current time zone from Asia/Kolkata to Asia/Kathmandu, here is the
command I used:
$ timedatectl set-timezone Asia/Kathmandu
and to verify the change, here is the output of the timedatectl command:
$ timedatectl
      Local time: Sat 2014-11-08 07:11:23 NPT
  Universal time: Sat 2014-11-08 01:26:23 UTC
        Timezone: Asia/Kathmandu (NPT, +0545)
     NTP enabled: yes
NTP synchronized: no
 RTC in local TZ: no
      DST active: n/a
You can see that the time zone was changed to the new value.
Configure RTC
You can also use the timedatectl command to configure RTC (real-time clock).
For those who are unaware, RTC is a battery-powered computer clock that keeps track of the time
even when the system is turned off. The timedatectl command offers a
set-local-rtc option which can be used to maintain the RTC in either local time or
universal time.
This option requires a boolean argument. If 0 is supplied, the system is configured to
maintain the RTC in universal time:
$ timedatectl set-local-rtc 0
but in case 1 is supplied, it will maintain the RTC in local time instead.
$ timedatectl set-local-rtc 1
A word of caution : Maintaining the RTC in the local time zone is not fully supported and
will create various problems with time zone changes and daylight saving adjustments. If at all
possible, use RTC in UTC.
Another point worth noting is that if set-local-rtc is invoked and the
--adjust-system-clock option is passed, the system clock is synchronized from the
RTC again, taking the new setting into account. Otherwise the RTC is synchronized from the
system clock.
Configure NTP-based network time synchronization
NTP, or Network Time Protocol, is a networking protocol for clock synchronization between
computer systems over packet-switched, variable-latency data networks. It is intended to
synchronize all participating computers to within a few milliseconds of
UTC.
The timedatectl command provides a set-ntp option that controls
whether NTP based network time synchronization is enabled. This option expects a boolean
argument. To enable NTP-based time synchronization, run the following command:
$ timedatectl set-ntp true
To disable, run:
$ timedatectl set-ntp false
Conclusion
As evident from the examples described above, the timedatectl command is a
handy tool for system administrators who can use it to to adjust various system clocks and RTC
configurations as well as poll remote servers for time information. To learn more about the
command, head over to its man page .
Time is an important aspect in Linux systems especially in critical services such as cron
jobs. Having the correct time on the server ensures that the server operates in a healthy
environment that consists of distributed systems and maintains accuracy in the workplace.
In this tutorial, we will focus on how to set time/date/time zone and to synchronize the
server clock with your Ubuntu Linux machine.
Check Current Time
You can verify the current time and date using the date and the
timedatectl commands. These linux commands
can be executed straight from the terminal as a regular user or as a superuser. The commands
are handy usefulness of the two commands is seen when you want to correct a wrong time from the
command line.
Using the date command
Log in as a root user and use the command as follows
$ date
Output
You can also use the same command to check a date 2 days ago
$ date --date="2 days ago"
Output
Using
timedatectl command
Checking on the status of the time on your system as well as the present time settings, use
the command timedatectl as shown
# timedatectl
or
# timedatectl status
Changing
Time
We use the timedatectl to change system time using the format HH:MM: SS. HH
stands for the hour in 24-hour format, MM stands for minutes and SS for seconds.
Setting the time to 09:08:07 use the command as follows (using the timedatectl)
# timedatectl set-time 09:08:07
using date command
Changing time means all the system processes are running on the same clock putting the
desktop and server at the same time. From the command line, use date command as follows
To change the locale to either AM or PM use the %p in the following format.
# date +%T%p -s "6:10:30AM"
# date +%T%p -s "12:10:30PM"
Change Date
Generally, you want your system date and time is set automatically. If for some reason you
have to change it manually using date command, we can use this command :
# date --set="20140125 09:17:00"
It will set your current date and time of your system into 'January 25, 2014' and '09:17:00
AM'. Please note, that you must have root privilege to do this.
You can use timedatectl to set the time and the date respectively. The accepted format is
YYYY-MM-DD, YYYY represents the year, MM the month in two digits and DD for the day in two
digits. Changing the date to 15 January 2019, you should use the following command
# timedatectl set-time 20190115
Create custom date format
To create custom date format, use a plus sign (+)
$ date +"Day : %d Month : %m Year : %Y"
Day: 05 Month: 12 Year: 2013
$ date +%D
12/05/13
%D format follows Year/Month/Day format .
You can also put the day name if you want. Here are some examples :
$ date +"%a %b %d %y"
Fri 06 Dec 2013
$ date +"%A %B %d %Y"
Friday December 06 2013
$ date +"%A %B %d %Y %T"
Friday December 06 2013 00:30:37
$ date +"%A %B-%d-%Y %c"
Friday December-06-2013 12:30:37 AM WIB
List/Change time zone
Changing the time zone is crucial when you want to ensure that everything synchronizes with
the Network Time Protocol. The first thing to do is to list all the region's time zones using
the list-time zones option or grep to make the command easy to understand
# timedatectl list-timezones
The above command will present a scrollable format.
Recommended timezone for servers is UTC as it doesn't have daylight savings. If you know,
the specific time zones set it using the name using the following command
# timedatectl set-timezone America/Los_Angeles
To display timezone execute
# timedatectl | grep "Time"
Set
the Local-rtc
The Real-time clock (RTC) which is also referred to as the hardware clock is independent of
the operating system and continues to run even when the server is shut down.
Use the following command
# timedatectl set-local-rtc 0
In addition, the following command for the local time
# timedatectl set-local-rtc 1
Check/Change CMOS Time
The computer CMOS battery will automatically synchronize time with system clock as long as
the CMOS is working correctly.
Use the hwclock command to check the CMOS date as follows
# hwclock
To synchronize the CMOS date with system date use the following format
# hwclock –systohc
To have the correct time for your Linux environment is critical because many operations
depend on it. Such operations include logging events and corn jobs as well. we hope you found
this article useful.
I have a program running under screen. In fact, when I detach from the session and check netstat, I can see the program is still
running (which is what I want):
udp 0 0 127.0.0.1:1720 0.0.0.0:* 3759/ruby
Now I want to reattach to the session running that process. So I start up a new terminal, and type screen -r
$ screen -r
There are several suitable screens on:
    5169.pts-2.teamviggy    (05/31/2013 09:30:28 PM)    (Detached)
    4872.pts-2.teamviggy    (05/31/2013 09:25:30 PM)    (Detached)
    4572.pts-2.teamviggy    (05/31/2013 09:07:17 PM)    (Detached)
    4073.pts-2.teamviggy    (05/31/2013 08:50:54 PM)    (Detached)
    3600.pts-2.teamviggy    (05/31/2013 08:40:14 PM)    (Detached)
Type "screen [-d] -r [pid.]tty.host" to resume one of them.
But how do I know which one is the session running that process I created?
Now one of the documents I came across said:
"When you're using a window, type C-a A to give it a name. This name will be used in the window listing, and will help you
remember what you're doing in each window when you start using a lot of windows."
The thing is when I am in a new screen session, I try to press control+a A and nothing happens.
Paul ,
There are two levels of "listings" involved here. First, you have the "window listing" within an individual session, which is
what ctrl-A A is for, and second there is a "session listing" which is what you have pasted in your question and what can also
be viewed with screen -ls .
You can customize the session names with the -S parameter, otherwise it uses your hostname (teamviggy), for example:
$ screen
(ctrl-A d to detach)
$ screen -S myprogramrunningunderscreen
(ctrl-A d to detach)
$ screen -ls

There are screens on:
    4964.myprogramrunningunderscreen    (05/31/2013 09:42:29 PM)    (Detached)
    4874.pts-1.creeper  (05/31/2013 09:39:12 PM)    (Detached)
2 Sockets in /var/run/screen/S-paul.
As a bonus, you can use an unambiguous abbreviation of the name you pass to -S later to reconnect:
screen -r myprog
(I am reconnected to the myprogramrunningunderscreen session)
njcwotx ,
I had a case where screen -r failed to reattach. Adding the -d flag so it looked like this
screen -d -r
worked for me. It detached the previous screen and allowed me to reattach. See the Man Page for more information.
Dr K ,
An easy way is to simply reconnect to an arbitrary screen with
screen -r
Then once you are running screen, you can get a list of all active screens by hitting Ctrl-A " (i.e. control-A
followed by a double quote). Then you can just select the active screens one at a time and see what they are running. Naming the
screens will, of course, make it easier to identify the right one.
Just my two cents
Lefty G Balogh ,
I tend to use the following combo where I need to work on several machines in several clusters:
screen -S clusterX
This creates the new screen session where I can build up the environment.
screen -dRR clusterX
This is what I use subsequently to reattach to that screen session. The nifty bits are that if the session is attached elsewhere,
it detaches that other display. Moreover, if there is no session for some quirky reason, like someone rebooted my server without
me knowing, it creates one. Finally. if multiple sessions exist, it uses the first one.
Also here's few useful explanations from man screen on cryptic parameters
       -d -r   Reattach a session and if necessary detach it first.

       -d -R   Reattach a session and if necessary detach or  even  create  it
               first.

       -d -RR  Reattach  a  session  and if necessary detach or create it. Use
               the first session if more than one session is available.

       -D -r   Reattach a session. If necessary  detach  and  logout  remotely
               first.
there is more with -D so be sure to check man screen
tilnam , 2018-03-14 17:12:06
The output of screen -list is formatted like pid.tty.host . The pids can be used to get the first child
process with pstree :
chkservice, a terminal user interface (TUI) for managing systemd units, has been updated recently with window resize and search
support.
chkservice is a simplistic
systemd unit manager that uses ncurses for its terminal interface.
Using it you can enable or disable, and start or stop a systemd unit. It also shows the units status (enabled, disabled, static or
masked).
You can navigate the chkservice user interface using keyboard shortcuts:
Up or l to move cursor up
Down or j to move cursor down
PgUp or b to move page up
PgDown or f to move page down
To enable or disable a unit press Space , and to start or stop a unity press s . You can access the help
screen which shows all available keys by pressing ? .
The command line tool had its first release in August 2017, with no new releases until a few days ago when version 0.2 was released,
quickly followed by 0.3.
With the latest 0.3 release, chkservice adds a search feature that allows easily searching through all systemd units.
To
search, type / followed by your search query, and press Enter . To search for the next item matching your
search query you'll have to type / again, followed by Enter or Ctrl + m (without entering
any search text).
Another addition to the latest chkservice is window resize support. In the 0.1 version, the tool would close when the user tried
to resize the terminal window. That's no longer the case now, chkservice allowing the resize of the terminal window it runs in.
And finally, the last addition to the latest chkservice 0.3 is G-g navigation support . Press G
( Shift + g ) to navigate to the bottom, and g to navigate to the top.
Download and install chkservice
The initial (0.1) chkservice version can be found
in the official repositories of a few Linux distributions, including Debian and Ubuntu (and Debian or Ubuntu based Linux distribution
-- e.g. Linux Mint, Pop!_OS, Elementary OS and so on).
There are some third-party repositories available as well, including a Fedora Copr, Ubuntu / Linux Mint PPA, and Arch Linux AUR,
but at the time I'm writing this, only the AUR package
was updated to the latest chkservice version 0.3.
You may also install chkservice from source. Use the instructions provided in the tool's
readme to either create a DEB package or install
it directly.
No time for
commands? Scheduling tasks with cron means programs can run but you don't have to stay up
late.9 comments Image by :
Internet Archive Book Images. Modified by Opensource.com. CC BY-SA 4.0 x Subscribe now
Instead, I use two service utilities that allow me to run commands, programs, and tasks at
predetermined times. The cron
and at services enable sysadmins to schedule tasks to run at a specific time in the future. The
at service specifies a one-time task that runs at a certain time. The cron service can schedule
tasks on a repetitive basis, such as daily, weekly, or monthly.
In this article, I'll introduce the cron service and how to use it.
Common (and
uncommon) cron uses
I use the cron service to schedule obvious things, such as regular backups that occur daily
at 2 a.m. I also use it for less obvious things.
The system times (i.e., the operating system time) on my many computers are set using the
Network Time Protocol (NTP). While NTP sets the system time, it does not set the hardware
time, which can drift. I use cron to set the hardware time based on the system time.
I also have a Bash program I run early every morning that creates a new "message of the
day" (MOTD) on each computer. It contains information, such as disk usage, that should be
current in order to be useful.
Many system processes and services, like Logwatch , logrotate , and Rootkit Hunter , use the cron service to schedule
tasks and run programs every day.
The crond daemon is the background service that enables cron functionality.
The cron service checks for files in the /var/spool/cron and /etc/cron.d directories and the
/etc/anacrontab file. The contents of these files define cron jobs that are to be run at
various intervals. The individual user cron files are located in /var/spool/cron , and system
services and applications generally add cron job files in the /etc/cron.d directory. The
/etc/anacrontab is a special case that will be covered later in this article.
Using
crontab
The cron utility runs based on commands specified in a cron table ( crontab ). Each user,
including root, can have a cron file. These files don't exist by default, but can be created in
the /var/spool/cron directory using the crontab -e command that's also used to edit a cron file
(see the script below). I strongly recommend that you not use a standard editor (such as
Vi, Vim, Emacs, Nano, or any of the many other editors that are available). Using the crontab
command not only allows you to edit the command, it also restarts the crond daemon when you
save and exit the editor. The crontab command uses Vi as its underlying editor, because Vi is
always present (on even the most basic of installations).
New cron files are empty, so commands must be added from scratch. I added the job definition
example below to my own cron files, just as a quick reference, so I know what the various parts
of a command mean. Feel free to copy it for your own use.
# Example of job definition:
# .---------------- minute (0 - 59)
# | .------------- hour (0 - 23)
# | | .---------- day of month (1 - 31)
# | | | .------- month (1 - 12) OR jan,feb,mar,apr ...
# | | | | .---- day of week (0 - 6) (Sunday=0 or 7) OR sun,mon,tue,wed,thu,fri,sat
# | | | | |
# * * * * * user-name command to be executed
# backup using the rsbu program to the internal 4TB HDD and then 4TB external
01 01 * * * / usr / local / bin / rsbu -vbd1 ; / usr / local / bin / rsbu -vbd2
# Set the hardware clock to keep it in sync with the more accurate system clock
03 05 * * * / sbin / hwclock --systohc
# Perform monthly updates on the first of the month
# 25 04 1 * * /usr/bin/dnf -y update
The crontab command is used to view or edit the cron files.
The first three lines in the code above set up a default environment. The environment must
be set to whatever is necessary for a given user because cron does not provide an environment
of any kind. The SHELL variable specifies the shell to use when commands are executed. This
example specifies the Bash shell. The MAILTO variable sets the email address where cron job
results will be sent. These emails can provide the status of the cron job (backups, updates,
etc.) and consist of the output you would see if you ran the program manually from the command
line. The third line sets up the PATH for the environment. Even though the path is set here, I
always prepend the fully qualified path to each executable.
There are several comment lines in the example above that detail the syntax required to
define a cron job. I'll break those commands down, then add a few more to show you some more
advanced capabilities of crontab files.
This line in my /etc/crontab runs a script that performs backups for my
systems.
This line runs my self-written Bash shell script, rsbu , that backs up all my systems. This
job kicks off at 1:01 a.m. (01 01) every day. The asterisks (*) in positions three, four, and
five of the time specification are like file globs, or wildcards, for other time divisions;
they specify "every day of the month," "every month," and "every day of the week." This line
runs my backups twice; one backs up to an internal dedicated backup hard drive, and the other
backs up to an external USB drive that I can take to the safe deposit box.
The following line sets the hardware clock on the computer using the system clock as the
source of an accurate time. This line is set to run at 5:03 a.m. (03 05) every day.
03 05 * * * /sbin/hwclock --systohc
This line sets the hardware clock using the system time as the source.
I was using the third and final cron job (commented out) to perform a dnf or yum update at
04:25 a.m. on the first day of each month, but I commented it out so it no longer runs.
# 25 04 1 * * /usr/bin/dnf -y update
This line used to perform a monthly update, but I've commented it
out.
Other scheduling tricks
Now let's do some things that are a little more interesting than these basics. Suppose you
want to run a particular job every Thursday at 3 p.m.:
00 15 * * Thu /usr/local/bin/mycronjob.sh
This line runs mycronjob.sh every Thursday at 3 p.m.
Or, maybe you need to run quarterly reports after the end of each quarter. The cron service
has no option for "The last day of the month," so instead you can use the first day of the
following month, as shown below. (This assumes that the data needed for the reports will be
ready when the job is set to run.)
02 03 1 1,4,7,10 * /usr/local/bin/reports.sh
This cron job runs quarterly reports on the first day of the month after a quarter
ends.
The following shows a job that runs one minute past every hour between 9:01 a.m. and 5:01
p.m.
01 09-17 * * * /usr/local/bin/hourlyreminder.sh
Sometimes you want to run jobs at regular times during normal business hours.
I have encountered situations where I need to run a job every two, three, or four hours.
That can be accomplished by dividing the hours by the desired interval, such as */3 for every
three hours, or 6-18/3 to run every three hours between 6 a.m. and 6 p.m. Other intervals can
be divided similarly; for example, the expression */15 in the minutes position means "run the
job every 15 minutes."
*/5 08-18/2 * * * /usr/local/bin/mycronjob.sh
This cron job runs every five minutes during every hour between 8 a.m. and 5:58
p.m.
One thing to note: The division expressions must result in a remainder of zero for the job
to run. That's why, in this example, the job is set to run every five minutes (08:05, 08:10,
08:15, etc.) during even-numbered hours from 8 a.m. to 6 p.m., but not during any odd-numbered
hours. For example, the job will not run at all from 9 p.m. to 9:59 a.m.
I am sure you can come up with many other possibilities based on these
examples.
Regular users with cron access could make mistakes that, for example, might cause system
resources (such as memory and CPU time) to be swamped. To prevent possible misuse, the sysadmin
can limit user access by creating a /etc/cron.allow file that contains a list of all users with
permission to create cron jobs. The root user cannot be prevented from using cron.
By preventing non-root users from creating their own cron jobs, it may be necessary for root
to add their cron jobs to the root crontab. "But wait!" you say. "Doesn't that run those jobs
as root?" Not necessarily. In the first example in this article, the username field shown in
the comments can be used to specify the user ID a job is to have when it runs. This prevents
the specified non-root user's jobs from running as root. The following example shows a job
definition that runs a job as the user "student":
04 07 * * * student /usr/local/bin/mycronjob.sh
If no user is specified, the job is run as the user that owns the crontab file, root in this
case.
cron.d
The directory /etc/cron.d is where some applications, such as SpamAssassin and sysstat , install cron files. Because there is no
spamassassin or sysstat user, these programs need a place to locate cron files, so they are
placed in /etc/cron.d .
The /etc/cron.d/sysstat file below contains cron jobs that relate to system activity
reporting (SAR). These cron files have the same format as a user cron file.
# Run system
activity accounting tool every 10 minutes
*/ 10 * * * * root / usr / lib64 / sa / sa1 1 1
# Generate a daily summary of process accounting at 23:53
53 23 * * * root / usr / lib64 / sa / sa2 -A
The sysstat package installs the /etc/cron.d/sysstat cron file to run programs for
SAR.
The sysstat cron file has two lines that perform tasks. The first line runs the sa1 program
every 10 minutes to collect data stored in special binary files in the /var/log/sa directory.
Then, every night at 23:53, the sa2 program runs to create a daily summary.
Scheduling
tips
Some of the times I set in the crontab files seem rather random -- and to some extent they
are. Trying to schedule cron jobs can be challenging, especially as the number of jobs
increases. I usually have only a few tasks to schedule on each of my computers, which is
simpler than in some of the production and lab environments where I have worked.
One system I administered had around a dozen cron jobs that ran every night and an
additional three or four that ran on weekends or the first of the month. That was a challenge,
because if too many jobs ran at the same time -- especially the backups and compiles -- the
system would run out of RAM and nearly fill the swap file, which resulted in system thrashing
while performance tanked, so nothing got done. We added more memory and improved how we
scheduled tasks. We also removed a task that was very poorly written and used large amounts of
memory.
The crond service assumes that the host computer runs all the time. That means that if the
computer is turned off during a period when cron jobs were scheduled to run, they will not run
until the next time they are scheduled. This might cause problems if they are critical cron
jobs. Fortunately, there is another option for running jobs at regular intervals: anacron
.
anacron
The anacron program
performs the same function as crond, but it adds the ability to run jobs that were skipped,
such as if the computer was off or otherwise unable to run the job for one or more cycles. This
is very useful for laptops and other computers that are turned off or put into sleep mode.
As soon as the computer is turned on and booted, anacron checks to see whether configured
jobs missed their last scheduled run. If they have, those jobs run immediately, but only once
(no matter how many cycles have been missed). For example, if a weekly job was not run for
three weeks because the system was shut down while you were on vacation, it would be run soon
after you turn the computer on, but only once, not three times.
The anacron program provides some easy options for running regularly scheduled tasks. Just
install your scripts in the /etc/cron.[hourly|daily|weekly|monthly] directories, depending how
frequently they need to be run.
How does this work? The sequence is simpler than it first appears.
The crond service runs the cron job specified in /etc/cron.d/0hourly .
# Run the hourly jobs
SHELL = / bin / bash
PATH = / sbin: / bin: / usr / sbin: / usr / bin
MAILTO =root
01 * * * * root run-parts / etc / cron.hourly
The contents of /etc/cron.d/0hourly cause the shell scripts located in /etc/cron.hourly
to run.
The cron job specified in /etc/cron.d/0hourly runs the run-parts program once per
hour.
The run-parts program runs all the scripts located in the /etc/cron.hourly
directory.
The /etc/cron.hourly directory contains the 0anacron script, which runs the anacron
program using the /etdc/anacrontab configuration file shown here.
# /etc/anacrontab: configuration file for anacron
# See anacron(8) and anacrontab(5) for details.
SHELL = / bin / sh
PATH = / sbin: / bin: / usr / sbin: / usr / bin
MAILTO =root
# the maximal random delay added to the base delay of the jobs
RANDOM_DELAY = 45
# the jobs will be started during the following hours only
START_HOURS_RANGE = 3 - 22
The contents of /etc/anacrontab file runs the executable files in the
cron.[daily|weekly|monthly] directories at the appropriate times.
The anacron program runs the programs located in /etc/cron.daily once per day; it runs
the jobs located in /etc/cron.weekly once per week, and the jobs in cron.monthly once per
month. Note the specified delay times in each line that help prevent these jobs from
overlapping themselves and other cron jobs.
Instead of placing complete Bash programs in the cron.X directories, I install them in the
/usr/local/bin directory, which allows me to run them easily from the command line. Then I add
a symlink in the appropriate cron directory, such as /etc/cron.daily .
The anacron program is not designed to run programs at specific times. Rather, it is
intended to run programs at intervals that begin at the specified times, such as 3 a.m. (see
the START_HOURS_RANGE line in the script just above) of each day, on Sunday (to begin the
week), and on the first day of the month. If any one or more cycles are missed, anacron will
run the missed jobs once, as soon as possible.
More on setting limits
I use most of these methods for scheduling tasks to run on my computers. All those tasks are
ones that need to run with root privileges. It's rare in my experience that regular users
really need a cron job. One case was a developer user who needed a cron job to kick off a daily
compile in a development lab.
It is important to restrict access to cron functions by non-root users. However, there are
circumstances when a user needs to set a task to run at pre-specified times, and cron can allow
them to do that. Many users do not understand how to properly configure these tasks using cron
and they make mistakes. Those mistakes may be harmless, but, more often than not, they can
cause problems. By setting functional policies that cause users to interact with the sysadmin,
individual cron jobs are much less likely to interfere with other users and other system
functions.
It is possible to set limits on the total resources that can be allocated to individual
users or groups, but that is an article for another time.
For more information, the man pages for cron , crontab , anacron , anacrontab , and run-parts
all have excellent information and descriptions of how the cron system works.
Cron is definitely a good tool. But if you need to do more advanced scheduling then Apache
Airflow is great for this.
Airflow has a number of advantages over Cron. The most important are: Dependencies (let
tasks run after other tasks), nice web based overview, automatic failure recovery and a
centralized scheduler. The disadvantages are that you will need to setup the scheduler and
some other centralized components on one server and a worker on each machine you want to run
stuff on.
You definitely want to use Cron for some stuff. But if you find that Cron is too limited
for your use case I would recommend looking into Airflow.
Hi David,
you have a well done article. Much appreciated. I make use of the @reboot crontab entry. With
crontab and root. I run the following.
@reboot /bin/dofstrim.sh
I wanted to run fstrim for my SSD drive once and only once per week.
dofstrim.sh is a script that runs the "fstrim" program once per week, irrespective of the
number of times the system is rebooted. I happen to have several Linux systems sharing one
computer, and each system has a root crontab with that entry. Since I may hop from Linux to
Linux in the day or several times per week, my dofstrim.sh only runs fstrim once per week,
irrespective which Linux system I boot. I make use of a common partition to all Linux
systems, a partition mounted as "/scratch" and the wonderful Linux command line "date"
program.
The dofstrim.sh listing follows below.
#!/bin/bash
# run fstrim either once/week or once/day not once for every reboot
#
# Use the date function to extract today's day number or week number
# the day number range is 1..366, weekno is 1 to 53
#WEEKLY=0 #once per day
WEEKLY=1 #once per week
lockdir='/scratch/lock/'
if [[ WEEKLY -eq 1 ]]; then
dayno="$lockdir/dofstrim.weekno"
today=$(date +%V)
else
dayno=$lockdir/dofstrim.dayno
today=$(date +%j)
fi
prevval="000"
if [ -f "$dayno" ]
then
prevval=$(cat ${dayno} )
if [ x$prevval = x ];then
prevval="000"
fi
else
mkdir -p $lockdir
fi
if [ ${prevval} -ne ${today} ]
then
/sbin/fstrim -a
echo $today > $dayno
fi
I had thought to use anacron, but then fstrim would be run frequently as each linux's
anacron would have a similar entry.
The "date" program produces a day number or a week number, depending upon the +%V or +%j
Running a report on the last day of the month is easy if you use the date program. Use the
date function from Linux as shown
*/9 15 28-31 * * [ `date -d +'1 day' +\%d` -eq 1 ] && echo "Tomorrow is the first
of month Today(now) is `date`" >> /root/message
Once per day from the 28th to the 31st, the date function is executed.
If the result of date +1day is the first of the month, today must be the last day of the
month.
An inode is a data structure in UNIX operating systems that contains important information
pertaining to files within a file system. When a file system is created in UNIX, a set amount
of inodes is created, as well. Usually, about 1 percent of the total file system disk space is
allocated to the inode table.
How do we find a file's inode ?
ls -i Command: display inode
ls -i Command: display inode
$ls -i /etc/bashrc
131094 /etc/bashrc
131094 is the inode of /etc/bashrc.
find / -inum XXXXXX -print to find the full path for each file pointing to inode XXXXXX.
Though you can use the example to do rm action, but simply I discourage to do so, for
security concern in find command, also in other file system, same inode refers a very different
file.
filesystem repair
If you get a bad luck on your filesystem, most of time, run fsck to fix it. It helps if you
have inode info of the filesystem in hand.
This is another big topic, I'll have another article for it.
Good luck. Anytime you pass any sort of command to this file, it's going to interpret it
as a flag. You can't fool rm, echo, sed, or anything else into actually deeming this a file
at this point. You do, however, have a inode for every file.
Traditional methods fail:
[eriks@jaded: ~]$ rm -f –fooface
rm: unrecognized option '–fooface'
Try `rm ./–fooface' to remove the file `–fooface'.
Try `rm –help' for more information.
[eriks@jaded: ~]$ rm -f '–fooface'
rm: unrecognized option '–fooface'
Try `rm ./–fooface' to remove the file `–fooface'.
Try `rm –help' for more information.
So now what, do you live forever with this annoyance of a file sitting inside your
filesystem, never to be removed or touched again? Nah.
We can remove a file, simply by an inode number, but first we must find out the file inode
number:
The author is the creator of nixCraft and a seasoned sysadmin, DevOps engineer, and a
trainer for the Linux operating system/Unix shell scripting. Get the latest tutorials on
SysAdmin, Linux/Unix and open source topics via RSS/XML feed or weekly
email newsletter .
Run the following command to start the Terminal session recording.
$ script -a my_terminal_activities
Where, -a flag is used to append the output to file or to typescript, retaining the prior
contents. The above command records everything you do in the Terminal and append the output to
a file called 'my_terminal_activities' and save it in your current working directory.
Sample output would be:
Script started, file is my_terminal_activities
Now, run some random Linux commands in your Terminal.
$ mkdir ostechnix
$ cd ostechnix/
$ touch hello_world.txt
$ cd ..
$ uname -r
After running all commands, end the 'script' command's session using command:
$ exit
After typing exit, you will the following output.
exit
Script done, file is my_terminal_activities
As you see, the Terminal activities have been stored in a file called
'my_terminal_activities' and saves it in the current working directory.
You can also save the Terminal activities in a file in different location like below.
$ script -a /home/ostechnix/documents/myscripts.txt
All commands will be stored in /home/ostechnix/documents/myscripts.txt file.
To view your Terminal activities, just open this file in any text editor or simply display
it using the 'cat' command.
$ cat my_terminal_activities
Sample output:
Script started on 2019-10-22 12:07:37+0530
sk@ostechnix:~$ mkdir ostechnix
sk@ostechnix:~$ cd ostechnix/
sk@ostechnix:~/ostechnix$ touch hello_world.txt
sk@ostechnix:~/ostechnix$ cd ..
sk@ostechnix:~$ uname -r
5.0.0-31-generic
sk@ostechnix:~$ exit
exit

Script done on 2019-10-22 12:08:10+0530
As you see in the above output, script command has recorded all my Terminal activities,
including the start and end time of the script command. Awesome, isn't it? The reason to use
script command is it's not just records the commands, but also the commands' output as well. To
put this simply, Script command will record everything you do on the Terminal.
Bonus
tip:
As one of our reader Mr.Alastair Montgomery mentioned in the comment section, we could setup
an alias
with would timestamp the recorded sessions.
Create an alias for the script command like below.
$ alias rec='script -aq ~/term.log-$(date "+%Y%m%d-%H-%M")'
Now simply enter the following command start recording the Terminal.
$ rec
Now, all your Terminal activities will be logged in a text file with timestamp, for example
term.log-20191022-12-16 .
So you thought you had your files backed up - until it came time to restore. Then you found out that you had bad sectors and
you've lost almost everything because gzip craps out 10% of the way through your archive. The gzip Recovery Toolkit has a program
- gzrecover - that attempts to skip over bad data in a gzip archive. This saved me from exactly the above situation. Hopefully it
will help you as well.
I'm very eager for feedback on this program
. If you download and try it, I'd appreciate and email letting me know what
your results were. My email is
[email protected]. Thanks.
ATTENTION
99% of "corrupted" gzip archives are caused by transferring the file via FTP in ASCII mode instead of binary mode. Please
re-transfer the file in the correct mode first before attempting to recover from a file you believe is corrupted.
Disclaimer and Warning
This program is provided AS IS with absolutely NO WARRANTY. It is not guaranteed to recover anything from your file, nor is
what it does recover guaranteed to be good data. The bigger your file, the more likely that something will be extracted from it.
Also keep in mind that this program gets faked out and is likely to "recover" some bad data. Everything should be manually
verified.
Downloading and Installing
Note that version 0.8 contains major bug fixes and improvements. See the
ChangeLog
for details. Upgrading is recommended. The old
version is provided in the event you run into troubles with the new release.
GNU cpio
(version 2.6 or higher) - Only if your archive is a
compressed tar file and you don't already have this (try "cpio --version" to find out)
First, build and install zlib if necessary. Next, unpack the gzrt sources. Then cd to the gzrt directory and build the
gzrecover program by typing
make
. Install manually by copying to the directory of your choice.
Usage
Run gzrecover on a corrupted .gz file. If you leave the filename blank, gzrecover will read from the standard input. Anything
that can be read from the file will be written to a file with the same name, but with a .recovered appended (any .gz is
stripped). You can override this with the -o
To get a verbose readout of exactly where gzrecover is finding bad bytes, use the -v option to enable verbose mode. This will
probably overflow your screen with text so best to redirect the stderr stream to a file. Once gzrecover has finished, you will
need to manually verify any data recovered as it is quite likely that our output file is corrupt and has some garbage data in it.
Note that gzrecover will take longer than regular gunzip. The more corrupt your data the longer it takes. If your archive is a
tarball, read on.
For tarballs, the tar program will choke because GNU tar cannot handle errors in the file format. Fortunately, GNU cpio
(tested at version 2.6 or higher) handles corrupted files out of the box.
Here's an example:
$ ls *.gz
my-corrupted-backup.tar.gz
$ gzrecover my-corrupted-backup.tar.gz
$ ls *.recovered
my-corrupted-backup.tar.recovered
$ cpio -F my-corrupted-backup.tar.recovered -i -v
Note that newer versions of cpio can spew voluminous error messages to your terminal. You may want to redirect the stderr
stream to /dev/null. Also, cpio might take quite a long while to run.
Copyright
The gzip Recovery Toolkit v0.8
Copyright (c) 2002-2013 Aaron M. Renn (
[email protected])
Recovery is possible but it depends on what caused the corruption.
If the file is just truncated, getting some partial result out is not too hard; just
run
gunzip < SMS.tar.gz > SMS.tar.partial
which will give some output despite the error at the end.
If the compressed file has large missing blocks, it's basically hopeless after the bad
block.
If the compressed file is systematically corrupted in small ways (e.g. transferring the
binary file in ASCII mode, which smashes carriage returns and newlines throughout the file),
it is possible to recover but requires quite a bit of custom programming, it's really only
worth it if you have absolutely no other recourse (no backups) and the data is worth a lot of
effort. (I have done it successfully.) I mentioned this scenario in a previous
question .
The answers for .zip files differ somewhat, since zip archives have multiple
separately-compressed members, so there's more hope (though most commercial tools are rather
bogus, they eliminate warnings by patching CRCs, not by recovering good data). But your
question was about a .tar.gz file, which is an archive with one big member.
,
Here is one possible scenario that we encountered. We had a tar.gz file that would not
decompress, trying to unzip gave the error:
Artistic Style is a source code indenter, formatter, and beautifier for the C, C++, C++/CLI,
Objective‑C, C# and Java programming languages.
When indenting source code, we as programmers have a tendency to use both spaces and tab
characters to create the wanted indentation. Moreover, some editors by default insert spaces
instead of tabs when pressing the tab key. Other editors (Emacs for example) have the ability
to "pretty up" lines by automatically setting up the white space before the code on the line,
possibly inserting spaces in code that up to now used only tabs for indentation.
The NUMBER of spaces for each tab character in the source code can change between editors
(unless the user sets up the number to his liking...). One of the standard problems programmers
face when moving from one editor to another is that code containing both spaces and tabs, which
was perfectly indented, suddenly becomes a mess to look at. Even if you as a programmer take
care to ONLY use spaces or tabs, looking at other people's source code can still be
problematic.
To address this problem, Artistic Style was created – a filter written in C++ that
automatically re-indents and re-formats C / C++ / Objective‑C / C++/CLI / C# / Java
source files. It can be used from a command line, or it can be incorporated as a library in
another program.
Vim can indent bash scripts. But not reformat them before indenting.
Backup your bash script, open it with vim, type gg=GZZ and indent will be
corrected. (Note for the impatient: this overwrites the file, so be sure to do that backup!)
Though, some bugs with << (expecting EOF as first character on a line)
e.g.
The granddaddy of HTML tools, with support for modern standards.
There used to be a fork called tidy-html5 which since became the official thing. Here is its
GitHub repository
.
Tidy is a console application for Mac OS X, Linux, Windows, UNIX, and more. It corrects and
cleans up HTML and XML documents by fixing markup errors and upgrading legacy code to modern
standards.
For your needs, here is the command line to call Tidy:
DiffMerge is a cross-platform GUI application for comparing and merging files. It has two
functionality engines, the Diff engine which shows the difference between two files, which
supports intra-line highlighting and editing and a Merge engine which outputs the changed lines
between three files.
Meld is a lightweight GUI diff and merge tool. It enables users to compare files,
directories plus version controlled programs. Built specifically for developers, it comes with
the following features:
Two-way and three-way comparison of files and directories
Update of file comparison as a users types more words
Makes merges easier using auto-merge mode and actions on changed blocks
Easy comparisons using visualizations
Supports Git, Mercurial, Subversion, Bazaar plus many more
Diffuse is another popular, free, small and simple GUI diff and merge tool that you can use
on Linux. Written in Python, It offers two major functionalities, that is: file comparison and
version control, allowing file editing, merging of files and also output the difference between
files.
You can view a comparison summary, select lines of text in files using a mouse pointer,
match lines in adjacent files and edit different file. Other features include:
Syntax highlighting
Keyboard shortcuts for easy navigation
Supports unlimited undo
Unicode support
Supports Git, CVS, Darcs, Mercurial, RCS, Subversion, SVK and Monotone
XXdiff is a free, powerful file and directory comparator and merge tool that runs on Unix
like operating systems such as Linux, Solaris, HP/UX, IRIX, DEC Tru64. One limitation of XXdiff
is its lack of support for unicode files and inline editing of diff files.
It has the following list of features:
Shallow and recursive comparison of two, three file or two directories
Horizontal difference highlighting
Interactive merging of files and saving of resulting output
Supports merge reviews/policing
Supports external diff tools such as GNU diff, SIG diff, Cleareddiff and many more
Extensible using scripts
Fully customizable using resource file plus many other minor features
KDiff3 is yet another cool, cross-platform diff and merge tool made from KDevelop . It works
on all Unix-like platforms including Linux and Mac OS X, Windows.
It can compare or merge two to three files or directories and has the following notable
features:
Indicates differences line by line and character by character
Supports auto-merge
In-built editor to deal with merge-conflicts
Supports Unicode, UTF-8 and many other codecs
Allows printing of differences
Windows explorer integration support
Also supports auto-detection via byte-order-mark "BOM"
TkDiff is also a cross-platform, easy-to-use GUI wrapper for the Unix diff tool. It provides
a side-by-side view of the differences between two input files. It can run on Linux, Windows
and Mac OS X.
Additionally, it has some other exciting features including diff bookmarks, a graphical map
of differences for easy and quick navigation plus many more.
Having read this review of some of the best file and directory comparator and merge tools,
you probably want to try out some of them. These may not be the only diff tools available you
can find on Linux, but they are known to offer some the best features, you may also want to let
us know of any other diff tools out there that you have tested and think deserve to be
mentioned among the best.
Using an trap to cleanup is simple enough. Here is an example of using trap to clean up a
temporary file on exit of the script.
#!/bin/bash
trap "rm -f /tmp/output.txt" EXIT
yum -y update > /tmp/output.txt
if grep -qi "kernel" /tmp/output.txt; then
     mail -s "KERNEL UPDATED" [email protected] < /tmp/output.txt
fi
NOTE: It is important that the trap statement be placed at the beginning of the script to
function properly. Any commands above the trap can exit and not be caught in the trap.
Now if the script exits for any reason, it will still run the rm command to delete the file.
Here is an example of me sending SIGINT (CTRL+C) while the script was
running.
# ./test.sh
 ^Cremoved '/tmp/output.txt'
NOTE: I added verbose ( -v ) output to the rm command so it prints "removed". The ^C
signifies where I hit CTRL+C to send SIGINT.
This is a much cleaner and safer way to ensure the cleanup occurs when the script exists.
Using EXIT ( 0 ) instead of a single defined signal (i.e. SIGINT – 2) ensures the cleanup
happens on any exit, even successful completion of the script.
The Linux exec command is a
bash builtin
and a very interesting
utility. It is not something most people who are new to Linux know. Most seasoned admins understand it but only use it occasionally.
If you are a developer, programmer or DevOp engineer it is probably something you use more often. Lets take a deep dive into the
builtin exec command, what it does and how to use it.
In order to understand the exec command, you need a fundamental understanding of how sub-shells work.
... ... ...
What the Exec Command Does
In it's most basic function the exec command changes the default behavior of creating a sub-shell to run a command. If you run
exec followed by a command, that command will REPLACE the original process, it will NOT create a sub-shell.
An additional feature of the exec command, is
redirection
and manipulation
of
file descriptors
. Explaining redirection and file descriptors is outside the scope of this tutorial. If these are new to you please read "
Linux IO, Standard Streams and
Redirection
" to get acquainted with these terms and functions.
In the following sections we will expand on both of these functions and try to demonstrate how to use them.
How to Use the Exec Command with Examples
Let's look at some examples of how to use the exec command and it's options.
Basic Exec Command Usage Replacement of Process
If you call exec and supply a command without any options, it simply replaces the shell with
command
.
Let's run an experiment. First, I ran the ps command to find the process id of my second terminal window. In this case it was
17524. I then ran "exec tail" in that second terminal and checked the ps command again. If you look at the screenshot below, you
will see the tail process replaced the bash process (same process ID).
Screenshot 3
Since the tail command replaced the bash shell process, the shell will close when the tail command terminates.
Exec Command Options
If the -l option is supplied, exec adds a dash at the beginning of the first (zeroth) argument given. So if we ran the following
command:
exec -l tail -f /etc/redhat-release
It would produce the following output in the process list. Notice the highlighted dash in the CMD column.
The -c option causes the supplied command to run with a empty environment. Environmental variables like
PATH
, are cleared before the command it run.
Let's try an experiment. We know that the printenv command prints all the settings for a users environment. So here we will open
a new bash process, run the printenv command to show we have some variables set. We will then run printenv again but this time with
the exec -c option.
In the example above you can see that an empty environment is used when using exec with the -c option. This is why there was no
output to the printenv command when ran with exec.
The last option, -a [name], will pass
name
as the first argument to
command
. The command will still run as expected,
but the name of the process will change. In this next example we opened a second terminal and ran the following command:
exec -a PUTORIUS tail -f /etc/redhat-release
Here is the process list showing the results of the above command:
Screenshot 5
As you can see, exec passed PUTORIUS as first argument to
command
, therefore it shows in the process list with that name.
Using the Exec Command for Redirection & File Descriptor Manipulation
The exec command is often used for redirection. When a file descriptor is redirected with exec it affects the current shell. It
will exist for the life of the shell or until it is explicitly stopped.
If no
command
is specified, redirections may be used to affect the current shell environment.
Bash Manual
Here are some examples of how to use exec for redirection and manipulating file descriptors. As we stated above, a deep dive into
redirection and file descriptors is outside the scope of this tutorial. Please read "
Linux IO, Standard Streams and
Redirection
" for a good primer and see the resources section for more information.
Redirect all standard output (STDOUT) to a file:
exec >file
In the example animation below, we use exec to redirect all standard output to a file. We then enter some commands that should
generate some output. We then use exec to redirect STDOUT to the /dev/tty to restore standard output to the terminal. This effectively
stops the redirection. Using the
cat
command
we can see that the file contains all the redirected output.
Open a file as file descriptor 6 for writing:
exec 6> file2write
Open file as file descriptor 8 for reading:
exec 8< file2read
Copy file descriptor 5 to file descriptor 7:
exec 7<&5
Close file descriptor 8:
exec 8<&-
Conclusion
In this article we covered the basics of the exec command. We discussed how to use it for process replacement, redirection and
file descriptor manipulation.
In the past I have seen exec used in some interesting ways. It is often used as a wrapper script for starting other binaries.
Using process replacement you can call a binary and when it takes over there is no trace of the original wrapper script in the process
table or memory. I have also seen many System Administrators use exec when transferring work from one script to another. If you call
a script inside of another script the original process stays open as a parent. You can use exec to replace that original script.
I am sure there are people out there using exec in some interesting ways. I would love to hear your experiences with exec. Please
feel free to leave a comment below with anything on your mind.
Type the following command to display the seconds since the epoch:
date +%s
date +%s
Sample outputs: 1268727836
Convert Epoch To Current Time
Type the command:
date -d @Epoch
date -d @1268727836
date -d "1970-01-01 1268727836 sec GMT"
date -d @Epoch date -d @1268727836 date -d "1970-01-01 1268727836 sec GMT"
Sample outputs:
Tue Mar 16 13:53:56 IST 2010
Please note that @ feature only works with latest version of date (GNU coreutils v5.3.0+).
To convert number of seconds back to a more readable form, use a command like this:
In ksh93 however, the argument is taken as a date expression where various
and hardly documented formats are supported.
For a Unix epoch time, the syntax in ksh93 is:
printf '%(%F %T)T\n' '#1234567890'
ksh93 however seems to use its own algorithm for the timezone and can get it
wrong. For instance, in Britain, it was summer time all year in 1970, but:
Time conversion using Bash This article show how you can obtain the UNIX epoch time
(number of seconds since 1970-01-01 00:00:00 UTC) using the Linux bash "date" command. It also
shows how you can convert a UNIX epoch time to a human readable time.
Obtain UNIX epoch time using bash
Obtaining the UNIX epoch time using bash is easy. Use the build-in date command and instruct it
to output the number of seconds since 1970-01-01 00:00:00 UTC. You can do this by passing a
format string as parameter to the date command. The format string for UNIX epoch time is
'%s'.
lode@srv-debian6:~$ date "+%s"

    1234567890
To convert a specific date and time into UNIX epoch time, use the -d parameter.
The next example shows how to convert the timestamp "February 20th, 2013 at 08:41:15" into UNIX
epoch time.
lode@srv-debian6:~$ date "+%s" -d "02/20/2013 08:41:15"

    1361346075
Converting UNIX epoch time to human readable time
Even though I didn't find it in the date manual, it is possible to use the date command to
reformat a UNIX epoch time into a human readable time. The syntax is the following:
lode@srv-debian6:~$ date -d @1234567890

    Sat Feb 14 00:31:30 CET 2009
The same thing can also be achieved using a bit of perl programming:
lode@srv-debian6:~$ perl -e 'print scalar(localtime(1234567890)), "\n"'

    Sat Feb 14 00:31:30 2009
Please note that the printed time is formatted in the timezone in which your Linux system is
configured. My system is configured in UTC+2, you can get another output for the same
command.
The Code-TidyAll
distribution provides a command line script called tidyall that will use
Perl::Tidy to change the
layout of the code.
This tandem needs 2 configuration file.
The .perltidyrc file contains the instructions to Perl::Tidy that describes the layout of a
Perl-file. We used the following file copied from the source code of the Perl Maven
project.
-pbp
-nst
-et=4
--maximum-line-length=120

# Break a line after opening/before closing token.
-vt=0
-vtc=0
The tidyall command uses a separate file called .tidyallrc that describes which files need
to be beautified.
Once I installed Code::TidyAll and placed those files in
the root directory of the project, I could run tidyall -a .
That created a directory called .tidyall.d/ where it stores cached versions of the files,
and changed all the files that were matches by the select statements in the .tidyallrc
file.
Then, I added .tidyall.d/ to the .gitignore file to avoid adding that subdirectory to the
repository and ran tidyall -a again to make sure the .gitignore file is sorted.
Vim can indent bash scripts. But not reformat them before indenting.
Backup your bash script, open it with vim, type gg=GZZ and indent will be
corrected. (Note for the impatient: this overwrites the file, so be sure to do that backup!)
Though, some bugs with << (expecting EOF as first character on a line)
e.g.
A shell parser, formatter and interpreter. Supports
POSIX Shell
,
Bash
and
mksh
. Requires Go 1.11 or later.
Quick start
To parse shell scripts, inspect them, and print them out, see the
syntax examples
.
For high-level operations like performing shell expansions on strings, see the
shell examples
.
shfmt
Go 1.11 and later can download the latest v2 stable release:
cd $(mktemp -d); go mod init tmp; go get mvdan.cc/sh/cmd/shfmt
The latest v3 pre-release can be downloaded in a similar manner, using the
/v3
module:
cd $(mktemp -d); go mod init tmp; go get mvdan.cc/sh/v3/cmd/shfmt
Finally, any older release can be built with their respective older Go versions by manually cloning,
checking out a tag, and running
go build ./cmd/shfmt
.
shfmt
formats shell programs. It can use tabs or any number of spaces to indent. See
canonical.sh
for a quick look at its
default style.
You can feed it standard input, any number of files or any number of directories to recurse into. When
recursing, it will operate on
.sh
and
.bash
files and ignore files starting with a
period. It will also operate on files with no extension and a shell shebang.
shfmt -l -w script.sh
Typically, CI builds should use the command below, to error if any shell scripts in a project don't adhere
to the format:
shfmt -d .
Use
-i N
to indent with a number of spaces instead of tabs. There are other formatting options
- see
shfmt -h
. For example, to get the formatting appropriate for
Google's Style
guide, use
shfmt -i 2 -ci
.
bash -n
can be useful to check for syntax errors in shell scripts. However,
shfmt
                     >/dev/null
can do a better job as it checks for invalid UTF-8 and does all parsing statically, including
checking POSIX Shell validity:
$((
and
((
ambiguity is not supported. Backtracking would complicate the
parser and make streaming support via
io.Reader
impossible. The POSIX spec recommends to
space the operands
if
$( (
is meant.
$ echo '$((foo); (bar))' | shfmt
1:1: reached ) without matching $(( with ))
Some builtins like
export
and
let
are parsed as keywords. This is to allow
statically parsing them and building their syntax tree, as opposed to just keeping the arguments as a slice
of arguments.
JavaScript
A subset of the Go packages are available as an npm package called
mvdan-sh
. See the
_js
directory for more information.
Docker
To build a Docker image, checkout a specific version of the repository and run:
First of all, stop executing everything as root . You never really need to do this. Only run
individual commands with sudo if you need to. If a normal command doesn't work
without sudo, just call sudo !! to execute it again.
If you're paranoid about rm , mv and other operations while
running as root, you can add the following aliases to your shell's configuration file:
[ $UID = 0 ] && \
  alias rm='rm -i' && \
  alias mv='mv -i' && \
  alias cp='cp -i'
These will all prompt you for confirmation ( -i ) before removing a file or
overwriting an existing file, respectively, but only if you're root (the user
with ID 0).
Don't get too used to that though. If you ever find yourself working on a system that
doesn't prompt you for everything, you might end up deleting stuff without noticing it. The
best way to avoid mistakes is to never run as root and think about what exactly you're doing
when you use sudo .
I am using rm within a BASH script to delete many files. Sometimes the files are
not present, so it reports many errors. I do not need this message. I have searched the man
page for a command to make rm quiet, but the only option I found is
-f , which from the description, "ignore nonexistent files, never prompt", seems
to be the right choice, but the name does not seem to fit, so I am concerned it might have
unintended consequences.
Is the -f option the correct way to silence rm ? Why isn't it
called -q ?
The main use of -f is to force the removal of files that would not be removed
using rm by itself (as a special case, it "removes" non-existent files, thus
suppressing the error message).
You can also just redirect the error message using
$ rm file.txt 2> /dev/null
(or your operating system's equivalent). You can check the value of $?
immediately after calling rm to see if a file was actually removed or not.
As far as rm -f doing "anything else", it does force ( -f is
shorthand for --force ) silent removal in situations where rm would
otherwise ask you for confirmation. For example, when trying to remove a file not writable by
you from a directory that is writable by you.
Any one can let me know the possible return codes for the command rm -rf other than zero i.e,
possible return codes for failure cases. I want to know more detailed reason for the failure
of the command unlike just the command is failed(return other than 0).
To see the return code, you can use echo $? in bash.
To see the actual meaning, some platforms (like Debian Linux) have the perror
binary available, which can be used as follows:
$ rm -rf something/; perror $?
rm: cannot remove `something/': Permission denied
OS error code   1:  Operation not permitted
rm -rf automatically suppresses most errors. The most likely error you will
see is 1 (Operation not permitted), which will happen if you don't have
permissions to remove the file. -f intentionally suppresses most errors
I need to copy all the *.c files from local laptop named hostA to hostB including all directories. I am using the following scp
command but do not know how to exclude specific files (such as *.out): $ scp -r ~/projects/ user@hostB:/home/delta/projects/
How do I tell scp command to exclude particular file or directory at the Linux/Unix command line? One can use scp command to securely
copy files between hosts on a network. It uses ssh for data transfer and authentication purpose. Typical scp command syntax is as
follows: scp file1 user@host:/path/to/dest/ scp -r /path/to/source/ user@host:/path/to/dest/ scp [options] /dir/to/source/
user@host:/dir/to/dest/
Scp exclude files
I don't think so you can filter or exclude files when using scp command. However, there is a great workaround to exclude files
and copy it securely using ssh. This page explains how to filter or excludes files when using scp to copy a directory recursively.
-a : Recurse into directories i.e. copy all files and subdirectories. Also, turn on archive mode and all other
options (-rlptgoD)
-v : Verbose output
-e ssh : Use ssh for remote shell so everything gets encrypted
--exclude='*.out' : exclude files matching PATTERN e.g. *.out or *.c and so on.
Example of rsync command
In this example copy all file recursively from ~/virt/ directory but exclude all *.new files: $ rsync -av -e ssh --exclude='*.new' ~/virt/ root@centos7:/tmp
The locate command also accepts patterns containing globbing characters such as
the wildcard character * . When the pattern contains no globbing characters the
command searches for *PATTERN* , that's why in the previous example all files
containing the search pattern in their names were displayed.
The wildcard is a symbol used to represent zero, one or more characters. For example, to
search for all .md files on the system you would use:
locate *.md
To limit the search results use the -n option followed by the number of results
you want to be displayed. For example, the following command will search for all
.py files and display only 10 results:
locate -n 10 *.py
By default, locate performs case-sensitive searches. The -i (
--ignore-case ) option tels locate to ignore case and run
case-insensitive search.
To display the count of all matching entries, use the -c ( --count
) option. The following command would return the number of all files containing
.bashrc in their names:
locate -c .bashrc
6
By default, locate doesn't check whether the found files still exist on the
file system. If you deleted a file after the latest database update if the file matches the
search pattern it will be included in the search results.
To display only the names of the files that exist at the time locate is run use
the -e ( --existing ) option. For example, the following would return
only the existing .json files:
locate -e *.json
If you need to run a more complex search you can use the -r (
--regexp ) option which allows you to search using a basic regexp instead of
patterns. This option can be specified multiple times.
For example, to search for all .mp4 and .avi files on your system and
ignore case you would run:
"... The sort command option "k" specifies a field, not a column. ..."
"... In gnu sort, the default field separator is 'blank to non-blank transition' which is a good default to separate columns. ..."
"... What is probably missing in that article is a short warning about the effect of the current locale. It is a common mistake to assume that the default behavior is to sort according ASCII texts according to the ASCII codes. ..."
Sort also has built in functionality to arrange by month. It recognizes several formats based on locale-specific information.
I tried to demonstrate some unqiue tests to show that it will arrange by date-day, but not year. Month abbreviations display before
full-names.
Here is the sample text file in this example:
March
Feb
February
April
August
July
June
November
October
December
May
September
1
4
3
6
01/05/19
01/10/19
02/06/18
Let's sort it by months using the -M option:
sort filename.txt -M
Here's the output you'll see:
01/05/19
01/10/19
02/06/18
1
3
4
6
Jan
Feb
February
March
April
May
June
July
August
September
October
November
December
... ... ...
7. Sort Specific Column [option -k]
If you have a table in your file, you can use the -k option to specify which column to sort. I added some arbitrary
numbers as a third column and will display the output sorted by each column. I've included several examples to show the variety of
output possible. Options are added following the column number.
1. MX Linux 100
2. Manjaro 400
3. Mint 300
4. elementary 500
5. Ubuntu 200
sort filename.txt -k 2
This will sort the text on the second column in alphabetical order:
4. elementary 500
2. Manjaro 400
3. Mint 300
1. MX Linux 100
5. Ubuntu 200
sort filename.txt -k 3n
This will sort the text by the numerals on the third column.
1. MX Linux 100
5. Ubuntu 200
3. Mint 300
2. Manjaro 400
4. elementary 500
sort filename.txt -k 3nr
Same as the above command just that the sort order has been reversed.
4. elementary 500
2. Manjaro 400
3. Mint 300
5. Ubuntu 200
1. MX Linux 100
8. Sort and remove duplicates [option -u]
If you have a file with potential duplicates, the -u option will make your life much easier. Remember that sort will
not make changes to your original data file. I chose to create a new file with just the items that are duplicates. Below you'll see
the input and then the contents of each file after the command is run.
1. MX Linux
2. Manjaro
3. Mint
4. elementary
5. Ubuntu
1. MX Linux
2. Manjaro
3. Mint
4. elementary
5. Ubuntu
1. MX Linux
2. Manjaro
3. Mint
4. elementary
5. Ubuntu
sort filename.txt -u > filename_duplicates.txt
Here's the output files sorted and without duplicates.
1. MX Linux
2. Manjaro
3. Mint
4. elementary
5. Ubuntu
9. Ignore case while sorting [option -f]
Many modern distros running sort will implement ignore case by default. If yours does not, adding the -f option will
produce the expected results.
sort filename.txt -f
Here's the output where cases are ignored by the sort command:
alpha
alPHa
Alpha
ALpha
beta
Beta
BEta
BETA
10. Sort by human numeric values [option -h]
This option allows the comparison of alphanumeric values like 1k (i.e. 1000).
sort filename.txt -h
Here's the sorted output:
10.0
100
1000.0
1k
I hope this tutorial helped you get the basic usage of the sort command in Linux. If you have some cool sort trick, why not share
it with us in the comment section?
Christopher works as a Software Developer in Orlando, FL. He loves open source, Taco Bell, and a Chi-weenie named Max. Visit
his website for more information or connect with him on social media.
John
The sort command option "k" specifies a field, not a column. In your example all five lines have the same character in
column 2 a "."
Stephane Chauveau
In gnu sort, the default field separator is 'blank to non-blank transition' which is a good default to separate columns.
In his example, the "." is part of the first column so it should work fine. If debug is used then the range of characters used
as keys is dumped.
What is probably missing in that article is a short warning about the effect of the current locale. It is a common mistake
to assume that the default behavior is to sort according ASCII texts according to the ASCII codes. For example, the command
echo `printf ".nxn0nXn@në" | sort` produces ". 0 @ X x ë" with LC_ALL=C but ". @ 0 ë x X" with LC_ALL=en_US.UTF-8.
The choice of shell as a programming language is strange, but the idea is good...
Notable quotes:
"... The tool is developed by Igor Chubin, also known for its console-oriented weather forecast service wttr.in , which can be used to retrieve the weather from the console using only cURL or Wget. ..."
While it does have its own cheat sheet repository too, the project is actually concentrated around the creation of a unified mechanism
to access well developed and maintained cheat sheet repositories.
The tool is developed by Igor Chubin, also known for its
console-oriented weather forecast
service wttr.in , which can be used to retrieve the weather from the console using
only cURL or Wget.
It's worth noting that cheat.sh is not new. In fact it had its initial commit around May, 2017, and is a very popular repository
on GitHub. But I personally only came across it recently, and I found it very useful, so I figured there must be some Linux Uprising
readers who are not aware of this cool gem.
cheat.sh features & more
cheat.sh major features:
Supports 58 programming
languages , several DBMSes, and more than 1000 most important UNIX/Linux commands
Very fast, returns answers within 100ms
Simple curl / browser interface
An optional command line client (cht.sh) is available, which allows you to quickly search cheat sheets and easily copy
snippets without leaving the terminal
Can be used from code editors, allowing inserting code snippets without having to open a web browser, search for the code,
copy it, then return to your code editor and paste it. It supports Vim, Emacs, Visual Studio Code, Sublime Text and IntelliJ Idea
Comes with a special stealth mode in which any text you select (adding it into the selection buffer of X Window System
or into the clipboard) is used as a search query by cht.sh, so you can get answers without touching any other keys
The command line client features a special shell mode with a persistent queries context and readline support. It also has a query
history, it integrates with the clipboard, supports tab completion for shells like Bash, Fish and Zsh, and it includes the stealth
mode I mentioned in the cheat.sh features.
The web, curl and cht.sh (command line) interfaces all make use of https://cheat.sh/
but if you prefer, you can self-host it .
It should be noted that each editor plugin supports a different feature set (configurable server, multiple answers, toggle comments,
and so on). You can view a feature comparison of each cheat.sh editor plugin on the
Editors integration section of the project's
GitHub page.
Want to contribute a cheat sheet? See the cheat.sh guide on
editing or adding a new cheat sheet.
cheat.sh curl / command line client usage examples Examples of using cheat.sh using the curl interface (this requires having curl installed as you'd expect) from the command
line:
Show the tar command cheat sheet:
curl cheat.sh/tar
Example with output:
$ curl cheat.sh/tar
# To extract an uncompressed archive:
tar -xvf /path/to/foo.tar

# To create an uncompressed archive:
tar -cvf /path/to/foo.tar /path/to/foo/

# To extract a .gz archive:
tar -xzvf /path/to/foo.tgz

# To create a .gz archive:
tar -czvf /path/to/foo.tgz /path/to/foo/

# To list the content of an .gz archive:
tar -ztvf /path/to/foo.tgz

# To extract a .bz2 archive:
tar -xjvf /path/to/foo.tgz

# To create a .bz2 archive:
tar -cjvf /path/to/foo.tgz /path/to/foo/

# To extract a .tar in specified Directory:
tar -xvf /path/to/foo.tar -C /path/to/destination/

# To list the content of an .bz2 archive:
tar -jtvf /path/to/foo.tgz

# To create a .gz archive and exclude all jpg,gif,... from the tgz
tar czvf /path/to/foo.tgz --exclude=\*.{jpg,gif,png,wmv,flv,tar.gz,zip} /path/to/foo/

# To use parallel (multi-threaded) implementation of compression algorithms:
tar -z ... -> tar -Ipigz ...
tar -j ... -> tar -Ipbzip2 ...
tar -J ... -> tar -Ipixz ...
cht.sh also works instead of cheat.sh:
curl cht.sh/tar
Want to search for a keyword in all cheat sheets? Use:
curl cheat.sh/~keyword
List the Python programming language cheat sheet for random list :
curl cht.sh/python/random+list
Example with output:
$ curl cht.sh/python/random+list
#  python - How to randomly select an item from a list?
#
#  Use random.choice
#  (https://docs.python.org/2/library/random.htmlrandom.choice):

import random

foo = ['a', 'b', 'c', 'd', 'e']
print(random.choice(foo))

#  For cryptographically secure random choices (e.g. for generating a
#  passphrase from a wordlist), use random.SystemRandom
#  (https://docs.python.org/2/library/random.htmlrandom.SystemRandom)
#  class:

import random

foo = ['battery', 'correct', 'horse', 'staple']
secure_random = random.SystemRandom()
print(secure_random.choice(foo))

#  [Pēteris Caune] [so/q/306400] [cc by-sa 3.0]
Replace python with some other programming language supported by cheat.sh, and random+list with the cheat
sheet you want to show.
Want to eliminate the comments from your answer? Add ?Q at the end of the query (below is an example using the same
/python/random+list):
For more flexibility and tab completion you can use cht.sh, the command line cheat.sh client; you'll find instructions for how to
install it further down this article. Examples of using the cht.sh command line client:
Show the tar command cheat sheet:
cht.sh tar
List the Python programming language cheat sheet for random list :
cht.sh python random list
There is no need to use quotes with multiple keywords.
You can start the cht.sh client in a special shell mode using:
cht.sh --shell
And then you can start typing your queries. Example:
$ cht.sh --shell
cht.sh> bash loop
If all your queries are about the same programming language, you can start the client in the special shell mode, directly in that
context. As an example, start it with the Bash context using:
cht.sh --shell bash
Example with output:
$ cht.sh --shell bash
cht.sh/bash> loop
...........
cht.sh/bash> switch case
Want to copy the previously listed answer to the clipboard? Type c , then press Enter to copy the whole
answer, or type C and press Enter to copy it without comments.
Type help in the cht.sh interactive shell mode to see all available commands. Also look under the
Usage section from the cheat.sh GitHub project page for more
options and advanced usage.
How to install cht.sh command line client
You can use cheat.sh in a web browser, from the command line with the help of curl and without having to install anything else, as
explained above, as a code editor plugin, or using its command line client which has some extra features, which I already mentioned.
The steps below are for installing this cht.sh command line client.
If you'd rather install a code editor plugin for cheat.sh, see the
Editors integration page.
1. Install dependencies.
To install the cht.sh command line client, the curl command line tool will be used, so this needs to be installed
on your system. Another dependency is rlwrap , which is required by the cht.sh special shell mode. Install these dependencies
as follows.
Debian, Ubuntu, Linux Mint, Pop!_OS, and any other Linux distribution based on Debian or Ubuntu:
sudo apt install curl rlwrap
Fedora:
sudo dnf install curl rlwrap
Arch Linux, Manjaro:
sudo pacman -S curl rlwrap
openSUSE:
sudo zypper install curl rlwrap
The packages seem to be named the same on most (if not all) Linux distributions, so if your Linux distribution is not on this list,
just install the curl and rlwrap packages using your distro's package manager.
2. Download and install the cht.sh command line interface.
You can install this either for your user only (so only you can run it), or for all users:
Install it for your user only. The command below assumes you have a ~/.bin folder added to your PATH
(and the folder exists). If you have some other local folder in your PATH where you want to install cht.sh, change
install path in the commands:
Install it for all users (globally, in /usr/local/bin ):
curl https://cht.sh/:cht.sh | sudo tee /usr/local/bin/cht.sh

sudo chmod +x /usr/local/bin/cht.sh
If the first command appears to have frozen displaying only the cURL output, press the Enter key and you'll be prompted
to enter your password in order to save the file to /usr/local/bin .
You may also download and install the cheat.sh command completion for Bash or Zsh:
"... There is effectively no CPU time spent tarring, so it wouldn't help much. The tar format is just a copy of the input file with header blocks in between files. ..."
"... You can also use the tar flag "--use-compress-program=" to tell tar what compression program to use. ..."
I normally compress using tar zcvf and decompress using tar zxvf
(using gzip due to habit).
I've recently gotten a quad core CPU with hyperthreading, so I have 8 logical cores, and I
notice that many of the cores are unused during compression/decompression.
Is there any way I can utilize the unused cores to make it faster?
The solution proposed by Xiong Chiamiov above works beautifully. I had just backed up my
laptop with .tar.bz2 and it took 132 minutes using only one cpu thread. Then I compiled and
installed tar from source: gnu.org/software/tar I included the options mentioned
in the configure step: ./configure --with-gzip=pigz --with-bzip2=lbzip2 --with-lzip=plzip I
ran the backup again and it took only 32 minutes. That's better than 4X improvement! I
watched the system monitor and it kept all 4 cpus (8 threads) flatlined at 100% the whole
time. THAT is the best solution. – Warren Severin
Nov 13 '17 at 4:37
You can use pigz instead of gzip, which
does gzip compression on multiple cores. Instead of using the -z option, you would pipe it
through pigz:
tar cf - paths-to-archive | pigz > archive.tar.gz
By default, pigz uses the number of available cores, or eight if it could not query that.
You can ask for more with -p n, e.g. -p 32. pigz has the same options as gzip, so you can
request better compression with -9. E.g.
pigz does use multiple cores for decompression, but only with limited improvement over a
single core. The deflate format does not lend itself to parallel decompression.
The
decompression portion must be done serially. The other cores for pigz decompression are used
for reading, writing, and calculating the CRC. When compressing on the other hand, pigz gets
close to a factor of n improvement with n cores.
There is effectively no CPU time spent tarring, so it wouldn't help much. The tar format is just a copy of the input file
with header blocks in between files.
Unfortunately by doing so the concurrent feature of pigz is lost. You can see for yourself by
executing that command and monitoring the load on each of the cores. – Valerio
Schiavoni
Aug 5 '14 at 22:38
I prefer tar - dir_to_zip | pv | pigz > tar.file pv helps me estimate, you
can skip it. But still it easier to write and remember. – Offenso
Jan 11 '17 at 17:26
-I, --use-compress-program PROG
      filter through PROG (must accept -d)
You can use multithread version of archiver or compressor utility.
Most popular multithread archivers are pigz (instead of gzip) and pbzip2 (instead of bzip2). For instance:
$ tar -I pbzip2 -cf OUTPUT_FILE.tar.bz2 paths_to_archive
$ tar --use-compress-program=pigz -cf OUTPUT_FILE.tar.gz paths_to_archive
Archiver must accept -d. If your replacement utility hasn't this parameter and/or you need
specify additional parameters, then use pipes (add parameters if necessary):
$ tar cf - paths_to_archive | pbzip2 > OUTPUT_FILE.tar.gz
$ tar cf - paths_to_archive | pigz > OUTPUT_FILE.tar.gz
Input and output of singlethread and multithread are compatible. You can compress using
multithread version and decompress using singlethread version and vice versa.
p7zip
For p7zip for compression you need a small shell script like the following:
#!/bin/sh
case $1 in
  -d) 7za -txz -si -so e;;
   *) 7za -txz -si -so a .;;
esac 2>/dev/null
Save it as 7zhelper.sh. Here the example of usage:
$ tar -I 7zhelper.sh -cf OUTPUT_FILE.tar.7z paths_to_archive
$ tar -I 7zhelper.sh -xf OUTPUT_FILE.tar.7z
xz
Regarding multithreaded XZ support. If you are running version 5.2.0 or above of XZ Utils,
you can utilize multiple cores for compression by setting -T or
--threads to an appropriate value via the environmental variable XZ_DEFAULTS
(e.g. XZ_DEFAULTS="-T 0" ).
This is a fragment of man for 5.1.0alpha version:
Multithreaded compression and decompression are not implemented yet, so this option has
no effect for now.
However this will not work for decompression of files that haven't also been compressed
with threading enabled. From man for version 5.2.2:
Threaded decompression hasn't been implemented yet. It will only work on files that
contain multiple blocks with size information in block headers. All files compressed in
multi-threaded mode meet this condition, but files compressed in single-threaded mode don't
even if --block-size=size is used.
Recompiling with replacement
If you build tar from sources, then you can recompile with parameters
After recompiling tar with these options you can check the output of tar's help:
$ tar --help | grep "lbzip2\|plzip\|pigz"
  -j, --bzip2                filter the archive through lbzip2
      --lzip                 filter the archive through plzip
  -z, --gzip, --gunzip, --ungzip   filter the archive through pigz
I just found pbzip2 and
mpibzip2 . mpibzip2 looks very
promising for clusters or if you have a laptop and a multicore desktop computer for instance.
– user1985657
Apr 28 '15 at 20:57
find /my/path/ -type f -name "*.sql" -o -name "*.log" -exec
This command will look for the files you want to archive, in this case
/my/path/*.sql and /my/path/*.log . Add as many -o -name
"pattern" as you want.
-exec will execute the next command using the results of find :
tar
Step 2: tar
tar -P --transform='s@/my/path/@@g' -cf - {} +
--transform is a simple string replacement parameter. It will strip the path
of the files from the archive so the tarball's root becomes the current directory when
extracting. Note that you can't use -C option to change directory as you'll lose
benefits of find : all files of the directory would be included.
-P tells tar to use absolute paths, so it doesn't trigger the
warning "Removing leading `/' from member names". Leading '/' with be removed by
--transform anyway.
-cf - tells tar to use the tarball name we'll specify later
{} + uses everyfiles that find found previously
Step 3:
pigz
pigz -9 -p 4
Use as many parameters as you want. In this case -9 is the compression level
and -p 4 is the number of cores dedicated to compression. If you run this on a
heavy loaded webserver, you probably don't want to use all available cores.
An important test is done using rsync. It requires two partitions: the original one, and a
spare partition where to restore the archive. It allows to know whether or not there are
differences between the original and the restored filesystem. rsync is able to compare both the
files contents, and files attributes (timestamps, permissions, owner, extended attributes, acl,
), so that's a very good test. The following command can be used to know whether or not files
are the same (data and attributes) on two file-systems:
Tmux is a screen
multiplexer, meaning that it provides your terminal with virtual terminals, allowing you to
switch from one virtual session to another. Modern terminal emulators feature a tabbed UI,
making the use of Tmux seem redundant, but Tmux has a few peculiar features that still prove
difficult to match without it.
First of all, you can launch Tmux on a remote machine, start a process running, detach from
Tmux, and then log out. In a normal terminal, logging out would end the processes you started.
Since those processes were started in Tmux, they persist even after you leave.
Secondly, Tmux can "mirror" its session on multiple screens. If two users log into the same
Tmux session, then they both see the same output on their screens in real time.
Tmux is a lightweight, simple, and effective solution in cases where you're training someone
remotely, debugging a command that isn't working for them, reviewing text, monitoring services
or processes, or just avoiding the ten minutes it sometimes takes to read commands aloud over a
phone clearly enough that your user is able to accurately type them.
To try this option out, you must have two computers. Assume one computer is owned by Alice,
and the other by Bob. Alice remotely logs into Bob's PC and launches a Tmux session:
alice$ ssh bob.local
alice$ tmux
On his PC, Bob starts Tmux, attaching to the same session:
bob$ tmux attach
When Alice types, Bob sees what she is typing, and when Bob types, Alice sees what he's
typing.
It's a simple but effective trick that enables interactive live sessions between computer
users, but it is entirely text-based.
Collaboration
With these two applications, you have access to some powerful methods of supporting users.
You can use these tools to manage systems remotely, as training tools, or as support tools, and
in every case, it sure beats wandering around the office looking for somebody's desk. Get
familiar with SSH and Tmux, and start using them today.
Screen Command
Examples To Manage Multiple Terminal Sessions
by
sk
· Published
June 6, 2019
· Updated
June 7, 2019
GNU Screen
is a terminal multiplexer (window manager). As the name says, Screen
multiplexes the physical terminal between multiple interactive shells, so we can perform different
tasks in each terminal session. All screen sessions run their programs completely independent. So, a
program or process running inside a screen session will keep running even if the session is
accidentally closed or disconnected. For instance, when
upgrading Ubuntu
server via SSH, Screen command will keep running the upgrade
process just in case your SSH session is terminated for any reason.
The GNU Screen allows us to
easily create multiple screen sessions, switch between different sessions, copy text between sessions,
attach or detach from a session at any time and so on. It is one of the important command line tool
every Linux admins should learn and use wherever necessary. In this brief guide, we will see the basic
usage of Screen command with examples in Linux.
Installing GNU Screen
GNU Screen is available in the default repositories of most Linux operating systems.
To install GNU Screen on Arch Linux, run:
$ sudo pacman -S screen
On Debian, Ubuntu, Linux Mint:
$ sudo apt-get install screen
On Fedora:
$ sudo dnf install screen
On RHEL, CentOS:
$ sudo yum install screen
On SUSE/openSUSE:
$ sudo zypper install screen
Let us go ahead and see some screen command examples.
Screen Command Examples To Manage
Multiple Terminal Sessions
The default prefix shortcut to all commands in Screen is
Ctrl+a
. You need to use
this shortcut a lot when using Screen. So, just remember this keyboard shortcut.
Create new Screen session
Let us create a new Screen session and attach to it. To do so, type the following command in
terminal:
screen
Now, run any program or process inside this session. The running process or program will keep
running even if you're disconnected from this session.
Detach from Screen sessions
To detach from inside a screen session, press
Ctrl+a
and
d
. You
don't have to press the both key combinations at the same time. First press
Ctrl+a
and then press
d
. After detaching from a session, you will see an output something
like below.
[detached from 29149.pts-0.sk]
Here,
29149
is the
screen ID
and
pts-0.sk
is the
name of the screen session. You can attach, detach and kill Screen sessions using either screen ID or
name of the respective session.
Create a named session
You can also create a screen session with any custom name of your choice other than the default
username like below.
screen -S ostechnix
The above command will create a new screen session with name
"xxxxx.ostechnix"
and
attach to it immediately. To detach from the current session, press
Ctrl+a
followed
by
d
.
Naming screen sessions can be helpful when you want to find which processes are running on which
sessions. For example, when a setup LAMP stack inside a session, you can simply name it like below.
screen -S lampstack
Create detached sessions
Sometimes, you might want to create a session, but don't want to attach it automatically. In such
cases, run the following command to create detached session named
"senthil"
:
screen -S senthil -d -m
Or, shortly:
screen -dmS senthil
The above command will create a session called "senthil", but won't attach to it.
List Screen sessions
To list all running sessions (attached or detached), run:
screen -ls
Sample output:
There are screens on:
	29700.senthil	(Detached)
	29415.ostechnix	(Detached)
	29149.pts-0.sk	(Detached)
3 Sockets in /run/screens/S-sk.
As you can see, I have three running sessions and all are detached.
Attach to Screen sessions
If you want to attach to a session at any time, for example
29415.ostechnix
,
simply run:
screen -r 29415.ostechnix
Or,
screen -r ostechnix
Or, just use the screen ID:
screen -r 29415
To verify if we are attached to the aforementioned session, simply list the open sessions and
check.
screen -ls
Sample output:
There are screens on:
        29700.senthil   (Detached)
        29415.ostechnix (Attached)
        29149.pts-0.sk  (Detached)
3 Sockets in /run/screens/S-sk.
As you see in the above output, we are currently attached to
29415.ostechnix
session. To exit from the current session, press ctrl+a, d.
Create nested sessions
When we run "screen" command, it will create a single session for us. We can, however, create
nested sessions (a session inside a session).
First, create a new session or attach to an opened session. I am going to create a new session
named "nested".
screen -S nested
Now, press
Ctrl+a
and
c
inside the session to create another
session. Just repeat this to create any number of nested Screen sessions. Each session will be
assigned with a number. The number will start from
0
.
You can move to the next session by pressing
Ctrl+n
and move to previous by
pressing
Ctrl+p
.
Here is the list of important Keyboard shortcuts to manage nested sessions.
Ctrl+a "
List all sessions
Ctrl+a 0
Switch to session number 0
Ctrl+a n
Switch to next session
Ctrl+a p
Switch to the previous session
Ctrl+a S
Split current region horizontally into two regions
Ctrl+a l
Split current region vertically into two regions
Ctrl+a Q
Close all sessions except the current one
Ctrl+a X
Close the current session
Ctrl+a \
Kill all sessions and terminate Screen
Ctrl+a ?
Show keybindings. To quit this, press ENTER.
Lock sessions
Screen has an option to lock a screen session. To do so, press
Ctrl+a
and
x
. Enter your Linux password to lock the screen.
Screen used by sk <sk> on ubuntuserver.
Password:
Logging sessions
You might want to log everything when you're in a Screen session. To do so, just press
Ctrl+a
and
H
.
Alternatively, you can enable the logging when starting a new session using
-L
parameter.
screen -L
From now on, all activities you've done inside the session will recorded and stored in a file named
screenlog.x
in your $HOME directory. Here,
x
is a number.
You can view the contents of the log file using
cat
command or any text viewer
applications.
Cat can also number a file's lines during output. There are two commands to do this, as shown in the help documentation: -b, --number-nonblank
number nonempty output lines, overrides -n
-n, --number number all output lines
If I use the -b command with the hello.world file, the output will be numbered like this:
   $ cat -b hello.world
   1 Hello World !
In the example above, there is an empty line. We can determine why this empty line appears by using the -n argument:
$ cat -n hello.world
   1 Hello World !
   2
   $
Now we see that there is an extra empty line. These two arguments are operating on the final output rather than the file contents,
so if we were to use the -n option with both files, numbering will count lines as follows:
   $ cat -n hello.world goodbye.world
   1 Hello World !
   2
   3 Good Bye World !
   4
   $
One other option that can be useful is -s for squeeze-blank . This argument tells cat to reduce repeated empty line output
down to one line. This is helpful when reviewing files that have a lot of empty lines, because it effectively fits more text on the
screen. Suppose I have a file with three lines that are spaced apart by several empty lines, such as in this example, greetings.world
:
   $ cat greetings.world
   Greetings World !

   Take me to your Leader !

   We Come in Peace !
   $
Using the -s option saves screen space:
$ cat -s greetings.world
Cat is often used to copy contents of one file to another file. You may be asking, "Why not just use cp ?" Here is how I could
create a new file, called both.files , that contains the contents of the hello and goodbye files:
$ cat hello.world goodbye.world > both.files
$ cat both.files
Hello World !
Good Bye World !
$
zcat
There is another variation on the cat command known as zcat . This command is capable of displaying files that have been compressed
with Gzip without needing to uncompress the files with the gunzip
command. As an aside, this also preserves disk space, which is the entire reason files are compressed!
The zcat command is a bit more exciting because it can be a huge time saver for system administrators who spend a lot of time
reviewing system log files. Where can we find compressed log files? Take a look at /var/log on most Linux systems. On my system,
/var/log contains several files, such as syslog.2.gz and syslog.3.gz . These files are the result of the log
management system, which rotates and compresses log files to save disk space and prevent logs from growing to unmanageable file sizes.
Without zcat , I would have to uncompress these files with the gunzip command before viewing them. Thankfully, I can use zcat :
$ cd / var / log
$ ls * .gz
syslog.2.gz syslog.3.gz
$
$ zcat syslog.2.gz | more
Jan 30 00:02: 26 workstation systemd [ 1850 ] : Starting GNOME Terminal Server...
Jan 30 00:02: 26 workstation dbus-daemon [ 1920 ] : [ session uid = 2112 pid = 1920 ] Successful
ly activated service 'org.gnome.Terminal'
Jan 30 00:02: 26 workstation systemd [ 1850 ] : Started GNOME Terminal Server.
Jan 30 00:02: 26 workstation org.gnome.Terminal.desktop [ 2059 ] : # watch_fast: "/org/gno
me / terminal / legacy / " (establishing: 0, active: 0)
Jan 30 00:02:26 workstation org.gnome.Terminal.desktop[2059]: # unwatch_fast: " / org / g
nome / terminal / legacy / " (active: 0, establishing: 1)
Jan 30 00:02:26 workstation org.gnome.Terminal.desktop[2059]: # watch_established: " /
org / gnome / terminal / legacy / " (establishing: 0)
--More--
We can also pass both files to zcat if we want to review both of them uninterrupted. Due to how log rotation works, you need to
pass the filenames in reverse order to preserve the chronological order of the log contents:
$ ls -l * .gz
-rw-r----- 1 syslog adm 196383 Jan 31 00:00 syslog.2.gz
-rw-r----- 1 syslog adm 1137176 Jan 30 00:00 syslog.3.gz
$ zcat syslog.3.gz syslog.2.gz | more
The cat command seems simple but is very useful. I use it regularly. You also don't need to feed or pet it like a real cat. As
always, I suggest you review the man pages ( man cat ) for the cat and zcat commands to learn more about how it can be used. You
can also use the --help argument for a quick synopsis of command line arguments.
Interesting article but please don't misuse cat to pipe to more......
I am trying to teach people to use less pipes and here you go abusing cat to pipe to other commands. IMHO, 99.9% of the time
this is not necessary!
In stead of "cat file | command" most of the time, you can use "command file" (yes, I am an old dinosaur
from a time where memory was very expensive and forking multiple commands could fill it all up)
As you know linux implements some type of mechanism
to gracefully shutdown and reboot, this means the daemons are stopping, usually linux stops
them one by one, the file cache is synced to disk.
But what sometimes happens is that the system will not reboot or shutdown no mater how many
times you issue the shutdown or reboot command.
If the server is close to you, you can always just do a physical reset, but what if it's far
away from you, where you can't reach it, sometimes it's not feasible, why if the OpenSSH server
crashes and you cannot log in again in the system.
If you ever find yourself in a situation like that, there is another option to force the
system to reboot or shutdown.
The magic SysRq key is a key combination understood by the Linux kernel, which allows the
user to perform various low-level commands regardless of the system's state. It is often used
to recover from freezes, or to reboot a computer without corrupting the filesystem.
Description
QWERTY
Immediately reboot the system, without unmounting or syncing filesystems
b
Sync all mounted filesystems
s
Shut off the system
o
Send the SIGKILL signal to all processes except init
i
So if you are in a situation where you cannot reboot or shutdown the server, you can force
an immediate reboot by issuing
echo 1 > /proc/sys/kernel/sysrq
echo b > /proc/sysrq-trigger
If you want you can also force a sync before rebooting by issuing these commands
echo 1 > /proc/sys/kernel/sysrq
echo s > /proc/sysrq-trigger
echo b > /proc/sysrq-trigger
These are called magic commands , and they're pretty much
synonymous with holding down Alt-SysRq and another key on older keyboards. Dropping 1 into
/proc/sys/kernel/sysrq tells the kernel that you want to enable SysRq access (it's usually
disabled). The second command is equivalent to pressing * Alt-SysRq-b on a QWERTY
keyboard.
If you want to keep SysRq enabled all the time, you can do that with an entry in your
server's sysctl.conf:
I am trying to backup my file server to a remove file server using rsync. Rsync is not successfully resuming when a transfer is
interrupted. I used the partial option but rsync doesn't find the file it already started because it renames it to a temporary
file and when resumed it creates a new file and starts from beginning.
When this command is ran, a backup file named OldDisk.dmg from my local machine get created on the remote machine as something
like .OldDisk.dmg.SjDndj23 .
Now when the internet connection gets interrupted and I have to resume the transfer, I have to find where rsync left off by
finding the temp file like .OldDisk.dmg.SjDndj23 and rename it to OldDisk.dmg so that it sees there already exists a file that
it can resume.
How do I fix this so I don't have to manually intervene each time?
TL;DR : Use --timeout=X (X in seconds) to change the default rsync server timeout, not --inplace .
The issue is the rsync server processes (of which there are two, see rsync --server ... in ps output
on the receiver) continue running, to wait for the rsync client to send data.
If the rsync server processes do not receive data for a sufficient time, they will indeed timeout, self-terminate and cleanup
by moving the temporary file to it's "proper" name (e.g., no temporary suffix). You'll then be able to resume.
If you don't want to wait for the long default timeout to cause the rsync server to self-terminate, then when your internet
connection returns, log into the server and clean up the rsync server processes manually. However, you
must politely terminate rsync -- otherwise,
it will not move the partial file into place; but rather, delete it (and thus there is no file to resume). To politely ask rsync
to terminate, do not SIGKILL (e.g., -9 ), but SIGTERM (e.g., pkill -TERM -x rsync
- only an example, you should take care to match only the rsync processes concerned with your client).
Fortunately there is an easier way: use the --timeout=X (X in seconds) option; it is passed to the rsync server
processes as well.
For example, if you specify rsync ... --timeout=15 ... , both the client and server rsync processes will cleanly
exit if they do not send/receive data in 15 seconds. On the server, this means moving the temporary file into position, ready
for resuming.
I'm not sure of the default timeout value of the various rsync processes will try to send/receive data before they die (it
might vary with operating system). In my testing, the server rsync processes remain running longer than the local client. On a
"dead" network connection, the client terminates with a broken pipe (e.g., no network socket) after about 30 seconds; you could
experiment or review the source code. Meaning, you could try to "ride out" the bad internet connection for 15-20 seconds.
If you do not clean up the server rsync processes (or wait for them to die), but instead immediately launch another rsync client
process, two additional server processes will launch (for the other end of your new client process). Specifically, the new rsync
client will not re-use/reconnect to the existing rsync server processes. Thus, you'll have two temporary files (and four rsync
server processes) -- though, only the newer, second temporary file has new data being written (received from your new rsync client
process).
Interestingly, if you then clean up all rsync server processes (for example, stop your client which will stop the new rsync
servers, then SIGTERM the older rsync servers, it appears to merge (assemble) all the partial files into the new
proper named file. So, imagine a long running partial copy which dies (and you think you've "lost" all the copied data), and a
short running re-launched rsync (oops!).. you can stop the second client, SIGTERM the first servers, it will merge
the data, and you can resume.
Finally, a few short remarks:
Don't use --inplace to workaround this. You will undoubtedly have other problems as a result, man rsync
for the details.
It's trivial, but -t in your rsync options is redundant, it is implied by -a .
An already compressed disk image sent over rsync without compression might result in shorter transfer time (by
avoiding double compression). However, I'm unsure of the compression techniques in both cases. I'd test it.
As far as I understand --checksum / -c , it won't help you in this case. It affects how rsync
decides if it should transfer a file. Though, after a first rsync completes, you could run a second rsync
with -c to insist on checksums, to prevent the strange case that file size and modtime are the same on both sides,
but bad data was written.
I didn't test how the server-side rsync handles SIGINT, so I'm not sure it will keep the partial file - you could check. Note
that this doesn't have much to do with Ctrl-c ; it happens that your terminal sends SIGINT to the foreground
process when you press Ctrl-c , but the server-side rsync has no controlling terminal. You must log in to the server
and use kill . The client-side rsync will not send a message to the server (for example, after the client receives
SIGINT via your terminal Ctrl-c ) - might be interesting though. As for anthropomorphizing, not sure
what's "politer". :-) Richard Michael
Dec 29 '13 at 22:34
I just tried this timeout argument rsync -av --delete --progress --stats --human-readable --checksum --timeout=60 --partial-dir
/tmp/rsync/ rsync://$remote:/ /src/ but then it timed out during the "receiving file list" phase (which in this case takes
around 30 minutes). Setting the timeout to half an hour so kind of defers the purpose. Any workaround for this?
d-b
Feb 3 '15 at 8:48
@user23122 --checksum reads all data when preparing the file list, which is great for many small files that change
often, but should be done on-demand for large files.
Cees Timmerman
Sep 15 '15 at 17:10
prsync is a program for copying files in parallel to a number of hosts using the popular
rsync program. It provides features such as passing a password to ssh, saving output to files,
and timing out.
Read hosts from the given host_file . Lines in the host file are of the form [
user @] host [: port ] and can include blank lines and comments (lines
beginning with "#"). If multiple host files are given (the -h option is used more than once), then prsync
behaves as though these files were concatenated together. If a host is specified multiple
times, then prsync will connect the given number of times.
Save standard output to files in the given directory. Filenames are of the form [
user @] host [: port ][. num ] where the user and port are only
included for hosts that explicitly specify them. The number is a counter that is incremented
each time for hosts that are specified more than once.
Passes extra rsync command-line arguments (see the rsync(1) man page for more information about rsync
arguments). This option may be specified multiple times. The arguments are processed to split
on whitespace, protect text within quotes, and escape with backslashes. To pass arguments
without such processing, use the -X option instead.
Passes a single rsync command-line argument (see the rsync(1) man page for more information about rsync
arguments). Unlike the -x
option, no processing is performed on the argument, including word splitting. To pass
multiple command-line arguments, use the option once for each argument.
SSH options in the format used in the SSH configuration file (see the ssh_config(5) man page for more information).
This option may be specified multiple times.
Prompt for a password and pass it to ssh. The password may be used for either to unlock a
key or for password authentication. The password is transferred in a fairly secure manner
(e.g., it will not show up in argument lists). However, be aware that a root user on your
system could potentially intercept the password.
Passes extra SSH command-line arguments (see the ssh(1) man page for more information about SSH
arguments). The given value is appended to the ssh command (rsync's -e option) without any processing.
The ssh_config file can include an arbitrary number of Host sections. Each host entry
specifies ssh options which apply only to the given host. Host definitions can even behave like
aliases if the HostName option is included. This ssh feature, in combination with pssh host
files, provides a tremendous amount of flexibility.
"... I RECURSIVELY DELETED ALL THE LIVE CORPORATE WEBSITES ON FRIDAY AFTERNOON AT 4PM! ..."
"... This is why it's ALWAYS A GOOD IDEA to use Midnight Commander or something similar to delete directories!! ..."
"... rsync with ssh as the transport mechanism works very well with my nightly LAN backups. I've found this page to be very helpful: http://www.mikerubel.org/computers/rsync_snapshots/ ..."
The Subject, not the content, really brings back memories.
Imagine this, your tasked with complete control over the network in a multi-million dollar company. You've had some experience
in the real world of network maintaince, but mostly you've learned from breaking things at home.
Time comes to implement (yes this was a startup company), a backup routine. You carefully consider the best way to do it and
decide copying data to a holding disk before the tape run would be perfect in the situation, faster restore if the holding disk
is still alive.
So off you go configuring all your servers for ssh pass through, and create the rsync scripts. Then before the trial run you
think it would be a good idea to create a local backup of all the websites.
You logon to the web server, create a temp directory
and start testing your newly advance rsync skills. After a couple of goes, you think your ready for the real thing, but you decide
to run the test one more time.
Everything seems fine so you delete the temp directory. You pause for a second and your month drops
open wider than it has ever opened before, and a feeling of terror overcomes you. You want to hide in a hole and hope you didn't
see what you saw.
I RECURSIVELY DELETED ALL THE LIVE CORPORATE WEBSITES ON FRIDAY AFTERNOON AT 4PM!
Anonymous on Sun, 11/10/2002 - 03:00.
This is why it's ALWAYS A GOOD IDEA to use Midnight Commander or something similar to delete directories!!
...Root for (5) years and never trashed a filesystem yet (knockwoody)...
I have a script which, when I run it from PuTTY, it scrolls the screen. Now, I want to go
back to see the errors, but when I scroll up, I can see the past commands, but not the output
of the command.
I would recommend using screen if you want to have good control over the
scroll buffer on a remote shell.
You can change the scroll buffer size to suit your needs by setting:
defscrollback 4000
in ~/.screenrc , which will specify the number of lines you want to be
buffered (4000 in this case).
Then you should run your script in a screen session, e.g. by executing screen
./myscript.sh or first executing screen and then
./myscript.sh inside the session.
It's also possible to enable logging of the console output to a file. You can find more
info on the screen's man page
.
,
From your descript, it sounds like the "problem" is that you are using screen, tmux, or
another window manager dependent on them (byobu). Normally you should be able to scroll back
in putty with no issue. Exceptions include if you are in an application like less or nano
that creates it's own "window" on the terminal.
With screen and tmux you can generally scroll back with SHIFT + PGUP (same as
you could from the physical terminal of the remote machine). They also both have a "copy"
mode that frees the cursor from the prompt and lets you use arrow keys to move it around (for
selecting text to copy with just the keyboard). It also lets you scroll up and down with the
PGUP and PGDN keys. Copy mode under byobu using screen or tmux
backends is accessed by pressing F7 (careful, F6 disconnects the
session). To do so directly under screen you press CTRL + a then
ESC or [ . You can use ESC to exit copy mode. Under
tmux you press CTRL + b then [ to enter copy mode and
] to exit.
The simplest solution, of course, is not to use either. I've found both to be quite a bit
more trouble than they are worth. If you would like to use multiple different terminals on a
remote machine simply connect with multiple instances of putty and manage your windows using,
er... Windows. Now forgive me but I must flee before I am burned at the stake for my
heresy.
EDIT: almost forgot, some keys may not be received correctly by the remote terminal if
putty has not been configured correctly. In your putty config check Terminal ->
Keyboard . You probably want the function keys and keypad set to be either
Linux or Xterm R6 . If you are seeing strange characters on the
terminal when attempting the above this is most likely the problem.
There is a separate
reboot command
but you don't need to learn a new command just for rebooting the system. You can use the Linux
shutdown command for rebooting as wel.
To reboot a system using the shutdown command, use the -r option.
sudo shutdown -r
The behavior is the same as the regular shutdown command. It's just that instead of a shutdown, the system will be
restarted.
So, if you used shutdown -r without any time argument, it will schedule a reboot after one minute.
You can schedule reboots the same way you did with shutdown.
sudo shutdown -r +30
You can also reboot the system immediately with shutdown command:
sudo shutdown -r now
4. Broadcast a custom message
If you are in a multi-user environment and there are several users logged on the system, you can send them a
custom broadcast message with the shutdown command.
By default, all the logged users will receive a notification about scheduled shutdown and its time. You can
customize the broadcast message in the shutdown command itself:
sudo shutdown 16:00 "systems will be shutdown for hardware upgrade, please save your work"
Fun Stuff: You
can use the shutdown command with -k option to initiate a 'fake shutdown'. It won't shutdown the system but the
broadcast message will be sent to all logged on users.
5. Cancel a scheduled shutdown
If you scheduled a shutdown, you don't have to live with it. You can always cancel a shutdown with option -c.
sudo shutdown -c
And if you had broadcasted a messaged about the scheduled shutdown, as a good sysadmin, you might also want to
notify other users about
cancelling
the scheduled shutdown.
sudo shutdown -c "planned shutdown has been cancelled"
Halt vs Power off
Halt (option -H): terminates all processes and shuts down the
cpu
.
Power off (option -P): Pretty much like halt but it also turns off the unit itself (lights and everything on the
system).
Historically, the earlier computers used to halt the system and then print a message like "it's ok to power off now"
and then the computers were turned off through physical switches.
These days,
halt
should
automically
power off the system thanks to
ACPI
.
These were the most common and the most useful examples of the Linux shutdown command. I hope you have learned how
to shut down a Linux system via command line. You might also like reading about the
less command usage
or browse through the
list of Linux commands
we have covered so far.
If you have any questions or suggestions, feel free to let me know in the comment section.
Is Glark a Better Grep? GNU grep is one of my go-to tools on any
Linux box. But grep isn't the only tool in town. If you want to try something a
bit different, check out glark a grep alternative that might
might be better in some situations.
What is glark? Basically, it's a utility that's similar to grep, but it has a few features
that grep does not. This includes complex expressions, Perl-compatible regular expressions, and
excluding binary files. It also makes showing contextual lines a bit easier. Let's take a
look.
I installed glark (yes, annoyingly it's yet another *nix utility that has no initial cap) on
Linux Mint 11. Just grab it with apt-get install glark and you should be good to
go.
Simple searches work the same way as with grep : glark
stringfilenames . So it's pretty much a drop-in replacement for those.
But you're interested in what makes glark special. So let's start with a
complex expression, where you're looking for this or that term:
glark -r -o thing1 thing2 *
This will search the current directory and subdirectories for "thing1" or "thing2." When the
results are returned, glark will colorize the results and each search term will be
highlighted in a different color. So if you search for, say "Mozilla" and "Firefox," you'll see
the terms in different colors.
You can also use this to see if something matches within a few lines of another term. Here's
an example:
glark --and=3 -o Mozilla Firefox -o ID LXDE *
This was a search I was using in my directory of Linux.com stories that I've edited. I used
three terms I knew were in one story, and one term I knew wouldn't be. You can also just use
the --and option to spot two terms within X number of lines of each other, like
so:
glark --and=3 term1 term2
That way, both terms must be present.
You'll note the --and option is a bit simpler than grep's context line options.
However, glark tries to stay compatible with grep, so it also supports the -A ,
-B and -C options from grep.
Miss the grep output format? You can tell glark to use grep format with the
--grep option.
Most, if not all, GNU grep options should work with glark .
Before and
After
If you need to search through the beginning or end of a file, glark has the
--before and --after options (short versions, -b and
-a ). You can use these as percentages or as absolute number of lines. For
instance:
glark -a 20 expression *
That will find instances of expression after line 20 in a file.
The glark
Configuration File
Note that you can have a ~/.glarkrc that will set common options for each use
of glark (unless overridden at the command line). The man page for glark does
include some examples, like so:
after-context: 1
before-context: 6
context: 5
file-color: blue on yellow
highlight: off
ignore-case: false
quiet: yes
text-color: bold reverse
line-number-color: bold
verbose: false
grep: true
Just put that in your ~/.glarkrc and customize it to your heart's content. Note
that I've set mine to grep: false and added the binary-files:
without-match option. You'll definitely want the quiet option to suppress all the notes
about directories, etc. See the man page for more options. It's probably a good idea to spend
about 10 minutes on setting up a configuration file.
Final Thoughts
One thing that I have noticed is that glark doesn't seem as fast as
grep . When I do a recursive search through a bunch of directories containing
(mostly) HTML files, I seem to get results a lot faster with grep . This is not
terribly important for most of the stuff I do with either utility. However, if you're doing
something where performance is a major factor, then you may want to see if grep
fits the bill better.
Is glark "better" than grep? It depends entirely on what you're doing. It has a few features
that give it an edge over grep, and I think it's very much worth trying out if you've never
given it a shot.
I am trying to backup my file server to a
remove file server using rsync. Rsync is not
successfully resuming when a transfer is
interrupted. I used the partial option but
rsync doesn't find the file it already
started because it renames it to a temporary
file and when resumed it creates a new file
and starts from beginning.
When this command is ran, a backup file
named
OldDisk.dmg
from my
local machine get created on the remote
machine as something like
.OldDisk.dmg.SjDndj23
.
Now when the internet connection gets
interrupted and I have to resume the
transfer, I have to find where rsync left
off by finding the temp file like
.OldDisk.dmg.SjDndj23
and rename it
to
OldDisk.dmg
so that it
sees there already exists a file that it can
resume.
How do I fix this so I don't have to
manually intervene each time?
TL;DR
: Use
--timeout=X
(X in seconds) to
change the default rsync server timeout,
not
--inplace
.
The issue
is the rsync server processes (of which
there are two, see
rsync --server
...
in
ps
output on
the receiver) continue running, to wait
for the rsync client to send data.
If the rsync server processes do not
receive data for a sufficient time, they
will indeed timeout, self-terminate and
cleanup by moving the temporary file to
it's "proper" name (e.g., no temporary
suffix). You'll then be able to resume.
If you don't want to wait for the
long default timeout to cause the rsync
server to self-terminate, then when your
internet connection returns, log into
the server and clean up the rsync server
processes manually. However, you
must politely terminate
rsync --
otherwise, it will not move the partial
file into place; but rather, delete it
(and thus there is no file to resume).
To politely ask rsync to terminate, do
not
SIGKILL
(e.g.,
-9
),
but
SIGTERM
(e.g.,
pkill -TERM -x rsync
- only an
example, you should take care to match
only the rsync processes concerned with
your client).
Fortunately there is an easier way:
use the
--timeout=X
(X in
seconds) option; it is passed to the
rsync server processes as well.
For example, if you specify
rsync ... --timeout=15 ...
, both
the client and server rsync processes
will cleanly exit if they do not
send/receive data in 15 seconds. On the
server, this means moving the temporary
file into position, ready for resuming.
I'm not sure of the default timeout
value of the various rsync processes
will try to send/receive data before
they die (it might vary with operating
system). In my testing, the server rsync
processes remain running longer than the
local client. On a "dead" network
connection, the client terminates with a
broken pipe (e.g., no network socket)
after about 30 seconds; you could
experiment or review the source code.
Meaning, you could try to "ride out" the
bad internet connection for 15-20
seconds.
If you do not clean up the server
rsync processes (or wait for them to
die), but instead immediately launch
another rsync client process, two
additional server processes will launch
(for the other end of your new client
process). Specifically, the new rsync
client
will not
re-use/reconnect to the existing rsync
server processes. Thus, you'll have two
temporary files (and four rsync server
processes) -- though, only the newer,
second temporary file has new data being
written (received from your new rsync
client process).
Interestingly, if you then clean up
all rsync server processes (for example,
stop your client which will stop the new
rsync servers, then
SIGTERM
the older rsync servers, it appears to
merge (assemble) all the partial files
into the new proper named file. So,
imagine a long running partial copy
which dies (and you think you've "lost"
all the copied data), and a short
running re-launched rsync (oops!).. you
can stop the second client,
SIGTERM
the first servers, it
will merge the data, and you can resume.
Finally, a few short remarks:
Don't use
--inplace
to workaround this. You will
undoubtedly have other problems as a
result,
man rsync
for
the details.
It's trivial, but
-t
in your rsync options is redundant,
it is implied by
-a
.
An already compressed disk image
sent over rsync
without
compression might result in shorter
transfer time (by avoiding double
compression). However, I'm unsure of
the compression techniques in both
cases. I'd test it.
As far as I understand
--checksum
/
-c
,
it won't help you in this case. It
affects how rsync decides if it
should
transfer a file. Though,
after a first rsync completes, you
could run a
second
rsync
with
-c
to insist on
checksums, to prevent the strange
case that file size and modtime are
the same on both sides, but bad data
was written.
I
didn't test how the
server-side rsync handles
SIGINT, so I'm not sure it
will keep the partial file -
you could check. Note that
this doesn't have much to do
with
Ctrl-c
; it
happens that your terminal
sends
SIGINT
to
the foreground process when
you press
Ctrl-c
,
but the server-side rsync
has no controlling terminal.
You must log in to the
server and use
kill
.
The client-side rsync will
not send a message to the
server (for example, after
the client receives
SIGINT
via your
terminal
Ctrl-c
)
- might be interesting
though. As for
anthropomorphizing, not sure
what's "politer". :-)
Richard
Michael
Dec 29 '13 at 22:34
I
just tried this timeout
argument
rsync -av
--delete --progress --stats
--human-readable --checksum
--timeout=60 --partial-dir /tmp/rsync/
rsync://$remote:/ /src/
but then it timed out during
the "receiving file list"
phase (which in this case
takes around 30 minutes).
Setting the timeout to half
an hour so kind of defers
the purpose. Any workaround
for this?
d-b
Feb 3 '15 at 8:48
@user23122
--checksum
reads all data when
preparing the file list,
which is great for many
small files that change
often, but should be done
on-demand for large files.
Cees
Timmerman
Sep 15 '15 at 17:10
I used rsync to copy a large number of files, but my OS (Ubuntu) restarted unexpectedly.
After reboot, I ran rsync again, but from the output on the terminal, I found that rsync still copied
those already copied before. But I heard that rsync is able to find differences between source and destination, and
therefore to just copy the differences. So I wonder in my case if rsync can resume what was left last time?
Yes, rsync won't copy again files that it's already copied. There are a few edge cases where its detection can fail. Did it copy
all the already-copied files? What options did you use? What were the source and target filesystems? If you run rsync again after
it's copied everything, does it copy again? Gilles
Sep 16 '12 at 1:56
@Gilles: Thanks! (1) I think I saw rsync copied the same files again from its output on the terminal. (2) Options are same as
in my other post, i.e. sudo rsync -azvv /home/path/folder1/ /home/path/folder2 . (3) Source and target are both NTFS,
buy source is an external HDD, and target is an internal HDD. (3) It is now running and hasn't finished yet.
Tim
Sep 16 '12 at 2:30
@Tim Off the top of my head, there's at least clock skew, and differences in time resolution (a common issue with FAT filesystems
which store times in 2-second increments, the --modify-window option helps with that).
Gilles
Sep 19 '12 at 9:25
First of all, regarding the "resume" part of your question, --partial just tells the receiving end to keep partially
transferred files if the sending end disappears as though they were completely transferred.
While transferring files, they are temporarily saved as hidden files in their target folders (e.g. .TheFileYouAreSending.lRWzDC
), or a specifically chosen folder if you set the --partial-dir switch. When a transfer fails and --partial
is not set, this hidden file will remain in the target folder under this cryptic name, but if --partial is set, the
file will be renamed to the actual target file name (in this case, TheFileYouAreSending ), even though the file isn't
complete. The point is that you can later complete the transfer by running rsync again with either --append or
--append-verify .
So, --partial doesn't itself resume a failed or cancelled transfer. To resume it, you'll have to use
one of the aforementioned flags on the next run. So, if you need to make sure that the target won't ever contain files that appear
to be fine but are actually incomplete, you shouldn't use --partial . Conversely, if you want to make sure you never
leave behind stray failed files that are hidden in the target directory, and you know you'll be able to complete the transfer
later, --partial is there to help you.
With regards to the --append switch mentioned above, this is the actual "resume" switch, and you can use it whether
or not you're also using --partial . Actually, when you're using --append , no temporary files are ever
created. Files are written directly to their targets. In this respect, --append gives the same result as --partial
on a failed transfer, but without creating those hidden temporary files.
So, to sum up, if you're moving large files and you want the option to resume a cancelled or failed rsync operation from the
exact point that rsync stopped, you need to use the --append or --append-verify switch
on the next attempt.
As @Alex points out below, since version 3.0.0 rsync now has a new option, --append-verify , which
behaves like --append did before that switch existed. You probably always want the behaviour of --append-verify
, so check your version with rsync --version . If you're on a Mac and not using rsync from homebrew
, you'll (at least up to and including El Capitan) have an older version and need to use --append rather than
--append-verify . Why they didn't keep the behaviour on --append and instead named the newcomer
--append-no-verify is a bit puzzling. Either way, --append on rsync before version 3 is
the same as --append-verify on the newer versions.
--append-verify isn't dangerous: It will always read and compare the data on both ends and not just assume they're
equal. It does this using checksums, so it's easy on the network, but it does require reading the shared amount of data on both
ends of the wire before it can actually resume the transfer by appending to the target.
Second of all, you said that you "heard that rsync is able to find differences between source and destination, and therefore
to just copy the differences."
That's correct, and it's called delta transfer, but it's a different thing. To enable this, you add the -c , or
--checksum switch. Once this switch is used, rsync will examine files that exist on both ends of the wire. It does
this in chunks, compares the checksums on both ends, and if they differ, it transfers just the differing parts of the file. But,
as @Jonathan points out below, the comparison is only done when files are of the same size on both ends -- different sizes will
cause rsync to upload the entire file, overwriting the target with the same name.
This requires a bit of computation on both ends initially, but can be extremely efficient at reducing network load if for example
you're frequently backing up very large files fixed-size files that often contain minor changes. Examples that come to mind are
virtual hard drive image files used in virtual machines or iSCSI targets.
It is notable that if you use --checksum to transfer a batch of files that are completely new to the target system,
rsync will still calculate their checksums on the source system before transferring them. Why I do not know :)
So, in short:
If you're often using rsync to just "move stuff from A to B" and want the option to cancel that operation and later resume
it, don't use --checksum , but do use --append-verify .
If you're using rsync to back up stuff often, using --append-verify probably won't do much for you, unless you're
in the habit of sending large files that continuously grow in size but are rarely modified once written. As a bonus tip, if you're
backing up to storage that supports snapshotting such as btrfs or zfs , adding the --inplace
switch will help you reduce snapshot sizes since changed files aren't recreated but rather the changed blocks are written directly
over the old ones. This switch is also useful if you want to avoid rsync creating copies of files on the target when only minor
changes have occurred.
When using --append-verify , rsync will behave just like it always does on all files that are the same size. If
they differ in modification or other timestamps, it will overwrite the target with the source without scrutinizing those files
further. --checksum will compare the contents (checksums) of every file pair of identical name and size.
UPDATED 2015-09-01 Changed to reflect points made by @Alex (thanks!)
UPDATED 2017-07-14 Changed to reflect points made by @Jonathan (thanks!)
According to the documentation--append does not
check the data, but --append-verify does. Also, as @gaoithe points out in a comment below, the documentation claims
--partialdoes resume from previous files.
Alex
Aug 28 '15 at 3:49
Thank you @Alex for the updates. Indeed, since 3.0.0, --append no longer compares the source to the target file before
appending. Quite important, really! --partial does not itself resume a failed file transfer, but rather leaves it
there for a subsequent --append(-verify) to append to it. My answer was clearly misrepresenting this fact; I'll update
it to include these points! Thanks a lot :)
DanielSmedegaardBuus
Sep 1 '15 at 13:29
@CMCDragonkai Actually, check out Alexander's answer below about --partial-dir -- looks like it's the perfect bullet
for this. I may have missed something entirely ;)
DanielSmedegaardBuus
May 10 '16 at 19:31
What's your level of confidence in the described behavior of --checksum ? According to the
man it has more to do with deciding which files to
flag for transfer than with delta-transfer (which, presumably, is rsync 's default behavior).
Jonathan Y.
Jun 14 '17 at 5:48
To use it download the tarball, unpack it and run ./INSTALL
Collectl now supports OpenStack Clouds
Colmux now part of collectl package
Looking for colplot ? It's now here!
There are a number of times in which you find yourself needing performance data. These can
include benchmarking, monitoring a system's general heath or trying to determine what your
system was doing at some time in the past. Sometimes you just want to know what the system is
doing right now. Depending on what you're doing, you often end up using different tools, each
designed to for that specific situation.
Unlike most monitoring tools that either focus on a small set of statistics, format their
output in only one way, run either interatively or as a daemon but not both, collectl tries to
do it all. You can choose to monitor any of a broad set of subsystems which currently include
buddyinfo, cpu, disk, inodes, infiniband, lustre, memory, network, nfs, processes, quadrics,
slabs, sockets and tcp.
The following is an example taken while writing a large file and running the collectl
command with no arguments. By default it shows cpu, network and disk stats in brief
format . The key point of this format is all output appears on a single line making it much
easier to spot spikes or other anomalies in the output:
In this example, taken while writing to an NFS mounted filesystem, collectl displays
interrupts, memory usage and nfs activity with timestamps. Keep in mind that you can mix and match
any data and in the case of brief format you simply need to have a window wide enough to
accommodate your output.
You can also display the same information in verbose format , in which case you get a
single line for each type of data at the expense of more screen real estate, as can be seen in this
example of network data during NFS writes. Note how you can actually see the network traffic stall
while waiting for the server to physically write the data.
In this last example we see what detail format looks like where we see multiple lines
of output for a partitular type of data, which in this case is interrupts. We've also elected to
show the time in msecs as well.
Collectl output can also be saved in a rolling set of logs for later playback or displayed
interactively in a variety of formats. If all that isn't enough there are plugins that allow you to
report data in alternate formats or even send them over a socket to remote tools such as ganglia or
graphite. You can even create files in space-separated format for plotting with external packages
like gnuplot. The one below was created with colplot, part of the collectl utilities project, which provides a web-based
interface to gnuplot.
Are you a big user of the top command? Have you ever wanted to look across a cluster to see
what the top processes are? Better yet, how about using iostat across a cluster? Or maybe
vmstat or even looking at top network interfaces across a cluster? Look no more because if
collectl reports it for one node, colmux can do it across a cluster AND you can
sort by any column of your choice by simply using the right/left arrow keys.
Collectl and Colmux run on all linux distros and are available in redhat and debian
respositories and so getting it may be as simple as running yum or apt-get. Note that since
colmux has just been merged into the collectl V4.0.0 package it may not yet be available in the
repository of your choice and you should install collectl-utils V4.8.2 or earlier to get it for the
time being.
Collectl requires perl which is usually installed by default on all major Linux distros and
optionally uses Time::Hires which is also usually installed and
allows collectl to use fractional intervals and display timestamps in msec. The Compress::Zlib module is usually
installed as well and if present the recorded data will be compressed and therefore use on
average 90% less storage when recording to a file.
If you're still not sure if collectl is right for you, take a couple of minutes to look at
the Collectl
Tutorial to get a better feel for what collectl can do. Also be sure to check back and see
what's new on the website, sign up for a Mailing List or watch the Forums .
"I absolutely love it and have been using it extensively for
months."
The main purpose of the program pexec is to execute the given command or shell script (e.g. parsed by /bin/sh
) in parallel on the local host or on remote hosts, while some of the execution parameters, namely the redirected standard input,
output or error and environmental variables can be varied. This program is therefore capable to replace the classic shell loop iterators
(e.g. for ~ in ~ done , in bash ) by executing the body of the loop in parallel. Thus, the program pexec
implements shell level data parallelism in a barely simple form. The capabilities of the program is extended with additional features,
such as allowing to define mutual exclusions, do atomic command executions and implement higher level resource and job control. See
the complete manual for more details. See a brief Hungarian
description of the program here .
The actual version of the program package is 1.0rc8 .
You may browse the package directory here (for FTP access, see
this directory ). See the GNU summary page
of this project here . The latest version of the program source
package is pexec-1.0rc8.tar.gz . Here is another
mirror of the package directory.
Please consider making donations
to the author (via PayPal ) in order to help further development of the program
or support the GNU project via the
FSF .
Linux split and join commands are very helpful when you are manipulating large files. This
article explains how to use Linux split and join command with descriptive examples.
Linux Split Command Examples1. Basic Split Example
Here is a basic example of split command.
$ split split.zip
$ ls
split.zip xab xad xaf xah xaj xal xan xap xar xat xav xax xaz xbb xbd xbf xbh xbj xbl xbn
xaa xac xae xag xai xak xam xao xaq xas xau xaw xay xba xbc xbe xbg xbi xbk xbm xbo
So we see that the file split.zip was split into smaller files with x** as file names. Where
** is the two character suffix that is added by default. Also, by default each x** file would
contain 1000 lines.
5. Customize the Number of Split Chunks using -C option
To get control over the number of chunks, use the -C option.
This example will create 50 chunks of split files.
$ split -n50 split.zip
$ ls
split.zip xac xaf xai xal xao xar xau xax xba xbd xbg xbj xbm xbp xbs xbv
xaa xad xag xaj xam xap xas xav xay xbb xbe xbh xbk xbn xbq xbt xbw
xab xae xah xak xan xaq xat xaw xaz xbc xbf xbi xbl xbo xbr xbu xbx
6. Avoid Zero Sized Chunks using -e option
While splitting a relatively small file in large number of chunks, its good to avoid zero
sized chunks as they do not add any value. This can be done using -e option.
I normally compress using tar zcvf and decompress using tar zxvf
(using gzip due to habit).
I've recently gotten a quad core CPU with hyperthreading, so I have 8 logical cores, and I
notice that many of the cores are unused during compression/decompression.
Is there any way I can utilize the unused cores to make it faster?
The solution proposed by Xiong Chiamiov above works beautifully. I had just backed up my
laptop with .tar.bz2 and it took 132 minutes using only one cpu thread. Then I compiled and
installed tar from source: gnu.org/software/tar I included the options mentioned
in the configure step: ./configure --with-gzip=pigz --with-bzip2=lbzip2 --with-lzip=plzip I
ran the backup again and it took only 32 minutes. That's better than 4X improvement! I
watched the system monitor and it kept all 4 cpus (8 threads) flatlined at 100% the whole
time. THAT is the best solution. – Warren Severin
Nov 13 '17 at 4:37
You can use pigz instead of gzip, which
does gzip compression on multiple cores. Instead of using the -z option, you would pipe it
through pigz:
tar cf - paths-to-archive | pigz > archive.tar.gz
By default, pigz uses the number of available cores, or eight if it could not query that.
You can ask for more with -p n, e.g. -p 32. pigz has the same options as gzip, so you can
request better compression with -9. E.g.
pigz does use multiple cores for decompression, but only with limited improvement over a
single core. The deflate format does not lend itself to parallel decompression. The
decompression portion must be done serially. The other cores for pigz decompression are used
for reading, writing, and calculating the CRC. When compressing on the other hand, pigz gets
close to a factor of n improvement with n cores. – Mark Adler
Feb 20 '13 at 16:18
There is effectively no CPU time spent tarring, so it wouldn't help much. The tar format is
just a copy of the input file with header blocks in between files. – Mark Adler
Apr 23 '15 at 5:23
This is an awesome little nugget of knowledge and deserves more upvotes. I had no idea this
option even existed and I've read the man page a few times over the years. – ranman
Nov 13 '13 at 10:01
Unfortunately by doing so the concurrent feature of pigz is lost. You can see for yourself by
executing that command and monitoring the load on each of the cores. – Valerio
Schiavoni
Aug 5 '14 at 22:38
I prefer tar - dir_to_zip | pv | pigz > tar.file pv helps me estimate, you
can skip it. But still it easier to write and remember. – Offenso
Jan 11 '17 at 17:26
-I, --use-compress-program PROG
filter through PROG (must accept -d)
You can use multithread version of archiver or compressor utility.
Most popular multithread archivers are pigz (instead of gzip) and pbzip2 (instead of bzip2). For instance:
$ tar -I pbzip2 -cf OUTPUT_FILE.tar.bz2 paths_to_archive
$ tar --use-compress-program=pigz -cf OUTPUT_FILE.tar.gz paths_to_archive
Archiver must accept -d. If your replacement utility hasn't this parameter and/or you need
specify additional parameters, then use pipes (add parameters if necessary):
$ tar cf - paths_to_archive | pbzip2 > OUTPUT_FILE.tar.gz
$ tar cf - paths_to_archive | pigz > OUTPUT_FILE.tar.gz
Input and output of singlethread and multithread are compatible. You can compress using
multithread version and decompress using singlethread version and vice versa.
p7zip
For p7zip for compression you need a small shell script like the following:
#!/bin/sh
case $1 in
-d) 7za -txz -si -so e;;
*) 7za -txz -si -so a .;;
esac 2>/dev/null
Save it as 7zhelper.sh. Here the example of usage:
$ tar -I 7zhelper.sh -cf OUTPUT_FILE.tar.7z paths_to_archive
$ tar -I 7zhelper.sh -xf OUTPUT_FILE.tar.7z
xz
Regarding multithreaded XZ support. If you are running version 5.2.0 or above of XZ Utils,
you can utilize multiple cores for compression by setting -T or
--threads to an appropriate value via the environmental variable XZ_DEFAULTS
(e.g. XZ_DEFAULTS="-T 0" ).
This is a fragment of man for 5.1.0alpha version:
Multithreaded compression and decompression are not implemented yet, so this option has
no effect for now.
However this will not work for decompression of files that haven't also been compressed
with threading enabled. From man for version 5.2.2:
Threaded decompression hasn't been implemented yet. It will only work on files that
contain multiple blocks with size information in block headers. All files compressed in
multi-threaded mode meet this condition, but files compressed in single-threaded mode don't
even if --block-size=size is used.
Recompiling with replacement
If you build tar from sources, then you can recompile with parameters
After recompiling tar with these options you can check the output of tar's help:
$ tar --help | grep "lbzip2\|plzip\|pigz"
-j, --bzip2 filter the archive through lbzip2
--lzip filter the archive through plzip
-z, --gzip, --gunzip, --ungzip filter the archive through pigz
> , Apr 28, 2015 at 20:41
This is indeed the best answer. I'll definitely rebuild my tar! – user1985657
Apr 28 '15 at 20:41
I just found pbzip2 and
mpibzip2 . mpibzip2 looks very
promising for clusters or if you have a laptop and a multicore desktop computer for instance.
– user1985657
Apr 28 '15 at 20:57
This is a great and elaborate answer. It may be good to mention that multithreaded
compression (e.g. with pigz ) is only enabled when it reads from the file.
Processing STDIN may in fact be slower. – oᴉɹǝɥɔ
Jun 10 '15 at 17:39
find /my/path/ -type f -name "*.sql" -o -name "*.log" -exec
This command will look for the files you want to archive, in this case
/my/path/*.sql and /my/path/*.log . Add as many -o -name
"pattern" as you want.
-exec will execute the next command using the results of find :
tar
Step 2: tar
tar -P --transform='s@/my/path/@@g' -cf - {} +
--transform is a simple string replacement parameter. It will strip the path
of the files from the archive so the tarball's root becomes the current directory when
extracting. Note that you can't use -C option to change directory as you'll lose
benefits of find : all files of the directory would be included.
-P tells tar to use absolute paths, so it doesn't trigger the
warning "Removing leading `/' from member names". Leading '/' with be removed by
--transform anyway.
-cf - tells tar to use the tarball name we'll specify later
{} + uses everyfiles that find found previously
Step 3:
pigz
pigz -9 -p 4
Use as many parameters as you want. In this case -9 is the compression level
and -p 4 is the number of cores dedicated to compression. If you run this on a
heavy loaded webserver, you probably don't want to use all available cores.
The long listing of the /lib64 directory above shows that the first character in the
filemode is the letter "l," which means that each is a soft or symbolic link.
Hard
links
In An introduction to Linux's
EXT4 filesystem , I discussed the fact that each file has one inode that contains
information about that file, including the location of the data belonging to that file.
Figure 2 in that
article shows a single directory entry that points to the inode. Every file must have at least
one directory entry that points to the inode that describes the file. The directory entry is a
hard link, thus every file has at least one hard link.
In Figure 1 below, multiple directory entries point to a single inode. These are all hard
links. I have abbreviated the locations of three of the directory entries using the tilde ( ~ )
convention for the home directory, so that ~ is equivalent to /home/user in this example. Note
that the fourth directory entry is in a completely different directory, /home/shared , which
might be a location for sharing files between users of the computer.
Figure 1
Hard links are limited to files contained within a single filesystem. "Filesystem" is used
here in the sense of a partition or logical volume (LV) that is mounted on a specified mount
point, in this case /home . This is because inode numbers are unique only within each
filesystem, and a different filesystem, for example, /var or /opt , will have inodes with the
same number as the inode for our file.
Because all the hard links point to the single inode that contains the metadata about the
file, all of these attributes are part of the file, such as ownerships, permissions, and the
total number of hard links to the inode, and cannot be different for each hard link. It is one
file with one set of attributes. The only attribute that can be different is the file name,
which is not contained in the inode. Hard links to a single file/inode located in the same
directory must have different names, due to the fact that there can be no duplicate file names
within a single directory.
The number of hard links for a file is displayed with the ls -l command. If you want to
display the actual inode numbers, the command ls -li does that.
Symbolic (soft) links
The difference between a hard link and a soft link, also known as a symbolic link (or
symlink), is that, while hard links point directly to the inode belonging to the file, soft
links point to a directory entry, i.e., one of the hard links. Because soft links point to a
hard link for the file and not the inode, they are not dependent upon the inode number and can
work across filesystems, spanning partitions and LVs.
The downside to this is: If the hard link to which the symlink points is deleted or renamed,
the symlink is broken. The symlink is still there, but it points to a hard link that no longer
exists. Fortunately, the ls command highlights broken links with flashing white text on a red
background in a long listing.
Lab project: experimenting with links
I think the easiest way to understand the use of and differences between hard and soft links
is with a lab project that you can do. This project should be done in an empty directory as a
non-root user . I created the ~/temp directory for this project, and you should, too.
It creates a safe place to do the project and provides a new, empty directory to work in so
that only files associated with this project will be located there.
Initial setup
First, create the temporary directory in which you will perform the tasks needed for this
project. Ensure that the present working directory (PWD) is your home directory, then enter the
following command.
mkdir temp
Change into ~/temp to make it the PWD with this command.
cd temp
To get started, we need to create a file we can link to. The following command does that and
provides some content as well.
du -h > main.file.txt
Use the ls -l long list to verify that the file was created correctly. It should look
similar to my results. Note that the file size is only 7 bytes, but yours may vary by a byte or
two.
[ dboth @ david temp ] $ ls -l
total 4
-rw-rw-r-- 1 dboth dboth 7 Jun 13 07: 34 main.file.txt
Notice the number "1" following the file mode in the listing. That number represents the
number of hard links that exist for the file. For now, it should be 1 because we have not
created any additional links to our test file.
Experimenting with hard links
Hard links create a new directory entry pointing to the same inode, so when hard links are
added to a file, you will see the number of links increase. Ensure that the PWD is still ~/temp
. Create a hard link to the file main.file.txt , then do another long list of the
directory.
[ dboth @ david temp ] $ ln main.file.txt link1.file.txt
[ dboth @ david temp ] $ ls -l
total 8
-rw-rw-r-- 2 dboth dboth 7 Jun 13 07: 34 link1.file.txt
-rw-rw-r-- 2 dboth dboth 7 Jun 13 07: 34 main.file.txt
Notice that both files have two links and are exactly the same size. The date stamp is also
the same. This is really one file with one inode and two links, i.e., directory entries to it.
Create a second hard link to this file and list the directory contents. You can create the link
to either of the existing ones: link1.file.txt or main.file.txt .
[ dboth @ david temp ] $
ln link1.file.txt link2.file.txt ; ls -l
total 16
-rw-rw-r-- 3 dboth dboth 7 Jun 13 07: 34 link1.file.txt
-rw-rw-r-- 3 dboth dboth 7 Jun 13 07: 34 link2.file.txt
-rw-rw-r-- 3 dboth dboth 7 Jun 13 07: 34 main.file.txt
Notice that each new hard link in this directory must have a different name because two
files -- really directory entries -- cannot have the same name within the same directory. Try
to create another link with a target name the same as one of the existing ones.
[ dboth @
david temp ] $ ln main.file.txt link2.file.txt
ln: failed to create hard link 'link2.file.txt' : File exists
Clearly that does not work, because link2.file.txt already exists. So far, we have created
only hard links in the same directory. So, create a link in your home directory, the parent of
the temp directory in which we have been working so far.
[ dboth @ david temp ] $ ln
main.file.txt .. / main.file.txt ; ls -l .. / main *
-rw-rw-r-- 4 dboth dboth 7 Jun 13 07: 34 main.file.txt
The ls command in the above listing shows that the main.file.txt file does exist in the home
directory with the same name as the file in the temp directory. Of course, these are not
different files; they are the same file with multiple links -- directory entries -- to the same
inode. To help illustrate the next point, add a file that is not a link.
[ dboth @ david
temp ] $ touch unlinked.file ; ls -l
total 12
-rw-rw-r-- 4 dboth dboth 7 Jun 13 07: 34 link1.file.txt
-rw-rw-r-- 4 dboth dboth 7 Jun 13 07: 34 link2.file.txt
-rw-rw-r-- 4 dboth dboth 7 Jun 13 07: 34 main.file.txt
-rw-rw-r-- 1 dboth dboth 0 Jun 14 08: 18 unlinked.file
Look at the inode number of the hard links and that of the new file using the -i option to
the ls command.
[ dboth @ david temp ] $ ls -li
total 12
657024 -rw-rw-r-- 4 dboth dboth 7 Jun 13 07: 34 link1.file.txt
657024 -rw-rw-r-- 4 dboth dboth 7 Jun 13 07: 34 link2.file.txt
657024 -rw-rw-r-- 4 dboth dboth 7 Jun 13 07: 34 main.file.txt
657863 -rw-rw-r-- 1 dboth dboth 0 Jun 14 08: 18 unlinked.file
Notice the number 657024 to the left of the file mode in the example above. That is the
inode number, and all three file links point to the same inode. You can use the -i option to
view the inode number for the link we created in the home directory as well, and that will also
show the same value. The inode number of the file that has only one link is different from the
others. Note that the inode numbers will be different on your system.
Let's change the size of one of the hard-linked files.
[ dboth @ david temp ] $ df -h
> link2.file.txt ; ls -li
total 12
657024 -rw-rw-r-- 4 dboth dboth 1157 Jun 14 14 : 14 link1.file.txt
657024 -rw-rw-r-- 4 dboth dboth 1157 Jun 14 14 : 14 link2.file.txt
657024 -rw-rw-r-- 4 dboth dboth 1157 Jun 14 14 : 14 main.file.txt
657863 -rw-rw-r-- 1 dboth dboth 0 Jun 14 08: 18 unlinked.file
The file size of all the hard-linked files is now larger than before. That is because there
is really only one file that is linked to by multiple directory entries.
I know this next experiment will work on my computer because my /tmp directory is on a
separate LV. If you have a separate LV or a filesystem on a different partition (if you're not
using LVs), determine whether or not you have access to that LV or partition. If you don't, you
can try to insert a USB memory stick and mount it. If one of those options works for you, you
can do this experiment.
Try to create a link to one of the files in your ~/temp directory in /tmp (or wherever your
different filesystem directory is located).
[ dboth @ david temp ] $ ln link2.file.txt / tmp
/ link3.file.txt
ln: failed to create hard link '/tmp/link3.file.txt' = > 'link2.file.txt' :
Invalid cross-device link
Why does this error occur? The reason is each separate mountable filesystem has its own set
of inode numbers. Simply referring to a file by an inode number across the entire Linux
directory structure can result in confusion because the same inode number can exist in each
mounted filesystem.
There may be a time when you will want to locate all the hard links that belong to a single
inode. You can find the inode number using the ls -li command. Then you can use the find
command to locate all links with that inode number.
Note that the find command did not find all four of the hard links to this inode because we
started at the current directory of ~/temp . The find command only finds files in the PWD and
its subdirectories. To find all the links, we can use the following command, which specifies
your home directory as the starting place for the search.
[ dboth @ david temp ] $ find ~
-samefile main.file.txt
/ home / dboth / temp / main.file.txt
/ home / dboth / temp / link1.file.txt
/ home / dboth / temp / link2.file.txt
/ home / dboth / main.file.txt
You may see error messages if you do not have permissions as a non-root user. This command
also uses the -samefile option instead of specifying the inode number. This works the same as
using the inode number and can be easier if you know the name of one of the hard
links.
Experimenting with soft links
As you have just seen, creating hard links is not possible across filesystem boundaries;
that is, from a filesystem on one LV or partition to a filesystem on another. Soft links are a
means to answer that problem with hard links. Although they can accomplish the same end, they
are very different, and knowing these differences is important.
Let's start by creating a symlink in our ~/temp directory to start our exploration.
[
dboth @ david temp ] $ ln -s link2.file.txt link3.file.txt ; ls -li
total 12
657024 -rw-rw-r-- 4 dboth dboth 1157 Jun 14 14 : 14 link1.file.txt
657024 -rw-rw-r-- 4 dboth dboth 1157 Jun 14 14 : 14 link2.file.txt
658270 lrwxrwxrwx 1 dboth dboth 14 Jun 14 15 : 21 link3.file.txt - >
link2.file.txt
657024 -rw-rw-r-- 4 dboth dboth 1157 Jun 14 14 : 14 main.file.txt
657863 -rw-rw-r-- 1 dboth dboth 0 Jun 14 08: 18 unlinked.file
The hard links, those that have the inode number 657024 , are unchanged, and the number of
hard links shown for each has not changed. The newly created symlink has a different inode,
number 658270 . The soft link named link3.file.txt points to link2.file.txt . Use the cat
command to display the contents of link3.file.txt . The file mode information for the symlink
starts with the letter " l " which indicates that this file is actually a symbolic link.
The size of the symlink link3.file.txt is only 14 bytes in the example above. That is the
size of the text link3.file.txt -> link2.file.txt , which is the actual content of the
directory entry. The directory entry link3.file.txt does not point to an inode; it points to
another directory entry, which makes it useful for creating links that span file system
boundaries. So, let's create that link we tried before from the /tmp directory.
[ dboth @
david temp ] $ ln -s / home / dboth / temp / link2.file.txt
/ tmp / link3.file.txt ; ls -l / tmp / link *
lrwxrwxrwx 1 dboth dboth 31 Jun 14 21 : 53 / tmp / link3.file.txt - >
/ home / dboth / temp / link2.file.txt Deleting links
There are some other things that you should consider when you need to delete links or the
files to which they point.
First, let's delete the link main.file.txt . Remember that every directory entry that points
to an inode is simply a hard link.
[ dboth @ david temp ] $ rm main.file.txt ; ls -li
total 8
657024 -rw-rw-r-- 3 dboth dboth 1157 Jun 14 14 : 14 link1.file.txt
657024 -rw-rw-r-- 3 dboth dboth 1157 Jun 14 14 : 14 link2.file.txt
658270 lrwxrwxrwx 1 dboth dboth 14 Jun 14 15 : 21 link3.file.txt - >
link2.file.txt
657863 -rw-rw-r-- 1 dboth dboth 0 Jun 14 08: 18 unlinked.file
The link main.file.txt was the first link created when the file was created. Deleting it now
still leaves the original file and its data on the hard drive along with all the remaining hard
links. To delete the file and its data, you would have to delete all the remaining hard
links.
Now delete the link2.file.txt hard link.
[ dboth @ david temp ] $ rm link2.file.txt ; ls
-li
total 8
657024 -rw-rw-r-- 3 dboth dboth 1157 Jun 14 14 : 14 link1.file.txt
658270 lrwxrwxrwx 1 dboth dboth 14 Jun 14 15 : 21 link3.file.txt - >
link2.file.txt
657024 -rw-rw-r-- 3 dboth dboth 1157 Jun 14 14 : 14 main.file.txt
657863 -rw-rw-r-- 1 dboth dboth 0 Jun 14 08: 18 unlinked.file
Notice what happens to the soft link. Deleting the hard link to which the soft link points
leaves a broken link. On my system, the broken link is highlighted in colors and the target
hard link is flashing. If the broken link needs to be fixed, you can create another hard link
in the same directory with the same name as the old one, so long as not all the hard links have
been deleted. You could also recreate the link itself, with the link maintaining the same name
but pointing to one of the remaining hard links. Of course, if the soft link is no longer
needed, it can be deleted with the rm command.
The unlink command can also be used to delete files and links. It is very simple and has no
options, as the rm command does. It does, however, more accurately reflect the underlying
process of deletion, in that it removes the link -- the directory entry -- to the file being
deleted.
Final thoughts
I worked with both types of links for a long time before I began to understand their
capabilities and idiosyncrasies. It took writing a lab project for a Linux class I taught to
fully appreciate how links work. This article is a simplification of what I taught in that
class, and I hope it speeds your learning curve. David Both - David Both is a Linux and
Open Source advocate who resides in Raleigh, North Carolina. He has been in the IT industry for
over forty years and taught OS/2 for IBM where he worked for over 20 years. While at IBM, he
wrote the first training course for the original IBM PC in 1981. He has taught RHCE classes for
Red Hat and has worked at MCI Worldcom, Cisco, and the State of North Carolina. He has been
working with Linux and Open Source Software for almost 20 years. dgrb on 23 Jun 2017
Permalink
There is a hard link "gotcha" which IMHO is worth mentioning.
If you use an editor which makes automatic backups - emacs certainly is one such - then you
may end up with a new version of the edited file, while the backup is the linked copy, because
the editor simply renames the file to the backup name (with emacs, test.c would be renamed
test.c~) and the new version when saved under the old name is no longer linked.
Symbolic links avoid this problem, so I tend to use them for source code where required.
There are two types of Linux filesystem links: hard and soft. The difference between the two
types of links is significant, but both types are used to solve similar problems. They both
provide multiple directory entries (or references) to a single file, but they do it quite
differently. Links are powerful and add flexibility to Linux filesystems because everything is a file
.
I have found, for instance, that some programs required a particular version of a library.
When a library upgrade replaced the old version, the program would crash with an error
specifying the name of the old, now-missing library. Usually, the only change in the library
name was the version number. Acting on a hunch, I simply added a link to the new library but
named the link after the old library name. I tried the program again and it worked perfectly.
And, okay, the program was a game, and everyone knows the lengths that gamers will go to in
order to keep their games running.
In fact, almost all applications are linked to libraries using a generic name with only a
major version number in the link name, while the link points to the actual library file that
also has a minor version number. In other instances, required files have been moved from one
directory to another to comply with the Linux file specification, and there are links in the
old directories for backwards compatibility with those programs that have not yet caught up
with the new locations. If you do a long listing of the /lib64 directory, you can find many
examples of both.
The long listing of the /lib64 directory above shows that the first character in the
filemode is the letter "l," which means that each is a soft or symbolic link.
Hard
links
In An introduction to Linux's
EXT4 filesystem , I discussed the fact that each file has one inode that contains
information about that file, including the location of the data belonging to that file.
Figure 2 in that
article shows a single directory entry that points to the inode. Every file must have at least
one directory entry that points to the inode that describes the file. The directory entry is a
hard link, thus every file has at least one hard link.
In Figure 1 below, multiple directory entries point to a single inode. These are all hard
links. I have abbreviated the locations of three of the directory entries using the tilde ( ~ )
convention for the home directory, so that ~ is equivalent to /home/user in this example. Note
that the fourth directory entry is in a completely different directory, /home/shared , which
might be a location for sharing files between users of the computer.
Figure 1
Hard links are limited to files contained within a single filesystem. "Filesystem" is used
here in the sense of a partition or logical volume (LV) that is mounted on a specified mount
point, in this case /home . This is because inode numbers are unique only within each
filesystem, and a different filesystem, for example, /var or /opt , will have inodes with the
same number as the inode for our file.
Because all the hard links point to the single inode that contains the metadata about the
file, all of these attributes are part of the file, such as ownerships, permissions, and the
total number of hard links to the inode, and cannot be different for each hard link. It is one
file with one set of attributes. The only attribute that can be different is the file name,
which is not contained in the inode. Hard links to a single file/inode located in the same
directory must have different names, due to the fact that there can be no duplicate file names
within a single directory.
The number of hard links for a file is displayed with the ls -l command. If you want to
display the actual inode numbers, the command ls -li does that.
Symbolic (soft) links
The difference between a hard link and a soft link, also known as a symbolic link (or
symlink), is that, while hard links point directly to the inode belonging to the file, soft
links point to a directory entry, i.e., one of the hard links. Because soft links point to a
hard link for the file and not the inode, they are not dependent upon the inode number and can
work across filesystems, spanning partitions and LVs.
The downside to this is: If the hard link to which the symlink points is deleted or renamed,
the symlink is broken. The symlink is still there, but it points to a hard link that no longer
exists. Fortunately, the ls command highlights broken links with flashing white text on a red
background in a long listing.
Lab project: experimenting with links
I think the easiest way to understand the use of and differences between hard and soft links
is with a lab project that you can do. This project should be done in an empty directory as a
non-root user . I created the ~/temp directory for this project, and you should, too.
It creates a safe place to do the project and provides a new, empty directory to work in so
that only files associated with this project will be located there.
Initial setup
First, create the temporary directory in which you will perform the tasks needed for this
project. Ensure that the present working directory (PWD) is your home directory, then enter the
following command.
mkdir temp
Change into ~/temp to make it the PWD with this command.
cd temp
To get started, we need to create a file we can link to. The following command does that and
provides some content as well.
du -h > main.file.txt
Use the ls -l long list to verify that the file was created correctly. It should look
similar to my results. Note that the file size is only 7 bytes, but yours may vary by a byte or
two.
[ dboth @ david temp ] $ ls -l
total 4
-rw-rw-r-- 1 dboth dboth 7 Jun 13 07: 34 main.file.txt
Notice the number "1" following the file mode in the listing. That number represents the
number of hard links that exist for the file. For now, it should be 1 because we have not
created any additional links to our test file.
Experimenting with hard links
Hard links create a new directory entry pointing to the same inode, so when hard links are
added to a file, you will see the number of links increase. Ensure that the PWD is still ~/temp
. Create a hard link to the file main.file.txt , then do another long list of the
directory.
[ dboth @ david temp ] $ ln main.file.txt link1.file.txt
[ dboth @ david temp ] $ ls -l
total 8
-rw-rw-r-- 2 dboth dboth 7 Jun 13 07: 34 link1.file.txt
-rw-rw-r-- 2 dboth dboth 7 Jun 13 07: 34 main.file.txt
Notice that both files have two links and are exactly the same size. The date stamp is also
the same. This is really one file with one inode and two links, i.e., directory entries to it.
Create a second hard link to this file and list the directory contents. You can create the link
to either of the existing ones: link1.file.txt or main.file.txt .
[ dboth @ david temp ] $
ln link1.file.txt link2.file.txt ; ls -l
total 16
-rw-rw-r-- 3 dboth dboth 7 Jun 13 07: 34 link1.file.txt
-rw-rw-r-- 3 dboth dboth 7 Jun 13 07: 34 link2.file.txt
-rw-rw-r-- 3 dboth dboth 7 Jun 13 07: 34 main.file.txt
Notice that each new hard link in this directory must have a different name because two
files -- really directory entries -- cannot have the same name within the same directory. Try
to create another link with a target name the same as one of the existing ones.
[ dboth @
david temp ] $ ln main.file.txt link2.file.txt
ln: failed to create hard link 'link2.file.txt' : File exists
Clearly that does not work, because link2.file.txt already exists. So far, we have created
only hard links in the same directory. So, create a link in your home directory, the parent of
the temp directory in which we have been working so far.
[ dboth @ david temp ] $ ln
main.file.txt .. / main.file.txt ; ls -l .. / main *
-rw-rw-r-- 4 dboth dboth 7 Jun 13 07: 34 main.file.txt
The ls command in the above listing shows that the main.file.txt file does exist in the home
directory with the same name as the file in the temp directory. Of course, these are not
different files; they are the same file with multiple links -- directory entries -- to the same
inode. To help illustrate the next point, add a file that is not a link.
[ dboth @ david
temp ] $ touch unlinked.file ; ls -l
total 12
-rw-rw-r-- 4 dboth dboth 7 Jun 13 07: 34 link1.file.txt
-rw-rw-r-- 4 dboth dboth 7 Jun 13 07: 34 link2.file.txt
-rw-rw-r-- 4 dboth dboth 7 Jun 13 07: 34 main.file.txt
-rw-rw-r-- 1 dboth dboth 0 Jun 14 08: 18 unlinked.file
Look at the inode number of the hard links and that of the new file using the -i option to
the ls command.
[ dboth @ david temp ] $ ls -li
total 12
657024 -rw-rw-r-- 4 dboth dboth 7 Jun 13 07: 34 link1.file.txt
657024 -rw-rw-r-- 4 dboth dboth 7 Jun 13 07: 34 link2.file.txt
657024 -rw-rw-r-- 4 dboth dboth 7 Jun 13 07: 34 main.file.txt
657863 -rw-rw-r-- 1 dboth dboth 0 Jun 14 08: 18 unlinked.file
Notice the number 657024 to the left of the file mode in the example above. That is the
inode number, and all three file links point to the same inode. You can use the -i option to
view the inode number for the link we created in the home directory as well, and that will also
show the same value. The inode number of the file that has only one link is different from the
others. Note that the inode numbers will be different on your system.
Let's change the size of one of the hard-linked files.
[ dboth @ david temp ] $ df -h
> link2.file.txt ; ls -li
total 12
657024 -rw-rw-r-- 4 dboth dboth 1157 Jun 14 14 : 14 link1.file.txt
657024 -rw-rw-r-- 4 dboth dboth 1157 Jun 14 14 : 14 link2.file.txt
657024 -rw-rw-r-- 4 dboth dboth 1157 Jun 14 14 : 14 main.file.txt
657863 -rw-rw-r-- 1 dboth dboth 0 Jun 14 08: 18 unlinked.file
The file size of all the hard-linked files is now larger than before. That is because there
is really only one file that is linked to by multiple directory entries.
I know this next experiment will work on my computer because my /tmp directory is on a
separate LV. If you have a separate LV or a filesystem on a different partition (if you're not
using LVs), determine whether or not you have access to that LV or partition. If you don't, you
can try to insert a USB memory stick and mount it. If one of those options works for you, you
can do this experiment.
Try to create a link to one of the files in your ~/temp directory in /tmp (or wherever your
different filesystem directory is located).
[ dboth @ david temp ] $ ln link2.file.txt / tmp
/ link3.file.txt
ln: failed to create hard link '/tmp/link3.file.txt' = > 'link2.file.txt' :
Invalid cross-device link
Why does this error occur? The reason is each separate mountable filesystem has its own set
of inode numbers. Simply referring to a file by an inode number across the entire Linux
directory structure can result in confusion because the same inode number can exist in each
mounted filesystem.
There may be a time when you will want to locate all the hard links that belong to a single
inode. You can find the inode number using the ls -li command. Then you can use the find
command to locate all links with that inode number.
Note that the find command did not find all four of the hard links to this inode because we
started at the current directory of ~/temp . The find command only finds files in the PWD and
its subdirectories. To find all the links, we can use the following command, which specifies
your home directory as the starting place for the search.
[ dboth @ david temp ] $ find ~
-samefile main.file.txt
/ home / dboth / temp / main.file.txt
/ home / dboth / temp / link1.file.txt
/ home / dboth / temp / link2.file.txt
/ home / dboth / main.file.txt
You may see error messages if you do not have permissions as a non-root user. This command
also uses the -samefile option instead of specifying the inode number. This works the same as
using the inode number and can be easier if you know the name of one of the hard
links.
Experimenting with soft links
As you have just seen, creating hard links is not possible across filesystem boundaries;
that is, from a filesystem on one LV or partition to a filesystem on another. Soft links are a
means to answer that problem with hard links. Although they can accomplish the same end, they
are very different, and knowing these differences is important.
Let's start by creating a symlink in our ~/temp directory to start our exploration.
[
dboth @ david temp ] $ ln -s link2.file.txt link3.file.txt ; ls -li
total 12
657024 -rw-rw-r-- 4 dboth dboth 1157 Jun 14 14 : 14 link1.file.txt
657024 -rw-rw-r-- 4 dboth dboth 1157 Jun 14 14 : 14 link2.file.txt
658270 lrwxrwxrwx 1 dboth dboth 14 Jun 14 15 : 21 link3.file.txt - >
link2.file.txt
657024 -rw-rw-r-- 4 dboth dboth 1157 Jun 14 14 : 14 main.file.txt
657863 -rw-rw-r-- 1 dboth dboth 0 Jun 14 08: 18 unlinked.file
The hard links, those that have the inode number 657024 , are unchanged, and the number of
hard links shown for each has not changed. The newly created symlink has a different inode,
number 658270 . The soft link named link3.file.txt points to link2.file.txt . Use the cat
command to display the contents of link3.file.txt . The file mode information for the symlink
starts with the letter " l " which indicates that this file is actually a symbolic link.
The size of the symlink link3.file.txt is only 14 bytes in the example above. That is the
size of the text link3.file.txt -> link2.file.txt , which is the actual content of the
directory entry. The directory entry link3.file.txt does not point to an inode; it points to
another directory entry, which makes it useful for creating links that span file system
boundaries. So, let's create that link we tried before from the /tmp directory.
[ dboth @
david temp ] $ ln -s / home / dboth / temp / link2.file.txt
/ tmp / link3.file.txt ; ls -l / tmp / link *
lrwxrwxrwx 1 dboth dboth 31 Jun 14 21 : 53 / tmp / link3.file.txt - >
/ home / dboth / temp / link2.file.txt Deleting links
There are some other things that you should consider when you need to delete links or the
files to which they point.
First, let's delete the link main.file.txt . Remember that every directory entry that points
to an inode is simply a hard link.
[ dboth @ david temp ] $ rm main.file.txt ; ls -li
total 8
657024 -rw-rw-r-- 3 dboth dboth 1157 Jun 14 14 : 14 link1.file.txt
657024 -rw-rw-r-- 3 dboth dboth 1157 Jun 14 14 : 14 link2.file.txt
658270 lrwxrwxrwx 1 dboth dboth 14 Jun 14 15 : 21 link3.file.txt - >
link2.file.txt
657863 -rw-rw-r-- 1 dboth dboth 0 Jun 14 08: 18 unlinked.file
The link main.file.txt was the first link created when the file was created. Deleting it now
still leaves the original file and its data on the hard drive along with all the remaining hard
links. To delete the file and its data, you would have to delete all the remaining hard
links.
Now delete the link2.file.txt hard link.
[ dboth @ david temp ] $ rm link2.file.txt ; ls
-li
total 8
657024 -rw-rw-r-- 3 dboth dboth 1157 Jun 14 14 : 14 link1.file.txt
658270 lrwxrwxrwx 1 dboth dboth 14 Jun 14 15 : 21 link3.file.txt - >
link2.file.txt
657024 -rw-rw-r-- 3 dboth dboth 1157 Jun 14 14 : 14 main.file.txt
657863 -rw-rw-r-- 1 dboth dboth 0 Jun 14 08: 18 unlinked.file
Notice what happens to the soft link. Deleting the hard link to which the soft link points
leaves a broken link. On my system, the broken link is highlighted in colors and the target
hard link is flashing. If the broken link needs to be fixed, you can create another hard link
in the same directory with the same name as the old one, so long as not all the hard links have
been deleted. You could also recreate the link itself, with the link maintaining the same name
but pointing to one of the remaining hard links. Of course, if the soft link is no longer
needed, it can be deleted with the rm command.
The unlink command can also be used to delete files and links. It is very simple and has no
options, as the rm command does. It does, however, more accurately reflect the underlying
process of deletion, in that it removes the link -- the directory entry -- to the file being
deleted.
Final thoughts
I worked with both types of links for a long time before I began to understand their
capabilities and idiosyncrasies. It took writing a lab project for a Linux class I taught to
fully appreciate how links work. This article is a simplification of what I taught in that
class, and I hope it speeds your learning curve. TopicsLinuxAbout the author David Both - David Both is a Linux and Open Source advocate who
resides in Raleigh, North Carolina. He has been in the IT industry for over forty years and
taught OS/2 for IBM where he worked for over 20 years. While at IBM, he wrote the first
training course for the original IBM PC in 1981. He has taught RHCE classes for Red Hat and has
worked at MCI Worldcom, Cisco, and the State of North Carolina. He has been working with Linux
and Open Source Software for almost 20 years. David has written articles for...
... I can
get a list of all previous screens using the command:
screen -ls
And this gives me the output as shown here:
As you can see, there is a screen session here with the name:
pts-0.test-centos-server
To reconnect to it, just type:
screen -r
And this will take you back to where you were before the SSH connection was terminated! It's
an amazing tool that you need to use for all important operations as insurance against
accidental terminations.
Manually Detaching Screens
When you break an SSH session, what actually happens is that the screen is automatically
detached from it and exists independently. While this is great, you can also detach
screens manually and have multiple screens existing at the same time.
For example, to detach a screen just type:
screen -d
And the current screen will be detached and preserved. However, all the processes inside it
are still running, and all the states are preserved:
You can re-attach to a screen at any time using the "screen -r" command. To connect to a
specific screen instead of the most recent, use:
screen -r [screenname]
Changing the Screen Names to Make Them More Relevant
By default, the screen names don't mean much. And when you have a bunch of them present, you
won't know which screens contain which processes. Fortunately, renaming a screen is easy when
inside one. Just type:
ctrl+a :
We saw in the previous article that "ctrl+a" is the trigger condition for screen commands.
The colon (:) will take you to the bottom of the screen where you can type commands. To rename,
use:
sessionname [newscreenname]
As shown here:
And now when you detach the screen, it will show with the new name like this:
Now you can have as many screens as you want without getting confused about which one is
which!
If you are one of our Managed VPS
hosting clients, we can do all of this for you. Simply contact our system administrators
and they will respond to your request as soon as possible.
If you liked this blog post on how to recover from an accidental SSH disconnection on Linux,
please share it with your friends on social media networks, or if you have any question
regarding this blog post, simply leave a comment below and we will answer it. Thanks!
I would like to find all the matches of the text I have in one file ('file1.txt')
that are found in another file ('file2.txt') using the grep option -f, that tells to read the
expressions to be found from file.
'file1.txt'
a
a
'file2.txt'
a
When I run the command:
grep -f file1.txt file2.txt -w
I get only once the output of the 'a'. instead I would like to get it twice, because it
occurs twice in my 'file1.txt' file. Is there a way to let grep (or any other unix/linux)
tool to output a match for each line it reads? Thanks in advance. Arturo
I understand that, but still I would like to find a way to print a match each time a pattern
(even a repeated one) from 'pattern.txt' is found in 'file.txt'. Even a tool or a script
rather then 'grep -f' would suffice. – Arturo
Mar 24 '17 at 9:17
I want to clean this up but I am worried because of the symlinks, which point to another
drive.
If I say rm -rf /home3 will it delete the other drive?
John Sui
rm -rf /home3 will delete all files and directory within home3 and
home3 itself, which include symlink files, but will not "follow"(de-reference)
those symlink.
Put it in another words, those symlink-files will be deleted. The files they
"point"/"link" to will not be touch.
$ ls -l
total 899166
drwxr-xr-x 12 me scicomp 324 Jan 24 13:47 data
-rw-r--r-- 1 me scicomp 84188 Jan 24 13:47 lod-thin-1.000000-0.010000-0.030000.rda
drwxr-xr-x 2 me scicomp 808 Jan 24 13:47 log
lrwxrwxrwx 1 me scicomp 17 Jan 25 09:41 msg -> /home/me/msg
And I want to remove it using rm -r .
However I'm scared rm -r will follow the symlink and delete everything in
that directory (which is very bad).
I can't find anything about this in the man pages. What would be the exact behavior of
running rm -rf from a directory above this one?
@frnknstn You are right. I see the same behaviour you mention on my latest Debian system. I
don't remember on which version of Debian I performed the earlier experiments. In my earlier
experiments on an older version of Debian, either a.txt must have survived in the third
example or I must have made an error in my experiment. I have updated the answer with the
current behaviour I observe on Debian 9 and this behaviour is consistent with what you
mention. – Susam
Pal
Sep 11 '17 at 15:20
Your /home/me/msg directory will be safe if you rm -rf the directory from which you ran ls.
Only the symlink itself will be removed, not the directory it points to.
The only thing I would be cautious of, would be if you called something like "rm -rf msg/"
(with the trailing slash.) Do not do that because it will remove the directory that msg
points to, rather than the msg symlink itself.
> ,Jan 25, 2012 at 16:54
"The only thing I would be cautious of, would be if you called something like "rm -rf msg/"
(with the trailing slash.) Do not do that because it will remove the directory that msg
points to, rather than the msg symlink itself." - I don't find this to be true. See the third
example in my response below. – Susam Pal
Jan 25 '12 at 16:54
I get the same result as @Susam ('rm -r symlink/' does not delete the target of symlink),
which I am pleased about as it would be a very easy mistake to make. – Andrew Crabb
Nov 26 '13 at 21:52
,
rm should remove files and directories. If the file is symbolic link, link is
removed, not the target. It will not interpret a symbolic link. For example what should be
the behavior when deleting 'broken links'- rm exits with 0 not with non-zero to indicate
failure
To prevent less from clearing the screen upon exit, use -X .
From the manpage:
-X or --no-init
Disables sending the termcap initialization and deinitialization strings to the
terminal. This is sometimes desirable if the deinitialization string does something
unnecessary, like clearing the screen.
As to less exiting if the content fits on one screen, that's option -F :
-F or --quit-if-one-screen
Causes less to automatically exit if the entire file can be displayed on the first
screen.
-F is not the default though, so it's likely preset somewhere for you. Check
the env var LESS .
This is especially annoying if you know about -F but not -X , as
then moving to a system that resets the screen on init will make short files simply not
appear, for no apparent reason. This bit me with ack when I tried to take my
ACK_PAGER='less -RF' setting to the Mac. Thanks a bunch! – markpasc
Oct 11 '10 at 3:44
@markpasc: Thanks for pointing that out. I would not have realized that this combination
would cause this effect, but now it's obvious. – sleske
Oct 11 '10 at 8:45
This is especially useful for the man pager, so that man pages do not disappear as soon as
you quit less with the 'q' key. That is, you scroll to the position in a man page that you
are interested in only for it to disappear when you quit the less pager in order to use the
info. So, I added: export MANPAGER='less -s -X -F' to my .bashrc to keep man
page info up on the screen when I quit less, so that I can actually use it instead of having
to memorize it. – Michael Goldshteyn
May 30 '13 at 19:28
If you want any of the command-line options to always be default, you can add to your
.profile or .bashrc the LESS environment variable. For example:
export LESS="-XF"
will always apply -X -F whenever less is run from that login session.
Sometimes commands are aliased (even by default in certain distributions). To check for
this, type
alias
without arguments to see if it got aliased with options that you don't want. To run the
actual command in your $PATH instead of an alias, just preface it with a back-slash :
\less
To see if a LESS environment variable is set in your environment and affecting
behavior:
Thanks for that! -XF on its own was breaking the output of git diff
, and -XFR gets the best of both worlds -- no screen-clearing, but coloured
git diff output. – Giles Thomas
Jun 10 '15 at 12:23
less is a lot more than more , for instance you have a lot more
functionality:
g: go top of the file
G: go bottom of the file
/: search forward
?: search backward
N: show line number
: goto line
F: similar to tail -f, stop with ctrl+c
S: split lines
There are a couple of things that I do all the time in less , that doesn't work
in more (at least the versions on the systems I use. One is using G
to go to the end of the file, and g to go to the beginning. This is useful for log
files, when you are looking for recent entries at the end of the file. The other is search,
where less highlights the match, while more just brings you to the
section of the file where the match occurs, but doesn't indicate where it is.
You can use v to jump into the current $EDITOR. You can convert to tail -f
mode with f as well as all the other tips others offered.
Ubuntu still has distinct less/more bins. At least mine does, or the more
command is sending different arguments to less.
In any case, to see the difference, find a file that has more rows than you can see at one
time in your terminal. Type cat , then the file name. It will just dump the
whole file. Type more , then the file name. If on ubuntu, or at least my version
(9.10), you'll see the first screen, then --More--(27%) , which means there's
more to the file, and you've seen 27% so far. Press space to see the next page.
less allows moving line by line, back and forth, plus searching and a whole
bunch of other stuff.
Basically, use less . You'll probably never need more for
anything. I've used less on huge files and it seems OK. I don't think it does
crazy things like load the whole thing into memory ( cough Notepad). Showing line
numbers could take a while, though, with huge files.
more is an old utility. When the text passed to it is too large to fit on one
screen, it pages it. You can scroll down but not up.
Some systems hardlink more to less , providing users with a strange
hybrid of the two programs that looks like more and quits at the end of the file
like more but has some less features such as backwards scrolling. This is a
result of less 's more compatibility mode. You can enable this
compatibility mode temporarily with LESS_IS_MORE=1 less ... .
more passes raw escape sequences by default. Escape sequences tell your terminal
which colors to display.
less
less was written by a man who was fed up with more 's inability to
scroll backwards through a file. He turned less into an open source project and over
time, various individuals added new features to it. less is massive now. That's why
some small embedded systems have more but not less . For comparison,
less 's source is over 27000 lines long. more implementations are generally
only a little over 2000 lines long.
In order to get less to pass raw escape sequences, you have to pass it the
-r flag. You can also tell it to only pass ANSI escape characters by passing it the
-R flag.
most
most is supposed to be more than less . It can display multiple files at
a time. By default, it truncates long lines instead of wrapping them and provides a
left/right scrolling mechanism. most's
website has no information about most 's features. Its manpage indicates that it
is missing at least a few less features such as log-file writing (you can use
tee for this though) and external command running.
By default, most uses strange non-vi-like keybindings. man most | grep
'\<vi.?\>' doesn't return anything so it may be impossible to put most
into a vi-like mode.
most has the ability to decompress gunzip-compressed files before reading. Its
status bar has more information than less 's.
more is old utility. You can't browse step wise with more, you can use space to browse page wise, or enter line
by line, that is about it. less is more + more additional features. You can browse page wise, line wise both up and down, search
There is one single application whereby I prefer more to less :
To check my LATEST modified log files (in /var/log/ ), I use ls -AltF |
more .
While less deletes the screen after exiting with q ,
more leaves those files and directories listed by ls on the screen,
sparing me memorizing their names for examination.
(Should anybody know a parameter or configuration enabling less to keep it's
text after exiting, that would render this post obsolete.)
The parameter you want is -X (long form: --no-init ). From
less ' manpage:
Disables sending the termcap initialization and
deinitialization strings to the terminal. This is sometimes desirable if the deinitialization
string does something unnecessary, like clearing the screen.
It is available from EPEL repository; to launch it type byobu-screen
Notable quotes:
"... Note that byobu doesn't actually do anything to screen itself. It's an elaborate (and pretty groovy) screen configuration customization. You could do something similar on your own by hacking your ~/.screenrc, but the byobu maintainers have already done it for you. ..."
Want a quick and dirty way to take notes of what's on your screen? Yep, there's a command
for that. Run Ctrl-a h and screen will save a text file called "hardcopy.n" in your current
directory that has all of the existing text. Want to get a quick snapshot of the top output on
a system? Just run Ctrl-a h and there you go.
You can also save a log of what's going on in a window by using Ctrl-a H . This will create
a file called screenlog.0 in the current directory. Note that it may have limited usefulness if
you're doing something like editing a file in Vim, and the output can look pretty odd if you're
doing much more than entering a few simple commands. To close a screenlog, use Ctrl-a H
again.
Note if you want a quick glance at the system info, including hostname, system load, and
system time, you can get that with Ctrl-a t .
Simplifying Screen with Byobu
If the screen commands seem a bit too arcane to memorize, don't worry. You can tap the power
of GNU Screen in a slightly more user-friendly package called byobu . Basically, byobu is a souped-up screen profile
originally developed for Ubuntu. Not using Ubuntu? No problem, you can find RPMs or a tarball with the profiles to install on other
Linux distros or Unix systems that don't feature a native package.
Note that byobu doesn't actually do anything to screen itself. It's an elaborate (and pretty
groovy) screen configuration customization. You could do something similar on your own by
hacking your ~/.screenrc, but the byobu maintainers have already done it for you.
Since most of byobu is self-explanatory, I won't go into great detail about using it. You
can launch byobu by running byobu . You'll see a shell prompt plus a few lines at the bottom of
the screen with additional information about your system, such as the system CPUs, uptime, and
system time. To get a quick help menu, hit F9 and then use the Help entry. Most of the commands
you would use most frequently are assigned F keys as well. Creating a new window is F2, cycling
between windows is F3 and F4, and detaching from a session is F6. To re-title a window use F8,
and if you want to lock the screen use F12.
The only downside to byobu is that it's not going to be on all systems, and in a pinch it
may help to know your way around plain-vanilla screen rather than byobu.
For an easy reference, here's a list of the most common screen commands that you'll want to
know. This isn't exhaustive, but it should be enough for most users to get started using screen
happily for most use cases.
Start Screen: screen
Detatch Screen: Ctrl-a d
Re-attach Screen: screen -x or screen -x PID
Split Horizontally: Ctrl-a S
Split Vertically: Ctrl-a |
Move Between Windows: Ctrl-a Tab
Name Session: Ctrl-a A
Log Session: Ctrl-a H
Note Session: Ctrl-a h
Finally, if you want help on GNU Screen, use the man page (man screen) and its built-in help
with Ctrl-a :help. Screen has quite a few advanced options that are beyond an introductory
tutorial, so be sure to check out the man page when you have the basics down.
When screen is started it reads its configuration parameters from
/etc/screenrc
and
~/.screenrc
if
the file is present. We can modify the default Screen settings according to our own preferences using the
.screenrc
file.
Here is a sample
~/.screenrc
configuration with customized status line and few additional options:
~/.screenrc
# Turn off the welcome message
startup_message off
# Disable visual bell
vbell off
# Set scrollback buffer to 10000
defscrollback 10000
# Customize the status line
hardstatus alwayslastline
hardstatus string '%{= kG}[ %{G}%H %{g}][%= %{= kw}%?%-Lw%?%{r}(%{W}%n*%f%t%?(%u)%?%{r})%{w}%?%+
To cut by complement us the --complement option. Note this option is not
available on the BSD version of cut . The --complement option selects
the inverse of the options passed to sort.
In the following example the -c option is used to select the first character.
Because the --complement option is also passed to cut the second and
third characters are cut.
echo 'foo' | cut --complement -c 1
oo
How to modify the output delimiter
To modify the output delimiter use the --output-delimiter option. Note that
this option is not available on the BSD version of cut . In the following example
a semi-colon is converted to a space and the first, third and fourth fields are selected.
echo 'how;now;brown;cow' | cut -d ';' -f 1,3,4 --output-delimiter=' '
how brown cow
George Ornbo is a hacker, futurist, blogger and Dad based in Buckinghamshire,
England.He is the author of Sams Teach Yourself
Node.js in 24 Hours .He can be found in most of the usual places as shapeshed including
Twitter and GitHub .
We already have discussed about a few
good alternatives to Man
pages . Those alternatives are mainly used for learning concise Linux command examples without having to go through the comprehensive
man pages. If you're looking for a quick and dirty way to easily and quickly learn a Linux command, those alternatives are worth
trying. Now, you might be thinking how can I create my own man-like help pages for a Linux command? This is where "Um" comes in
handy. Um is a command line utility, used to easily create and maintain your own Man pages that contains only what you've learned
about a command so far.
By creating your own alternative to man pages, you can avoid lots of unnecessary, comprehensive details in a man page and include
only what is necessary to keep in mind. If you ever wanted to created your own set of man-like pages, Um will definitely help. In
this brief tutorial, we will see how to install "Um" command line utility and how to create our own man pages.
Installing Um
Um is available for Linux and Mac OS. At present, it can only be installed using Linuxbrew package manager in Linux systems. Refer
the following link if you haven't installed Linuxbrew yet.
Once Linuxbrew installed, run the following command to install Um utility.
$ brew install sinclairtarget/wst/um
If you will see an output something like below, congratulations! Um has been installed and ready to use.
[...]
==> Installing sinclairtarget/wst/um
==> Downloading https://github.com/sinclairtarget/um/archive/4.0.0.tar.gz
==> Downloading from https://codeload.github.com/sinclairtarget/um/tar.gz/4.0.0
-=#=# # #
==> Downloading https://rubygems.org/gems/kramdown-1.17.0.gem
######################################################################## 100.0%
==> gem install /home/sk/.cache/Homebrew/downloads/d0a5d978120a791d9c5965fc103866815189a4e3939
==> Caveats
Bash completion has been installed to:
/home/linuxbrew/.linuxbrew/etc/bash_completion.d
==> Summary
/home/linuxbrew/.linuxbrew/Cellar/um/4.0.0: 714 files, 1.3MB, built in 35 seconds
==> Caveats
==> openssl
A CA file has been bootstrapped using certificates from the SystemRoots
keychain. To add additional certificates (e.g. the certificates added in
the System keychain), place .pem files in
/home/linuxbrew/.linuxbrew/etc/openssl/certs
and run
/home/linuxbrew/.linuxbrew/opt/openssl/bin/c_rehash
==> ruby
Emacs Lisp files have been installed to:
/home/linuxbrew/.linuxbrew/share/emacs/site-lisp/ruby
==> um
Bash completion has been installed to:
/home/linuxbrew/.linuxbrew/etc/bash_completion.d
Before going to use to make your man pages, you need to enable bash completion for Um.
To do so, open your ~/.bash_profile file:
$ nano ~/.bash_profile
And, add the following lines in it:
if [ -f $(brew --prefix)/etc/bash_completion.d/um-completion.sh ]; then
. $(brew --prefix)/etc/bash_completion.d/um-completion.sh
fi
Save and close the file. Run the following commands to update the changes.
$ source ~/.bash_profile
All done. let us go ahead and create our first man page.
Create And Maintain Your Own Man Pages
Let us say, you want to create your own man page for "dpkg" command. To do so, run:
$ um edit dpkg
The above command will open a markdown template in your default editor:
Create a new man page
My default editor is Vi, so the above commands open it in the Vi editor. Now, start adding everything you want to remember about
"dpkg" command in this template.
Here is a sample:
Add contents in dpkg man page
As you see in the above output, I have added Synopsis, description and two options for dpkg command. You can add as many as sections
you want in the man pages. Make sure you have given proper and easily-understandable titles for each section. Once done, save and
quit the file (If you use Vi editor, Press ESC key and type :wq ).
Finally, view your newly created man page using command:
$ um dpkg
View dpkg man page
As you can see, the the dpkg man page looks exactly like the official man pages. If you want to edit and/or add more details in
a man page, again run the same command and add the details.
$ um edit dpkg
To view the list of newly created man pages using Um, run:
$ um list
All man pages will be saved under a directory named .um in your home directory
Just in case, if you don't want a particular page, simply delete it as shown below.
$ um rm dpkg
To view the help section and all available general options, run:
$ um --help
usage: um <page name>
um <sub-command> [ARGS...]
The first form is equivalent to `um read <page name>`.
Subcommands:
um (l)ist List the available pages for the current topic.
um (r)ead <page name> Read the given page under the current topic.
um (e)dit <page name> Create or edit the given page under the current topic.
um rm <page name> Remove the given page.
um (t)opic [topic] Get or set the current topic.
um topics List all topics.
um (c)onfig [config key] Display configuration environment.
um (h)elp [sub-command] Display this help message, or the help message for a sub-command.
Configure Um
To view the current configuration, run:
$ um config
Options prefixed by '*' are set in /home/sk/.um/umconfig.
editor = vi
pager = less
pages_directory = /home/sk/.um/pages
default_topic = shell
pages_ext = .md
In this file, you can edit and change the values for pager , editor , default_topic , pages_directory , and pages_ext options
as you wish. Say for example, if you want to save the newly created Um pages in your
Dropbox folder, simply change
the value of pages_directory directive and point it to the Dropbox folder in ~/.um/umconfig file.
pages_directory = /Users/myusername/Dropbox/um
And, that's all for now. Hope this was useful. More good stuffs to come. Stay tuned!
I am a happy user of the cd - command to go to the previous directory. At the same time I like pushd .
and popd .
However, when I want to remember the current working directory by means of pushd . , I lose the possibility to
go to the previous directory by cd - . (As pushd . also performs cd . ).
I don't understand your question? The point is that pushd breaks the behavior of cd - that I want (or expect). I
know perfectly well in which directory I am, but I want to increase the speed with which I change directories :)
Bernhard
Feb 21 '12 at 12:46
@bernhard Oh, I misunderstood what you were asking. You were wanting to know how to store the current working directory.
I was interpreting it as you wanted to remember (as in you forgot) your current working directory.
Patrick
Feb 22 '12 at 1:58
This works perfectly for me. Is there no such feature in the built-in pushd? As I would always prefer a standard solution. Thanks
for this function however, maybe I will leave out the argument and it's checking at some point.
Bernhard
Feb 21 '12 at 12:41
There is no such feature in the builtin. Your own function is the best solution because pushd and popd both call cd
modifying $OLDPWD, hence the source of your problem. I would name the function saved and use it in the context you like too, that
of saving cwd. bsd
Feb 21 '12 at 12:53
pushd () {
if [ "$1" = . ]; then
cd -
builtin pushd -
else
builtin pushd "$1"
fi
}
By naming the function pushd , you can use pushd as normal, you don't need to remember to use the
function name.
,
Kevin's answer is excellent. I've written up some details about what's going on, in case people are looking for a better understanding
of why their script is necessary to solve the problem.
The reason that pushd . breaks the behavior of cd - will be apparent if we dig into the workings
of cd and the directory stack. Let's push a few directories onto the stack:
Notice that we jumped back to our previous directory, even though the previous directory wasn't actually listed in the directory
stack. This is because cd uses the environment variable $OLDPWD to keep track of the previous directory:
$ echo $OLDPWD
/home/username/dir2
If we do pushd . we will push an extra copy of the current directory onto the stack:
In order to both empty the stack and restore the working directory from the stack
bottom, either:
retrieve that directory from dirs , change to that directory, and than
clear the stack:
cd "$(dirs -l -0)" && dirs -c
The -l option here will list full paths, to make sure we don't fail if we
try to cd into ~ , and the -0 retrieves the first
entry from the stack bottom.
@jw013 suggested making this command more robust, by avoiding path expansions:
pushd -0 && dirs -c
or, popd until you encounter an error (which is the status of a
popd call when the directory stack is empty):
The first method is exactly what I wanted. The second wouldn't work in my case since I had
called pushd a few times, then removed one of the directories in the middle,
then popd was failing when I tried to unroll. I needed to jump over all the
buggered up stuff in the middle to get back to where I started. – Chuck Wilbur
Nov 14 '17 at 18:21
cd "$(...)" works in 90%, probably even 99% of use cases, but with pushd
-0 you can confidently say 100%. There are so many potential gotchas and edge cases
associated with expanding file/directory paths in the shell that the most robust thing to do
is just avoid it altogether, which pushd -0 does very concisely.
There is no
chance of getting caught by a bug with a weird edge case if you never take the risk. If you
want further reading on the possible headaches involved with Unix file / path names, a good
starting point is mywiki.wooledge.org/ParsingLs – jw013
Dec 12 '17 at 15:31
awk , cut , and join , sort views its input as a stream of records made up of fields of variable width,
with records delimited by newline characters and fields delimited by whitespace or a user-specifiable single character.
sort
Usage
sort [ options ] [ file(s) ]
Purpose
Sort input lines into an order determined by the key field and datatype options, and the locale.
Major options
-b
Ignore leading whitespace.
-c
Check that input is correctly sorted. There is no output, but the exit code is nonzero if the input is not sorted.
-d
Dictionary order: only alphanumerics and whitespace are significant.
-g
General numeric value: compare fields as floating-point numbers. This works like -n , except that numbers may have
decimal points and exponents (e.g., 6.022e+23 ). GNU version only.
-f
Fold letters implicitly to a common lettercase so that sorting is case-insensitive.
-i
Ignore nonprintable characters.
-k
Define the sort key field.
-m
Merge already-sorted input files into a sorted output stream.
-n
Compare fields as integer numbers.
-ooutfile
Write output to the specified file instead of to standard output. If the file is one of the input files, sort copies
it to a temporary file before sorting and writing the output.
-r
Reverse the sort order to descending, rather than the default ascending.
-tchar
Use the single character char as the default field separator, instead of the default of whitespace.
-u
Unique records only: discard all but the first record in a group with equal keys. Only the key fields matter: other parts
of the discarded records may differ.
Behavior
sort reads the specified files, or standard input if no files are given, and writes the sorted data on standard output.
Sorting by Lines
In the simplest case, when no command-line options are supplied, complete records are sorted according
to the order defined by the current locale. In the traditional C locale, that means ASCII order, but you can set an alternate locale
as we described in
Section 2.8 . A tiny bilingual dictionary in the ISO 8859-1 encoding translates four French words differing only in accents:
$ cat french-english Show the tiny dictionary
côte coast
cote dimension
coté dimensioned
côté side
To understand the sorting, use the octal dump tool, od , to display the French words in ASCII and octal:
$ cut -f1 french-english | od -a -b Display French words in octal bytes
0000000 c t t e nl c o t e nl c o t i nl c
143 364 164 145 012 143 157 164 145 012 143 157 164 351 012 143
0000020 t t i nl
364 164 351 012
0000024
Evidently, with the ASCII option -a , od strips the high-order bit of characters, so the accented letters have been
mangled, but we can see their octal values: é is 351 8 and ô is 364 8 . On GNU/Linux systems,
you can confirm the character values like this:
$ man iso_8859_1 Check the ISO 8859-1 manual page
...
Oct Dec Hex Char Description
--------------------------------------------------------------------
...
351 233 E9 é LATIN SMALL LETTER E WITH ACUTE
...
364 244 F4 ô LATIN SMALL LETTER O WITH CIRCUMFLEX
...
First, sort the file in strict byte order:
$ LC_ALL=C sort french-english Sort in traditional ASCII order
cote dimension
coté dimensioned
côte coast
côté side
Notice that e (145 8 ) sorted before é (351 8 ), and o (157 8 ) sorted
before ô (364 8 ), as expected from their numerical values. Now sort the text in Canadian-French order:
$ LC_ALL=fr_CA.iso88591 sort french-english Sort in Canadian-French locale
côte coast
cote dimension
coté dimensioned
côté side
The output order clearly differs from the traditional ordering by raw byte values. Sorting conventions are strongly dependent on
language, country, and culture, and the rules are sometimes astonishingly complex. Even English, which mostly pretends that accents
are irrelevant, can have complex sorting rules: examine your local telephone directory to see how lettercase, digits, spaces, punctuation,
and name variants like McKay and Mackay are handled.
Sorting by Fields
For more control over sorting, the -k
option allows you to specify the field to sort on, and the -t option lets you choose the field delimiter. If -t is
not specified, then fields are separated by whitespace and leading and trailing whitespace in the record is ignored. With the
-t option, the specified character delimits fields, and whitespace is significant. Thus, a three-character record consisting
of space-X-space has one field without -t , but three with -t ' ' (the first and third fields are empty). The -k
option is followed by a field number, or number pair, optionally separated by whitespace after -k . Each number may be suffixed
by a dotted character position, and/or one of the modifier letters shown in Table.
Letter
Description
b
Ignore leading whitespace.
d
Dictionary order.
f
Fold letters implicitly to a common lettercase.
g
Compare as general floating-point numbers. GNU version only.
i
Ignore nonprintable characters.
n
Compare as (integer) numbers.
r
Reverse the sort order.
Fields and characters within fields are numbered starting from one.
If only one field number is specified, the sort key begins at the start of that field, and continues to the end of the record
( not the end of the field).
If a comma-separated pair of field numbers is given, the sort key starts at the beginning of the first field, and finishes at
the end of the second field.
With a dotted character position, comparison begins (first of a number pair) or ends (second of a number pair) at that character
position: -k2.4,5.6 compares starting with the fourth character of the second field and ending with the sixth character of
the fifth field.
If the start of a sort key falls beyond the end of the record, then the sort key is empty, and empty sort keys sort before all
nonempty ones.
When multiple -k options are given, sorting is by the first key field, and then, when records match in that key, by the
second key field, and so on.
!
While the -k option is available on all of the systems that we tested, sort also recognizes an older
field specification, now considered obsolete, where fields and character positions are numbered from zero. The key start
for character m in field n is defined by +n.m , and the key end by -n.m
. For example, sort +2.1 -3.2 is equivalent to sort -k3.2,4.3 . If the character position is omitted,
it defaults to zero. Thus, +4.0nr and +4nr mean the same thing: a numeric key, beginning at the start
of the fifth field, to be sorted in reverse (descending) order.
Let's try out these options on a sample password file, sorting it by the username, which is found in the first colon-separated
field:
For more control, add a modifier letter in the field selector to define the type of data in the field and the sorting order. Here's
how to sort the password file by descending UID:
A more precise field specification would have been -k3nr,3 (that is, from the start of field three, numerically, in reverse
order, to the end of field three), or -k3,3nr , or even -k3,3-n-r , but sort stops collecting
a number at the first nondigit, so -k3nr works correctly.
In our password file example, three users have a common GID in field 4, so we could sort first by GID, and then by UID, with:
The useful -u option asks sort to output only unique records, where unique means that their sort-key fields match,
even if there are differences elsewhere. Reusing the password file one last time, we find:
Notice that the output is shorter: three users are in group 1000, but only one of them was output...
Sorting Text Blocks
Sometimes you need to sort data composed of multiline records. A good example is an address list, which is conveniently stored
with one or more blank lines between addresses. For data like this, there is no constant sort-key position that could be used in
a -k option, so you have to help out by supplying some extra markup. Here's a simple example:
$ cat my-friends Show address file
# SORTKEY: Schloß, Hans Jürgen
Hans Jürgen Schloß
Unter den Linden 78
D-10117 Berlin
Germany
# SORTKEY: Jones, Adrian
Adrian Jones
371 Montgomery Park Road
Henley-on-Thames RG9 4AJ
UK
# SORTKEY: Brown, Kim
Kim Brown
1841 S Main Street
Westchester, NY 10502
USA
The sorting trick is to use the ability of awk to handle more-general record separators to recognize paragraph breaks,
temporarily replace the line breaks inside each address with an otherwise unused character, such as an unprintable control character,
and replace the paragraph break with a newline. sort then sees lines that look like this:
# SORTKEY: Schloß, Hans Jürgen^ZHans Jürgen Schloß^ZUnter den Linden 78^Z...
# SORTKEY: Jones, Adrian^ZAdrian Jones^Z371 Montgomery Park Road^Z...
# SORTKEY: Brown, Kim^ZKim Brown^Z1841 S Main Street^Z...
Here, ^Z is a Ctrl-Z character. A filter step downstream from sort restores the line breaks and paragraph breaks,
and the sort key lines are easily removed, if desired, with grep . The entire pipeline looks like this:
cat my-friends | Pipe in address file
awk -v RS="" { gsub("\n", "^Z"); print }' | Convert addresses to single lines
sort -f | Sort address bundles, ignoring case
awk -v ORS="\n\n" '{ gsub("^Z", "\n"); print }' | Restore line structure
grep -v '# SORTKEY' Remove markup lines
The gsub( ) function performs "global substitutions." It is similar to the s/x/y/g construct in sed .
The RS variable is the input Record Separator. Normally, input records are separated by newlines, making each line a separate
record. Using RS=" " is a special case, whereby records are separated by blank lines; i.e., each block or "paragraph" of
text forms a separate record. This is exactly the form of our input data. Finally, ORS is the Output Record Separator; each
output record printed with print is terminated with its value. Its default is also normally a single newline; setting it
here to " \n\n " preserves the input format with blank lines separating records. (More detail on these constructs may be
found in
Chapter 9 .)
The beauty of this approach is that we can easily include additional keys in each address that can be used for both sorting and
selection: for example, an extra markup line of the form:
# COUNTRY: UK
in each address, and an additional pipeline stage of grep '# COUNTRY: UK ' just before the sort , would let us
extract only the UK addresses for further processing.
You could, of course, go overboard and use XML markup to identify the parts of the address in excruciating detail:
With fancier data-processing filters, you could then please your post office by presorting your mail by country and postal code,
but our minimal markup and simple pipeline are often good enough to get the job done.
4.1.4. Sort Efficiency
The obvious way to sort data requires comparing all pairs of items to see which comes first, and leads to algorithms known as
bubble sort and insertion sort . These quick-and-dirty algorithms are fine for small amounts of data, but they certainly
are not quick for large amounts, because their work to sort n records grows like n 2 . This is quite different from almost
all of the filters that we discuss in this book: they read a record, process it, and output it, so their execution time is directly
proportional to the number of records, n .
Fortunately, the sorting problem has had lots of attention in the computing community, and good sorting algorithms are known whose
average complexity goes like n 3/2 ( shellsort ), n log n ( heapsort , mergesort , and quicksort
), and for restricted kinds of data, n ( distribution sort ). The Unix sort command implementation has received extensive
study and optimization: you can be confident that it will do the job efficiently, and almost certainly better than you can do yourself
without learning a lot more about sorting algorithms.
4.1.5. Sort Stability
An important question about sorting algorithms is whether or not they are stable : that is, is the input order of equal
records preserved in the output? A stable sort may be desirable when records are sorted by multiple keys, or more than once in a
pipeline. POSIX does not require that sort be stable, and most implementations are not, as this example shows:
$ sort -t_ -k1,1 -k2,2 << EOF Sort four lines by first two fields
The sort fields are identical in each record, but the output differs from the input, so sort is not stable. Fortunately,
the GNU implementation in the coreutils package [1] remedies that deficiency via
the -- stable option: its output for this example correctly matches the input.
When Tmux is started it reads its configuration parameters from
~/.tmux.conf
if the file is present.
Here is a sample
~/.tmux.conf
configuration with customized status line and few additional options:
~/.tmux.conf
# Improve colors
set -g default-terminal 'screen-256color'
# Set scrollback buffer to 10000
set -g history-limit 10000
# Customize the status line
set -g status-fg green
set -g status-bg black
In this tutorial, you learned how to use Tmux. Now you can start creating multiple Tmux windows in a single session, split
windows by creating new panes, navigate between windows, detach and resume sessions and personalize your Tmux instance using the
.tmux.conf
file.
I used rsync to copy a large number of files, but my OS (Ubuntu) restarted
unexpectedly.
After reboot, I ran rsync again, but from the output on the terminal, I found
that rsync still copied those already copied before. But I heard that
rsync is able to find differences between source and destination, and therefore
to just copy the differences. So I wonder in my case if rsync can resume what
was left last time?
Yes, rsync won't copy again files that it's already copied. There are a few edge cases where
its detection can fail. Did it copy all the already-copied files? What options did you use?
What were the source and target filesystems? If you run rsync again after it's copied
everything, does it copy again? – Gilles
Sep 16 '12 at 1:56
@Gilles: Thanks! (1) I think I saw rsync copied the same files again from its output on the
terminal. (2) Options are same as in my other post, i.e. sudo rsync -azvv
/home/path/folder1/ /home/path/folder2 . (3) Source and target are both NTFS, buy
source is an external HDD, and target is an internal HDD. (3) It is now running and hasn't
finished yet. – Tim
Sep 16 '12 at 2:30
@Tim Off the top of my head, there's at least clock skew, and differences in time resolution
(a common issue with FAT filesystems which store times in 2-second increments, the
--modify-window option helps with that). – Gilles
Sep 19 '12 at 9:25
First of all, regarding the "resume" part of your question, --partial just tells
the receiving end to keep partially transferred files if the sending end disappears as though
they were completely transferred.
While transferring files, they are temporarily saved as hidden files in their target
folders (e.g. .TheFileYouAreSending.lRWzDC ), or a specifically chosen folder if
you set the --partial-dir switch. When a transfer fails and
--partial is not set, this hidden file will remain in the target folder under
this cryptic name, but if --partial is set, the file will be renamed to the
actual target file name (in this case, TheFileYouAreSending ), even though the
file isn't complete. The point is that you can later complete the transfer by running rsync
again with either --append or --append-verify .
So, --partial doesn't itself resume a failed or cancelled transfer.
To resume it, you'll have to use one of the aforementioned flags on the next run. So, if you
need to make sure that the target won't ever contain files that appear to be fine but are
actually incomplete, you shouldn't use --partial . Conversely, if you want to
make sure you never leave behind stray failed files that are hidden in the target directory,
and you know you'll be able to complete the transfer later, --partial is there
to help you.
With regards to the --append switch mentioned above, this is the actual
"resume" switch, and you can use it whether or not you're also using --partial .
Actually, when you're using --append , no temporary files are ever created.
Files are written directly to their targets. In this respect, --append gives the
same result as --partial on a failed transfer, but without creating those hidden
temporary files.
So, to sum up, if you're moving large files and you want the option to resume a cancelled
or failed rsync operation from the exact point that rsync stopped, you need to
use the --append or --append-verify switch on the next attempt.
As @Alex points out below, since version 3.0.0 rsync now has a new option,
--append-verify , which behaves like --append did before that
switch existed. You probably always want the behaviour of --append-verify , so
check your version with rsync --version . If you're on a Mac and not using
rsync from homebrew , you'll (at least up to and including El
Capitan) have an older version and need to use --append rather than
--append-verify . Why they didn't keep the behaviour on --append
and instead named the newcomer --append-no-verify is a bit puzzling. Either way,
--append on rsync before version 3 is the same as
--append-verify on the newer versions.
--append-verify isn't dangerous: It will always read and compare the data on
both ends and not just assume they're equal. It does this using checksums, so it's easy on
the network, but it does require reading the shared amount of data on both ends of the wire
before it can actually resume the transfer by appending to the target.
Second of all, you said that you "heard that rsync is able to find differences between
source and destination, and therefore to just copy the differences."
That's correct, and it's called delta transfer, but it's a different thing. To enable
this, you add the -c , or --checksum switch. Once this switch is
used, rsync will examine files that exist on both ends of the wire. It does this in chunks,
compares the checksums on both ends, and if they differ, it transfers just the differing
parts of the file. But, as @Jonathan points out below, the comparison is only done when files
are of the same size on both ends -- different sizes will cause rsync to upload the entire
file, overwriting the target with the same name.
This requires a bit of computation on both ends initially, but can be extremely efficient
at reducing network load if for example you're frequently backing up very large files
fixed-size files that often contain minor changes. Examples that come to mind are virtual
hard drive image files used in virtual machines or iSCSI targets.
It is notable that if you use --checksum to transfer a batch of files that
are completely new to the target system, rsync will still calculate their checksums on the
source system before transferring them. Why I do not know :)
So, in short:
If you're often using rsync to just "move stuff from A to B" and want the option to cancel
that operation and later resume it, don't use --checksum , but do use
--append-verify .
If you're using rsync to back up stuff often, using --append-verify probably
won't do much for you, unless you're in the habit of sending large files that continuously
grow in size but are rarely modified once written. As a bonus tip, if you're backing up to
storage that supports snapshotting such as btrfs or zfs , adding
the --inplace switch will help you reduce snapshot sizes since changed files
aren't recreated but rather the changed blocks are written directly over the old ones. This
switch is also useful if you want to avoid rsync creating copies of files on the target when
only minor changes have occurred.
When using --append-verify , rsync will behave just like it always does on
all files that are the same size. If they differ in modification or other timestamps, it will
overwrite the target with the source without scrutinizing those files further.
--checksum will compare the contents (checksums) of every file pair of identical
name and size.
UPDATED 2015-09-01 Changed to reflect points made by @Alex (thanks!)
UPDATED 2017-07-14 Changed to reflect points made by @Jonathan (thanks!)
According to the documentation--append does not check the data, but --append-verify does.
Also, as @gaoithe points out in a comment below, the documentation claims
--partialdoes resume from previous files. – Alex
Aug 28 '15 at 3:49
Thank you @Alex for the updates. Indeed, since 3.0.0, --append no longer
compares the source to the target file before appending. Quite important, really!
--partial does not itself resume a failed file transfer, but rather leaves it
there for a subsequent --append(-verify) to append to it. My answer was clearly
misrepresenting this fact; I'll update it to include these points! Thanks a lot :) –
DanielSmedegaardBuus
Sep 1 '15 at 13:29
@CMCDragonkai Actually, check out Alexander's answer below about --partial-dir
-- looks like it's the perfect bullet for this. I may have missed something entirely ;)
– DanielSmedegaardBuus
May 10 '16 at 19:31
What's your level of confidence in the described behavior of --checksum ?
According to the man it has more to do with deciding
which files to flag for transfer than with delta-transfer (which, presumably, is
rsync 's default behavior). – Jonathan Y.
Jun 14 '17 at 5:48
Just specify a partial directory as the rsync man pages recommends:
--partial-dir=.rsync-partial
Longer explanation:
There is actually a built-in feature for doing this using the --partial-dir
option, which has several advantages over the --partial and
--append-verify / --append alternative.
Excerpt from the
rsync man pages:
--partial-dir=DIR
A better way to keep partial files than the --partial option is
to specify a DIR that will be used to hold the partial data
(instead of writing it out to the destination file). On the
next transfer, rsync will use a file found in this dir as data
to speed up the resumption of the transfer and then delete it
after it has served its purpose.
Note that if --whole-file is specified (or implied), any par-
tial-dir file that is found for a file that is being updated
will simply be removed (since rsync is sending files without
using rsync's delta-transfer algorithm).
Rsync will create the DIR if it is missing (just the last dir --
not the whole path). This makes it easy to use a relative path
(such as "--partial-dir=.rsync-partial") to have rsync create
the partial-directory in the destination file's directory when
needed, and then remove it again when the partial file is
deleted.
If the partial-dir value is not an absolute path, rsync will add
an exclude rule at the end of all your existing excludes. This
will prevent the sending of any partial-dir files that may exist
on the sending side, and will also prevent the untimely deletion
of partial-dir items on the receiving side. An example: the
above --partial-dir option would add the equivalent of "-f '-p
.rsync-partial/'" at the end of any other filter rules.
By default, rsync uses a random temporary file name which gets deleted when a transfer
fails. As mentioned, using --partial you can make rsync keep the incomplete file
as if it were successfully transferred , so that it is possible to later append to
it using the --append-verify / --append options. However there are
several reasons this is sub-optimal.
Your backup files may not be complete, and without checking the remote file which must
still be unaltered, there's no way to know.
If you are attempting to use --backup and --backup-dir ,
you've just added a new version of this file that never even exited before to your version
history.
However if we use --partial-dir , rsync will preserve the temporary partial
file, and resume downloading using that partial file next time you run it, and we do not
suffer from the above issues.
I agree this is a much more concise answer to the question. the TL;DR: is perfect and for
those that need more can read the longer bit. Strong work. – JKOlaf
Jun 28 '17 at 0:11
You may want to add the -P option to your command.
From the man page:
--partial By default, rsync will delete any partially transferred file if the transfer
is interrupted. In some circumstances it is more desirable to keep partially
transferred files. Using the --partial option tells rsync to keep the partial
file which should make a subsequent transfer of the rest of the file much faster.
-P The -P option is equivalent to --partial --progress. Its pur-
pose is to make it much easier to specify these two options for
a long transfer that may be interrupted.
@Flimm not quite correct. If there is an interruption (network or receiving side) then when
using --partial the partial file is kept AND it is used when rsync is resumed. From the
manpage: "Using the --partial option tells rsync to keep the partial file which should
<b>make a subsequent transfer of the rest of the file much faster</b>." –
gaoithe
Aug 19 '15 at 11:29
@Flimm and @gaoithe, my answer wasn't quite accurate, and definitely not up-to-date. I've
updated it to reflect version 3 + of rsync . It's important to stress, though,
that --partial does not itself resume a failed transfer. See my answer
for details :) – DanielSmedegaardBuus
Sep 1 '15 at 14:11
@DanielSmedegaardBuus I tried it and the -P is enough in my case. Versions:
client has 3.1.0 and server has 3.1.1. I interrupted the transfer of a single large file with
ctrl-c. I guess I am missing something. – guettli
Nov 18 '15 at 12:28
I think you are forcibly calling the rsync and hence all data is getting
downloaded when you recall it again. use --progress option to copy only those
files which are not copied and --delete option to delete any files if already
copied and now it does not exist in source folder...
@Fabien He tells rsync to set two ssh options (rsync uses ssh to connect). The second one
tells ssh to not prompt for confirmation if the host he's connecting to isn't already known
(by existing in the "known hosts" file). The first one tells ssh to not use the default known
hosts file (which would be ~/.ssh/known_hosts). He uses /dev/null instead, which is of course
always empty, and as ssh would then not find the host in there, it would normally prompt for
confirmation, hence option two. Upon connecting, ssh writes the now known host to /dev/null,
effectively forgetting it instantly :) – DanielSmedegaardBuus
Dec 7 '14 at 0:12
...but you were probably wondering what effect, if any, it has on the rsync operation itself.
The answer is none. It only serves to not have the host you're connecting to added to your
SSH known hosts file. Perhaps he's a sysadmin often connecting to a great number of new
servers, temporary systems or whatnot. I don't know :) – DanielSmedegaardBuus
Dec 7 '14 at 0:23
There are a couple errors here; one is very serious: --delete will delete files
in the destination that don't exist in the source. The less serious one is that
--progress doesn't modify how things are copied; it just gives you a progress
report on each file as it copies. (I fixed the serious error; replaced it with
--remove-source-files .) – Paul d'Aoust
Nov 17 '16 at 22:39
I was recently troubleshooting some issues we were having with Shippable , trying to get a bunch of our unit tests to run in
parallel so that our builds would complete faster. I didn't care what order the different
processes completed in, but I didn't want the shell script to exit until all the spawned unit
test processes had exited. I ultimately wasn't able to satisfactorily solve the issue we were
having, but I did learn more than I ever wanted to know about how to run processes in parallel
in shell scripts. So here I shall impart unto you the knowledge I have gained. I hope someone
else finds it useful!
Wait
The simplest way to achieve what I wanted was to use the wait command. You
simply fork all of your processes with & , and then follow them with a
wait command. Behold:
It's really as easy as that. When you run the script, all three processes will be forked in
parallel, and the script will wait until all three have completed before exiting. Anything
after the wait command will execute only after the three forked processes have
exited.
Pros
Damn, son! It doesn't get any simpler than that!
Cons
I don't think there's really any way to determine the exit codes of the processes you
forked. That was a deal-breaker for my use case, since I needed to know if any of the tests
failed and return an error code from the parent shell script if they did.
Another downside is that output from the processes will be all mish-mashed together, which
makes it difficult to follow. In our situation, it was basically impossible to determine which
unit tests had failed because they were all spewing their output at the same time.
GNU Parallel
There is a super nifty program called GNU Parallel that does exactly what I wanted. It
works kind of like xargs in that you can give it a collection of arguments to pass
to a single command which will all be run, only this will run them in parallel instead of in
serial like xargs does (OR DOES IT??</foreshadowing>). It is super
powerful, and all the different ways you can use it are beyond
the scope of this article, but here's a rough equivalent to the example script above:
If any of the processes returns a non-zero exit code, parallel will return a
non-zero exit code. This means you can use $? in your shell script to detect if
any of the processes failed. Nice! GNU Parallel also (by default) collates the output of each
process together, so you'll see the complete output of each process as it completes instead of
a mash-up of all the output combined together as it's produced. Also nice!
I am such a damn fanboy I might even buy an official GNU Parallel mug and t-shirt . Actually I'll
probably save the money and get the new Star Wars Battlefront game when it comes out instead.
But I did seriously consider the parallel schwag for a microsecond or so.
Cons
Literally none.
Xargs
So it turns out that our old friend xargs has supported parallel processing all
along! Who knew? It's like the nerdy chick in the movies who gets a makeover near the end and
it turns out she's even hotter than the stereotypical hot cheerleader chicks who were picking
on her the whole time. Just pass it a -Pn argument and it will run your commands
using up to n threads. Check out this mega-sexy equivalent to the above
scripts:
xargs returns a non-zero exit code if any of the processes fails, so you can
again use $? in your shell script to detect errors. The difference is it will
return 123 , unlike GNU Parallel which passes through the non-zero exit code of
the process that failed (I'm not sure how parallel picks if more than one process
fails, but I'd assume it's either the first or last process to fail). Another pro is that
xargs is most likely already installed on your preferred distribution of
Linux.
Cons
I have read reports that the non-GNU version of xargs does not support parallel
processing, so you may or may not be out of luck with this option if you're on AIX or a BSD or
something.
xargs also has the same problem as the wait solution where the
output from your processes will be all mixed together.
Another con is that xargs is a little less flexible than parallel
in how you specify the processes to run. You have to pipe your values into it, and if you use
the -I argument for string-replacement then your values have to be separated by
newlines (which is more annoying when running it ad-hoc). It's still pretty nice, but nowhere
near as flexible or powerful as parallel .
Also there's no place to buy an xargs mug and t-shirt. Lame!
And The Winner Is
After determining that the Shippable problem we were having was completely unrelated to the
parallel scripting method I was using, I ended up sticking with parallel for my
unit tests. Even though it meant one more dependency on our build machine, the ease
The
Task Spooler
project allows you
to queue up tasks from the shell for batch execution. Task Spooler is simple to use and requires no
configuration. You can view and edit queued commands, and you can view the output of queued commands at any
time.
Task Spooler has some similarities with other delayed and batch execution projects, such as "
at
."
While both Task Spooler and at handle multiple queues and allow the execution of commands at a later point, the
at project handles output from commands by emailing the results to the user who queued the command, while Task
Spooler allows you to get at the results from the command line instead. Another major difference is that Task
Spooler is not aimed at executing commands at a specific time, but rather at simply adding to and executing
commands from queues.
The main repositories for Fedora, openSUSE, and Ubuntu do not contain packages for Task Spooler. There are
packages for some versions of Debian, Ubuntu, and openSUSE 10.x available along with the source code on the
project's homepage. In this article I'll use a 64-bit Fedora 9 machine and install version 0.6 of Task Spooler
from source. Task Spooler does not use autotools to build, so to install it, simply run
make; sudo make
install
. This will install the main Task Spooler command
ts
and its manual page into /usr/local.
A simple interaction with Task Spooler is shown below. First I add a new job to the queue and check the
status. As the command is a very simple one, it is likely to have been executed immediately. Executing ts by
itself with no arguments shows the executing queue, including tasks that have completed. I then use
ts -c
to get at the stdout of the executed command. The
-c
option uses
cat
to display the
output file for a task. Using
ts -i
shows you information about the job. To clear finished jobs
from the queue, use the
ts -C
command, not shown in the example.
$ ts echo "hello world"
6
$ ts
ID State Output E-Level Times(r/u/s) Command [run=0/1]
6 finished /tmp/ts-out.QoKfo9 0 0.00/0.00/0.00 echo hello world
The
-t
option operates like
tail -f
, showing you the last few lines of output and
continuing to show you any new output from the task. If you would like to be notified when a task has
completed, you can use the
-m
option to have the results mailed to you, or you can queue another
command to be executed that just performs the notification. For example, I might add a tar command and want to
know when it has completed. The below commands will create a tarball and use
libnotify
commands to create an
inobtrusive popup window on my desktop when the tarball creation is complete. The popup will be dismissed
automatically after a timeout.
$ ts tar czvf /tmp/mytarball.tar.gz liberror-2.1.80011
11
$ ts notify-send "tarball creation" "the long running tar creation process is complete."
12
$ ts
ID State Output E-Level Times(r/u/s) Command [run=0/1]
11 finished /tmp/ts-out.O6epsS 0 4.64/4.31/0.29 tar czvf /tmp/mytarball.tar.gz liberror-2.1.80011
12 finished /tmp/ts-out.4KbPSE 0 0.05/0.00/0.02 notify-send tarball creation the long... is complete.
Notice in the output above, toward the far right of the header information, the
run=0/1
line.
This tells you that Task Spooler is executing nothing, and can possibly execute one task. Task spooler allows
you to execute multiple tasks at once from your task queue to take advantage of multicore CPUs. The
-S
option allows you to set how many tasks can be executed in parallel from the queue, as shown below.
$ ts -S 2
$ ts
ID State Output E-Level Times(r/u/s) Command [run=0/2]
6 finished /tmp/ts-out.QoKfo9 0 0.00/0.00/0.00 echo hello world
If you have two tasks that you want to execute with Task Spooler but one depends on the other having already
been executed (and perhaps that the previous job has succeeded too) you can handle this by having one task wait
for the other to complete before executing. This becomes more important on a quad core machine when you might
have told Task Spooler that it can execute three tasks in parallel. The commands shown below create an explicit
dependency, making sure that the second command is executed only if the first has completed successfully, even
when the queue allows multiple tasks to be executed. The first command is queued normally using
ts
.
I use a subshell to execute the commands by having
ts
explicitly start a new bash shell. The
second command uses the
-d
option, which tells
ts
to execute the command only after
the successful completion of the last command that was appended to the queue. When I first inspect the queue I
can see that the first command (28) is executing. The second command is queued but has not been added to the
list of executing tasks because Task Spooler is aware that it cannot execute until task 28 is complete. The
second time I view the queue, both tasks have completed.
$ ts bash -c "sleep 10; echo hi"
28
$ ts -d echo there
29
$ ts
ID State Output E-Level Times(r/u/s) Command [run=1/2]
28 running /tmp/ts-out.hKqDva bash -c sleep 10; echo hi
29 queued (file) && echo there
$ ts
ID State Output E-Level Times(r/u/s) Command [run=0/2]
28 finished /tmp/ts-out.hKqDva 0 10.01/0.00/0.01 bash -c sleep 10; echo hi
29 finished /tmp/ts-out.VDtVp7 0 0.00/0.00/0.00 && echo there
$ cat /tmp/ts-out.hKqDva
hi
$ cat /tmp/ts-out.VDtVp7
there
You can also explicitly set dependencies on other tasks as shown below. Because the
ts
command
prints the ID of a new task to the console, the first command puts that ID into a shell variable for use in the
second command. The second command passes the task ID of the first task to ts, telling it to wait for the task
with that ID to complete before returning. Because this is joined with the command we wish to execute with the
&&
operation, the second command will execute only if the first one has finished
and
succeeded.
The first time we view the queue you can see that both tasks are running. The first task will be in the
sleep
command that we used explicitly to slow down its execution. The second command will be
executing
ts
, which will be waiting for the first task to complete. One downside of tracking
dependencies this way is that the second command is added to the running queue even though it cannot do
anything until the first task is complete.
$ FIRST_TASKID=`ts bash -c "sleep 10; echo hi"`
$ ts sh -c "ts -w $FIRST_TASKID && echo there"
25
$ ts
ID State Output E-Level Times(r/u/s) Command [run=2/2]
24 running /tmp/ts-out.La9Gmz bash -c sleep 10; echo hi
25 running /tmp/ts-out.Zr2n5u sh -c ts -w 24 && echo there
$ ts
ID State Output E-Level Times(r/u/s) Command [run=0/2]
24 finished /tmp/ts-out.La9Gmz 0 10.01/0.00/0.00 bash -c sleep 10; echo hi
25 finished /tmp/ts-out.Zr2n5u 0 9.47/0.00/0.01 sh -c ts -w 24 && echo there
$ ts -c 24
hi
$ ts -c 25
there
Wrap-up
Task Spooler allows you to convert a shell command to a queued command by simply prepending
ts
to the command line. One major advantage of using ts over something like the
at
command is that
you can effectively run
tail -f
on the output of a running task and also get at the output of
completed tasks from the command line. The utility's ability to execute multiple tasks in parallel is very
handy if you are running on a multicore CPU. Because you can explicitly wait for a task, you can set up very
complex interactions where you might have several tasks running at once and have jobs that depend on multiple
other tasks to complete successfully before they can execute.
Because you can make explicitly dependant tasks take up slots in the actively running task queue, you can
effectively delay the execution of the queue until a time of your choosing. For example, if you queue up a task
that waits for a specific time before returning successfully and have a small group of other tasks that are
dependent on this first task to complete, then no tasks in the queue will execute until the first task
completes.
Run the commands listed in the ' my-at-jobs.txt ' file at 1:35 AM. All output from the job will be mailed to the
user running the task. When this command has been successfully entered you should receive a prompt similar to the example below:
commands will be executed using /bin/sh
job 1 at Wed Dec 24 00:22:00 2014
at -l
This command will list each of the scheduled jobs in a format like the following:
1 Wed Dec 24 00:22:00 2003
...this is the same as running the command atq .
at -r 1
Deletes job 1 . This command is the same as running the command atrm 1 .
atrm 23
Deletes job 23. This command is the same as running the command at -r 23 .
But processing each line until the command is finished then moving to the next one is very
time consuming, I want to process for instance 20 lines at once then when they're finished
another 20 lines are processed.
I thought of wget LINK1 >/dev/null 2>&1 & to send the command
to the background and carry on, but there are 4000 lines here this means I will have
performance issues, not to mention being limited in how many processes I should start at the
same time so this is not a good idea.
One solution that I'm thinking of right now is checking whether one of the commands is
still running or not, for instance after 20 lines I can add this loop:
Of course in this case I will need to append & to the end of the line! But I'm feeling
this is not the right way to do it.
So how do I actually group each 20 lines together and wait for them to finish before going
to the next 20 lines, this script is dynamically generated so I can do whatever math I want
on it while it's being generated, but it DOES NOT have to use wget, it was just an example so
any solution that is wget specific is not gonna do me any good.
wait is the right answer here, but your while [ $(ps would be much
better written while pkill -0 $KEYWORD – using proctools that is, for legitimate reasons to
check if a process with a specific name is still running. – kojiro
Oct 23 '13 at 13:46
I think this question should be re-opened. The "possible duplicate" QA is all about running a
finite number of programs in parallel. Like 2-3 commands. This question, however, is
focused on running commands in e.g. a loop. (see "but there are 4000 lines"). –
VasyaNovikov
Jan 11 at 19:01
@VasyaNovikov Have you readall the answers to both this question and the
duplicate? Every single answer to this question here, can also be found in the answers to the
duplicate question. That is precisely the definition of a duplicate question. It makes
absolutely no difference whether or not you are running the commands in a loop. –
robinCTS
Jan 11 at 23:08
@robinCTS there are intersections, but questions themselves are different. Also, 6 of the
most popular answers on the linked QA deal with 2 processes only. – VasyaNovikov
Jan 12 at 4:09
I recommend reopening this question because its answer is clearer, cleaner, better, and much
more highly upvoted than the answer at the linked question, though it is three years more
recent. – Dan Nissenbaum
Apr 20 at 15:35
For the above example, 4 processes process1 .. process4 would be
started in the background, and the shell would wait until those are completed before starting
the next set ..
Wait until the child process specified by each process ID pid or job specification
jobspec exits and return the exit status of the last command waited for. If a job spec is
given, all processes in the job are waited for. If no arguments are given, all currently
active child processes are waited for, and the return status is zero. If neither jobspec
nor pid specifies an active child process of the shell, the return status is 127.
So basically i=0; waitevery=4; for link in "${links[@]}"; do wget "$link" & ((
i++%waitevery==0 )) && wait; done >/dev/null 2>&1 – kojiro
Oct 23 '13 at 13:48
Unless you're sure that each process will finish at the exact same time, this is a bad idea.
You need to start up new jobs to keep the current total jobs at a certain cap .... parallel is the answer.
– rsaw
Jul 18 '14 at 17:26
I've tried this but it seems that variable assignments done in one block are not available in
the next block. Is this because they are separate processes? Is there a way to communicate
the variables back to the main process? – Bobby
Apr 27 '17 at 7:55
This is better than using wait , since it takes care of starting new jobs as old
ones complete, instead of waiting for an entire batch to finish before starting the next.
– chepner
Oct 23 '13 at 14:35
For example, if you have the list of links in a file, you can do cat list_of_links.txt
| parallel -j 4 wget {} which will keep four wget s running at a time.
– Mr.
Llama
Aug 13 '15 at 19:30
I am using xargs to call a python script to process about 30 million small
files. I hope to use xargs to parallelize the process. The command I am using
is:
Basically, Convert.py will read in a small json file (4kb), do some
processing and write to another 4kb file. I am running on a server with 40 CPU cores. And no
other CPU-intense process is running on this server.
By monitoring htop (btw, is there any other good way to monitor the CPU performance?), I
find that -P 40 is not as fast as expected. Sometimes all cores will freeze and
decrease almost to zero for 3-4 seconds, then will recover to 60-70%. Then I try to decrease
the number of parallel processes to -P 20-30 , but it's still not very fast. The
ideal behavior should be linear speed-up. Any suggestions for the parallel usage of xargs
?
You are most likely hit by I/O: The system cannot read the files fast enough. Try starting
more than 40: This way it will be fine if some of the processes have to wait for I/O. –
Ole Tange
Apr 19 '15 at 8:45
I second @OleTange. That is the expected behavior if you run as many processes as you have
cores and your tasks are IO bound. First the cores will wait on IO for their task (sleep),
then they will process, and then repeat. If you add more processes, then the additional
processes that currently aren't running on a physical core will have kicked off parallel IO
operations, which will, when finished, eliminate or at least reduce the sleep periods on your
cores. – PSkocik
Apr 19 '15 at 11:41
1- Do you have hyperthreading enabled? 2- in what you have up there, log.txt is actually
overwritten with each call to convert.py ... not sure if this is the intended behavior or
not. – Bichoy
Apr 20 '15 at 3:32
I'd be willing to bet that your problem is python . You didn't say what kind of processing is
being done on each file, but assuming you are just doing in-memory processing of the data,
the running time will be dominated by starting up 30 million python virtual machines
(interpreters).
If you can restructure your python program to take a list of files, instead of just one,
you will get a huge improvement in performance. You can then still use xargs to further
improve performance. For example, 40 processes, each processing 1000 files:
This isn't to say that python is a bad/slow language; it's just not optimized for startup
time. You'll see this with any virtual machine-based or interpreted language. Java, for
example, would be even worse. If your program was written in C, there would still be a cost
of starting a separate operating system process to handle each file, but it would be much
less.
From there you can fiddle with -P to see if you can squeeze out a bit more
speed, perhaps by increasing the number of processes to take advantage of idle processors
while data is being read/written.
What is the constraint on each job? If it's I/O you can probably get away with
multiple jobs per CPU core up till you hit the limit of I/O, but if it's CPU intensive, its
going to be worse than pointless running more jobs concurrently than you have CPU cores.
My understanding of these things is that GNU Parallel would give you better control over
the queue of jobs etc.
As others said, check whether you're I/O-bound. Also, xargs' man page suggests using
-n with -P , you don't mention the number of
Convert.py processes you see running in parallel.
As a suggestion, if you're I/O-bound, you might try using an SSD block device, or try
doing the processing in a tmpfs (of course, in this case you should check for enough memory,
avoiding swap due to tmpfs pressure (I think), and the overhead of copying the data to it in
the first place).
I want the ability to schedule commands to be run in a FIFO queue. I DON'T want them to be
run at a specified time in the future as would be the case with the "at" command. I want them
to start running now, but not simultaneously. The next scheduled command in the queue should
be run only after the first command finishes executing. Alternatively, it would be nice if I
could specify a maximum number of commands from the queue that could be run simultaneously;
for example if the maximum number of simultaneous commands is 2, then only at most 2 commands
scheduled in the queue would be taken from the queue in a FIFO manner to be executed, the
next command in the remaining queue being started only when one of the currently 2 running
commands finishes.
I've heard task-spooler could do something like this, but this package doesn't appear to
be well supported/tested and is not in the Ubuntu standard repositories (Ubuntu being what
I'm using). If that's the best alternative then let me know and I'll use task-spooler,
otherwise, I'm interested to find out what's the best, easiest, most tested, bug-free,
canonical way to do such a thing with bash.
UPDATE:
Simple solutions like ; or && from bash do not work. I need to schedule these
commands from an external program, when an event occurs. I just don't want to have hundreds
of instances of my command running simultaneously, hence the need for a queue. There's an
external program that will trigger events where I can run my own commands. I want to handle
ALL triggered events, I don't want to miss any event, but I also don't want my system to
crash, so that's why I want a queue to handle my commands triggered from the external
program.
That will list the directory. Only after ls has run it will run touch
test which will create a file named test. And only after that has finished it will run
the next command. (In this case another ls which will show the old contents and
the newly created file).
Similar commands are || and && .
; will always run the next command.
&& will only run the next command it the first returned success.
Example: rm -rf *.mp3 && echo "Success! All MP3s deleted!"
|| will only run the next command if the first command returned a failure
(non-zero) return value. Example: rm -rf *.mp3 || echo "Error! Some files could not be
deleted! Check permissions!"
If you want to run a command in the background, append an ampersand ( &
).
Example: make bzimage & mp3blaster sound.mp3 make mytestsoftware ; ls ; firefox ; make clean
Will run two commands int he background (in this case a kernel build which will take some
time and a program to play some music). And in the foregrounds it runs another compile job
and, once that is finished ls, firefox and a make clean (all sequentially)
For more details, see man bash
[Edit after comment]
in pseudo code, something like this?
Program run_queue:
While(true)
{
Wait_for_a_signal();
While( queue not empty )
{
run next command from the queue.
remove this command from the queue.
// If commands where added to the queue during execution then
// the queue is not empty, keep processing them all.
}
// Queue is now empty, returning to wait_for_a_signal
}
//
// Wait forever on commands and add them to a queue
// Signal run_quueu when something gets added.
//
program add_to_queue()
{
While(true)
{
Wait_for_event();
Append command to queue
signal run_queue
}
}
The easiest way would be to simply run the commands sequentially:
cmd1; cmd2; cmd3; cmdN
If you want the next command to run only if the previous command exited
successfully, use && :
cmd1 && cmd2 && cmd3 && cmdN
That is the only bash native way I know of doing what you want. If you need job control
(setting a number of parallel jobs etc), you could try installing a queue manager such as
TORQUE but that
seems like overkill if all you want to do is launch jobs sequentially.
You are looking for at 's twin brother: batch . It uses the same
daemon but instead of scheduling a specific time, the jobs are queued and will be run
whenever the system load average is low.
Apart from dedicated queuing systems (like the Sun Grid Engine ) which you can also
use locally on one machine and which offer dozens of possibilities, you can use something
like
command1 && command2 && command3
which is the other extreme -- a very simple approach. The latter neither does provide
multiple simultaneous processes nor gradually filling of the "queue".
task spooler is a Unix batch system where the tasks spooled run one after the other. The
amount of jobs to run at once can be set at any time. Each user in each system has his own
job queue. The tasks are run in the correct context (that of enqueue) from any shell/process,
and its output/results can be easily watched. It is very useful when you know that your
commands depend on a lot of RAM, a lot of disk use, give a lot of output, or for whatever
reason it's better not to run them all at the same time, while you want to keep your
resources busy for maximum benfit. Its interface allows using it easily in scripts.
For your first contact, you can read an article at linux.com , which I like
as overview, guide and
examples(original url) .
On more advanced usage, don't neglect the TRICKS file in the package.
Features
I wrote Task Spooler because I didn't have any comfortable way of running batch
jobs in my linux computer. I wanted to:
Queue jobs from different terminals.
Use it locally in my machine (not as in network queues).
Have a good way of seeing the output of the processes (tail, errorlevels, ...).
Easy use: almost no configuration.
Easy to use in scripts.
At the end, after some time using and developing ts , it can do something
more:
It works in most systems I use and some others, like GNU/Linux, Darwin, Cygwin, and
FreeBSD.
No configuration at all for a simple queue.
Good integration with renice, kill, etc. (through `ts -p` and process
groups).
Have any amount of queues identified by name, writting a simple wrapper script for each
(I use ts2, tsio, tsprint, etc).
Control how many jobs may run at once in any queue (taking profit of multicores).
It never removes the result files, so they can be reached even after we've lost the
ts task list.
I created a GoogleGroup for the program. You look for the archive and the join methods in
the taskspooler google
group page .
Alessandro Öhler once maintained a mailing list for discussing newer functionalities
and interchanging use experiences. I think this doesn't work anymore , but you can
look at the old archive
or even try to subscribe .
How
it works
The queue is maintained by a server process. This server process is started if it isn't
there already. The communication goes through a unix socket usually in /tmp/ .
When the user requests a job (using a ts client), the client waits for the server message to
know when it can start. When the server allows starting , this client usually forks, and runs
the command with the proper environment, because the client runs run the job and not
the server, like in 'at' or 'cron'. So, the ulimits, environment, pwd,. apply.
When the job finishes, the client notifies the server. At this time, the server may notify
any waiting client, and stores the output and the errorlevel of the finished job.
Moreover the client can take advantage of many information from the server: when a job
finishes, where does the job output go to, etc.
Download
Download the latest version (GPLv2+ licensed): ts-1.0.tar.gz - v1.0
(2016-10-19) - Changelog
Look at the version repository if you are
interested in its development.
Андрей
Пантюхин (Andrew Pantyukhin) maintains the
BSD port .
Eric Keller wrote a nodejs web server showing the status of the task spooler queue (
github project
).
Manual
Look at its manpage (v0.6.1). Here you also
have a copy of the help for the same version:
usage: ./ts [action] [-ngfmd] [-L <lab>] [cmd...]
Env vars:
TS_SOCKET the path to the unix socket used by the ts command.
TS_MAILTO where to mail the result (on -m). Local user by default.
TS_MAXFINISHED maximum finished jobs in the queue.
TS_ONFINISH binary called on job end (passes jobid, error, outfile, command).
TS_ENV command called on enqueue. Its output determines the job information.
TS_SAVELIST filename which will store the list, if the server dies.
TS_SLOTS amount of jobs which can run at once, read on server start.
Actions:
-K kill the task spooler server
-C clear the list of finished jobs
-l show the job list (default action)
-S [num] set the number of max simultanious jobs of the server.
-t [id] tail -f the output of the job. Last run if not specified.
-c [id] cat the output of the job. Last run if not specified.
-p [id] show the pid of the job. Last run if not specified.
-o [id] show the output file. Of last job run, if not specified.
-i [id] show job information. Of last job run, if not specified.
-s [id] show the job state. Of the last added, if not specified.
-r [id] remove a job. The last added, if not specified.
-w [id] wait for a job. The last added, if not specified.
-u [id] put that job first. The last added, if not specified.
-U <id-id> swap two jobs in the queue.
-h show this help
-V show the program version
Options adding jobs:
-n don't store the output of the command.
-g gzip the stored output (if not -n).
-f don't fork into background.
-m send the output by e-mail (uses sendmail).
-d the job will be run only if the job before ends well
-L <lab> name this task with a label, to be distinguished on listing.
Thanks
To Raúl Salinas, for his inspiring ideas
To Alessandro Öhler, the first non-acquaintance user, who proposed and created the
mailing list.
Андрею
Пантюхину, who created the BSD
port .
To the useful, although sometimes uncomfortable, UNIX interface.
To Alexander V. Inyukhin, for the debian packages.
To Pascal Bleser, for the SuSE packages.
To Sergio Ballestrero, who sent code and motivated the development of a multislot version
of ts.
To GNU, an ugly but working and helpful ol' UNIX implementation.
I'm trying to use xargs in a shell script to run parallel instances of a function I've
defined in the same script. The function times the fetching of a page, and so it's important
that the pages are actually fetched concurrently in parallel processes, and not in background
processes (if my understanding of this is wrong and there's negligible difference between the
two, just let me know).
The function is:
function time_a_url ()
{
oneurltime=$($time_command -p wget -p $1 -O /dev/null 2>&1 1>/dev/null | grep real | cut -d" " -f2)
echo "Fetching $1 took $oneurltime seconds."
}
How does one do this with an xargs pipe in a form that can take number of times to run
time_a_url in parallel as an argument? And yes, I know about GNU parallel, I just don't have
the privilege to install software where I'm writing this.
The keys to making this work are to export the function so the
bash that xargs spawns will see it and to escape the space between
the function name and the escaped braces. You should be able to adapt this to work in your
situation. You'll need to adjust the arguments for -P and -n (or
remove them) to suit your needs.
You can probably get rid of the grep and cut . If you're using
the Bash builtin time , you can specify an output format using the
TIMEFORMAT variable. If you're using GNU /usr/bin/time , you can
use the --format argument. Either of these will allow you to drop the
-p also.
You can replace this part of your wget command: 2>&1
1>/dev/null with -q . In any case, you have those reversed. The
correct order would be >/dev/null 2>&1 .
If you already know you want it, get it here:
parsync+utils.tar.gz (contains parsync
plus the kdirstat-cache-writer , stats , and scut utilities below) Extract it into a dir on your $PATH and after
verifying the other dependencies below, give it a shot.
While parsync is developed for and test on Linux, the latest version of parsync has been modified to (mostly) work on the Mac
(tested on OSX 10.9.5). A number of the Linux-specific dependencies have been removed and there are a number of Mac-specific work
arounds.
Thanks to Phil Reese < [email protected] > for the code mods needed to get it started.
It's the same package and instructions for both platforms.
2. Dependencies
parsync requires the following utilities to work:
stats - self-writ Perl utility for providing
descriptive stats on STDIN
scut - self-writ Perl utility like cut
that allows regex split tokens
kdirstat-cache-writer (included in the tarball mentioned above), requires a
parsync needs to be installed only on the SOURCE end of the transfer and uses whatever rsync is available on the TARGET.
It uses a number of Linux- specific utilities so if you're transferring between Linux and a FreeBSD host, install parsync on the
Linux side. In fact, as currently written, it will only PUSH data to remote targets ; it will not pull data as rsync itself
can do. This will probably in the near future. 3. Overviewrsync is
a fabulous data mover. Possibly more bytes have been moved (or have been prevented from being moved) by rsync than by any other application.
So what's not to love? For transferring large, deep file trees, rsync will pause while it generates lists of files to process. Since
Version 3, it does this pretty fast, but on sluggish filesystems, it can take hours or even days before it will start to actually
exchange rsync data. Second, due to various bottlenecks, rsync will tend to use less than the available bandwidth on high speed networks.
Starting multiple instances of rsync can improve this significantly. However, on such transfers, it is also easy to overload the
available bandwidth, so it would be nice to both limit the bandwidth used if necessary and also to limit the load on the system.
parsync tries to satisfy all these conditions and more by:
using the kdir-cache-writer
utility from the beautiful kdirstat directory browser which can
produce lists of files very rapidly
allowing re-use of the cache files so generated.
doing crude loadbalancing of the number of active rsyncs, suspending and un-suspending the processes as necessary.
using rsync's own bandwidth limiter (--bwlimit) to throttle the total bandwidth.
using rsync's own vast option selection is available as a pass-thru (tho limited to those compatible with the --files-from
option).
Only use for LARGE data transfers The main use case for parsync is really only very large data transfers thru fairly fast
network connections (>1Gb/s). Below this speed, a single rsync can saturate the connection, so there's little reason to use
parsync and in fact the overhead of testing the existence of and starting more rsyncs tends to worsen its performance on small
transfers to slightly less than rsync alone.
Beyond this introduction, parsync's internal help is about all you'll need to figure out how to use it; below is what you'll see
when you type parsync -h . There are still edge cases where parsync will fail or behave oddly, especially with small data
transfers, so I'd be happy to hear of such misbehavior or suggestions to improve it. Download the complete tarball of parsync, plus
the required utilities here: parsync+utils.tar.gz
Unpack it, move the contents to a dir on your $PATH , chmod it executable, and try it out.
parsync --help
or just
parsync
Below is what you should see:
4. parsync help
parsync version 1.67 (Mac compatibility beta) Jan 22, 2017
by Harry Mangalam <[email protected]> || <[email protected]>
parsync is a Perl script that wraps Andrew Tridgell's miraculous 'rsync' to
provide some load balancing and parallel operation across network connections
to increase the amount of bandwidth it can use.
parsync is primarily tested on Linux, but (mostly) works on MaccOSX
as well.
parsync needs to be installed only on the SOURCE end of the
transfer and only works in local SOURCE -> remote TARGET mode
(it won't allow remote local SOURCE <- remote TARGET, emitting an
error and exiting if attempted).
It uses whatever rsync is available on the TARGET. It uses a number
of Linux-specific utilities so if you're transferring between Linux
and a FreeBSD host, install parsync on the Linux side.
The only native rsync option that parsync uses is '-a' (archive) &
'-s' (respect bizarro characters in filenames).
If you need more, then it's up to you to provide them via
'--rsyncopts'. parsync checks to see if the current system load is
too heavy and tries to throttle the rsyncs during the run by
monitoring and suspending / continuing them as needed.
It uses the very efficient (also Perl-based) kdirstat-cache-writer
from kdirstat to generate lists of files which are summed and then
crudely divided into NP jobs by size.
It appropriates rsync's bandwidth throttle mechanism, using '--maxbw'
as a passthru to rsync's 'bwlimit' option, but divides it by NP so
as to keep the total bw the same as the stated limit. It monitors and
shows network bandwidth, but can't change the bw allocation mid-job.
It can only suspend rsyncs until the load decreases below the cutoff.
If you suspend parsync (^Z), all rsync children will suspend as well,
regardless of current state.
Unless changed by '--interface', it tried to figure out how to set the
interface to monitor. The transfer will use whatever interface routing
provides, normally set by the name of the target. It can also be used for
non-host-based transfers (between mounted filesystems) but the network
bandwidth continues to be (usually pointlessly) shown.
[[NB: Between mounted filesystems, parsync sometimes works very poorly for
reasons still mysterious. In such cases (monitor with 'ifstat'), use 'cp'
or 'tnc' (https://goo.gl/5FiSxR) for the initial data movement and a single
rsync to finalize. I believe the multiple rsync chatter is interfering with
the transfer.]]
It only works on dirs and files that originate from the current dir (or
specified via "--rootdir"). You cannot include dirs and files from
discontinuous or higher-level dirs.
** the ~/.parsync files **
The ~/.parsync dir contains the cache (*.gz), the chunk files (kds*), and the
time-stamped log files. The cache files can be re-used with '--reusecache'
(which will re-use ALL the cache and chunk files. The log files are
datestamped and are NOT overwritten.
** Odd characters in names **
parsync will sometimes refuse to transfer some oddly named files, altho
recent versions of rsync allow the '-s' flag (now a parsync default)
which tries to respect names with spaces and properly escaped shell
characters. Filenames with embedded newlines, DOS EOLs, and other
odd chars will be recorded in the log files in the ~/.parsync dir.
** Because of the crude way that files are chunked, NP may be
adjusted slightly to match the file chunks. ie '--NP 8' -> '--NP 7'.
If so, a warning will be issued and the rest of the transfer will be
automatically adjusted.
OPTIONS
=======
[i] = integer number
[f] = floating point number
[s] = "quoted string"
( ) = the default if any
--NP [i] (sqrt(#CPUs)) ............... number of rsync processes to start
optimal NP depends on many vars. Try the default and incr as needed
--startdir [s] (`pwd`) .. the directory it works relative to. If you omit
it, the default is the CURRENT dir. You DO have
to specify target dirs. See the examples below.
--maxbw [i] (unlimited) .......... in KB/s max bandwidth to use (--bwlimit
passthru to rsync). maxbw is the total BW to be used, NOT per rsync.
--maxload [f] (NP+2) ........ max total system load - if sysload > maxload,
sleeps an rsync proc for 10s
--checkperiod [i] (5) .......... sets the period in seconds between updates
--rsyncopts [s] ... options passed to rsync as a quoted string (CAREFUL!)
this opt triggers a pause before executing to verify the command.
--interface [s] ............. network interface to /monitor/, not nec use.
default: `/sbin/route -n | grep "^0.0.0.0" | rev | cut -d' ' -f1 | rev`
above works on most simple hosts, but complex routes will confuse it.
--reusecache .......... don't re-read the dirs; re-use the existing caches
--email [s] ..................... email address to send completion message
(requires working mail system on host)
--barefiles ..... set to allow rsync of individual files, as oppo to dirs
--nowait ................ for scripting, sleep for a few s instead of wait
--version ................................. dumps version string and exits
--help ......................................................... this help
Examples
========
-- Good example 1 --
% parsync --maxload=5.5 --NP=4 --startdir='/home/hjm' dir1 dir2 dir3
hjm@remotehost:~/backups
where
= "--startdir='/home/hjm'" sets the working dir of this operation to
'/home/hjm' and dir1 dir2 dir3 are subdirs from '/home/hjm'
= the target "hjm@remotehost:~/backups" is the same target rsync would use
= "--NP=4" forks 4 instances of rsync
= -"-maxload=5.5" will start suspending rsync instances when the 5m system
load gets to 5.5 and then unsuspending them when it goes below it.
It uses 4 instances to rsync dir1 dir2 dir3 to hjm@remotehost:~/backups
-- Good example 2 --
% parsync --rsyncopts="--ignore-existing" --reusecache --NP=3
--barefiles *.txt /mount/backups/txt
where
= "--rsyncopts='--ignore-existing'" is an option passed thru to rsync
telling it not to disturb any existing files in the target directory.
= "--reusecache" indicates that the filecache shouldn't be re-generated,
uses the previous filecache in ~/.parsync
= "--NP=3" for 3 copies of rsync (with no "--maxload", the default is 4)
= "--barefiles" indicates that it's OK to transfer barefiles instead of
recursing thru dirs.
= "/mount/backups/txt" is the target - a local disk mount instead of a network host.
It uses 3 instances to rsync *.txt from the current dir to "/mount/backups/txt".
-- Error Example 1 --
% pwd
/home/hjm # executing parsync from here
% parsync --NP4 --compress /usr/local /media/backupdisk
why this is an error:
= '--NP4' is not an option (parsync will say "Unknown option: np4")
It should be '--NP=4'
= if you were trying to rsync '/usr/local' to '/media/backupdisk',
it will fail since there is no /home/hjm/usr/local dir to use as
a source. This will be shown in the log files in
~/.parsync/rsync-logfile-<datestamp>_#
as a spew of "No such file or directory (2)" errors
= the '--compress' is a native rsync option, not a native parsync option.
You have to pass it to rsync with "--rsyncopts='--compress'"
The correct version of the above command is:
% parsync --NP=4 --rsyncopts='--compress' --startdir=/usr local
/media/backupdisk
-- Error Example 2 --
% parsync --start-dir /home/hjm mooslocal [email protected]:/usr/local
why this is an error:
= this command is trying to PULL data from a remote SOURCE to a
local TARGET. parsync doesn't support that kind of operation yet.
The correct version of the above command is:
# ssh to hjm@moo, install parsync, then:
% parsync --startdir=/usr local hjm@remote:/home/hjm/mooslocal
We've only just scratched the surface of GNU Parallel. I highly recommend you give the
official GNU Parallel tutorial a
read, and watch this video tutorial series
on Yutube , so you can understand the complexities of the tool (of which there are many).
But this will get you started on a path to helping your data center Linux servers use commands
with more efficiency.
I have been using a rsync script to synchronize data at one host with the data
at another host. The data has numerous small-sized files that contribute to almost 1.2TB.
In order to sync those files, I have been using rsync command as follows:
As a test, I picked up two of those projects (8.5GB of data) and I executed the command
above. Being a sequential process, it tool 14 minutes 58 seconds to complete. So, for 1.2TB
of data it would take several hours.
If I would could multiple rsync processes in parallel (using
& , xargs or parallel ), it would save my
time.
I tried with below command with parallel (after cd ing to source
directory) and it took 12 minutes 37 seconds to execute:
If possible, we would want to use 50% of total bandwidth. But, parallelising multiple
rsync s is our first priority. – Mandar Shinde
Mar 13 '15 at 7:32
In fact, I do not know about above parameters. For the time being, we can neglect the
optimization part. Multiple rsync s in parallel is the primary focus now.
– Mandar Shinde
Mar 13 '15 at 7:47
Here, --relative option ( link
) ensured that the directory structure for the affected files, at the source and destination,
remains the same (inside /data/ directory), so the command must be run in the
source folder (in example, /data/projects ).
That would do an rsync per file. It would probably be more efficient to split up the whole
file list using split and feed those filenames to parallel. Then use rsync's
--files-from to get the filenames out of each file and sync them. rm backups.*
split -l 3000 backup.list backups. ls backups.* | parallel --line-buffer --verbose -j 5 rsync
--progress -av --files-from {} /LOCAL/PARENT/PATH/ REMOTE_HOST:REMOTE_PATH/ –
Sandip Bhattacharya
Nov 17 '16 at 21:22
How does the second rsync command handle the lines in result.log that are not files? i.e.
receiving file list ... donecreated directory /data/ . –
Mike D
Sep 19 '17 at 16:42
On newer versions of rsync (3.1.0+), you can use --info=name in place of
-v , and you'll get just the names of the files and directories. You may want to
use --protect-args to the 'inner' transferring rsync too if any files might have spaces or
shell metacharacters in them. – Cheetah
Oct 12 '17 at 5:31
I would strongly discourage anybody from using the accepted answer, a better solution is to
crawl the top level directory and launch a proportional number of rync operations.
I have a large zfs volume and my source was was a cifs mount. Both are linked with 10G,
and in some benchmarks can saturate the link. Performance was evaluated using zpool
iostat 1 .
The source drive was mounted like:
mount -t cifs -o username=,password= //static_ip/70tb /mnt/Datahoarder_Mount/ -o vers=3.0
This in synthetic benchmarks (crystal disk), performance for sequential write approaches
900 MB/s which means the link is saturated. 130MB/s is not very good, and the difference
between waiting a weekend and two weeks.
So, I built the file list and tried to run the sync again (I have a 64 core machine):
In conclusion, as @Sandip Bhattacharya brought up, write a small script to get the
directories and parallel that. Alternatively, pass a file list to rsync. But don't create new
instances for each file.
ls -1 | parallel rsync -a {} /destination/directory/
Which only is usefull when you have more than a few non-near-empty directories, else
you'll end up having almost every rsync terminating and the last one doing all
the job alone.
rsync is a great tool, but sometimes it will not fill up the available bandwidth. This
is often a problem when copying several big files over high speed connections.
The following will start one rsync per big file in src-dir to dest-dir on the server
fooserver:
If I use --dry-run option in rsync , I would have a list of files
that would be transferred. Can I provide that file list to parallel in order to
parallelise the process? – Mandar Shinde
Apr 10 '15 at 3:47
rsync is a great tool, but sometimes it will not fill up the available bandwidth.
This is often a problem when copying several big files over high speed connections.
The following will start one rsync per big file in src-dir to dest-dir
on the server fooserver :
That's a great point to consider among all of this. Compression is always a tradeoff between how much CPU and memory you want
to throw at something and how much space you would like to save. In my case, hammering the server for 3 minutes in order to take
a backup is necessary because the uncompressed data would bottleneck at the LAN speed.
You might want to play with 'pigz' - it's gzip, multi-threaded. You can 'pv' to restrict the rate of the output, and it accepts
signals to control the rate limiting.
With -9 you can surely make backup CPU bound. I've given up on compression though: rsync is much faster than straight backup
and I use btrfs compression/deduplication/snapshotting on the backup server.
I'm running gzip, bzip2, and pbzip2 now (not at the same time, of course) and will add results soon. But in my case the compression
keeps my db dumps from being IO bound by the 100mbit LAN connection. For example, lzop in the results above puts out 6041.632
megabits in 53.82 seconds for a total compressed data rate of 112 megabits per second, which would make the transfer IO bound.
Whereas the pigz example puts out 3339.872 megabits in 81.892 seconds, for an output data rate of 40.8 megabits per second. This
is just on my dual-core box with a static file, on the 8-core server I see the transfer takes a total of about three minutes.
It's probably being limited more by the rate at which the MySQL server can dump text from the database, but if there was no compression
it'd be limited by the LAN speed. If we were dumping 2.7GB over the LAN directly, we would need 122mbit/s of real throughput to
complete it in three minutes.
xz archives use the LZMA2 format (which is also used in 7z archives). LZMA2 speed seems to range from a little slower than gzip
to much slower than bzip2, but results in better compression all around.
However LZMA2 decompression speed is generally much faster than bzip2, in my experience, though not as fast as gzip.
This is why we use it, as we decompress our data much more often than we compress it, and the space saving/decompression speed
tradeoff is much more favorable for us than either gzip of bzip2.
I mentioned how 7zip was superior to all other zip programs in /r/osx
a few days ago and my comment was burried in favor of the the osx circlejerk .. it feels good seeing this data.
Why... Tar supports xz, lzma, lzop, lzip, and any other kernel based compression algorithms. Its also much more likely to be preinstalled
on your given distro.
I've used 7zip at my old job for a backup of our business software's database. We needed speed, high level of compression, and
encryption. Portability wasn't high on the list since only a handful of machines needed access to the data. All machines were
multi-processor and 7zip gave us the best of everything given the requirements. I haven't really looked at anything deeply - including
tar, which my old boss didn't care for.
Summary : Very high compression ratio file archiver
Description :
p7zip is a port of 7za.exe for Unix. 7-Zip is a file archiver with a very high
compression ratio. The original version can be found at http://www.7-zip.org/.
RPM found in directory: /mirror/apt.sw.be/redhat/el6/en/x86_64/rpmforge/RPMS
There are certain file sizes were pigz makes no difference, in general you need at least 2
cores to feel the benefits, there are quite a few reasons. That being said, pigz and its bzip
counterpart pbzip2 can be symlinked in place when emerged with gentoo and using the "symlink"
use flag.
adam@eggsbenedict ~ $ eix pigz
[I] app-arch/pigz
Available versions: 2.2.5 2.3 2.3.1 (~)2.3.1-r1 {static symlink |test}
Installed versions: 2.3.1-r1(02:06:01 01/25/14)(symlink -static -|test)
Homepage: http://www.zlib.net/pigz/
Description: A parallel implementation of gzip
You can, but often shouldn't. I can only speak for vmware here, other hypervisors may work
differently. Generally you want to size your VMware vm's so that they are around 80% cpu
utilization. When any VM with multiple cores needs compute power the hypervisor will make it
wait to until it can free that number of CPUs, even if the task in the VM only needs one
core. This makes the multi-core VM slower by having to wait longer to do it's work, as well
as makes other VMs on the hypervisor slower as they must all wait for it to finish before
they can get a core allocated.
Posted on January
26, 2015 by Sandeep Shenoy This topic is not
Solaris specific, but certainly helps Solaris users who are frustrated with the single threaded
implementation of all officially supported compression tools such as compress, gzip, zip.
pigz(pig-zee) is a parallel
implementation of gzip that suits well for the latest multi-processor, multi-core machines. By
default, pigz breaks up the input into multiple chunks of size 128 KB, and compress each chunk
in parallel with the help of light-weight threads. The number of compress threads is set by
default to the number of online processors. The chunk size and the number of threads are
configurable. Compressed files can be restored to their original form using -d option of pigz
or gzip tools. As per the man page, decompression is not parallelized out of the box, but may
show some improvement compared to the existing old tools. The following example demonstrates
the advantage of using pigz over gzip in compressing and decompressing a large file. eg.,
Original file, and the target hardware. $ ls -lh PT8.53.04.tar -rw-r–r– 1 psft dba
4.8G Feb 28 14:03 PT8.53.04.tar
$ psrinfo -pv The physical processor has 8 cores and 64 virtual processors (0-63) The core has
8 virtual processors (0-7) The core has 8 virtual processors (56-63) SPARC-T5 (chipid 0, clock
3600 MHz)
gzip compression.
$ time gzip –fast PT8.53.04.tar
real 3m40.125s user 3m27.105s sys 0m13.008s
$ ls -lh PT8.53* -rw-r–r– 1 psft dba 3.1G Feb 28 14:03 PT8.53.04.tar.gz /* the
following prstat, vmstat outputs show that gzip is compressing thetar file using a
single thread – hence low CPU utilization. */
$ prstat -p 42510 PID USERNAME SIZE RSS STATE PRI NICE TIME CPU PROCESS/NLWP 42510 psft 2616K
2200K cpu16 10 0 0:01:00 1.5% gzip/ 1
pigz compression. $ time ./pigz PT8.53.04.tar real 0m25.111s <== wall clock time is
25s compared to gzip's 3m 27s
user 17m18.398s sys 0m37.718s
/* the following prstat, vmstat outputs show that pigz is compressing thetar file
using many threads – hence busy system with high CPU utilization. */
$ prstat -p 49734 PID USERNAME SIZE RSS STATE PRI NICE TIME CPU PROCESS/NLWP 49734 psft 59M 58M
sleep 11 0 0:12:58 38% pigz/ 66
$ vmstat 2 kthr memory page disk faults cpu r b w swap free re mf pi po fr de sr s0 s1 s2 s3
in sy cs us sy id 0 0 0 778097840 919076008 6 113 0 0 0 0 0 0 0 40 36 39330 45797 74148 61 4
35
0 0 0 777956280 918841720 0 1 0 0 0 0 0 0 0 0 0 38752 43292 71411 64 4 32
0 0 0 777490336 918334176 0 3 0 0 0 0 0 0 0 17 15 46553 53350 86840 60 4 35
1 0 0 777274072 918141936 0 1 0 0 0 0 0 0 0 39 34 16122 20202 28319 88 4 9
1 0 0 777138800 917917376 0 0 0 0 0 0 0 0 0 3 3 46597 51005 86673 56 5 39
$ ls -lh PT8.53.04.tar.gz -rw-r–r– 1 psft dba 3.0G Feb 28 14:03
PT8.53.04.tar.gz
$ gunzip PT8.53.04.tar.gz <== shows that the pigz compressed file iscompatible
with gzip/gunzip
$ ls -lh PT8.53* -rw-r–r– 1 psft dba 4.8G Feb 28 14:03 PT8.53.04.tar
Decompression. $ time ./pigz -d PT8.53.04.tar.gz real 0m18.068s
user 0m22.437s sys 0m12.857s
$ time gzip -d PT8.53.04.tar.gz real 0m52.806s <== compare gzip's 52s decompression time
with pigz's 18s
user 0m42.068s sys 0m10.736s
$ ls -lh PT8.53.04.tar -rw-r–r– 1 psft dba 4.8G Feb 28 14:03 PT8.53.04.tar
Of course, there are other tools such as Parallel BZIP2 (PBZIP2), which is a parallel implementation
of the bzip2 tool are worth a try too. The idea here is to highlight the fact that there are
better tools out there to get the job done in a quick manner compared to the existing/old tools
that are bundled with the operating system distribution.
Necessity is frequently the mother of invention. I knew very little about BASH scripting but
that was about to change rapidly. Working with the existing script and using online help
forums, search engines, and some printed documentation, I setup Linux network attached storage
computer running on Fedora Core. I learned how to create an SSH keypair and
configure that along with rsync to move the backup file from the email server
to the storage server. That worked well for a few days until I noticed that the storage servers
disk space was rapidly disappearing. What was I going to do?
That's when I learned more about Bash scripting. I modified my rsync command to delete
backed up files older than ten days. In both cases I learned that a little knowledge can be a
dangerous thing but in each case my experience and confidence as Linux user and system
administrator grew and due to that I functioned as a resource for other. On the plus side, we
soon realized that the disk to disk backup system was superior to tape when it came to
restoring email files. In the long run it was a win but there was a lot of uncertainty and
anxiety along the way.
So you thought you had your files backed up - until it came time to restore. Then you found out that you had bad sectors and you've
lost almost everything because gzip craps out 10% of the way through your archive. The gzip Recovery Toolkit has a program - gzrecover
- that attempts to skip over bad data in a gzip archive. This saved me from exactly the above situation. Hopefully it will help you
as well.
I'm very eager for feedback on this program . If you download and try it, I'd appreciate and email letting me know what
your results were. My email is [email protected]. Thanks.
ATTENTION
99% of "corrupted" gzip archives are caused by transferring the file via FTP in ASCII mode instead of binary mode. Please re-transfer
the file in the correct mode first before attempting to recover from a file you believe is corrupted.
Disclaimer and Warning
This program is provided AS IS with absolutely NO WARRANTY. It is not guaranteed to recover anything from your file, nor is what
it does recover guaranteed to be good data. The bigger your file, the more likely that something will be extracted from it. Also
keep in mind that this program gets faked out and is likely to "recover" some bad data. Everything should be manually verified.
Downloading and Installing
Note that version 0.8 contains major bug fixes and improvements. See the
ChangeLog for details. Upgrading is recommended.
The old version is provided in the event you run into troubles with the new release.
GNU cpio (version 2.6 or higher) - Only if your archive is a
compressed tar file and you don't already have this (try "cpio --version" to find out)
First, build and install zlib if necessary. Next, unpack the gzrt sources. Then cd to the gzrt directory and build the gzrecover
program by typing make . Install manually by copying to the directory of your choice.
Usage
Run gzrecover on a corrupted .gz file. If you leave the filename blank, gzrecover will read from the standard input. Anything
that can be read from the file will be written to a file with the same name, but with a .recovered appended (any .gz is stripped).
You can override this with the -o
To get a verbose readout of exactly where gzrecover is finding bad bytes, use the -v option to enable verbose mode. This will
probably overflow your screen with text so best to redirect the stderr stream to a file. Once gzrecover has finished, you will need
to manually verify any data recovered as it is quite likely that our output file is corrupt and has some garbage data in it. Note
that gzrecover will take longer than regular gunzip. The more corrupt your data the longer it takes. If your archive is a tarball,
read on.
For tarballs, the tar program will choke because GNU tar cannot handle errors in the file format. Fortunately, GNU cpio (tested
at version 2.6 or higher) handles corrupted files out of the box.
Here's an example:
$ ls *.gz
my-corrupted-backup.tar.gz
$ gzrecover my-corrupted-backup.tar.gz
$ ls *.recovered
my-corrupted-backup.tar.recovered
$ cpio -F my-corrupted-backup.tar.recovered -i -v
Note that newer versions of cpio can spew voluminous error messages to your terminal. You may want to redirect the stderr stream
to /dev/null. Also, cpio might take quite a long while to run.
Copyright
The gzip Recovery Toolkit v0.8
Copyright (c) 2002-2013 Aaron M. Renn ( [email protected])
Most of the time on newly created file systems of NFS filesystems we see error
like below :
1 2 3 4
root @ kerneltalks # touch file1 touch : cannot touch ' file1 ' : Read - only file
system
This is because file system is mounted as read only. In such scenario you have to mount it
in read-write mode. Before that we will see how to check if file system is mounted in read only
mode and then we will get to how to re mount it as a read write filesystem.
How to check if file system is read only
To confirm file system is mounted in read only mode use below command –
Grep your mount point in cat /proc/mounts and observer third column which shows
all options which are used in mounted file system. Here ro denotes file system is
mounted read-only.
You can also get these details using mount -v command
1 2 3 4
root @ kerneltalks # mount -v |grep datastore / dev / xvdf on / datastore type ext3 (
ro , relatime , seclabel , data = ordered )
In this output. file system options are listed in braces at last column.
Re-mount file system in read-write mode
To remount file system in read-write mode use below command –
1 2 3 4 5 6
root @ kerneltalks # mount -o remount,rw /datastore root @ kerneltalks # mount -v |grep
datastore / dev / xvdf on / datastore type ext3 ( rw , relatime , seclabel , data = ordered
)
Observe after re-mounting option ro changed to rw . Now, file
system is mounted as read write and now you can write files in it.
Note : It is recommended to fsck file system before re mounting it.
You can check file system by running fsck on its volume.
1 2 3 4 5 6 7 8 9 10
root @ kerneltalks # df -h /datastore Filesystem Size Used Avail Use % Mounted on / dev
/ xvda2 10G 881M 9.2G 9 % / root @ kerneltalks # fsck /dev/xvdf fsck from util - linux
2.23.2 e2fsck 1.42.9 ( 28 - Dec - 2013 ) / dev / xvdf : clean , 12 / 655360 files , 79696 /
2621440 blocks
Sometimes there are some corrections needs to be made on file system which needs reboot to
make sure there are no processes are accessing file system.
You can see that user has to type 'y' for each query. It's in situation like these where yes
can help. For the above scenario specifically, you can use yes in the following way:
yes | rm -ri test Q3. Is there any use of yes when it's used alone?
Yes, there's at-least one use: to tell how well a computer system handles high amount of
loads. Reason being, the tool utilizes 100% processor for systems that have a single processor.
In case you want to apply this test on a system with multiple processors, you need to run a yes
process for each processor.
There is a flag --files-from that does exactly what you want. From man
rsync :
--files-from=FILE
Using this option allows you to specify the exact list of files to transfer (as read
from the specified FILE or - for standard input). It also tweaks the default behavior of
rsync to make transferring just the specified files and directories easier:
The --relative (-R) option is implied, which preserves the path information that is
specified for each item in the file (use --no-relative or --no-R if you want to turn that
off).
The --dirs (-d) option is implied, which will create directories specified in the
list on the destination rather than noisily skipping them (use --no-dirs or --no-d if you
want to turn that off).
The --archive (-a) option's behavior does not imply --recursive (-r), so specify it
explicitly, if you want it.
These side-effects change the default state of rsync, so the position of the
--files-from option on the command-line has no bearing on how other options are parsed
(e.g. -a works the same before or after --files-from, as does --no-R and all other
options).
The filenames that are read from the FILE are all relative to the source dir -- any
leading slashes are removed and no ".." references are allowed to go higher than the source
dir. For example, take this command:
rsync -a --files-from=/tmp/foo /usr remote:/backup
If /tmp/foo contains the string "bin" (or even "/bin"), the /usr/bin directory will be
created as /backup/bin on the remote host. If it contains "bin/" (note the trailing slash),
the immediate contents of the directory would also be sent (without needing to be
explicitly mentioned in the file -- this began in version 2.6.4). In both cases, if the -r
option was enabled, that dir's entire hierarchy would also be transferred (keep in mind
that -r needs to be specified explicitly with --files-from, since it is not implied by -a).
Also note that the effect of the (enabled by default) --relative option is to duplicate
only the path info that is read from the file -- it does not force the duplication of the
source-spec path (/usr in this case).
In addition, the --files-from file can be read from the remote host instead of the local
host if you specify a "host:" in front of the file (the host must match one end of the
transfer). As a short-cut, you can specify just a prefix of ":" to mean "use the remote end
of the transfer". For example:
rsync -a --files-from=:/path/file-list src:/ /tmp/copy
This would copy all the files specified in the /path/file-list file that was located on
the remote "src" host.
If the --iconv and --protect-args options are specified and the --files-from filenames
are being sent from one host to another, the filenames will be translated from the sending
host's charset to the receiving host's charset.
NOTE: sorting the list of files in the --files-from input helps rsync to be more
efficient, as it will avoid re-visiting the path elements that are shared between adjacent
entries. If the input is not sorted, some path elements (implied directories) may end up
being scanned multiple times, and rsync will eventually unduplicate them after they get
turned into file-list elements.
Note that you still have to specify the directory where the files listed are located, for
instance: rsync -av --files-from=file-list . target/ for copying files from the
current dir. – Nicolas Mattia
Feb 11 '16 at 11:06
if the files-from file has anything starting with .. rsync appears to ignore the
.. giving me an error like rsync: link_stat
"/home/michael/test/subdir/test.txt" failed: No such file or directory (in this case
running from the "test" dir and trying to specify "../subdir/test.txt" which does exist.
– Michael
Nov 2 '16 at 0:09
xxx,
--files-from= parameter needs trailing slash if you want to keep the absolute
path intact. So your command would become something like below:
rsync -av --files-from=/path/to/file / /tmp/
This could be done like there are a large number of files and you want to copy all files
to x path. So you would find the files and throw output to a file like below:
20 Sed (Stream Editor) Command Examples for Linux Users
by Pradeep Kumar · Published November 9, 2017 · Updated
November 9, 2017
Sed command or Stream Editor is very powerful utility offered by Linux/Unix
systems. It is mainly used for text substitution , find & replace but it can also perform other text manipulations like insertion
deletion search etc. With SED, we can edit complete files without actually having to open it. Sed also supports the use of regular
expressions, which makes sed an even more powerful test manipulation tool
In this article, we will learn to use SED command with the help some examples. Basic syntax for using sed command is,
sed OPTIONS [SCRIPT] [INPUTFILE ]
Now let's see some examples.
Example :1) Displaying partial text of a file
With sed, we can view only some part of a file rather than seeing whole file. To see some lines of the file, use the following
command,
[linuxtechi@localhost ~]$ sed -n 22,29p testfile.txt
here, option 'n' suppresses printing of whole file & option 'p' will print only line lines from 22 to 29.
Example :2) Display all except some lines
To display all content of a file except for some portion, use the following command,
[linuxtechi@localhost ~]$ sed 22,29d testfile.txt
Option 'd' will remove the mentioned lines from output.
Example :3) Display every 3rd line starting with Nth line
Do display content of every 3rd line starting with line number 2 or any other line, use the following command
[linuxtechi@localhost ~]$ sed -n '2-3p' file.txt
Example :4 ) Deleting a line using sed command
To delete a line with sed from a file, use the following command,
[linuxtechi@localhost ~]$ sed Nd testfile.txt
where 'N' is the line number & option 'd' will delete the mentioned line number. To delete the last line of the file, use
[linuxtechi@localhost ~]$ sed $d testfile.txt
Example :5) Deleting a range of lines
To delete a range of lines from the file, run
[linuxtechi@localhost ~]$ sed '29-34d' testfile.txt
This will delete lines 29 to 34 from testfile.txt file.
Example :6) Deleting lines other than the mentioned
To delete lines other than the mentioned lines from a file, we will use '!'
[linuxtechi@localhost ~]$ sed '29-34!d' testfile.txt
here '!' option is used as not, so it will reverse the condition i.e. will not delete the lines mentioned. All the lines other
29-34 will be deleted from the files testfile.txt.
Example :7) Adding Blank lines/spaces
To add a blank line after every non-blank line, we will use option 'G',
[linuxtechi@localhost ~]$ sed G testfile.txt
Example :8) Search and Replacing a string using sed
To search & replace a string from the file, we will use the following example,
[linuxtechi@localhost ~]$ sed 's/danger/safety/' testfile.txt
here option 's' will search for word 'danger' & replace it with 'safety' on every line for the first occurrence only.
Example :9) Search and replace a string from whole file using sed
To replace the word completely from the file, we will use option 'g' with 's',
[linuxtechi@localhost ~]$ sed 's/danger/safety/g' testfile.txt
Example :10) Replace the nth occurrence of string pattern
We can also substitute a string on nth occurrence from a file. Like replace 'danger' with 'safety' only on second occurrence,
[linuxtechi@localhost ~]$ sed 's/danger/safety/2' testfile.txt
To replace 'danger' on 2nd occurrence of every line from whole file, use
[linuxtechi@localhost ~]$ sed 's/danger/safety/2g' testfile.txt
Example :11) Replace a string on a particular line
To replace a string only from a particular line, use
[linuxtechi@localhost ~]$ sed '4 s/danger/safety/' testfile.txt
This will only substitute the string from 4th line of the file. We can also mention a range of lines instead of a single line,
[linuxtechi@localhost ~]$ sed '4-9 s/danger/safety/' testfile.txt
Example :12) Add a line after/before the matched search
To add a new line with some content after every pattern match, use option 'a' ,
[linuxtechi@localhost ~]$ sed '/danger/a "This is new line with text after match"' testfile.txt
To add a new line with some content a before every pattern match, use option 'i',
[linuxtechi@localhost ~]$ sed '/danger/i "This is new line with text before match" ' testfile.txt
Example :13) Change a whole line with matched pattern
To change a whole line to a new line when a search pattern matches we need to use option 'c' with sed,
[linuxtechi@localhost ~]$ sed '/danger/c "This will be the new line" ' testfile.txt
So when the pattern matches 'danger', whole line will be changed to the mentioned line.
Advanced options with sed
Up until now we were only using simple expressions with sed, now we will discuss some advanced uses of sed with regex,
Example :14) Running multiple sed commands
If we need to perform multiple sed expressions, we can use option 'e' to chain the sed commands,
[linuxtechi@localhost ~]$ sed -e 's/danger/safety/g' -e 's/hate/love/' testfile.txt
Example :15) Making a backup copy before editing a file
To create a backup copy of a file before we edit it, use option '-i.bak',
[linuxtechi@localhost ~]$ sed -i.bak -e 's/danger/safety/g' testfile.txt
This will create a backup copy of the file with extension .bak. You can also use other extension if you like.
Example :16) Delete a file line starting with & ending with a pattern
To delete a file line starting with a particular string & ending with another string, use
[linuxtechi@localhost ~]$ sed -e 's/danger.*stops//g' testfile.txt
This will delete the line with 'danger' on start & 'stops' in the end & it can have any number of words in between , '.*' defines
that part.
Example :17) Appending lines
To add some content before every line with sed & regex, use
[linuxtechi@localhost ~]$ sed -e 's/.*/testing sed &/' testfile.txt
So now every line will have 'testing sed' before it.
Example :18) Removing all commented lines & empty lines
To remove all commented lines i.e. lines with # & all the empty lines, use
[linuxtechi@localhost ~]$ sed -e 's/#.*//;/^$/d' testfile.txt
To only remove commented lines, use
[linuxtechi@localhost ~]$ sed -e 's/#.*//' testfile.txt
Example :19) Get list of all usernames from /etc/passwd
To get the list of all usernames from /etc/passwd file, use
[linuxtechi@localhost ~]$ sed 's/\([^:]*\).*/\1/' /etc/passwd
a complete list all usernames will be generated on screen as output.
Example :20) Prevent overwriting of system links with sed command
'sed -i' command has been know to remove system links & create only regular files in place of the link file. So to avoid such
a situation & prevent ' sed -i ' from destroying the links, use ' follow-symklinks ' options with the command being executed.
Let's assume i want to disable SELinux on CentOS or RHEL Severs
[linuxtechi@localhost ~]# sed -i --follow-symlinks 's/SELINUX=enforcing/SELINUX=disabled/g' /etc/sysconfig/selinux
These were some examples to show sed, we can use these reference to employ them as & when needed. If you guys have any queries
related to this or any article, do share with us.
A certain piece of very misleading advice is often given online to users having problems
with the way certain command-line applications are displaying in their terminals. This is to suggest
that the user change the value of their TERM environment variable from within the shell,
doing something like this:
$ TERM=xterm-256color
This misinformation sometimes extends to suggesting that users put the forced TERM
change into their shell startup scripts. The reason this is such a bad idea is that it forces your
shell to assume what your terminal is, and thereby disregards the initial terminal identity string
sent by the emulator. This leads to a lot of confusion when one day you need to connect with a very
different terminal emulator.
Accounting for differences
All terminal emulators are not created equal. Certainly, not all of them are
xterm(1) , although many
other terminal emulators do a decent but not comprehensive job of copying it. The value of the
TERM environment variable is used by the system running the shell to determine what
the terminal connecting to it can and cannot do, what control codes to send to the program to use
those features, and how the shell should understand the input of certain key codes, such as the Home
and End keys. These things in particular are common causes of frustration for new users who turn
out to be using a forced TERM string.
Instead, focus on these two guidelines for setting TERM :
Avoid setting TERM from within the shell, especially in your startup
scripts like .bashrc or .bash_profile . If that ever seems like the
answer, then you are probably asking the wrong question! The terminal identification string should
always be sent by the terminal emulator you are using; if you do need to change it, then
change it in the settings for the emulator.
Always use an appropriate TERM string that accurately describes what your choice
of terminal emulator can and cannot display. Don't make an
rxvt(1) terminal identify
itself as xterm ; don't make a linux console identify itself as
vt100 ; and don't make an xterm(1) compiled without 256 color support
refer to itself as xterm-256color .
In particular, note that sometimes for compatibility reasons, the default terminal identification
used by an emulator is given as something generic like xterm , when in fact a more accurate
or comprehensive terminal identity file is more than likely available for your particular choice
of terminal emulator with a little searching.
An example that surprises a lot of people is the availability of the putty terminal
identity file, when the application defaults to presenting itself as an imperfect xterm(1)
emulator.
Configuring your emulator's string
Before you change your terminal string in its settings, check whether the default it uses is already
the correct one, with one of these:
$ echo $TERM
$ tset -q
Most builds of rxvt(1) , for example, should already use the correct TERM
string by default, such as rxvt-unicode-256color for builds with 256 colors and Unicode
support.
Where to configure which TERM string your terminal uses will vary depending on the
application. For xterm(1) , your .Xresources file should contain a definition
like the below:
XTerm*termName: xterm-256color
For rxvt(1) , the syntax is similar:
URxvt*termName: rxvt-unicode-256color
Other GTK and Qt emulators sometimes include the setting somewhere in their preferences. Look
for mentions of xterm , a common fallback default.
For Windows PuTTY, it's configurable under the "'Connections > Data"' section:
More detail about configuring PuTTY for connecting to modern systems can be found in my
article on configuring
PuTTY .
Testing your TERM string
On GNU/Linux systems, an easy way to test the terminal capabilities (particularly effects like
colors and reverse video) is using the
msgcat(1) utility:
$ msgcat --color=test
This will output a large number of tests of various features to the terminal, so that you can
check their appearance is what you expect.
Finding appropriate terminfo(5) definitions
On GNU/Linux systems, the capabilities and behavior of various terminal types is described using
terminfo(5) files,
usually installed as part of the ncurses package. These files are often installed in
/lib/terminfo or /usr/share/terminfo , in subdirectories by first letter.
In order to use a particular TERM string, an appropriate file must exist in one of
these directories. On Debian-derived systems, a large collection of terminal types can be installed
to the system with the
ncurses-term
package.
For example, the following variants of the rxvt terminal emulator are all available:
$ cd /usr/share/terminfo/r
$ ls rxvt*
rxvt-16color rxvt-256color rxvt-88color rxvt-color rxvt-cygwin
rxvt-cygwin-native rxvt+pcfkeys rxvt-unicode-256color rxvt-xpm
Private and custom terminfo(5) files
If you connect to a system that doesn't have a terminfo(5) definition to match the
TERM definition for your particular terminal, you might get a message similar to this
on login:
setterm: rxvt-unicode-256color: unknown terminal type
tput: unknown terminal "rxvt-unicode-256color"
$
If you're not able to install the appropriate terminal definition system-wide, one technique is
to use a private .terminfo directory in your home directory containing the definitions
you need:
You can copy this to your home directory on the servers you manage with a tool like scp
:
$ scp -r .terminfo server:
TERM and multiplexers
Terminal multiplexers like screen(1)
and tmux(1)
are special cases, and they cause perhaps the most confusion to people when inaccurate TERM
strings are used. The tmux
FAQ even opens by saying that most of the display problems reported by people are due to incorrect
TERM settings, and a good portion of the codebase in both multiplexers is dedicated
to negotiating the differences between terminal capacities.
This is because they are "terminals within terminals", and provide their own functionality only
within the bounds of what the outer terminal can do. In addition to this, they have their
own type for terminals within them; both of them use screen and its variants, such as
screen-256color .
It's therefore very important to check that both the outer and inner definitions
for TERM are correct. In .screenrc it usually suffices to use a line like
the following:
term screen
Or in .tmux.conf :
set-option -g default-terminal screen
If the outer terminals you use consistently have 256 color capabilities, you may choose to use
the screen-256color variant instead.
If you follow all of these guidelines, your terminal experience will be much smoother, as your
terminal and your system will understand each other that much better. You may find that this fixes
a lot of struggles with interactive tools like
vim(1) , for one thing,
because if the application is able to divine things like the available color space directly from
terminal information files, it saves you from having to include nasty hacks on the t_Co
variable in your .vimrc . Posted in
Terminal Tagged
term strings ,
terminal types
, terminfo
Posted on PuTTY is a terminal emulator with a free software license, including an SSH client.
While it has cross-platform ports, it's used most frequently on Windows systems, because they otherwise
lack a built-in terminal emulator that interoperates well with Unix-style TTY systems.
While it's very popular and useful, PuTTY's defaults are quite old, and are chosen for compatibility
reasons rather than to take advantage of all the features of a more complete terminal emulator. For
new users, this is likely an advantage as it can avoid confusion, but more advanced users who need
to use a Windows client to connect to a modern GNU/Linux system may find the defaults frustrating,
particularly when connecting to a more capable and custom-configured server.
Here are a few of the problems with the default configuration:
It identifies itself as an xterm(1) , when terminfo(5) definitions
are available named putty and putty-256color , which more precisely
define what the terminal can and cannot do, and their various custom escape sequences.
It only allows 16 colors, where most modern terminals are capable of using 256; this is partly
tied into the terminal type definition.
It doesn't use UTF-8 by default, which
should be used whenever possible
for reasons of interoperability and compatibility, and is well-supported by modern locale
definitions on GNU/Linux.
It uses Courier New, a workable but rather harsh monospace font, which should be swapped out
for something more modern if available.
It uses audible terminal bells, which tend to be annoying.
Its default palette based on xterm(1) is rather garish and harsh; softer colors
are more pleasant to read.
All of these things are fixable.
Terminal type
Usually the most important thing in getting a terminal working smoothly is to make sure it identifies
itself correctly to the machine to which it's connecting, using an appropriate $TERM
string. By default, PuTTY identifies itself as an xterm(1) terminal emulator, which
most systems will support.
However, there's a terminfo(5) definition for putty and putty-256color
available as part of ncurses , and if you have it available on your system then you
should use it, as it slightly more precisely describes the features available to PuTTY as a terminal
emulator.
You can check that you have the appropriate terminfo(5) definition installed by looking
in /usr/share/terminfo/p :
$ ls -1 /usr/share/terminfo/p/putty*
/usr/share/terminfo/p/putty
/usr/share/terminfo/p/putty-256color
/usr/share/terminfo/p/putty-sco
/usr/share/terminfo/p/putty-vt100
On Debian and Ubuntu systems, these files can be installed with:
# apt-get install ncurses-term
If you can't install the files via your system's package manager, you can also keep a private
repository of terminfo(5) files in your home directory, in a directory called
.terminfo :
$ ls -1 $HOME/.terminfo/p
putty
putty-256color
Once you have this definition installed, you can instruct PuTTY to identify with that $TERM
string in the Connection > Data section:
Here, I've used putty-256color ; if you don't need or want a 256 color terminal you
could just use putty .
Once connected, make sure that your $TERM string matches what you specified, and
hasn't been mangled by any of your shell or terminal configurations:
$ echo $TERM
putty-256color
Color space
Certain command line applications like Vim and Tmux can take advantage of
a full 256 colors
in the terminal. If you'd like to use this, set PuTTY's $TERM string to putty-256color
as outlined above, and select Allow terminal to use xterm 256-colour mode in Window > Colours
You can test this is working by using a 256 color application, or by trying out the terminal colours
directly in your shell using tput :
$ for ((color = 0; color <= 255; color++)); do
> tput setaf "$color"
> printf "test"
> done
If you see the word test in many different colors, then things are probably working.
Type reset to fix your terminal after this:
$ reset
Using UTF-8
If you're connecting to a modern GNU/Linux system, it's likely that you're using a UTF-8 locale.
You can check which one by typing locale . In my case, I'm using the en_NZ
locale with UTF-8 character encoding:
If the output of locale does show you're using a UTF-8 character encoding, then you
should configure PuTTY to interpret terminal output using that character set; it can't detect it
automatically (which isn't PuTTY's fault; it's a known hard problem). You do this in the Window >
Translation section:
While you're in this section, it's best to choose the Use Unicode line drawing code points option
as well. Line-drawing characters are most likely to work properly with this setting for UTF-8 locales
and modern fonts:
If Unicode and its various encodings is new to you, I highly recommend
Joel Spolsky's classic
article about what programmers should know about both.
Fonts
Courier New is a workable monospace font, but modern Windows systems include
Consolas , a much nicer terminal
font. You can change this in the Window > Appearance section:
There's no reason you can't use another favourite Bitmap or TrueType font instead once it's installed
on your system; DejaVu Sans Mono
, Inconsolata , and
Terminus are popular alternatives.
I personally favor Ubuntu Mono .
Bells
Terminal bells by default in PuTTY emit the system alert sound. Most people find this annoying;
some sort of visual bell tends to be much better if you want to use the bell at all. Configure this
in Terminal > Bell
Given the purpose of the alert is to draw attention to the window, I find that using a flashing
taskbar icon works well; I use this to draw my attention to my prompt being displayed after a long
task completes, or if someone mentions my name or directly messages me in irssi(1) .
Another option is using the Visual bell (flash window) option, but I personally find this even
worse than the audible bell.
Default palette
The default colours for PuTTY are rather like those used in xterm(1) , and hence
rather harsh, particularly if you're used to the slightly more subdued colorscheme of terminal emulators
like gnome-terminal(1) , or have customized your palette to something like
Solarized .
If you have decimal RGB values for the colours you'd prefer to use, you can enter those in the
Window > Colours section, making sure that Use system colours and Attempt to use logical palettes
are unchecked:
There are a few other default annoyances in PuTTY, but the above are the ones that seem to annoy
advanced users most frequently. Dag Wieers has
a similar post with a few more defaults to fix.
[Nov 09, 2017] Searching files
Notable quotes:
"... With all this said, there's a very popular alternative to grep called ack , which excludes this sort of stuff for you by default. It also allows you to use Perl-compatible regular expressions (PCRE), which are a favourite for many programmers. It has a lot of utilities that are generally useful for working with source code, so while there's nothing wrong with good old grep since you know it will always be there, if you can install ack I highly recommend it. There's a Debian package called ack-grep , and being a Perl script it's otherwise very simple to install. ..."
"... Unix purists might be displeased with my even mentioning a relatively new Perl script alternative to classic grep , but I don't believe that the Unix philosophy or using Unix as an IDE is dependent on sticking to the same classic tools when alternatives with the same spirit that solve new problems are available. ..."
More often than attributes of a set of files, however, you want to find files based on
their contents, and it's no surprise that grep, in particular grep -R,
is useful here. This searches the current directory tree recursively for anything matching 'someVar':
$ grep -FR someVar .
Don't forget the case insensitivity flag either, since by default grep works with
fixed case:
$ grep -iR somevar .
Also, you can print a list of files that match without printing the matches themselves with
grep -l:
$ grep -lR someVar .
If you write scripts or batch jobs using the output of the above, use a while loop
with read to handle spaces and other special characters in filenames:
grep -lR someVar | while IFS= read -r file; do
head "$file"
done
If you're using version control for your project, this often includes metadata in the .svn,
.git, or .hg directories. This is dealt with easily enough by excluding
(grep -v) anything matching an appropriate fixed (grep -F) string:
$ grep -R someVar . | grep -vF .svn
Some versions of grep include --exclude and --exclude-dir
options, which may be tidier.
With all this said, there's a very popular alternative
to grep called ack, which excludes this sort of stuff for you by default. It also
allows you to use Perl-compatible regular expressions (PCRE), which are a favourite for many programmers.
It has a lot of utilities that are generally useful for working with source code, so while there's
nothing wrong with good old grep since you know it will always be there, if you can
install ack I highly recommend it. There's a Debian package called ack-grep,
and being a Perl script it's otherwise very simple to install.
Unix purists might be displeased with my even mentioning a relatively new Perl script alternative
to classic grep, but I don't believe that the Unix philosophy or using Unix as an IDE
is dependent on sticking to the same classic tools when alternatives with the same spirit that solve
new problems are available.
The time-based job scheduler cron(8)
has been around since Version 7 Unix, and its
crontab(5) syntax is
familiar even for people who don't do much Unix system administration. It's
standardised
, reasonably flexible, simple to configure, and works reliably, and so it's trusted by both system
packages and users to manage many important tasks.
However, like many older Unix tools, cron(8) 's simplicity has a drawback: it relies
upon the user to know some detail of how it works, and to correctly implement any other safety checking
behaviour around it. Specifically, all it does is try and run the job at an appropriate time, and
email the output. For simple and unimportant per-user jobs, that may be just fine, but for more crucial
system tasks it's worthwhile to wrap a little extra infrastructure around it and the tasks it calls.
There are a few ways to make the way you use cron(8) more robust if you're in a situation
where keeping track of the running job is desirable.
Apply the principle of least privilege
The sixth column of a system crontab(5) file is the username of the user as which
the task should run:
0 * * * * root cron-task
To the extent that is practical, you should run the task as a user with only the privileges it
needs to run, and nothing else. This can sometimes make it worthwhile to create a dedicated system
user purely for running scheduled tasks relevant to your application.
0 * * * * myappcron cron-task
This is not just for security reasons, although those are good ones; it helps protect you against
nasties like scripting errors attempting to
remove entire
system directories .
Similarly, for tasks with database systems such as MySQL, don't use the administrative root
user if you can avoid it; instead, use or even create a dedicated user with a unique random password
stored in a locked-down ~/.my.cnf file, with only the needed permissions. For a MySQL
backup task, for example, only a few permissions should be required, including SELECT
, SHOW VIEW , and LOCK TABLES .
In some cases, of course, you really will need to be root . In particularly sensitive
contexts you might even consider using sudo(8) with appropriate NOPASSWD
options, to allow the dedicated user to run only the appropriate tasks as root , and
nothing else.
Test the tasks
Before placing a task in a crontab(5) file, you should test it on the command line,
as the user configured to run the task and with the appropriate environment set. If you're going
to run the task as root , use something like su or sudo -i
to get a root shell with the user's expected environment first:
$ sudo -i -u cronuser
$ cron-task
Once the task works on the command line, place it in the crontab(5) file with the
timing settings modified to run the task a few minutes later, and then watch /var/log/syslog
with tail -f to check that the task actually runs without errors, and that the task
itself completes properly:
May 7 13:30:01 yourhost CRON[20249]: (you) CMD (cron-task)
This may seem pedantic at first, but it becomes routine very quickly, and it saves a lot of hassles
down the line as it's very easy to make an assumption about something in your environment that doesn't
actually hold in the one that cron(8) will use. It's also a necessary acid test to make
sure that your crontab(5) file is well-formed, as some implementations of cron(8)
will refuse to load the entire file if one of the lines is malformed.
If necessary, you can set arbitrary environment variables for the tasks at the top of the file:
MYVAR=myvalue
0 * * * * you cron-task
Don't throw away errors or useful output
You've probably seen tutorials on the web where in order to keep the crontab(5) job
from sending standard output and/or standard error emails every five minutes, shell redirection operators
are included at the end of the job specification to discard both the standard output and standard
error. This kluge is particularly common for running web development tasks by automating a request
to a URL with curl(1)
or wget(1) :
Ignoring the output completely is generally not a good idea, because unless you have other tasks
or monitoring ensuring the job does its work, you won't notice problems (or know what they are),
when the job emits output or errors that you actually care about.
In the case of curl(1) , there are just way too many things that could go wrong,
that you might notice far too late:
The script could get broken and return 500 errors.
The URL of the cron.php task could change, and someone could forget to add a
HTTP 301 redirect.
Even if a HTTP 301 redirect is added, if you don't use -L or --location
for curl(1) , it won't follow it.
The client could get blacklisted, firewalled, or otherwise impeded by automatic or manual
processes that falsely flag the request as spam.
If using HTTPS, connectivity could break due to cipher or protocol mismatch.
The author has seen all of the above happen, in some cases very frequently.
As a general policy, it's worth taking the time to read the manual page of the task you're calling,
and to look for ways to correctly control its output so that it emits only the output you actually
want. In the case of curl(1) , for example, I've found the following formula works well:
curl -fLsS -o /dev/null http://example.com/
-f : If the HTTP response code is an error, emit an error message rather than
the 404 page.
-L : If there's an HTTP 301 redirect given, try to follow it.
-sS : Don't show progress meter ( -S stops -s from
also blocking error messages).
-o /dev/null : Send the standard output (the actual page returned) to /dev/null
.
This way, the curl(1) request should stay silent if everything is well, per the old
Unix philosophy Rule of Silence
.
You may not agree with some of the choices above; you might think it important to e.g. log the
complete output of the returned page, or to fail rather than silently accept a 301 redirect, or you
might prefer to use wget(1) . The point is that you take the time to understand in more
depth what the called program will actually emit under what circumstances, and make it match your
requirements as closely as possible, rather than blindly discarding all the output and (worse) the
errors. Work with Murphy's law
; assume that anything that can go wrong eventually will.
Send the output somewhere useful
Another common mistake is failing to set a useful MAILTO at the top of the
crontab(5) file, as the specified destination for any output and errors from the tasks.
cron(8) uses the system mail implementation to send its messages, and typically, default
configurations for mail agents will simply send the message to an mbox file in
/var/mail/$USER , that they may not ever read. This defeats much of the point of mailing output
and errors.
This is easily dealt with, though; ensure that you can send a message to an address you actually
do check from the server, perhaps using mail(1) :
Once you've verified that your mail agent is correctly configured and that the mail arrives in
your inbox, set the address in a MAILTO variable at the top of your file:
[email protected]
0 * * * * you cron-task-1
*/5 * * * * you cron-task-2
If you don't want to use email for routine output, another method that works is sending the output
to syslog with a tool like
logger(1) :
0 * * * * you cron-task | logger -it cron-task
Alternatively, you can configure aliases on your system to forward system mail destined for you
on to an address you check. For Postfix, you'd use an
aliases(5) file.
I sometimes use this setup in cases where the task is expected to emit a few lines of output which
might be useful for later review, but send stderr output via MAILTO as
normal. If you'd rather not use syslog , perhaps because the output is high in volume
and/or frequency, you can always set up a log file /var/log/cron-task.log but don't
forget to add a logrotate(8)
rule for it!
Put the tasks in their own shell script file
Ideally, the commands in your crontab(5) definitions should only be a few words,
in one or two commands. If the command is running off the screen, it's likely too long to be in the
crontab(5) file, and you should instead put it into its own script. This is a particularly
good idea if you want to reliably use features of bash or some other shell besides POSIX/Bourne
/bin/sh for your commands, or even a scripting language like Awk or Perl; by default,
cron(8) uses the system's /bin/sh implementation for parsing the commands.
Because crontab(5) files don't allow multi-line commands, and have other gotchas
like the need to escape percent signs % with backslashes, keeping as much configuration
out of the actual crontab(5) file as you can is generally a good idea.
If you're running cron(8) tasks as a non-system user, and can't add scripts into
a system bindir like /usr/local/bin , a tidy method is to start your own, and include
a reference to it as part of your PATH . I favour ~/.local/bin , and have
seen references to ~/bin as well. Save the script in ~/.local/bin/cron-task
, make it executable with chmod +x , and include the directory in the PATH
environment definition at the top of the file:
PATH=/home/you/.local/bin:/usr/local/bin:/usr/bin:/bin
[email protected]
0 * * * * you cron-task
Having your own directory with custom scripts for your own purposes has a host of other benefits,
but that's another article
Avoid /etc/crontab
If your implementation of cron(8) supports it, rather than having an /etc/crontab
file a mile long, you can put tasks into separate files in /etc/cron.d :
$ ls /etc/cron.d
system-a
system-b
raid-maint
This approach allows you to group the configuration files meaningfully, so that you and other
administrators can find the appropriate tasks more easily; it also allows you to make some files
editable by some users and not others, and reduces the chance of edit conflicts. Using sudoedit(8)
helps here too. Another advantage is that it works better with version control; if I start collecting
more than a few of these task files or to update them more often than every few months, I start a
Git repository to track them:
If you're editing a crontab(5) file for tasks related only to the individual user,
use the crontab(1) tool; you can edit your own crontab(5) by typing
crontab -e , which will open your $EDITOR to edit a temporary file that
will be installed on exit. This will save the files into a dedicated directory, which on my system
is /var/spool/cron/crontabs .
On the systems maintained by the author, it's quite normal for /etc/crontab never
to change from its packaged template.
Include a timeout
cron(8) will normally allow a task to run indefinitely, so if this is not desirable,
you should consider either using options of the program you're calling to implement a timeout, or
including one in the script. If there's no option for the command itself, the
timeout(1) command
wrapper in coreutils is one possible way of implementing this:
cron(8) will start a new process regardless of whether its previous runs have completed,
so if you wish to avoid locking for long-running task, on GNU/Linux you could use the
flock(1) wrapper for
the flock(2) system call
to set an exclusive lockfile, in order to prevent the task from running more than one instance in
parallel.
0 * * * * you flock -nx /var/lock/cron-task cron-task
Greg's wiki has some more in-depth discussion of the
file locking problem for scripts
in a general sense, including important information about the caveats of "rolling your own" when
flock(1) is not available.
If it's important that your tasks run in a certain order, consider whether it's necessary to have
them in separate tasks at all; it may be easier to guarantee they're run sequentially by collecting
them in a single shell script.
Do something useful with exit statuses
If your cron(8) task or commands within its script exit non-zero, it can be useful
to run commands that handle the failure appropriately, including cleanup of appropriate resources,
and sending information to monitoring tools about the current status of the job. If you're using
Nagios Core or one of its derivatives, you could consider using send_nsca to send passive
checks reporting the status of jobs to your monitoring server. I've written
a simple script called
nscaw to do this for me:
0 * * * * you nscaw CRON_TASK -- cron-task
Consider alternatives to cron(8)
If your machine isn't always on and your task doesn't need to run at a specific time, but rather
needs to run once daily or weekly, you can install
anacron and drop scripts
into the cron.hourly , cron.daily , cron.monthly , and
cron.weekly directories in /etc , as appropriate. Note that on Debian and
Ubuntu GNU/Linux systems, the default /etc/crontab contains hooks that run these, but
they run only if anacron(8)
is not installed.
If you're using cron(8) to poll a directory for changes and run a script if there
are such changes, on GNU/Linux you could consider using a daemon based on inotifywait(1)
instead.
Finally, if you require more advanced control over when and how your task runs than cron(8)
can provide, you could perhaps consider writing a daemon to run on the server consistently and fork
processes for its task. This would allow running a task more often than once a minute, as an example.
Don't get too bogged down into thinking that cron(8) is your only option for any kind
of asynchronous task management!
Using ls is probably one of the first commands an administrator
will learn for getting a simple list of the contents of the directory. Most
administrators will also know about the -a and -l
switches, to show all files including dot files and to show more detailed data
about files in columns, respectively.
There are other switches to GNU ls which are less frequently used,
some of which turn out to be very useful for programming:
-t - List files in order of last modification date, newest
first. This is useful for very large directories when you want to get a quick
list of the most recent files changed, maybe piped through head or
sed 10q. Probably most useful combined with -l. If
you want the oldest files, you can add -r to reverse the
list.
-X - Group files by extension; handy for polyglot code, to
group header files and source files separately, or to separate source files
from directories or build files.
-v - Naturally sort version numbers in filenames.
-S - Sort by filesize.
-R - List files recursively. This one is good combined with
-l and piped through a pager like less.
Since the listing is text like anything else, you could, for example, pipe the
output of this command into a vim process, so you could add
explanations of what each file is for and save it as an inventory
file or add it to a README:
$ ls -XR | vim -
This kind of stuff can even be automated by make with a little
work, which I'll cover in another article later in the series.
When you're searching a set of version-controlled files for a string with grep ,
particularly if it's a recursive search, it can get very annoying to be presented with swathes of
results from the internals of the hidden version control directories like .svn or
.git , or include metadata you're unlikely to have wanted in files like .gitmodules
.
GNU grep uses an environment variable named GREP_OPTIONS to define a
set of options that are always applied to every call to grep . This comes in handy when
exported in your .bashrc file to set a "standard" grep environment for
your interactive shell. Here's an example of a definition of GREP_OPTIONS that excludes
a lot of patterns which you'd very rarely if ever want to search with grep :
GREP_OPTIONS=
for pattern in .cvs .git .hg .svn; do
GREP_OPTIONS="$GREP_OPTIONS --exclude-dir=$pattern
done
export GREP_OPTIONS
Note that --exclude-dir is a relatively recent addition to the options for GNU
grep , but it should only be missing on very legacy GNU/Linux machines by now. If you
want to keep your .bashrc file compatible, you could apply a little extra hackery to
make sure the option is available before you set it up to be used:
GREP_OPTIONS=
if grep --help | grep -- --exclude-dir &>/dev/null; then
for pattern in .cvs .git .hg .svn; do
GREP_OPTIONS="$GREP_OPTIONS --exclude-dir=$pattern"
done
fi
export GREP_OPTIONS
Similarly, you can ignore single files with --exclude . There's also --exclude-from=FILE
if your list of excluded patterns starts getting too long.
Other useful options available in GNU grep that you might wish to add to this environment
variable include:
--color -- On appropriate terminal types, highlight the pattern matches in output,
among other color changes that make results more readable
-s -- Suppresses error messages about files not existing or being unreadable;
helps if you find this behaviour more annoying than useful.
-E, -F, or -P -- Pick a favourite "mode" for grep ; devotees of
PCRE may find adding -P for grep 's experimental PCRE support makes
grep behave in a much more pleasing way, even though it's described in the manual
as being experimental and incomplete
If you don't want to use GREP_OPTIONS , you could instead simply set up an
alias :
alias grep='grep --exclude-dir=.git'
You may actually prefer this method as it's essentially functionally equivalent, but if you do
it this way, when you want to call grep without your standard set of options, you only
have to prepend a backslash to its call:
$ \grep pattern file
Commenter Andy Pearce also points out that using this method can avoid some build problems where
GREP_OPTIONS would interfere.
Oftentimes you may
wish to start a process on the Bash shell without having to wait for it to actually complete,
but still be notified when it does. Similarly, it may be helpful to temporarily stop a task
while it's running without actually quitting it, so that you can do other things with the
terminal. For these kinds of tasks, Bash's built-in job control is very useful.
Backgrounding processes
If you have a process that you expect to take a long time, such as a long cp or
scp operation, you can start it in the background of your current shell by adding
an ampersand to it as a suffix:
$ cp -r /mnt/bigdir /home &
[1] 2305
This will start the copy operation as a child process of your bash instance,
but will return you to the prompt to enter any other commands you might want to run while
that's going.
The output from this command shown above gives both the job number of 1, and the process ID
of the new task, 2305. You can view the list of jobs for the current shell with the builtin
jobs :
$ jobs
[1]+ Running cp -r /mnt/bigdir /home &
If the job finishes or otherwise terminates while it's backgrounded, you should see a
message in the terminal the next time you update it with a newline:
[1]+ Done cp -r /mnt/bigdir /home &
Foregrounding processes
If you want to return a job in the background to the foreground, you can type
fg :
$ fg
cp -r /mnt/bigdir /home &
If you have more than one job backgrounded, you should specify the particular job to bring
to the foreground with a parameter to fg :
$ fg %1
In this case, for shorthand, you can optionally omit fg and it will work just
the same:
$ %1
Suspending processes
To temporarily suspend a process, you can press Ctrl+Z:
You can then continue it in the foreground or background with fg %1 or bg
%1 respectively, as above.
This is particularly useful while in a text editor; instead of quitting the editor to get
back to a shell, or dropping into a subshell from it, you can suspend it temporarily and return
to it with fg once you're ready.
Dealing with output
While a job is running in the background, it may still print its standard output and
standard error streams to your terminal. You can head this off by redirecting both streams to
/dev/null for verbose commands:
$ cp -rv /mnt/bigdir /home &>/dev/null
However, if the output of the task is actually of interest to you, this may be a case where
you should fire up another terminal emulator, perhaps in GNU Screen or tmux , rather than using simple job control.
Suspending SSH
sessions
As a special case, you can suspend an SSH session using an SSH escape sequence . Type a
newline followed by a ~ character, and finally press Ctrl+Z to background your SSH session and
return to the terminal from which you invoked it.
For many system
administrators, Awk is used only as a way to print specific columns of data from programs that
generate columnar output, such as netstat or ps .
For example, to get
a list of all the IP addresses and ports with open TCP connections on a machine, one might run
the following:
# netstat -ant | awk '{print $5}'
This works pretty well, but among the data you actually wanted it also includes the fifth
word of the opening explanatory note, and the heading of the fifth column:
and
Address
0.0.0.0:*
205.188.17.70:443
172.20.0.236:5222
72.14.203.125:5222
There are varying ways to deal with this.
Matching patterns
One common way is to pipe the output further through a call to grep , perhaps
to only include results with at least one number:
# netstat -ant | awk '{print $5}' | grep '[0-9]'
In this case, it's instructive to use the awk call a bit more intelligently by
setting a regular expression which the applicable line must match in order for that field to be
printed, with the standard / characters as delimiters. This eliminates the need
for the call to grep :
# netstat -ant | awk '/[0-9]/ {print $5}'
We can further refine this by ensuring that the regular expression should only match data in
the fifth column of the output, using the ~ operator:
# netstat -ant | awk '$5 ~ /[0-9]/ {print $5}'
Skipping lines
Another approach you could take to strip the headers out might be to use sed to
skip the first two lines of the output:
# netstat -ant | awk '{print $5}' | sed 1,2d
However, this can also be incorporated into the awk call, using the
NR variable and making it part of a conditional checking the line number is
greater than two:
# netstat -ant | awk 'NR>2 {print $5}'
Combining and excluding patterns
Another common idiom on systems that don't have the special pgrep command is to
filter ps output for a string, but exclude the grep process itself
from the output with grep -v grep :
If you're using Awk to get columnar data from the output, in this case the second column
containing the process ID, both calls to grep can instead be incorporated into the
awk call:
# ps -ef | awk '/apache/ && !/awk/ {print $2}'
Again, this can be further refined if necessary to ensure you're only matching the
expressions against the command name by specifying the field number for each comparison:
If you're used to using Awk purely as a column filter, the above might help to increase its
utility for you and allow you to write shorter and more efficient command lines. The Awk Primer on Wikibooks is a
really good reference for using Awk to its fullest for the sorts of tasks for which it's
especially well-suited.
A common idiom in Unix is to count the lines of output in a file or pipe with wc -l
:
$ wc -l example.txt
43
$ ps -e | wc -l
97
Sometimes you want to count the number of lines of output from a grep call, however.
You might do it this way:
$ ps -ef | grep apache | wc -l
6
But grep has built-in counting of its own, with the -c option:
$ ps -ef | grep -c apache
6
The above is more a matter of good style than efficiency, but another tool with a built-in counting
option that could save you time is the oft-used uniq . The below example shows a use
of uniq to filter a sorted list into unique rows:
Incidentally, if you're not counting results and really do just want a list of unique
users, you can leave out the uniq and just add the -u flag to sort
:
"... An earlier version of this post suggested changing the TERM definition in .bashrc , which is generally not a good idea, even if bounded with conditionals as my example was. You should always set the terminal string in the emulator itself if possible, if you do it at all. ..."
"... Similarly, to use 256 colours in GNU Screen, add the following to your .screenrc : ..."
Using 256 colours
in terminals is well-supported in GNU/Linux distributions these days, and also in Windows
terminal emulators like PuTTY. Using 256 colours is great for Vim colorschemes in particular,
but also very useful for Tmux colouring or any other terminal application where a slightly
wider colour space might be valuable. Be warned that once you get this going reliably, there's
no going back if you spend a lot of time in the terminal. Xterm
To set this up for xterm or emulators that use xterm as the
default value for $TERM , such as xfce4-terminal or
gnome-terminal , it generally suffices to check the options for your terminal
emulator to ensure that it will allow 256 colors, and then use the TERM stringxterm-256color for it.
An earlier version of this post suggested changing the TERM definition in
.bashrc , which is generally not a good idea, even if bounded with conditionals as
my example was. You should always set the terminal string in the emulator itself if possible,
if you do it at all.
Be aware that older systems may not have terminfo definitions for this
terminal, but you can always copy them in using a private .terminfo directory if
need be.
Tmux
To use 256 colours in Tmux, you should set the default terminal in .tmux.conf
to be screen-256color :
set -g default-terminal "screen-256color"
This will allow you to use color definitions like colour231 in your status
lines and other configurations. Again, this particular terminfo definition may not
be present on older systems, so you should copy it into
~/.terminfo/s/screen-256color on those systems if you want to use it
everywhere.
GNU Screen
Similarly, to use 256 colours in GNU Screen, add the following to your
.screenrc :
term screen-256color
Vim
With the applicable options from the above set, you should not need to change anything in
Vim to be able to use 256-color colorschemes. If you're wanting to write or update your own
256-colour compatible scheme, it should either begin with set t_Co=256 , or more
elegantly, check the value of the corresponding option value is &t_Co is 256
before trying to use any of the extra colour set.
A tr script to remove all non-printing characters from a file is below. Non-printing
characters may be invisible, but cause problems with printing or sending the file via
electronic mail. You run it from Unix command prompt, everything on one line:
What is the meaning of this tr script is, that it deletes all charactes with octal value from
001 to 011, characters 013, 014, characters from 016 to 037 and characters from 200 to 377. Other
characters are copied over from filein to fileout and these are printable. Please remember, you can
not fold a line containing tr command, everything must be on one line, how long it would be. In
practice, this script solves some mysterious Unix printing problems.
Type in a text file named "f127.TR" with the line starting tr above. Print the file
on screen with cat f127.TR command, replace "filein" and "fileout" with your file names, not
same the file, then copy and paste the line and run (execute) it. Please, remember this
does not solve Unix end-of-file problem, that is the character '\000', also known as a 'null',
in the file. Nor does it handle binary file problem, that is a file starting with two zeroes
'\060' and '\060'
Sometimes there are some invisible characters causing havoc. This tr command line
converts tabulate- characters into hashes (#) and formfeed- characters into stars (*).
> tr '\011\014' '#*' < filein > fileout
The numeric value of tabulate is 9, hex 09, octal 011 and in C-notation it is \t or \011.
Formfeed is 12, hex 0C, octal 014 and in C-notation it is \f or \014. Please note, tr
replaces character from the first (leftmost) group with corresponding character in the second
group. Characters in octal format, like \014 are counted as one character each.
How to Use "Script" Command To Record Linux Terminal Session May 30, 2014 By
Pungki Arianto Updated June
14, 2017 FacebookGoogle+
Twitter
Pinterest
LinkedIn
StumbleUpon
Reddit
Email This script command is very helpful for system admin. If any problem occurs to the
system, it is very difficult to find what command was executed previously. Hence, system admin
knows the importance of this script command. Sometimes you are on the server and you think to
yourself that your team or somebody you know is actually missing a documentation on how to do a
specific configuration. It is possible for you to do the configuration, record all actions of
your shell session and show the record to the person who will see exactly what you had (the
same output) on your shell at the moment of the configuration. How does script command work?
script command records a shell session for you so that you can look at the output that you
saw at the time and you can even record with timing so that you can have a real-time playback.
It is really useful and comes in handy in the strangest kind of times and places.
The script command keeps action log for various tasks. The script records everything in a
session such as things you type, things you see. To do this you just type script
command on the terminal and type exit when finished. Everything between the
script and the exit command is logged to the file. This includes the
confirmation messages from script itself.
1. Record your terminal session
script makes a typescript of everything printed on your terminal. If the argument file is
given, script saves all dialogue in the indicated file in the current directory. If no file
name is given, the typescript is saved in default file typescript. To record your shell session
so what you are doing in the current shell, just use the command below
# script shell_record1
Script started, file is shell_record1
It indicates that a file shell_record1 is created. Let's check the file
# ls -l shell_*
-rw-r--r-- 1 root root 0 Jun 9 17:50 shell_record1
After completion of your task, you can enter exit or Ctrl-d to close
down the script session and save the file.
# exit
exit
Script done, file is shell_record1
You can see that script indicates the filename.
2. Check the content of a recorded
terminal session
When you use script command, it records everything in a session such as things you type so
all your output. As the output is saved into a file, it is possible after to check its content
after existing a recorded session. You can simply use a text editor command or a text file
command viewer.
# cat shell_record1
Script started on Fri 09 Jun 2017 06:23:41 PM UTC
[root@centos-01 ~]# date
Fri Jun 9 18:23:46 UTC 2017
[root@centos-01 ~]# uname -a
Linux centos-01 3.10.0-514.16.1.el7.x86_64 #1 SMP Wed Apr 12 15:04:24 UTC 2017 x86_64 x86_64 x86_64 GNU/Linux
[root@centos-01 ~]# whoami
root
[root@centos-01 ~]# pwd
/root
[root@centos-01 ~]# exit
exit
Script done on Fri 09 Jun 2017 06:25:11 PM UTC
While you view the file you realize that the script also stores line feeds and backspaces.
It also indicates the time of the recording to the top and the end of the file.
3. Record
several terminal session
You can record several terminal session as you want. When you finish a record, just begin
another new session record. It can be helpful if you want to record several configurations that
you are doing to show it to your team or students for example. You just need to name each
recording file.
For example, let us assume that you have to do OpenLDAP
, DNS
, Machma
configurations. You will need to record each configuration. To do this, just create recording
file corresponding to each configuration when finished.
And so on for the other. Note that if you script command followed by existing filename, the
file will be replaced. So you will lost everything.
Now, let us imagine that you have begun Machma configuration but you have to abort its
configuration in order to finish DNS configuration because of some emergency case. Now you want
to continue the machma configuration where you left. It means you want to record the next steps
into the existing file machma_record without deleting its previous content; to do this
you will use script -a command to append the new output to the file.
This is the content of our recorded file
Now if we want to continue our recording in this file without deleting the content already
present, we will do
# script -a machma_record
Script started, file is machma_record
Now continue the configuration, then exit when finished and let's check the content of the
recorded file.
Note the new time of the new record which appears. You can see that the file has the
previous and actual records.
4. Replay a linux terminal session
We have seen that it is possible to see the content of the recorded file with commands to
display a text file content. The script command also gives the possibility to see the recorded
session as a video. It means that you will review exactly what you have done step by
step at the moment you were entering the commands as if you were looking a video. So you will
playback/replay the recorded terminal session.
To do it, you have to use --timing option of script command when you will start
the record.
# script --timing=file_time shell_record1
Script started, file is shell_record1
See that the file into which to record is shell_record1. When the record is
finished, exit normally
The --timing option outputs timing data to the file indicated. This data
contains two fields, separated by a space which indicates how much time elapsed since the
previous output how many characters were output this time. This information can be used to
replay typescripts with realistic typing and output delays.
Now to replay the terminal session, we use scriptreplay command instead of script command
with the same syntax when recording the session. Look below
# scriptreplay --timing=file_time shell_record1
You will that the recorded session with be played as if you were looking a video which was
recording all that you were doing. You can just insert the timing file without indicating all
the --timing=file_time. Look below
# scriptreplay file_time shell_record1
So you understand that the first parameter is the timing file and the second is the recorded
file.
Conclusion
The script command can be your to-go tool for documenting your work and showing others what
you did in a session. It can be used as a way to log what you are doing in a shell session.
When you run script, a new shell is forked. It reads standard input and output for your
terminal tty and stores the data in a file.
I have one older ubuntu server, and one newer debian server and I am migrating data from the old
one to the new one. I want to use rsync to transfer data across to make final migration easier and
quicker than the equivalent tar/scp/untar process.
As an example, I want to sync the home folders one at a time to the new server. This requires
root access at both ends as not all files at the source side are world readable and the destination
has to be written with correct permissions into /home. I can't figure out how to give rsync root
access on both sides.
I've seen a few related questions, but none quite match what I'm trying to do.
Actually you do NOT need to allow root authentication via SSH to run rsync as Antoine suggests.
The transport and system authentication can be done entirely over user accounts as long as
you can run rsync with sudo on both ends for reading and writing the files.
As a user on your destination server you can suck the data from your source server like
this:
The user you run as on both servers will need passwordless* sudo access to the rsync binary,
but you do NOT need to enable ssh login as root anywhere. If the user you are using doesn't
match on the other end, you can add user@boron: to specify a different remote user.
Good luck.
*or you will need to have entered the password manually inside the timeout window.
Although this is an old question I'd like to add word of CAUTION to this
accepted answer. From my understanding allowing passwordless "sudo rsync" is equivalent
to open the root account to remote login. This is because with this it is very easy
to gain full root access, e.g. because all system files can be downloaded, modified
and replaced without a password.
Ascurion
Jan 8 '16 at 16:30
Good point. In a trusted environment, you'll pick up a lot of speed by not encrypting.
It might not matter on small files, but with GBs of data it will.
pboin
May 18 '10 at 10:53
How do I use the rsync tool to copy
only the hidden files and directory (such as ~/.ssh/, ~/.foo, and so on) from /home/jobs directory
to the /mnt/usb directory under Unix like operating system?
The rsync program is used for synchronizing files over a network or local disks. To view or display
only hidden files with ls command:
ls -ld ~/.??*
OR
ls -ld ~/.[^.]*
Sample outputs:
Fig:01 ls command to view only hidden files
rsync not synchronizing all hidden .dot files?
In this example, you used the pattern .[^.]* or .??* to
select and display only hidden files using ls command . You can use the same pattern with any
Unix command including rsync command. The syntax is as follows to copy hidden files with rsync:
In this example, copy all hidden files from my home directory to /mnt/test:
rsync -avzP ~/.[^.]* /mnt/test
rsync -avzP ~/.[^.]* /mnt/test
Sample outputs:
Fig.02 Rsync example to copy only hidden files
Vivek Gite is the creator of nixCraft and a seasoned sysadmin and a trainer for the Linux operating
system/Unix shell scripting. He has worked with global clients and in various industries, including
IT, education, defense and space research, and the nonprofit sector. Follow him on
Twitter ,
Facebook ,
Google+ .
Using ssh means encryption, which makes things slower. --force does only affect
directories, if I read the man page correctly. –
Torsten Bronger
Jan 1 '13 at 23:08
Unless your using ancient kit, the CPU overhead of encrypting / decrypting the
traffic shouldn't be noticeable, but you will loose 10-20% of your bandwidth,
through the encapsulation process. Then again 80% of a working link is better than
100% of a non working one :) –
arober11
Jan 2 '13 at 10:52
do
have an "ancient kit". ;-) (Slow ARM CPU on a NAS.) But I now mount
the NAS with NFS and use rsync (with "sudo") locally. This solves the problem (and
is even faster). However, I still think that my original problem must be solvable
using the rsync protocol (remote, no ssh). –
Torsten Bronger
Jan 4 '13 at 7:55
On my Ubuntu server there are about 150 shell accounts. All usernames begin with the prefix
u12.. I have root access and I am trying to copy a directory named "somefiles" to all the
home directories. After copying the directory the user and group ownership of the directory
should be changed to user's. Username, group and home-dir name are same. How can this be
done?
Do the copying as the target user. This will automatically make the target files. Make sure
that the original files are world-readable (or at least readable by all the target users).
Run chmod afterwards if you don't want the copied files to be world-readable.
getent passwd |
awk -F : '$1 ~ /^u12/ {print $1}' |
while IFS= read -r user; do
su "$user" -c 'cp -Rp /original/location/somefiles ~/'
done
I am using rsync to replicate a web folder structure from a local server to a remote server.
Both servers are ubuntu linux. I use the following command, and it works well:
The usernames for the local system and the remote system are different. From what I have
read it may not be possible to preserve all file and folder owners and groups. That is OK,
but I would like to preserve owners and groups just for the www-data user, which does exist
on both servers.
Is this possible? If so, how would I go about doing that?
I ended up getting the desired affect thanks to many of the helpful comments and answers
here. Assuming the IP of the source machine is 10.1.1.2 and the IP of the destination machine
is 10.1.1.1. I can use this line from the destination machine:
This preserves the ownership and groups of the files that have a common user name, like
www-data. Note that using
rsync
without
sudo
does not preserve
these permissions.
This lets you authenticate as
user
on targethost, but still get privileged
write permission through
sudo
. You'll have to modify your sudoers file on the
target host to avoid sudo's request for your password.
man sudoers
or run
sudo visudo
for instructions and samples.
You mention that you'd like to retain the ownership of files owned by www-data, but not
other files. If this is really true, then you may be out of luck unless you implement
chown
or a second run of
rsync
to update permissions. There is no
way to tell rsync to preserve ownership for
just one user
.
That said, you should read about rsync's
--files-from
option.
As far as I know, you cannot
chown
files to somebody else than you, if you are
not root. So you would have to
rsync
using the
www-data
account, as
all files will be created with the specified user as owner. So you need to
chown
the files afterwards.
The root users for the local system and the remote system are different.
What does this mean? The
root
user is uid 0. How are they different?
Any user with read permission to the directories you want to copy can determine what
usernames own what files. Only root can change the ownership of files being
written
.
You're currently running the command on the source machine, which restricts your writes to
the permissions associated with [email protected]. Instead, you can try to run the command
as
root
on the
target
machine. Your
read
access on the source machine
isn't an issue.
So on the target machine (10.1.1.1), assuming the source is 10.1.1.2:
Also, set up access to [email protected] using a DSA or RSA key, so that you can avoid having
passwords floating around. For example, as root on your target machine, run:
# ssh-keygen -d
Then take the contents of the file
/root/.ssh/id_dsa.pub
and add it to
~user/.ssh/authorized_keys
on the source machine. You can
ssh
[email protected] as root from the target machine to see if it works. If you get a
password prompt, check your error log to see why the key isn't working.
I'm trying to use rsync to copy a set of files from one system to another. I'm running
the command as a normal user (not root). On the remote system, the files are owned by
apache and when copied they are obviously owned by the local account (fred).
My problem is that every time I run the rsync command, all files are re-synched even
though they haven't changed. I think the issue is that rsync sees the file owners are
different and my local user doesn't have the ability to change ownership to apache, but
I'm not including the
-a
or
-o
options so I thought this would
not be checked. If I run the command as root, the files come over owned by apache and do
not come a second time if I run the command again. However I can't run this as root for
other reasons. Here is the command:
Why can't you run rsync as root? On the remote system, does fred have read
access to the apache-owned files? –
chrishiestand
May 3 '11 at 0:32
Ah, I left out the fact that there are ssh keys set up so that local fred can
become remote root, so yes fred/root can read them. I know this is a bit convoluted
but its real. –
Fred Snertz
May 3 '11 at 14:50
Always be careful when root can ssh into the machine. But if you have password
and challenge response authentication disabled it's not as bad. –
chrishiestand
May 3 '11 at 17:32
-c, --checksum
This changes the way rsync checks if the files have been changed and are in need of a transfer. Without this option,
rsync uses a "quick check" that (by default) checks if each file's size and time of last modification match between the
sender and receiver. This option changes this to compare a 128-bit checksum for each file that has a matching size.
Generating the checksums means that both sides will expend a lot of disk I/O reading all the data in the files in the
transfer (and this is prior to any reading that will be done to transfer changed files), so this can slow things down
significantly.
The sending side generates its checksums while it is doing the file-system scan that builds the list of the available
files. The receiver generates its checksums when it is scanning for changed files, and will checksum any file that has
the same size as the corresponding sender's file: files with either a changed size or a changed checksum are selected
for transfer.
Note that rsync always verifies that each transferred file was correctly reconstructed on the receiving side by checking
a whole-file checksum that is generated as the file is transferred, but that automatic after-the-transfer verification
has nothing to do with this option's before-the-transfer "Does this file need to be updated?" check.
For protocol 30 and beyond (first supported in 3.0.0), the checksum used is MD5. For older protocols, the checksum used
is MD4.
I have a bash script which uses
rsync
to backup files in Archlinux. I noticed
that
rsync
failed to copy a file from
/sys
, while
cp
worked just fine:
# rsync /sys/class/net/enp3s1/address /tmp
rsync: read errors mapping "/sys/class/net/enp3s1/address": No data available (61)
rsync: read errors mapping "/sys/class/net/enp3s1/address": No data available (61)
ERROR: address failed verification -- update discarded.
rsync error: some files/attrs were not transferred (see previous errors) (code 23) at main.c(1052) [sender=3.0.9]
# cp /sys/class/net/enp3s1/address /tmp ## this works
I wonder why does
rsync
fail, and is it possible to copy the file with
it?
Rsync has
code
which specifically checks if a file is truncated during read and gives this error !
ENODATA
. I don't know
why
the files in
/sys
have this
behavior, but since they're not real files, I guess it's not too surprising. There doesn't
seem to be a way to tell rsync to skip this particular check.
I think you're probably better off not rsyncing
/sys
and using specific
scripts to cherry-pick out the particular information you want (like the network card
address).
First off
/sys
is a
pseudo file system
. If you look at
/proc/filesystems
you will find a list of registered file systems where quite a
few has
nodev
in front. This indicates they are
pseudo filesystems
.
This means they exists on a running kernel as a RAM-based filesystem. Further they do not
require a block device.
Further you can do a
stat
on a file and notice another distinct feature; it
occupies 0 blocks. Also inode of root (stat /sys) is 1.
/stat/fs
typically has
inode 2. etc.
rsync vs. cp
The easiest explanation for rsync failure of synchronizing pseudo files is perhaps by
example.
Say we have a file named
address
that is 18 bytes. An
ls
or
stat
of the file reports 4096 bytes.
rsync
Opens file descriptor, fd.
Uses fstat(fd) to get information such as size.
Set out to read size bytes, i.e. 4096. That would be
line 253
of the code linked by
@mattdm
.
read_size ==
4096
Ask; read: 4096 bytes.
A short string is read i.e. 18 bytes.
nread == 18
read_size = read_size - nread (4096 - 18 = 4078)
Ask; read: 4078 bytes
0 bytes read (as first read consumed all bytes in file).
During this process it actually reads the entire file. But with no size available it
cannot validate the result – thus failure is only option.
cp
Opens file descriptor, fd.
Uses fstat(fd) to get information such as st_size (also uses lstat and stat).
Check if file is likely to be sparse. That is the file has holes etc.
copy.c:1010
/* Use a heuristic to determine whether SRC_NAME contains any sparse
* blocks. If the file has fewer blocks than would normally be
* needed for a file of its size, then at least one of the blocks in
* the file is a hole. */
sparse_src = is_probably_sparse (&src_open_sb);
As
stat
reports file to have zero blocks it is categorized as sparse.
Tries to read file by extent-copy (a more efficient way to copy
normal
sparse
files), and fails.
Copy by sparse-copy.
Starts out with max read size of MAXINT.
Typically
18446744073709551615
bytes on a 32 bit system.
Ask; read 4096 bytes. (Buffer size allocated in memory from stat information.)
A short string is read i.e. 18 bytes.
Check if a hole is needed, nope.
Write buffer to target.
Subtract 18 from max read size.
Ask; read 4096 bytes.
0 bytes as all got consumed in first read.
Return success.
All OK. Update flags for file.
FINE.
,
Might be related, but extended attribute calls will fail on sysfs:
[root@hypervisor eth0]# lsattr address
lsattr: Inappropriate ioctl for device While reading flags on address
[root@hypervisor eth0]#
Looking at my strace it looks like rsync tries to pull in extended attributes by
default:
22964 <... getxattr resumed> , 0x7fff42845110, 132) = -1 ENODATA (No data
available)
I tried finding a flag to give rsync to see if skipping extended attributes resolves the
issue but wasn't able to find anything (
--xattrs
turns them
on
at the
destination).
I'm having some trouble with rsync. I'm trying to sync my local /etc directory to a remote
server, but this won't work.
The problem is that it seems he doesn't copy all the files.
The local /etc dir contains 15MB of data, after a rsync, the remote backup contains only 4.6MB
of data.
Scormen May 31st, 2009, 11:05 AM I found that if I do a local sync, everything goes fine.
But if I do a remote sync, it copies only 4.6MB.
Any idea?
LoneWolfJack May 31st, 2009, 05:14 PM never used rsync on a remote machine, but "sudo rsync"
looks wrong. you probably can't call sudo like that so the ssh connection needs to have the
proper privileges for executing rsync.
just an educated guess, though.
Scormen May 31st, 2009, 05:24 PM Thanks for your answer.
In /etc/sudoers I have added next line, so "sudo rsync" will work.
kris ALL=NOPASSWD: /usr/bin/rsync
I also tried without --rsync-path="sudo rsync", but without success.
I have also tried on the server to pull the files from the laptop, but that doesn't work
either.
LoneWolfJack May 31st, 2009, 05:30 PM in the rsync help file it says that --rsync-path is for
the path to rsync on the remote machine, so my guess is that you can't use sudo there as it
will be interpreted as a path.
so you will have to do --rsync-path="/path/to/rsync" and make sure the ssh login has root
privileges if you need them to access the files you want to sync.
--rsync-path="sudo rsync" probably fails because
a) sudo is interpreted as a path
b) the space isn't escaped
c) sudo probably won't allow itself to be called remotely
again, this is not more than an educated guess.
Scormen May 31st, 2009, 05:45 PM I understand what you mean, so I tried also:
sending incremental file list
rsync: recv_generator: failed to stat "/home/kris/backup/laptopkris/etc/chatscripts/pap":
Permission denied (13)
rsync: recv_generator: failed to stat "/home/kris/backup/laptopkris/etc/chatscripts/provider":
Permission denied (13)
rsync: symlink "/home/kris/backup/laptopkris/etc/cups/ssl/server.crt" ->
"/etc/ssl/certs/ssl-cert-snakeoil.pem" failed: Permission denied (13)
rsync: symlink "/home/kris/backup/laptopkris/etc/cups/ssl/server.key" ->
"/etc/ssl/private/ssl-cert-snakeoil.key" failed: Permission denied (13)
rsync: recv_generator: failed to stat "/home/kris/backup/laptopkris/etc/ppp/peers/provider":
Permission denied (13)
rsync: recv_generator: failed to stat
"/home/kris/backup/laptopkris/etc/ssl/private/ssl-cert-snakeoil.key": Permission denied
(13)
sent 86.85K bytes received 306 bytes 174.31K bytes/sec
total size is 8.71M speedup is 99.97
rsync error: some files/attrs were not transferred (see previous errors) (code 23) at
main.c(1058) [sender=3.0.5]
And the same command with "root" instead of "kris".
Then, I get no errors, but I still don't have all the files synced.
Scormen June 1st, 2009, 09:00 AM Sorry for this bump.
I'm still having the same problem.
Any idea?
Thanks.
binary10 June 1st, 2009, 10:36 AM I understand what you mean, so I tried also:
And the same command with "root" instead of "kris".
Then, I get no errors, but I still don't have all the files synced.
Maybe there's a nicer way but you could place /usr/bin/rsync into a private protected area
and set the owner to root place the sticky bit on it and change your rsync-path argument such
like:
# on the remote side, aka [email protected]
mkdir priv-area
# protect it from normal users running a priv version of rsync
chmod 700 priv-area
cd priv-area
cp -p /usr/local/bin/rsync ./rsync-priv
sudo chown 0:0 ./rsync-priv
sudo chmod +s ./rsync-priv
ls -ltra # rsync-priv should now be 'bold-red' in bash
Looking at your flags, you've specified a cvs ignore factor, ignore files that are updated
on the target, and you're specifying a backup of removed files.
From those qualifiers you're not going to be getting everything sync'd. It's doing what
you're telling it to do.
If you really wanted to perform a like for like backup.. (not keeping stuff that's been
changed/deleted from the source. I'd go for something like the following.
Remove the --dry-run and -i when you're happy with the output, and it should do what you
want. A word of warning, I get a bit nervous when not seeing trailing (/) on directories as it
could lead to all sorts of funnies if you end up using rsync on softlinks.
Scormen June 1st, 2009, 12:19 PM Thanks for your help, binary10.
I've tried what you have said, but still, I only receive 4.6MB on the remote server.
Thanks for the warning, I'll not that!
Did someone already tried to rsync their own /etc to a remote system? Just to know if this
strange thing only happens to me...
Thanks.
binary10 June 1st, 2009, 01:22 PM Thanks for your help, binary10.
I've tried what you have said, but still, I only receive 4.6MB on the remote server.
Thanks for the warning, I'll not that!
Did someone already tried to rsync their own /etc to a remote system? Just to know if this
strange thing only happens to me...
Thanks.
Ok so I've gone back and looked at your original post, how are you calculating 15MB of data
under etc - via a du -hsx /etc/ ??
I do daily drive to drive backup copies via rsync and drive to network copies.. and have
used them recently for restoring.
Sure my du -hsx /etc/ reports 17MB of data of which 10MB gets transferred via an rsync. My
backup drives still operate.
rsync 3.0.6 has some fixes to do with ACLs and special devices rsyncing between solaris. but
I think 3.0.5 is still ok with ubuntu to ubuntu systems.
Here is my test doing exactly what you you're probably trying to do. I even check the remote
end..
Number of files: 3121
Number of files transferred: 1812
Total file size: 10.04M bytes
Total transferred file size: 10.00M bytes
Literal data: 10.00M bytes
Matched data: 0 bytes
File list size: 109.26K
File list generation time: 0.002 seconds
File list transfer time: 0.000 seconds
Total bytes sent: 10.20M
Total bytes received: 38.70K
sent 10.20M bytes received 38.70K bytes 4.09M bytes/sec
total size is 10.04M speedup is 0.98
binary10@jsecx25:~/bin-priv$ sudo du -hsx /etc/
17M /etc/
binary10@jsecx25:~/bin-priv$
And then on the remote system I do the du -hsx
binary10@lenovo-n200:/home/kris/backup/laptopkris/etc$ cd ..
binary10@lenovo-n200:/home/kris/backup/laptopkris$ sudo du -hsx etc
17M etc
binary10@lenovo-n200:/home/kris/backup/laptopkris$
Scormen June 1st, 2009, 01:35 PM ow are you calculating 15MB of data under etc - via a du -hsx
/etc/ ??
Indeed, on my laptop I see:
root@laptopkris:/home/kris# du -sh /etc/
15M /etc/
If I do the same thing after a fresh sync to the server, I see:
root@server:/home/kris# du -sh /home/kris/backup/laptopkris/etc/
4.6M /home/kris/backup/laptopkris/etc/
On both sides, I have installed Ubuntu 9.04, with version 3.0.5 of rsync.
So strange...
binary10 June 1st, 2009, 01:45 PM it does seem a bit odd.
I'd start doing a few diffs from the outputs find etc/ -printf "%f %s %p %Y\n" | sort
And see what type of files are missing.
- edit - Added the %Y file type.
Scormen June 1st, 2009, 01:58 PM Hmm, it's going stranger.
Now I see that I have all my files on the server, but they don't have their full size (bytes).
I have uploaded the files, so you can look into them.
binary10 June 1st, 2009, 02:16 PM If you look at the files that are different aka the ssl's
they are links to local files else where aka linked to /usr and not within /etc/
aka they are different on your laptop and the server
Scormen June 1st, 2009, 02:25 PM I understand that soft links are just copied, and not the
"full file".
But, you have run the same command to test, a few posts ago.
How is it possible that you can see the full 15MB?
binary10 June 1st, 2009, 02:34 PM I was starting to think that this was a bug with du.
The de-referencing is a bit topsy.
If you rsync copy the remote backup back to a new location back onto the laptop and do the
du command. I wonder if you'll end up with 15MB again.
Scormen June 1st, 2009, 03:20 PM Good tip.
On the server side, the backup of the /etc was still 4.6MB.
I have rsynced it back to the laptop, to a new directory.
If I go on the laptop to that new directory and do a du, it says 15MB.
binary10 June 1st, 2009, 03:34 PM Good tip.
On the server side, the backup of the /etc was still 4.6MB.
I have rsynced it back to the laptop, to a new directory.
If I go on the laptop to that new directory and do a du, it says 15MB.
I think you've now confirmed that RSYNC DOES copy everything.. just tht du confusing what
you had expected by counting the end link sizes.
It might also think about what you're copying, maybe you need more than just /etc of course
it depends on what you are trying to do with the backup :)
enjoy.
Scormen June 1st, 2009, 03:37 PM Yeah, it seems to work well.
So, the "problem" where just the soft links, that couldn't be counted on the server side?
binary10 June 1st, 2009, 04:23 PM Yeah, it seems to work well.
So, the "problem" where just the soft links, that couldn't be counted on the server side?
The links were copied as links as per the design of the --archive in rsync.
The contents of the pointing links were different between your two systems. These being that
that reside outside of /etc/ in /usr And so DU reporting them differently.
Scormen June 1st, 2009, 05:36 PM Okay, I got it.
Many thanks for the support, binarty10!
Scormen June 1st, 2009, 05:59 PM Just to know, is it possible to copy the data from these links
as real, hard data?
Thanks.
binary10 June 2nd, 2009, 09:54 AM Just to know, is it possible to copy the data from these
links as real, hard data?
Thanks.
Yep absolutely
You should then look at other possibilities of:
-L, --copy-links transform symlink into referent file/dir
--copy-unsafe-links only "unsafe" symlinks are transformed
--safe-links ignore symlinks that point outside the source tree
-k, --copy-dirlinks transform symlink to a dir into referent dir
-K, --keep-dirlinks treat symlinked dir on receiver as dir
but then you'll have to start questioning why you are backing them up like that especially
stuff under /etc/. If you ever wanted to restore it you'd be restoring full files and not
symlinks the restore result could be a nightmare as well as create future issues (upgrades etc)
let alone your backup will be significantly larger, could be 150MB instead of 4MB.
Scormen June 2nd, 2009, 10:04 AM Okay, now I'm sure what its doing :)
Is it also possible to show on a system the "real disk usage" of e.g. that /etc directory? So,
without the links, that we get a output of 4.6MB.
Thank you very much for your help!
binary10 June 2nd, 2009, 10:22 AM What does the following respond with.
sudo du --apparent-size -hsx /etc
If you want the real answer then your result from a dry-run rsync will only be enough for
you.
06-29-2016Vikram
Jain Registered UserJoin Date: Jun 2016 Last Activity: 23 March 2017, 2:57 PM EDT Posts:
3 Thanks: 3 Thanked 0 Times in 0 Posts
Cut command on RHEL 6.8 compatibility issues
We have a lot of scripts using cut as :
cut -c 0-8 --works for cut (GNU coreutils) 5.97, but does not work for cut (GNU coreutils) 8.4.
Gives error -
Code:
cut: fields and positions are numbered from 1
Try `cut --help' for more information.
The position needs to start with 1 for later version of cut and this is causing an issue.
Is there a way where I can have multiple cut versions installed and use the older version of
cut for the user which runs the script?
or any other work around without having to change the scripts?
Thanks.
Last edited by RudiC; 06-30-2016 at 04:53 AM .. Reason: Added code tags.
Vikram Jain
Don Cragun AdministratorJoin Date: Jul 2012 Last Activity: 14 August 2017, 3:59
PM EDT Location: San Jose, CA, USA Posts: 10,455 Thanks: 533 Thanked 3,654 Times in 3,118 Posts
What are you trying to do when you invoke
Code:
cut -c 0-8
with your old version of cut
With that old version of cut , is there any difference in the output produced by the two pipelines:
Code:
echo 0123456789abcdef | cut -c 0-8
and:
Code:
echo 0123456789abcdef | cut -c 1-8
or do they produce the same output?
Don Cragun
# 06-30-2016
Vikram Jain Registered UserJoin Date: Jun 2016 Last Activity: 23 March 2017, 2:57 PM
EDT Posts: 3 Thanks: 3 Thanked 0 Times in 0 Posts
I am trying to get a value from the 1st line of the file and check if that value is a valid
date or not.
------------------------------------------------------------------
Below is the output for the cut command from new version
Code:
$ echo 0123456789abcdef | cut -c 0-8
cut: fields and positions are numbered from 1
Try `cut --help' for more information.
$ echo 0123456789abcdef | cut -c 1-8
01234567
-------------------------------------------------------------------
With old version, both have same results:
Please wrap all code, files, input & output/errors in CODE tags
It makes them far easier to read and preserves spaces for indenting or fixed-width data.
Last edited by rbatte1; 06-30-2016 at 11:38 AM .. Reason: Code tags
Vikram Jain
06-30-2016
Scrutinizer ModeratorJoin Date: Nov 2008 Last Activity: 14 August 2017, 2:48 PM
EDT Location: Amsterdam Posts: 11,509 Thanks: 497 Thanked 3,326 Times in 2,934 Posts
The use of 0 is not according to specification. Alternatively, you can just omit it, which
should work across versions
Code:
$ echo 0123456789abcdef | cut -c -8
01234567
If you cannot adjust the scripts, you could perhaps create a wrapper script for cut, so that the
0 gets stripped..
Last edited by Scrutinizer; 07-02-2016 at 02:28 AM ..
Scrutinizer
06-30-2016
Vikram Jain Registered UserJoin Date: Jun 2016 Last Activity: 23 March 2017, 2:57 PM
EDT Posts: 3 Thanks: 3 Thanked 0 Times in 0 Posts
Yes, don't want to adjust my scripts.
Wrapper for cut looks like something that would work.
could you please tell me how would I use it, as in, how would I make sure that the wrapper
is called and not the cut command which causes the issue.
Vikram Jain
Don Cragun AdministratorJoin Date: Jul 2012 Last Activity: 14 August 2017, 3:59
PM EDT Location: San Jose, CA, USA Posts: 10,455 Thanks: 533 Thanked 3,654 Times in 3,118 Posts
The only way to make sure that your wrapper is always called instead of the OS supplied utility
is to move the OS supplied utility to a different location and install your wrapper in the location
where your OS installed cut originally.
Of course, once you have installed this wrapper, your code might or might not work properly
(depending on the quality of your wrapper) and no one else on your system will be able to look
at the diagnostics produced by scripts that have bugs in the way they specify field and character
ranges so they can identify and fix their code.
My personal opinion is that you should spend time fixing your scripts that call cut -c 0....
, cut -f 0... , and lots of other possible misuses of 0 that are now correctly diagnosed as errors
by the new version of cut instead of debugging code to be sure that it changes all of the appropriate
0 characters in its argument list to 1 characters and doesn't change any 0 characters that are
correctly specified and do not reference a character 0 or field 0.
MadeInGermany ModeratorJoin Date: May 2012 Last Activity: 14 August 2017, 2:33
PM EDT Location: Simplicity Posts: 3,666 Thanks: 295 Thanked 1,226 Times in 1,108 Posts
An update of "cut" will overwrite your wrapper.
Much better: change your scripts. Run the following fix_cut script on your scripts:
Code:
#!/bin/sh
# fix_cut
PATH=/bin:/usr/bin
PRE="\b(cut\s+(-\S*\s+)*-[cf]\s*0*)0-"
for arg
do
perl -ne 'exit 1 if m/'"$PRE"'/' "$arg" || {
perl -i -pe 's/'"$PRE"'/${1}1-/g' "$arg"
}
done
Example: fix all .sh scripts
Code:
fix_cut *.sh
The Following User Says Thank You to MadeInGermany For This Useful Post:
Using
vi-mode in your shell
(Mar 27, 2017, 11:00)
opensource.com: Get an introduction to using vi-mode for line editing at the command
line.
Notepadqq Source Code Editor for Linux
(Mar 27, 2017, 10:00)
Notepadqq is a free, open source code editor and Notepad replacement, that helps
developers to work more efficiently.
It's easy to get
into the habit of googling anything you want to know about a command or operation in Linux, but
I'd argue there's something even better: a living and breathing, complete reference, the man
pages , which is short for manual pages.
The history of man pages predates Linux, all the way back to the early days of Unix.
According to Wikipedia
,
Dennis Ritchie and Ken Thompson wrote the first man pages in 1971, well before the days of
personal computers, around the time when many calculators in use were the size of toaster
ovens. Man pages also have a reputation of being terse and, in a way, have a language of their
own. Just like Unix and Linux, the man pages have not been static, and they continue to be
developed and maintained just like the kernel.
Man pages are divided into sections referenced by numbers:
General user commands
System calls
Library functions
Special files and drivers
File formats
Games and screensavers
Miscellanea
System administration commands and daemons
Even so, users generally don't need to know the section where a particular command lies to
find what they need.
The files are formatted in a way that may look odd to many users today. Originally, they
were written in in an old form of markup called troff because they were designed to be printed
through a PostScript printer, so they included formatting for headers and other layout aspects.
In Linux,
groff
is
used instead.
In my Fedora, the man pages are located in /usr/share/man with subdirectories (like man1 for
Section 1 commands) as well as additional subdirectories for translations of the man pages.
If you look up the man page for the command man , you'll see the file man.1.gz , which is
the man pages compressed with the gzip utility. To access a man page, type a command such
as:
man
man
for example, to show the man page for man . This uncompresses the man page, interprets the
formatting commands, and displays the results with
less
, so navigation is the same as when you
use less .
All man pages should have the following subsections: Name , Synopsis , Description ,
Examples , and See Also . Many have additional sections, like Options , Exit Status ,
Environment , Bugs , Files , Author , Reporting Bugs , History , and Copyright .
Breaking
down a man page
To explain how to interpret a typical man page, let's use the
man page for ls
as an example. Under Name , we
see
ls
- list directory contents
which tells us what ls means in the simplest terms.
Under Synopsis , we begin to see the terseness:
ls
[
OPTION
]
...
[
FILE
]
Any element that occurs inside brackets is optional. The above command means you can
legitimately type ls and nothing else. The ellipsis after each element indicates that you can
include as many options as you want (as long as they're compatible with each other) and as many
files as you want. You can specify a directory name, and you can also use * as a wildcard. For
example:
ls
Documents
/*
.txt
Under Description , we see a more verbose description of what the command does, followed by
a list of the available options for the command. The first option for ls is
-a, --all
do not ignore entries starting with .
If we want to use this option, we can either type the short form syntax, -a , or the long
form --all . Not all options have two forms (e.g., --author ), and even when they do, they
aren't always so obviously related (e.g., - F, --classify ). When you want to use multiple
options, you can either type the short forms with spaces in between or type them with a single
hyphen and no spaces (as long as they do not require further sub-options). Therefore,
ls
-a
-d
-l
and
ls
-adl
are equivalent.
The command tar is somewhat unique, presumably due to its long history, in that it doesn't
require a hyphen at all for the short form. Therefore,
tar
-cvf
filearchive.tar thisdirectory
/
and
tar
cvf filearchive.tar thisdirectory
/
are both legitimate.
On the ls man page, after Description are Author , Reporting Bugs , Copyright , and See Also
.
The See Also section will often suggest related man pages, so it is generally worth a
glance. After all, there is much more to man pages than just commands.
Certain commands that are specific to Bash and not system commands, like alias , cd , and a
number of others, are listed together in a single BASH_BUILTINS man page. While the
documentation for these is even more terse and compact, overall it contains similar
information.
I find that man pages offer a lot of good, usable information, especially when I need a
command I haven't used recently, and I need to brush up on the options and requirements. This
is one place where the man pages' much-maligned terseness is actually very beneficial.
Topics
Linux
About
the author
Greg Pittman - Greg is a retired neurologist in
Louisville, Kentucky, with a long-standing interest in computers and programming, beginning
with Fortran IV in the 1960s. When Linux and open source software came along, it kindled a
commitment to learning more, and eventually contributing. He is a member of the Scribus
Team.
cURL is very useful command line tool to transfer data from
or to a server. cURL supports various protocols like FILE, HTTP, HTTPS, IMAP, IMAPS, LDAP,
DICT, LDAPS, TELNET, FTP, FTPS, GOPHER, RTMP, RTSP, SCP, SFTP, POP3, POP3S, SMB, SMBS,
SMTP, SMTPS, and TFTP.
cURL can be used in many different and interesting ways. With this
tool you can download, upload and manage files, check your email address, or even update
your status on some of the social media websites or check the weather outside. In this
article will cover five of the most useful and basic uses of the cURL tool on any
Linux VPS
.
1. Check URL
One of the most common and simplest uses of cURL is typing the command itself, followed
by the URL you want to check
curl https://domain.com
This command will display the content of the URL on your terminal
2. Save the output of the URL to a file
The output of the cURL command can be easily saved to a file by adding the -o option to
the command, as shown below
curl -o website https://domain.com
% Total % Received % Xferd Average Speed Time Time Time Current
Dload Upload Total Spent Left Speed
100 41793 0 41793 0 0 275k 0 --:--:-- --:--:-- --:--:-- 2.9M
In this example, output will be save to a file named 'website' in the current working
directory.
3. Download files with cURL
You can downlaod files with cURL by adding the -O option to the command. It is used for
saving files on the local server with the same names as on the remote server
curl -O https://domain.com/file.zip
In this example, the 'file.zip' zip archive will be downloaded to the current working
directory.
You can also download the file with a different name by adding the -o option to cURL.
curl -o archive.zip https://domain.com/file.zip
This way the 'file.zip' archive will be downloaded and saved as 'archive.zip'.
cURL can be also used to download multiple files simultaneously, as shown in the example
below
You can check cURL manual page to see all available cURL options and functionalities
man curl
Of course, if you use one of our
Linux VPS Hosting
services, you can always contact and ask our expert Linux admins (via chat or ticket) about
cURL and anything related to cURL. They are available 24×7 and will provide information or
assistance immediately.
PS.
If you liked this post
please share it with your friends on the social networks using the buttons below or simply
leave a reply. Thanks.
Another interesting option, and my personal favorite because it
increases the power and flexibility of rsync immensely, is the
--link-dest
option. The
--link-dest
option allows a series
of daily backups that take up very little additional space for each
day and also take very little time to create.
Specify the previous
day's target directory with this option and a new directory for today.
rsync then creates today's new directory and a hard link for each file
in yesterday's directory is created in today's directory. So we now
have a bunch of hard links to yesterday's files in today's directory.
No new files have been created or duplicated. Just a bunch of hard
links have been created. Wikipedia has a very good description of
hard
links
. After creating the target directory for today with this set
of hard links to yesterday's target directory, rsync performs its sync
as usual, but when a change is detected in a file, the target hard
link is replaced by a copy of the file from yesterday and the changes
to the file are then copied from the source to the target.
There are also times when it is desirable to exclude certain
directories or files from being synchronized. For this, there is the
--exclude
option. Use this option and the pattern for the files
or directories you want to exclude. You might want to exclude browser
cache files so your new command will look like this.
Note that each file pattern you want to exclude must have a
separate exclude option.
rsync can sync files with remote hosts as either the source or the
target. For the next example, let's assume that the source directory
is on a remote computer with the hostname remote1 and the target
directory is on the local host. Even though SSH is the default
communications protocol used when transferring data to or from a
remote host, I always add the ssh option. The command now looks like
this.
This is the final form of my rsync backup command.
rsync has a very large number of options that you can use to
customize the synchronization process. For the most part, the
relatively simple commands that I have described here are perfect for
making backups for my personal needs. Be sure to read the extensive
man page for rsync to learn about more of its capabilities as well as
the options discussed here.
It can perform differential uploads and downloads (synchronization) of files across the network,
transferring only data that has changed. The rsync remote-update protocol allows rsync to transfer
just the differences between two sets of files across the network connection.
How do I install rsync?
Use any one of the following commands to install rsync. If you are using Debian or Ubuntu Linux,
type the following command: # apt-get install rsync
OR $ sudo apt-get install rsync
If you are using Red Hat Enterprise Linux (RHEL) / CentOS 4.x or older version, type the following
command: # up2date rsync
RHEL / CentOS 5.x or newer (or Fedora Linux) user type the following command: # yum install rsync
Always use rsync over ssh
Since rsync does not provide any security while transferring data it is recommended that you use
rsync over ssh session. This allows a secure remote connection. Now let us see some examples of rsync
command.
Comman rsync command options
--delete : delete files that don't exist on sender (system)
-v : Verbose (try -vv for more detailed information)
-e "ssh options" : specify the ssh as remote shell
-a : archive mode
-r : recurse into directories
-z : compress file data
Task : Copy file from a local computer to a remote server
Copy file from /www/backup.tar.gz to a remote server called openbsd.nixcraft.in $ rsync -v -e ssh /www/backup.tar.gz [email protected]:~
Output:
Password:
sent 19099 bytes received 36 bytes 1093.43 bytes/sec
total size is 19014 speedup is 0.99
Please note that symbol ~ indicate the users home directory (/home/jerry).
Task : Copy file from a remote server to a local computer
Copy file /home/jerry/webroot.txt from a remote server openbsd.nixcraft.in to a local computer's
/tmp directory: $ rsync -v -e ssh [email protected]:~/webroot.txt /tmp
Task: Synchronize a local directory with a remote directory
Task: Synchronize a local directory with a remote rsync server or vise-versa
$ rsync -r -a -v --delete rsync://rsync.nixcraft.in/cvs /home/cvs
OR $ rsync -r -a -v --delete /home/cvs rsync://rsync.nixcraft.in/cvs
Task: Mirror a directory between my "old" and "new" web server/ftp
You can mirror a directory between my "old" (my.old.server.com) and "new" web server with the
command (assuming that ssh keys are set for password less authentication) $ rsync -zavrR --delete --links --rsh="ssh -l vivek" my.old.server.com:/home/lighttpd /home/lighttpd
The rdiff command uses the rsync algorithm. A utility called rdiff-backup has been created which
is capable of maintaining a backup mirror of a file or directory over the network, on another server.
rdiff-backup stores incremental rdiff deltas with the backup, with which it is possible to recreate
any backup point. Next time I will write about these utilities.
rsync for Windows Server/XP/7/8
Please note if you are using MS-Windows, try any one of the program:
The purpose of creating a mirror of your Web Server with Rsync is if your main web server fails,
your backup server can take over to reduce downtime of your website. This way of creating a web server
backup is very good and effective for small and medium size web businesses. Advantages of Syncing
Web Servers
The main advantages of creating a web server backup with rsync are as follows:
Rsync syncs only those bytes and blocks of data that have changed.
Rsync has the ability to check and delete those files and directories at backup server that
have been deleted from the main web server.
It takes care of permissions, ownerships and special attributes while copying data remotely.
It also supports SSH protocol to transfer data in an encrypted manner so that you will be
assured that all data is safe.
Rsync uses compression and decompression method while transferring data which consumes less
bandwidth.
How To Sync Two Apache Web Servers
Let's proceed with setting up rsync to create a mirror of your web server. Here, I'll be using
two servers.
Main Server
IP Address : 192.168.0.100
Hostname : webserver.example.com
Backup Server
IP Address : 192.168.0.101
Hostname : backup.example.com
Step 1: Install Rsync Tool
Here in this case web server data of webserver.example.com will be mirrored on backup.example.com
. And to do so first, we need to install Rsync on both the server with the help of following command.
[root@tecmint]# yum install rsync [On
Red Hat
based systems]
[root@tecmint]# apt-get install rsync [On
Debian
based systems]
Step 2: Create a User to run Rsync
We can setup rsync with root user, but for security reasons, you can create an unprivileged user
on main webserver i.e webserver.example.com to run rsync.
[email protected]'s password:
receiving incremental file list
sent 128 bytes received 32.67K bytes 5.96K bytes/sec
total size is 12.78M speedup is 389.70
You can see that your rsync is now working absolutely fine and syncing data. I have used " /var/www
" to transfer; you can change the folder location according to your needs.
Step 4: Automate Sync with SSH Passwordless Login
Now, we are done with rsync setups and now its time to setup a cron for rsync. As we are going
to use rsync with SSH protocol, ssh will be asking for authentication and if we won't provide a password
to cron it will not work. In order to work cron smoothly, we need to setup passwordless ssh logins
for rsync.
Here in this example, I am doing it as root to preserve file ownerships as well, you can do it
for alternative users too.
First, we'll generate a public and private key with following commands on backups server (i.e.
backup.example.com ).
[root@backup]# ssh-keygen -t rsa -b 2048
When you enter this command, please don't provide passphrase and click enter for Empty passphrase
so that rsync cron will not need any password for syncing data.
Sample Output
Generating public/private rsa key pair.
Enter file in which to save the key (/root/.ssh/id_rsa):
Enter passphrase (empty for no passphrase):
Enter same passphrase again:
Your identification has been saved in /root/.ssh/id_rsa.
Your public key has been saved in /root/.ssh/id_rsa.pub.
The key fingerprint is:
9a:33:a9:5d:f4:e1:41:26:57:d0:9a:68:5b:37:9c:23 [email protected]
The key's randomart image is:
+--[ RSA 2048]----+
| .o. |
| .. |
| ..++ . |
| o=E * |
| .Sooo o |
| =.o o |
| * . o |
| o + |
| . . |
+-----------------+
Now, our Public and Private key has been generated and we will have to share it with main server
so that main web server will recognize this backup machine and will allow it to login without asking
any password while syncing data.
Let's setup a cron for this. To setup a cron, please open crontab file with the following command.
[root@backup ~]# crontab e
It will open up /etc/crontab file to edit with your default editor. Here In this example, I am
writing a cron to run it every 5 minutes to sync the data.
The above cron and rsync command simply syncing " /var/www/ " from the main web server to a backup
server in every 5 minutes . You can change the time and folder location configuration according to
your needs. To be more creative and customize with Rsync and Cron command, you can check out our
more detailed articles at:
Great demonstration and very easy to follow Don! Just a
note to anyone who might come across this and start
using it in production based systems is that you
certainly would not want to be rsyncing with root
accounts. In addition you would use key based auth with
SSH as an additional layer of security. Just my 2cents
;-)
curtis shaw
11
months ago
Best rsync tutorial on the web. Thanks.
We all know that ping command will tell you instantly whether the website is
live or down. Usually, we all check whether a website is up or down like below.
ping ostechnix.com -c 3
Sample output:
PING ostechnix.com (64.90.37.180) 56(84) bytes of data.
64 bytes from ostechnix.com (64.90.37.180): icmp_seq=1 ttl=51 time=376 ms
64 bytes from ostechnix.com (64.90.37.180): icmp_seq=2 ttl=51 time=374 ms
--- ostechnix.com ping statistics ---
3 packets transmitted, 2 received, 33% packet loss, time 2000ms
rtt min/avg/max/mdev = 374.828/375.471/376.114/0.643 ms
But, Would you run this command every time to check whether your website is live or down? You
may create a script to check your website status at periodic intervals. But wait. It's not necessary!
Here is simple command that will watch or monitor on a regular interval.
watch -n 1 curl -I http://DOMAIN_NAME/
For those who don't know, watch command is used to run any command on a particular
intervals.
Let us check if ostechnix.com site is live or down. To do so, run:
watch -n 1 curl -I https://www.ostechnix.com/
Sample output:
Every 1.0s: curl -I https://www.ostechnix.com/ sk: Thu Dec 22 17:37:24 2016
% Total % Received % Xferd Average Speed Time Time Time Current
Dload Upload Total Spent Left Speed
0 0 0 0 0 0 0 0 --:--:-- --:--:-- --:--:-- 0
0 0 0 0 0 0 0 0 --:--:-- --:--:-- --:--:-- 0
0 0 0 0 0 0 0 0 --:--:-- 0:00:01 --:--:-- 0
0 0 0 0 0 0 0 0 --:--:-- 0:00:01 --:--:-- 0
HTTP/1.1 200 OK
Date: Thu, 22 Dec 2016 12:07:09 GMT
Server: ApacheD
Vary: Cookieh
Link: <https://www.ostechnix.com/wp-json/>; rel="https://api.w.org/", <https://w
p.me/5ILHv>; rel=shortlinki
Content-Type: text/html; charset=UTF-8
The above command will monitor our site ostechnix.com at every one second interval. You can change
the monitoring time as you wish. Unlike ping command, it will keep watching your site status until
you stop it. To stop this command, press CTRL+C.
If you got HTTP/1.1 200 OK in the output, great? It means your website is working
and live.
New submitter
rrconan writes I always feel like I'm getting old because of the constant need to learn a
new tools to do the same job. At the end of projects, I get the impression that nothing changes
— there are no real benefits to the new tools, and the only result is a lot of time wasted
learning them instead of doing the work. We discussed this
last week
with Andrew Binstock's "Just Let Me Code" article, and now he's written a follow-up about
reducing tool complexity and focusing on writing code. He says, "Tool vendors have several
misperceptions that stand in the way. The first is a long-standing issue, which is 'featuritis':
the tendency to create the perception of greater value in upgrades by adding rarely needed
features. ... The second misperception is that many tool vendors view the user experience they
offer as already pretty darn good. Compared with tools we had 10 years ago or more, UIs have
indeed improved significantly. But they have not improved as fast as complexity has increased.
And in that gap lies the problem.' Now I understand that what I thought of as "getting old" was
really "getting smart."
10 most rated linux commands for last
past weeks at
commandlinefu.
1- Save man-page as pdf
man -t awk | ps2pdf - awk.pdf
2- Duplicate installed packages from
one machine to the other (RPM-based systems)
3- Stamp a text line on top of the
pdf pages to quickly add some remark, comment, stamp text, … on top of (each
of) the pages of the input pdf file
echo "This text gets stamped on the top of the pdf pages." | enscript -B -f Courier-Bold16 -o- | ps2pdf - | pdftk input.pdf stamp - output output.pdf
4- Display the number of connections
to a MySQL Database
Count the number of active connections
to a MySQL database.
The MySQL command “show processlist” gives a list of all the active clients.
However, by using the processlist table, in the information_schema database,
we can sort and count the results within MySQL.
mysql -u root -p -BNe "select host,count(host) from processlist group by host;" information_schema
5- Create a local compressed tarball
from remote host directory
This improves on #9892 by compressing
the directory on the remote machine so that the amount of data transferred over
the network is much smaller. The command uses ssh(1) to get to a remote host,
uses tar(1) to archive and compress a remote directory, prints the result to
STDOUT, which is written to a local file. In other words, we are archiving and
compressing a remote directory to our local box.
6- tail a log over ssh
This is also handy for taking a look
at resource usage of a remote box.
ssh -t remotebox "tail -f /var/log/remote.log"
7- Print diagram of user/groups
Parses /etc/group to “dot” format and
pases it to “display” (imagemagick) to show a usefull diagram of users and groups
(don’t show empty groups).
awk 'BEGIN{FS=":"; print "digraph{"}{split($4, a, ","); for (i in a) printf "\"%s\" [shape=box]\n\"%s\" -> \"%s\"\n", $1, a[i], $1}END{print "}"}' /etc/group|display
8- Draw kernel module dependancy
graph.
Parse `lsmod’ output and pass to `dot’
drawing utility then finally pass it to an image viewer
pv allows a user to see the progress of data through a pipeline, by
giving information such as time elapsed, percentage completed (with progress
bar), current throughput rate, total data transferred, and ETA.
To use it, insert it in a pipeline between two processes, with the appropriate
options. Its standard input will be passed through to its standard output and
progress will be shown on standard error.
pv will copy each supplied FILE in turn to standard output
(- means standard input), or if no FILEs are specified just standard
input is copied. This is the same behaviour as cat(1).
A simple example to watch how quickly a file is transferred using nc(1):
pv file | nc -w 1 somewhere.com 3000
A similar example, transferring a file from another process and passing the
expected size to pv:
The package also contain Solaris binary of
chpasswd clone, which is extremely
useful for mass changes of passwords in corporate environments which include Solaris
and other Unixes that does not have chpasswd utility (HP-UX is another example in
this category). Version 1.3.2 now includes Solaris binary of
chpasswd which works on Solaris 9 and
10.
cgipaf is a combination of three CGI programs.
passwd.cgi, which allow users to
update their password,
viewmailcfg.cgi, which allows users
to view their current mail configuration,
mailcfg.cgi, which updates the mail
configuration.
All programs use PAM for user authentication. It is possible to run a script
to update SAMBA passwords or NIS configuration when a password is changed. mailcfg.cgi
creates a .procmailrc in the user's home directory. A user with too many invalid
logins can be locked. The minimum and maximum UID can be set in the configuration
file, so you can specify a range of UIDs that are allowed to use cgipaf.
If you manage systems and networks, you need Expect.
More precisely, why would you want to be without Expect? It saves hours common
tasks otherwise demand. Even if you already depend on Expect, though, you might
not be aware of the capabilities described below.
You don't have to understand all of Expect to begin profiting from the tool;
let's start with a concrete example of how Expect can simplify your work on
AIX® or other operating systems:
Suppose you have logins on several UNIX® or UNIX-like hosts and you need
to change the passwords of these accounts, but the accounts are not synchronized
by Network Information Service (NIS), Lightweight Directory Access Protocol
(LDAP), or some other mechanism that recognizes you're the same person logging
in on each machine. Logging in to a specific host and running the appropriate
passwd command doesn't take long—probably only a minute, in most
cases. And you must log in "by hand," right, because there's no way to
script your password?
Wrong. In fact, the standard Expect distribution (full distribution) includes
a command-line tool (and a manual page describing its use!) that precisely takes
over this chore. passmass (see
Resources) is a short script written
in Expect that makes it as easy to change passwords on twenty machines as on
one. Rather than retyping the same password over and over, you can launch
passmass once and let your desktop computer take care of updating
each individual host. You save yourself enough time to get a bit of fresh air,
and multiple opportunities for the frustration of mistyping something you've
already entered.
This passmass application is an excellent model—it illustrates
many of Expect's general properties:
It's a great return on investment: The utility is already written, freely
downloadable, easy to install and use, and saves time and effort.
Its contribution is "superficial," in some sense. If everything were
"by the book"—if you had NIS or some other domain authentication or single
sign-on system in place—or even if login could be scripted, there'd be no
need for passmass. The world isn't polished that way, though,
and Expect is very handy for grabbing on to all sorts of sharp edges that
remain. Maybe Expect will help you create enough free time to rationalize
your configuration so that you no longer need Expect. In the meantime, take
advantage of it.
As distributed, passmass only logs in by way of telnet,
rlogin, or slogin. I hope all current developerWorks
readers have abandoned these protocols for ssh, which
passmasss does not fully support.
On the other hand, almost everything having to do with Expect is clearly
written and freely available. It only takes three simple lines (at most)
to enhance passmass to respect ssh and other options.
You probably know enough already to begin to write or modify your own Expect
tools. As it turns out, the passmass distribution actually includes
code to log in by means of ssh, but omits the command-line parsing
to reach that code. Here's one way you might modify the distribution source
to put ssh on the same footing as telnet and the other
protocols: Listing 1. Modified passmass fragment that accepts the
-ssh argument
...
} "-rlogin" {
set login "rlogin"
continue
} "-slogin" {
set login "slogin"
continue
} "-ssh" {
set login "ssh"
continue
} "-telnet" {
set login "telnet"
continue
...
In my own code, I actually factor out more of this "boilerplate." For now,
though, this cascade of tests, in the vicinity of line #100 of passmass,
gives a good idea of Expect's readability. There's no deep programming here—no
need for object-orientation, monadic application, co-routines, or other subtleties.
You just ask the computer to take over typing you usually do for yourself. As
it happens, this small step represents many minutes or hours of human effort
saved.
Running Command Line Applications on Windows
XP/2000 from a Linux Box:
Question:
-----Original Message----- From: swagner@******** Sent: Thursday, April 13, 2006 2:35 PM To: Port25 Feedback Subject: (Port25) : You guys should look into _____ Importance: High
Can you recommend anything for running command line applications on a Windows
XP/2000 box from within a program that runs on Linux? For example
I want a script to run on a Linux server that will connect to a Windows
server, on our network, and run certain commands.
Answer:
One way to do this would be to install an SSH daemon on the Windows
machine and run commands via the ssh client on the Linux machine.
Simply search the web for information on setting up the Cygwin SSH daemon
as a service in Windows (there are docs about this everywhere). You
can then run commands with ssh, somewhat like:
That will create a file in C:\ called "blar". You can also access
Windows commands if you alter the path in the Cygwin environment or use
the full path to the command:
I would also very much like to see this as a built in feature -
cygwin is great and I use it all the time but why not build something
like this into the OS?
re: Running Windows Command Line Applications
from a Linux Box
I'm stunned that you didn't recommend OpenSSH running on Interix
from SFU 3.5 or SUA 5.2. I would much rather rely upon Interix than
Cygwin. Interopsystems maintains an both a free straight OpenSSH
package and an commercial enhanced version with an MMC-based GUI
configurator.
re: Running Windows Command Line Applications
from a Linux Box
Of course if there was an RDP client that could access Windows full
screen using a browser (the same way as Virtual Labs work) you could
run GUI programs as well
" I am disappointed that Microsoft does not offer an SSH implementation
with Services for Unix or with SUA."
When I was at Microsoft, the legal department raised objections.
Not sure if they were trademark related or what. But a good
substitute would be a kerberized telnet client and server that would
be capable of session encryption as per the Kerberos specification.
People usually don't know that this is possible using Kerberos and
telnet but it is. And given the architecture of AD, this would
lead to close integration.
Vox wrote: " Of course if there was an RDP client that could access Windows
full screen using a browser (the same way as Virtual Labs work)
you could run GUI programs as well"
Ever use rdesktop? It doesn;t use a browser, but it close
enough you can easily run GUI apps.
Best Wishes, Chris Travers Metatron Technology Consulting
re: Running Windows Command Line Applications
from a Linux Box
rdesktop -0 -f <servername> will work the same as mstsc /console
with the fullscreen switch set. As Chris said, it's not a
browser, but it's a 100% replacement for MSTSC, and fits every single
option, security and otherwise, that is in MSTSC.
Also, KDE users have "krdc" which wraps around rdesktop and VNC,
so you can connect to either, and save off your settings, just like
saving .RDP files in Windows.
Rob
re: Running Windows Command Line Applications
from a Linux Box
I completely forgot this portion to my previous comment:
Is there anyone who has experience running Windows Resource Kit
tools or Windows 2003 Support Tools from Wine or similar directly
off of the Linux box? It would be fantastic to be able to
run those and the MMC tools, perhaps with WinBind as the authentication
path?
As things sit right now, I have to run a VMWare WinXP instance,
or dual-boot to get access to those tools that I run less frequently
than certain FOSS tools, but still need.
re: Running Windows Command Line Applications
from a Linux Box
Simply install vncserver from, for example, realvnc.com, then use
vncviewer on the Linux box. You have your complete Windows
desktop within a window in your X server. Open the terminal
from the start menu.
re: Running Windows Command Line Applications
from a Linux Box
You can either purchase a copy of Cross Over Office and/or Cedega,
which allow you to run windows native binarys on linux (directX)
or you can under wine get these to work, though you need to
install IE 6.1 You need to set your 0/S in wine.conf to 2000 you need to copy most of the files contained in
sysroot/system32 to your winex install performance is horrible
The better sollution is to install a ssh server on the windows box
and then remote in via command line. If you can not afford a commerical
one, you can always use cygwin
ManEdit is provided by
WolfPack Entertainment.
I know, that doesn't sound like a company that would be releasing a manual page
editor, but they did — and under the GNU General Public License, no less.
It's not terribly difficult to create manual
pages using an editor like Emacs or Vim (see my
December 2003 column if you'd like to start from scratch) but it's yet another
skill that developers and admins have to tackle to learn how to write in *roff
format. ManEdit actually uses an XML format that it converts to groff
format when saving, so it's not necessary to delve into groff if you don't want
to. (I would recommend having at least a passing familiarity with groff
if you're going to be doing much development, but it's not absolutely necessary.)
ManEdit is an easy-to-use manual page editor
and viewer that takes all the hassle out of creating manual pages (well, the
formatting hassle, anyway — you still have to actually write the manual
itself).
The ManEdit
homepage
has source and packages for Debian, Mandrake, Slackware, and SUSE Linux. The
source should compile on FreeBSD and Solaris as well, so long as you have
GTK 1.2.0. I
used the SUSE packages without any problem on a SUSE 9.2 system.
It can also show profile data on a running process.
In this case, the data shows what the process did between when truss
was started and when truss execution was terminated with a control-c.
It’s ideal for determining why a process is hung without having to wade through
the pages of truss output.
truss -d and
truss -D (Solaris >= 8): These truss options show the time associated
with each system call being shown by truss and is excellent for finding performance
problems in custom or commercial code. For example:
In this example, the stat system call
took a lot longer than the others.
truss -T:
This is a great debugging help. It will stop a process at the execution of a
specified system call. (“-U” does the same, but with user-level function calls.)
A core could then be taken for further analysis, or any of the /proc tools could
be used to determine many aspects of the status of the process.
truss -l (improved
in Solaris 9): Shows the thread number of each call in a multi-threaded processes.
Solaris 9 truss -l finally makes it possible to watch the execution of
a multi-threaded application.
Truss is truly a powerful tool. It can be used
on core files to analyze what caused the problem, for example. It can also show
details on user-level library calls (either system libraries or programmer libraries)
via the “-u” option.
pkg-get: This
is a nice tool (http://www.bolthole.com/solaris) for automatically getting
freeware packages. It is configured via /etc/pkg-get.conf. Once it’s
up and running, execute pkg-get -a to get a list of available packages,
and pkg-get -i to get and install a given package.
plimit (Solaris
>= 8): This command displays and sets the per-process limits on a running process.
This is handy if a long-running process is running up against a limit (for example,
number of open files). Rather than using limit and restarting the command,
plimit can modify the running process.
coreadm (Solaris
>= 8): In the “old” days (before coreadm), core dumps were placed in
the process’s working directory. Core files would also overwrite each other.
All this and more has been addressed by coreadm, a tool to manage core
file creation. With it, you can specify whether to save cores, where cores should
be stored, how many versions should be retained, and more. Settings can be retained
between reboots by coreadm modifying /etc/coreadm.conf.
pgrep (Solaris
>= 8): pgrep searches through /proc for processes matching the given
criteria, and returns their process-ids. A great option is “-n”, which returns
the newest process that matches.
preap (Solaris
>= 9): Reaps zombie processes. Any processes stuck in the “z” state (as shown
by ps), can be removed from the system with this command.
pargs (Solaris
>= 9): Shows the arguments and environment variables of a process.
nohup -p (Solaris
>= 9): The nohup command can be used to start a process, so that if the
shell that started the process closes (i.e., the process gets a “SIGHUP” signal),
the process will keep running. This is useful for backgrounding a task that
should continue running no matter what happens around it. But what happens if
you start a process and later want to HUP-proof it? With Solaris 9, nohup
-p takes a process-id and causes SIGHUP to be ignored.
prstat (Solaris
>= 8): prstat is top and a lot more. Both commands provide a screen’s
worth of process and other information and update it frequently, for a nice
window on system performance. prstat has much better accuracy than
top. It also has some nice options. “-a” shows process and user information
concurrently (sorted by CPU hog, by default). “-c” causes it to act like
vmstat (new reports printed below old ones). “-C” shows processes in a processor
set. “-j” shows processes in a “project”. “-L” shows per-thread information
as well as per-process. “-m” and “-v” show quite a bit of per-process performance
detail (including pages, traps, lock wait, and CPU wait). The output data can
also be sorted by resident-set (real memory) size, virtual memory size, execute
time, and so on. prstat is very useful on systems without top,
and should probably be used instead of top because of its accuracy (and
some sites care that it is a supported program).
trapstat (Solaris
>= 9): trapstat joins lockstat and kstat as the most inscrutable
commands on Solaris. Each shows gory details about the innards of the running
operating system. Each is indispensable in solving strange happenings on a Solaris
system. Best of all, their output is good to send along with bug reports, but
further study can reveal useful information for general use as well.
vmstat -p
(Solaris >= 8): Until this option became available, it was almost impossible
(see the “se toolkit”) to determine what kind of memory demand was causing a
system to page. vmstat -p is key because it not only shows whether your
system is under memory stress (via the “sr” column), it also shows whether that
stress is from application code, application data, or I/O. “-p” can really help
pinpoint the cause of any mysterious memory issues on Solaris.
pmap -x (Solaris
>= 8, bugs fixed in Solaris >= 9): If the process with memory problems is known,
and more details on its memory use are needed, check out pmap -x. The
target process-id has its memory map fully explained, as in:
Here we see each chunk of memory, what it is
being used for, how much space it is taking (virtual and real), and mode information.
df -h (Solaris
>= 9): This command is popular on Linux, and just made its way into Solaris.
df -h displays summary information about file systems in human-readable
form:
Each administrator has a set of tools used daily,
and another set of tools to help in a pinch. This column included a wide variety
of commands and options that are lesser known, but can be very useful. Do you
have favorite tools that have saved you in a bind? If so, please send them to
me so I can expand my tool set as well. Alternately, send along any tools that
you hate or that you feel are dangerous, which could also turn into a useful
column!
There is a wonderful discussion of this question in
The UNIX Programming Environment, by Kernighan & Pike. A good utility is
one that does its job as well as possible. It has to play well with others;
it has to be amenable to being combined with other utilities. A program
that doesn't combine with others isn't a utility; it's an application.
Utilities are supposed to let you build one-off
applications cheaply and easily from the materials at hand. A lot of people
think of them as being like tools in a toolbox. The goal is not to have a single
widget that does everything, but to have a handful of tools, each of which does
one thing as well as possible.
Some utilities are reasonably useful on
their own, whereas others imply cooperation in pipelines of utilities. Examples
of the former include sort
and grep. On
the other hand, xargs
is rarely used except with other utilities, most often
find.
What language
to write in?
Most of the UNIX system utilities are written in C. The examples here
are in Perl and sh. Use the right tool for the right job. If you use
a utility heavily enough, the cost of writing it in a compiled language
might be justified by the performance gain. On the other hand, for the
fairly common case where a program's workload is light, a scripting
language may offer faster development.
If you aren't sure, you should use the
language you know best. At least when you're prototyping a utility,
or figuring out how useful it is, favor programmer efficiency over performance
tuning. Most of the UNIX system utilities are in C, simply because they're
heavily used enough to justify the development cost. Perl and sh (or
ksh) can be good languages for a quick prototype. Utilities that tie
other programs together may be easier to write in a shell than in a
more conventional programming language. On the other hand, any time
you want to interact with raw bytes, C is probably looming on your horizon.
A good rule of thumb is to start thinking about
the design of a utility the second time you have to solve a problem. Don't mourn
the one-off hack you write the first time; think of it as a prototype. The second
time, compare what you need to do with what you needed to do the first time.
Around the third time, you should start thinking about taking the time to write
a general utility. Even a merely repetitive task might merit the development
of a utility; for instance, many generalized file-renaming programs have been
written based on the frustration of trying to rename files in a generalized
way.
Here are some design goals of utilities; each
gets its own section, below.
Do one thing well; don't do multiple things
badly. The best example of this doing one thing well is probably
sort. No utilities
other than sort
have a sort feature. The idea is simple; if you only solve a problem once, you
can take the time to do it well.
Imagine how frustrating it would be if most programs
sorted data, but some supported only lexographic sorts, while others supported
only numeric sorts, and a few even supported selection of keys rather than sorting
by whole lines. It would be annoying at best.
When you find a problem to solve, try to break
the problem up into parts, and don't duplicate the parts for which utilities
already exist. The more you can focus on a tool that lets you work with existing
tools, the better the chances that your utility will stay useful.
You may need to write more than one program.
The best way to solve a specialized task is often to write one or two utilities
and a bit of glue to tie them together, rather than writing a single program
to solve the whole thing. It's fine to use a 20-line shell script to tie your
new utility together with existing tools. If you try to solve the whole problem
at once, the first change that comes along might require you to rethink everything.
I have occasionally needed to produce two-column
or three-column output from a database. It is generally more efficient to write
a program to build the output in a single column and then glue it to a program
that puts things in columns. The shell script that combines these two utilities
is itself a throwaway; the separate utilities have outlived it.
Some utilities serve very specialized needs.
If the output of ls
in a crowded directory scrolls off the screen very quickly, it might be because
there's a file with a very long name, forcing
ls to use only a single
column for output. Paging through it using more
takes time. Why not just sort lines by length, and pipe the result through
tail, as follows?
The script in Listing 1 does exactly one
thing. It takes no options, because it needs no options; it only cares about
the length of lines. Thanks to Perl's convenient
<> idiom, this automatically
works either on standard input or on files named on the command line.
Almost all utilities are best conceived of as
filters, although a few very useful utilities don't fit this model. (For instance,
a program that counts might be very useful, even though it doesn't work well
as a filter. Programs that take only command-line arguments as input, and produce
potentially complicated output, can be very useful.) Most utilities, though,
should work as filters. By convention, filters work on lines of text. Most filters
should have some support for running on multiple input files.
Remember that a utility needs to work on
the command line and in scripts. Sometimes, the ideal behavior varies a little.
For instance, most versions of ls
automatically sort input into columns when writing to a terminal. The default
behavior of grep
is to print the file name in which a match was found only if multiple files
were specified. Such differences should have to do with how users will want
the utility to work, not with other agendas. For instance, old versions of GNU
bc displayed
an intrusive copyright notice when started. Please don't do that. Make your
utility stick to doing its job.
Utilities like to live in pipelines. A
pipeline lets a utility focus on doing its job, and nothing else. To live in
a pipeline, a utility needs to read data from standard input and write data
to standard output. If you want to deal with records, it's best if you can make
each line be a "record." Existing programs such as
sort and
join are already thinking
that way. They'll thank you for it.
One utility I occasionally use is a program that
calls other programs iteratively over a tree of files. This makes very good
use of the standard UNIX utility filter model, but it only works with utilities
that read input and write output; you can't use it with utilities that operate
in place, or take input and output file names.
Most programs that can run from standard
input can also reasonably be run on a single file, or possibly on a group of
files. Note that this arguably violates the rule against duplicating effort;
obviously, this could be managed by feeding
cat into the next program in the series. However,
in practice, it seems to be justified.
Some programs may legitimately read records in
one format but produce something entirely different. An example would be a utility
to put material into columnar form. Such a utility might equate lines to records
on input, but produce multiple records per line on output.
Not every utility fits entirely into this
model. For instance, xargs
takes not records but names of files as input, and all of the actual processing
is done by some other program.
Try to think of tasks similar to the one you're
actually performing; if you can find a general description of these tasks, it
may be best to try to write a utility that fits that description. For instance,
if you find yourself sorting text lexicographically one day and numerically
another day, it might make sense to consider attempting a general sort utility.
Generalizing functionality sometimes leads to
the discovery that what seemed like a single utility is really two utilities
used in concert. That's fine. Two well-defined utilities can be easier to write
than one ugly or complicated one.
Doing one thing well doesn't mean doing
exactly one thing. It means handling a consistent but useful problem space.
Lots of people use grep.
However, a great deal of its utility comes from the ability to perform related
tasks. The various options to grep
do the work of a handful of small utilities that would have ended up sharing,
or duplicating, a lot of code.
This rule, and the rule to do one thing,
are both corollaries of an underlying principle: avoid duplication of code whenever
possible. If you write a half-dozen programs, each of which sorts lines, you
can end up having to fix similar bugs half a dozen times instead of having one
better-maintained sort
program to work on.
This is the part of writing a utility that adds
the most work to the process of getting it completed. You may not have time
to generalize something fully at first, but it pays off when you get to keep
using the utility.
Sometimes, it's very useful to add related functionality
to a program, even when it's not quite the same task. For instance, a program
to pretty-print raw binary data might be more useful if, when run on a terminal
device, it threw the terminal into raw mode. This makes it a lot easier to test
questions involving keymaps, new keyboards, and the like. Not sure why you're
getting tildes when you hit the delete key? This is an easy way to find out
what's really getting sent. It's not exactly the same task, but it's similar
enough to be a likely addition.
The errno
utility in
Listing 2 below is a good example of generalizing, as it supports both numeric
and symbolic names.
It's important that a utility be durable.
A utility that crashes easily or can't handle real data is not a useful utility.
Utilities should handle arbitrarily long lines, huge files, and so on. It is
perhaps tolerable for a utility to fail on a data set larger than it can hold
in memory, but some utilities don't do this; for instance,
sort, by using temporary
files, can generally sort data sets much larger than it can hold in memory.
Try to make sure you've figured out what data
your utility can possibly run on. Don't just ignore the possibility of data
you can't handle. Check for it and diagnose it. The more specific your error
messages, the more helpful you are being to your users. Try to give the user
enough information to know what happened and how to fix it. When processing
data files, try to identify exactly what the malformed data was. When trying
to parse a number, don't just give up; tell the user what you got, and if possible,
what line of the input stream the data was on.
As a good example, consider the difference
between two implementations of dc.
If you run dc /home,
one of them says "Cannot use directory as input!" The other just returns silently;
no error message, no unusual exit code. Which of these would you rather have
in your path when you make a typo on a cd
command? Similarly, the former will give verbose error messages if you feed
it the stream of data from a directory, perhaps by doing
dc < /home. On the other
hand, it might be nice for it to give up early on when getting invalid data.
Security holes are often rooted in a program
that isn't robust in the face of unexpected data. Keep in mind that a good utility
might find its way into a shell script run as root. A buffer overflow in a program
such as find
is likely to be a risk to a great number of systems.
The better a program deals with unexpected data,
the more likely it is to adapt well to varied circumstances. Often, trying to
make a program more robust leads to a better understanding of its role, and
better generalizations of it.
One of the worst kinds of utility to write
is the one you already have. I wrote a wonderful utility called
count. It allowed
me to perform just about any counting task. It's a great utility, but there's
a standard BSD utility called jot
that does the same thing. Likewise, my very clever program for turning data
into columns duplicates an existing utility,
rs, likewise found on BSD
systems except that rs
is much more flexible and better designed. See
Resources below for more information on
jot and rs.
If you're about to start writing a utility, take
a bit of time to browse around a few systems to see if there might be one already.
Don't be afraid to steal Linux utilities for use on BSD, or BSD utilities for
use on Linux; one of the joys of utility code is that almost all utilities are
quite portable.
Don't forget to look at the possibility of combining
existing applications to make a utility. It is possible, in theory, that you'll
find stringing existing programs together is not fast enough, but it's very
rare that writing a new utility is faster than waiting for a slightly slow pipeline.
#!/bin/sh
usage() {
echo >&2 "usage: errno [numbers or error names]\n"
exit 1
}
for i
do
case "$i" in
[0-9]*)
awk '/^#define/ && $3 == '"$i"' {
for (i = 5; i < NF; ++i) {
foo = foo " " $i;
}
printf("%-22s%s\n", $2 " [" $3 "]:", foo);
foo = ""
}' < /usr/include/sys/errno.h
;;
E*)
awk '/^#define/ && $2 == "'"$i"'" {
for (i = 5; i < NF; ++i) {
foo = foo " " $i;
}
printf("%-22s%s\n", $2 " [" $3 "]:", foo);
foo = ""
}' < /usr/include/sys/errno.h
;;
*)
echo >&2 "errno: can't figure out whether '$i' is a name or a number."
usage
;;
esac
done
Does it generalize? Yes, nicely. It supports
both numeric and symbolic names. On the other hand, it doesn't know about other
files, such as /usr/include/sys/signal.h, that are likely in the same format.
It could easily be extended to do that, but for a convenience utility like this,
it's easier to just make a copy called "signal" that reads signal.h, and uses
"SIG*" as the pattern to match a name.
This is just a tad more convenient than
using grep
on system header files, but it's less error-prone. It doesn't produce garbled
results from ill-considered arguments. On the other hand, it produces no diagnostic
if a given name or number is not found in the header. It also doesn't bother
to correct some invalid inputs. Still, as a command-line utility never intended
to be used in an automated context, it's okay.
Another example might be a program to unsort
input (see
Resources for a link to this utility). This is simple enough; read in input
files, store them in some way, then generate a random order in which to print
out the lines. This is a utility of nearly infinite applications. It's also
a lot easier to write than a sorting program; for instance, you don't need to
specify which keys you're not sorting on, or whether you want things in a random
order alphabetically, lexicographically, or numerically. The tricky part comes
in reading in potentially very long lines. In fact, the provided version cheats;
it assumes there will be no null bytes in the lines it reads. It's a lot harder
to get that right, and I was lazy when I wrote it.
If you find yourself performing a task repeatedly,
consider writing a program to do it. If the program turns out to be reasonable
to generalize a bit, generalize it, and you will have written a utility.
Don't design the utility the first time you need
it. Wait until you have some experience. Feel free to write a prototype or two;
a good utility is sufficiently better than a bad utility to justify a bit of
time and effort on researching it. Don't feel bad if what you thought would
be a great utility ends up gathering dust after you wrote it. If you find yourself
frustrated by your new program's shortcomings, you just had another prototyping
phase. If it turns out to be useless, well, that happens sometimes.
The thing you're looking for is a program
that finds general application outside your initial usage patterns. I wrote
unsort because
I wanted an easy way to get a random series of colors out of an old X11 "rgb.txt"
file. Since then, I've used it for an incredible number of tasks, not the least
of which was producing test data for debugging and benchmarking sort routines.
One good utility can pay back the time you spent
on all the near misses. The next thing to do is make it available for others,
so they can experiment. Make your failed attempts available, too; other people
may have a use for a utility you didn't need. More importantly, your failed
utility may be someone else's prototype, and lead to a wonderful utility program
for everyone.
Learn how to write secure applications,
validate and check inputs, prevent buffer overflows, and more with David
Wheeler's
Secure programmer column on
developerWorks.
The "Bash
by example" series on
developerWorks will help you get started writing shell scripts.
The tutorial "Building
a cross-platform C library" shows how to convert an existing C program
or module -- or utility -- into a shared library (developerWorks,
June 2001).
Get the
developerWorks Subscription (formerly the Toolbox subscription) to get
CDs and downloads of the latest software from IBM to build, test, evaluate,
and demonstrate applications on the IBM Software Development Platform.
"What is it about m4 that makes it so useful,
and yet so overlooked? m4 -- a macro processor -- unfortunately has a dry name
that disguises a great utility. A macro processor is basically a program that
scans text and looks for defined symbols, which it replaces with other text
or other symbols."
[Apr 17, 2003] Exploring processes with Truss: Part 1 By Sandra Henry-Stocker
The ps command can tell you quite a few things about each process running
on your system. These include the process owner, memory use, accumulated time,
the process status (e.g., waiting on resources) and many other things as well.
But one thing that ps cannot tell you is what a process is doing - what files
it is using, what ports it has opened, what libraries it is using and what system
calls it is making. If you can't look at source code to determine how a program
works, you can tell a lot about it by using a procedure called "tracing". When
you trace a process (e.g., truss date), you get verbose commentary on the process'
actions. For example, you will see a line like this each time the program opens
a file:
open("/usr/lib/libc.so.1", O_RDONLY) = 4
The text on the left side of the equals sign clearly indicates what is happening.
The program is trying to open the file /usr/lib/libc.so.1 and it's trying to
open it in read-only mode (as you would expect, given that this is a system
library). The right side is not nearly as self-evident. We have just the number
4. Open is not a Unix command, of course, but a system call. That means that
you can only use the command within a program. Due to the nature of Unix, however,
system calls are documented in man pages just like ls and pwd.
To determine what this number represents, you can skip down in this column
or you can read the man page. If you elect to read the man page, you will undoubtedly
read a line that tells you that the open() function returns a file descriptor
for the named file. In other words, the number, 4 in our example, is the number
of the file descriptor referred to in this open call. If the process that you
are tracing opens a number of files, you will see a sequence of open calls.
With other activity removed, the list might look something like this:
open("/dev/zero", O_RDONLY) = 3
open("/var/ld/ld.config", O_RDONLY) Err#2 ENOENT
open("/usr/lib/libc.so.1", O_RDONLY) = 4
open("/usr/lib/libdl.so.1", O_RDONLY) = 4
open64("./../", O_RDONLY|O_NDELAY) = 3
open64("./../../", O_RDONLY|O_NDELAY) = 3
open("/etc/mnttab", O_RDONLY) = 4
Notice that the first file handle is 3 and that file handles 3 and 4 are
used repeatedly. The initial file handle is always 3. This indicates that it
is the first file handle following those that are the same for every process
that you will run - 0, 1 and 2. These represent standard in, standard out and
standard error.
The file handles shown in the example truss output above are repeated only
because the associated files are subsequently closed. When a file is closed,
the file handle that was used to access it can be used again.
The close commands include only the file handle, since the location of the
file is known. A close command would, therefore, be something like close(3).
One of the lines shown above displays a different response - Err#2
ENOENT. This "error" (the word is put in quotes because this does not necessarily
indicate that the process is defective in any way) indicates that the file the
open call is attempting to open does not exist. Read "ENOENT" as "No such file".
Some open calls place multiple restrictions on the way that a file is opened.
The open64 calls in the example output above, for example, specify both O_RDONLY
and O_NDELAY. Again, reading the man page will help you to understand what each
of these specifications means and will present with a list of other options
as well.
As you might expect, open is only one of many system calls that you will
see when you run the truss command. Next week we will look at some additional
system calls and determine what they are doing.
Exploring processes with Truss: part 2 By Sandra Henry-Stocker
While truss and its cousins on non-Solaris systems (e.g., strace on Linux
and ktrace on many BSD systems) provide a lot of data on what a running process
is doing, this information is only useful if you know what it means. Last week,
we looked at the open call and the file handles that are returned by the call
to open(). This week, we look at some other system calls and analyze what these
system calls are doing. You've probably noticed that the nomenclature for system
functions is to follow the name of the call with a set of empty parentheses
for example, open(). You will see this nomenclature in use whenever system calls
are discussed.
The fstat() and fstat64() calls obtains information about open files - "fstat"
refers to "file status". As you might expect, this information is retrieved
from the files' inodes, including whether or not you are allowed to read the
files' contents. If you trace the ls command (i.e., truss ls), for example,
your trace will start with lines that resemble these:
In line 31, we see a call to fstat64, but what file is it checking? The man
page for the fstat() and your intuition are probably both telling you that this
fstat call is obtaining information on the file opened two lines before – "."
or the current directory - and that it is referring to this file by its file
handle (3) returned by the open() call in line
2. Keep in mind that a directory is simply a file, though a different variety
of file, so the same system calls are used as would be used to check a text
file.
You will probably also notice that the file being opened is called /dev/zero
(again, see line 2). Most Unix sysadmins will immediately know that /dev/zero
is a special kind of file - primarily because it is stored in /dev. And, if
moved to look more closely at the file, they
will confirm that the file that /dev/zero points to (it is itself a symbolic
link) is a special character file. What /dev/zero provides to system programmers,
and to sysadmins if they care to use it, is an endless stream of zeroes. This
is more useful than might first appear.
To see how /dev/zero works, you can create a 10M-byte file full of zeroes
with a command like this:
This command works well because it creates the needed file with only a few
read and write operations; in other words, it is very efficient.
You can verify that the file is zero-filled with od.
# od -x zerofile
0000000 0000 0000 0000 0000 0000 0000 0000 0000
*
50002000
Each string of four zeros (0000) represents two bytes of data. The * on the
second line of output indicates that all of the remaining lines are identical
to the first.
Looking back at the truss output above, we cannot help but notice that the
first line of the truss output includes the name of the command that we are
tracing. The execve() system call executes a process. The first argument to
execve() is the name of the file from which the new process
image is to be loaded. The mmap() call which follows maps the process image
into memory. In
other words, it directly incorporates file data into the process address
space. The getdents64() calls on lines 34 and 35 are extracting information
from the directory file - "dents" refers to "directory entries'.
The sequence of steps that we see at the beginning of the truss output executing
the entered command, opening /dev/zero, mapping memory and so on - looks the
same whether you are tracing ls, pwd, date or restarting Apache. In fact, the
first dozen or so lines in your truss output will be nearly identical regardless
of the command you are running. You should, however, expect to see some differences
between different Unix systems and different versions of Solaris.
Viewing the output of truss, you can get a solid sense of how the operating
system works. The same insights are available if you are tracing your own applications
or troubleshooting third party executables.
3.2. Displaying all processes owned by a specific
user
$ ps ux
USER PID %CPU %MEM VSZ RSS TTY STAT START TIME COMMAND
heyne 691 0.0 2.4 19272 9576 ? S 13:35 0:00 kdeinit: kded
heyne 700 0.1 1.0 5880 3944 ? S 13:35 0:01 artsd -F 10 -S 40
... ... ...
You can also use the syntax "ps U username".
As you can see, the ps command can give you a
lot of interesting information. If you for example want to know what your friend
actually does, just replace your login name with her/his name and you see all
processe belonging to her/him.
3.3. Own output format
If you are bored by the regular output, you could
simply change the format. To do so use the formatting characters which are supported
by the ps command.
If you execute the ps command with the 'o' parameter you can tell the ps command
what you want to see:
e.g.
Odd display with AIX field descriptors:
Dogs of the Linux Shell Posted on Saturday, October 19,
2002 by Louis J. IaconaCould the command-line tools
you've forgotten or never knew save time and some frustration?
One incarnation of the so called 80/20 rule has been associated with software
systems. It has been observed that 80% of a user population regularly uses only
20% of a system's features. Without backing this up with hard statistics, my
20+ years of building and using software systems tells me that this hypothesis
is probably true. The collection of Linux command-line programs is no exception
to this generalization. Of the dozens of shell-level commands offered by Linux,
perhaps only ten commands are commonly understood and utilized, and the remaining
majority are virtually ignored.
Which of these dogs of the Linux shell have the most value to offer? I'll
briefly describe ten of the less popular but useful Linux shell commands, those
which I have gotten some mileage from over the years. Specifically, I've chosen
to focus on commands that parse and format textual content.
The working examples presented here assume a basic familiarity with command-line
syntax, simple shell constructs and some of the not-so-uncommon Linux commands.
Even so, the command-line examples are fairly well commented and straightforward.
Whenever practical, the output of usage examples is presented under each command-line
execution.
The following eight commands parse, format and display textual content. Although
not all provided examples demonstrate this, be aware that the following commands
will read from standard input if file arguments are not presented.
As their names imply, head and tail are used to display some
amount of the top or bottom of a text block. head presents beginning
of a file to standard output while tail does the same with the end of a file.
Review the following commented examples:
## (1) displays the first 6 lines of a file
head -6 readme.txt
## (2) displays the last 25 lines of a file
tail -25 mail.txt
Here's an example of using head and tail in concert to display the 11th through
20th line of a file.
# (3)
head -20 file | tail -10
Manual pages show that the tail command has more command-line options than
head. One of the more useful tail option is -f. When it is used, tail does not
return when end-of-file is detected, unless it is explicitly interrupted. Instead,
tail sleeps for a period and checks for new lines of data that may have been
appended since the last read.
## (4) display ongoing updates to the given
## log file
tail -f /usr/tmp/logs/daemon_log.txt
Imagine that a dæmon process was continually appending activity logs to the
/usr/adm/logs/daemon_log.txt file. Using tail -f at a console window,
for example, will more or less track all updates to the file in real time. (The
-f option is applicable only when tail's input is a file).
If you give multiple arguments to tail, you can track several log files in
the same window.
## track the mail log and the server error log
## at the same time.
tail -f /var/log/mail.log /var/log/apache/error_log
tac--Concatenate in Reverse
What is cat spelled backwards? Well, that's what tac's functionality is all
about. It concatenates file order and their contents in reverse. So what's its
usefulness? It can be used on any task that requires ordering elements in a
last-in, first-out (LIFO) manner. Consider the following command line to list
the three most recently established user accounts from the most recent through
the least recent.
# (5) last 3 /etc/passwd records - in reverse
$ tail -3 /etc/passwd | tac
curly:x:1003:100:3rd Stooge:/homes/curly:/bin/ksh
larry:x:1002:100:2nd Stooge:/homes/larry:/bin/ksh
moe:x:1001:100:1st Stooge:/homes/moe:/bin/ksh
nl--Numbered Line Output
nl is a simple but useful numbering filter. I displays input with
each line numbered in the left margin, in a format dictated by command-line
options. nl provides a plethora of options that specify every detail
of its numbered output. The following commented examples demonstrate some of
of those options:
# (6) Display the first 4 entries of the password
# file - numbers to be three columns wide and
# padded by zeros.
$ head -4 /etc/passwd | nl -nrz -w3
001 root:x:0:1:Super-User:/:/bin/ksh
002 daemon:x:1:1::/:
003 bin:x:2:2::/usr/bin:
004 sys:x:3:3::/:
#
# (7) Prepend ordered line numbers followed by an
# '=' sign to each line -- start at 101.
$ nl -s= -v101 Data.txt
101=1st Line ...
102=2nd Line ...
103=3rd Line ...
104=4th Line ...
105=5th Line ...
.......
fmt--Format
The fmt command is a simple text formatter that focuses on making textual
data conform to a maximum line width. It accomplishes this by joining and breaking
lines around white space. Imagine that you need to maintain textual content
that was generated with a word processor. The exported text may contain lines
whose lengths vary from very short to much longer than a standard screen length.
If such text is to be maintained in a text editor (like vi), fmt is the command
of choice to transform the original text into a more maintainable format. The
first example below shows fmt being asked to reformat file contents as text
lines no greater than 60 characters long.
# (8) No more than 60 char lines
$ fmt -w 60 README.txt > NEW_README.txt
#
# (9) Force uniform spacing:
# 1 space between words, 2 between sentences
$ echo "Hello World. Hello Universe." | fmt -u -w80
Hello World. Hello Universe.
fold--Break Up Input
fold is similar to fmt but is used typically to format data
that will be used by other programs, rather than to make the text more readable
to the human eye. The commented examples below are fairly easy to follow:
# (10) Format text in 3 column width lines
$ echo oxoxoxoxo | fold -w3
oxo
xox
oxo
# (11) Parse by triplet-char strings -
# search for 'xox'
$ echo oxoxoxoxo | fold -w3 | grep "xox"
xox
# (12) One way to iterate through a string of chars
$ for i in $(echo 12345 | fold -w1)
> do
> ### perform some task ...
> print $i
> done
1
2
3
4
5
pr
pr shares features with simpler commands like nl and fmt, but its
command-line options make it ideal for converting text files into a format that's
suitable for printing. pr offers options that allow you to specify page
length, column width, margins, headers/footers, double line spacing and more.
Aside from being the best suited formatter for printing tasks, pr also offers
other useful features. These features include allowing you to view multiple
files vertically in adjacent columns or columnizing a list in a fixed number
of columns (see Listing 2).
Listing 2. Using pr
Miscellaneous
The following two commands are specialized parsers used to pick apart file
path pieces.
Basename/Dirname
The basename and dirname commands are useful for presenting portions of a
given file path. Quite often in scripting situations, it's convenient to be
able to parse and capture a file name or the containing-directory name portions
of a file path. These commands reduce this task to a simple one-line command.
(There are other ways to approach this using the Korn shell or sed "magic",
but basename and dirname are more portable and straightforward).
basename is used to strip off the directory, and optionally, the file
suffix parts of a file path. Consider the following trivial examples:
:# (21) Parse out the Java Class name
$ basename
/usr/local/src/java/TheClass.java .java
TheClass
# (22) Parse out the file name.
$ basename srcs/C/main.c
main.c
dirname is used to display the containing directory path, as much
of the path as is provided. Consider the following examples:
# (23) absolute and relative directory examples
$ dirname /homes/curly/.profile
/homes/curly
$ dirname curly/.profile
curly
#
# (24) From any korn-shell script, the following
# line will assign the directory from where
# the script was launched
SCRIPT_HOME="$(dirname $(whence $0))"
#
# (25)
# Okay, how about a non-trivial practical example?
# List all directories (under $PWD that contain a
# file called 'core'.
$ for i in $(find $PWD -name core )^
> do
> dirname $i
> done | sort -u
bin
rje/gcc
src/C
In the next few articles, I'd like to take
a look at backups and archiving utilities. if you're like I was when I started
using Unix, I was intimidated by the words tar,
cpio and
dump, and a
quick peek at their respective man pages did not alleviate my fears.
Links to the manuals for the Gnu tools most commonly used in embedded development:
Using and Porting GNU CC * Using as, The GNU Assembler * GASP, an assembly preprocessor
* Using ld, the GNU linker http://www.objsw.com/docs/
(Oct 21, 2000, 18:38 UTC) (116 reads) (0 talkbacks) (Posted by
john)
"This book takes a different approach in
that it steps through the development of a fictional application. The application
you will build is an interface for a DVD rental store."
(Oct 21, 2000, 18:03 UTC) (203 reads) (0 talkbacks) (Posted by
john)
"The Red Hat Package Manager (RPM) has establised
itself as one of the most popular distrubution formats for linux software today.
A first time user may feel overwhelmed by the vast number of options available and
this article will help a newbie to get familiar with usage of this tool."
"The company that employs Tom and me builds big
pieces of food processing machinery that cost upwards of $400K. Each machine
includes an embedded PCs running -- and I cringe -- NT 4. While the company's
legacy currently dictates NT, those of us at the lower levels of the totem pole
work to wedge Linux in wherever we can. What follows is a short story of a successful
insertion that turned out to be (gasp!) financially beneficial to the company,
too."
"...Ghost works well; it does exactly what we
wanted it to. You boot off of a floppy (while the image medium is in another
drive), and Ghost does the rest. The problem lies in Ghost's licensing. If you
want to install in a situation like ours, you have to purchase a Value-Added
Reseller (VAR) license from Symantec. And, every time you create a drive, you
have to pay them about 17 dollars. When you also figure in the time needed to
keep track of those licenses, that adds up in a hurry."
"It finally occurred to me that we could use
Linux and a couple of simple tools (dd, gzip, and a shell script) to do the
same thing as Ghost -- at least as far as our purposes go. ... The Results?
We showed our little program to management, and they were impressed. We were
able to create disk images almost as quickly as Norton Ghost, and we did it
all in an afternoon using entirely free software. The rest is history."
The sort command is used to sort the lines in an input
stream in alphanumeric or telephone book order. The simplest ways to use
sort are to provide it with a filename to sort or an input stream whose
data should be output in sorted form:
sort myfile.txt
cat myfile.txt | sort
This tool can be told to sort based on alternate fields and
in several different orders. The uniq command is often used in conjunction
with sort because it removes consecutive duplicate lines from and input
stream before writing them to standard output. This provides a quick easy way
to sort a pool of data and them remove duplicate entries.
A more in-depth discussion of sort can be found in
the past QuickTip called
Sort and Uniq.
tr
The tr command in its simplest form can be thought
of as a simpler case of the sed command discussed earlier. It is used
to replace all occurances of a single character in an input stream with an alternate
character before writing to the output stream. For example, to change all percent
(%) characters to spaces, you might use:
tr '%' ' '
newfile.txt
Though sed can be used to accomplish the same task,
it is often simpler to use tr when replacing a single character because
the syntax is easy to remember and many special characters which must be escaped
for sed can be supplied to tr without escaping.
wc
The wc, or "word count" command does just what its
name implies: it counts words. As an added feature, tr also counts lines
and bytes. The formats for counting words, lines, or bytes in a file or input
stream are:
Notice that the output for wc normally includes the
filename (when reading from a file) and always includes a number of spaces as
well. Often, this behavior is undesirable, usually when a number is required
without leading or trailing whitespace. In such cases, sed and cut
can be used to eliminate them:
Note that other methods for removing spaces or filenames include
using a more complex sed command alone or even using awk, which
we won't discuss in this issue.
xargs
The xargs utility is used to break long input streams
into groups of lines so that the shell isn't overloaded by command substitution.
For example, the following command may fail if too many files are present in
the current directory tree for BASH to substitute correctly:
lpr $(find .)
However, using xargs, the desired effect can be obtained:
find . | xargs lpr
More information on using xargs can be found in the
QuickTip called
Long Argument Lists and on the xargs manual page.
"SCO is contributing source code for
two developer tools -- "cscope" and "fur." The code is released under the terms
of the BSD License and will be maintained by SCO.
The first technology, cscope, is available to download at www.sco.com/opensource.
Software developers can use cscope to help design and debug programs coded with
the C programming language. The second technology, Fur, will be available to
download in several weeks. Fur is a real-time analysis program used to optimize
application and system binaries for more effective run time execution. Dramatic
results have been seen in high-level applications and database systems using
fur."
One of the greatest strengths of the Open Source
movement is the availability of source code for almost every program. This article
will discuss in general terms, with some examples, how to install a program
from source code rather than a precompiled binary package. The primary audience
for this article is the user who has some familiarity with installing programs
from binaries, but isn't familiar with installing from source code. Some knowledge
of compiling software is helpful, but not required.
They recommend Apache, Mozilla, Samba
and Perl for enterprise use. Evaluations of a particular product are second-rate
and does not deserve attention. Only the list is interesting [Jan
25, 1999] Win32
Editors page was added
Open Source Software Chronicles
-- October-December, 1998
Index - GNU
(unofficial) - A collection of information about the GNU project: links
to many GNU resources, and a complete collection of GNU's bulletins.
Linux
Central Man Pages -- almost no hypertext links, but at least commands are
sorted correctly
Linux
Manual Pages from Linux Journal. Better to use if for search only -- in
the chapters lists command are not sorted. Generally it's pretty primitive translation
to HTML, not all hypertext links are functional.
"What is it about m4 that makes it so useful, and yet so overlooked? m4 --
a macro processor -- unfortunately has a dry name that disguises a great
utility. A macro processor is basically a program that scans text and
looks for defined symbols, which it replaces with other text or other symbols."
This chapter provides information about the
m4 macro processor, which is a front-end processor
for any programming language being used in the operating system environment.
The m4
macro processor is useful in many ways. At the beginning of a program, you can
define a symbolic name or symbolic constant as a particular string of characters.
You can then use the
m4 program to replace unquoted occurrences of
the symbolic name with the corresponding string. Besides replacing one string
of text with another, the m4 macro processor provides
the following features:
Arithmetic capabilities
File manipulation
Conditional macro expansion
String and substring functions
The m4
macro processor processes strings of letters and digits called
tokens. The m4 program
reads each alphanumeric token and determines if it is the name of a macro. The
program then replaces the name of the macro with its defining text, and pushes
the resulting string back onto the input to be rescanned. You can call macros
with arguments, in which case the arguments are collected and substituted into
the right places in the defining text before the defining text is rescanned.
The m4
program provides built-in macros such as define. You
can also create new macros. Built-in and user-defined macros work the same way.
Macros for
GNU autoconf. The highlight is a set of three macros to ease checking
for 3rd party libraries. The macros were originally available here as acmacros.
Matthew Langston took the macros, cleaned them up, and wrote documentation
for them. This much-improved version is now known as smr_macros,
available here or in Matthew Langston's
SLAC archive. (Matthew also distributes RPMs)
The Last but not LeastTechnology is dominated by
two types of people: those who understand what they do not manage and those who manage what they do not understand ~Archibald Putt.
Ph.D
FAIR USE NOTICEThis site contains
copyrighted material the use of which has not always been specifically
authorized by the copyright owner. We are making such material available
to advance understanding of computer science, IT technology, economic, scientific, and social
issues. We believe this constitutes a 'fair use' of any such
copyrighted material as provided by section 107 of the US Copyright Law according to which
such material can be distributed without profit exclusively for research and educational purposes.
This is a Spartan WHYFF (We Help You For Free)
site written by people for whom English is not a native language. Grammar and spelling errors should
be expected. The site contain some broken links as it develops like a living tree...
You can use PayPal to to buy a cup of coffee for authors
of this site
Disclaimer:
The statements, views and opinions presented on this web page are those of the author (or
referenced source) and are
not endorsed by, nor do they necessarily reflect, the opinions of the Softpanorama society.We do not warrant the correctness
of the information provided or its fitness for any purpose. The site uses AdSense so you need to be aware of Google privacy policy. You you do not want to be
tracked by Google please disable Javascript for this site. This site is perfectly usable without
Javascript.
 Whenever your browser is loading a page from any website, it performs HTTP requests. It is a client-server model.

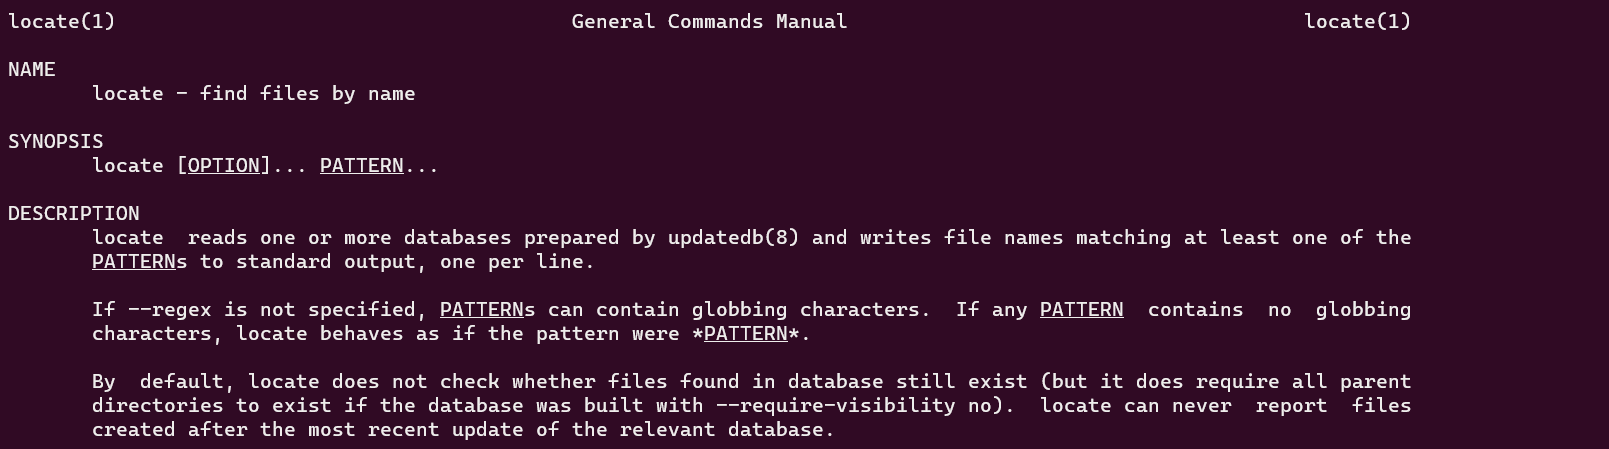


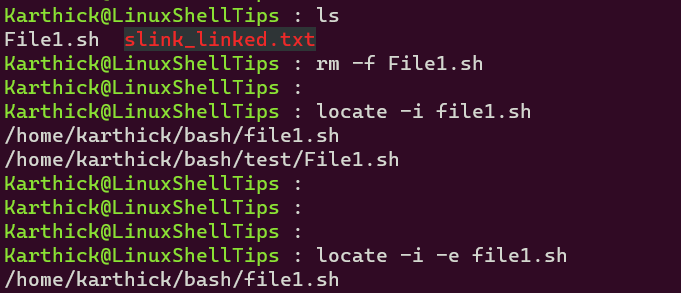
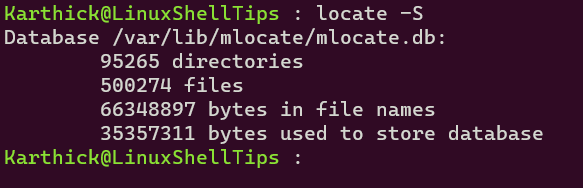


David K Hill 07/11/2019 at 4:15 am
Javed 28/12/2019 at 7:16 pm
DAVE MCKAY @thegurkha


<img src="https://i2.wp.com/linuxhandbook.com/wp-content/uploads/Watch_Command.png?ssl=1" alt="Watch Command" srcset="https://i2.wp.com/linuxhandbook.com/wp-content/uploads/Watch_Command.png?w=800&ssl=1 800w, https://i2.wp.com/linuxhandbook.com/wp-content/uploads/Watch_Command.png?resize=300%2C169&ssl=1 300w, https://i2.wp.com/linuxhandbook.com/wp-content/uploads/Watch_Command.png?resize=768%2C432&ssl=1 768w" sizes="(max-width: 800px) 100vw, 800px" data-recalc-dims="1" />
<img src="https://i2.wp.com/linuxhandbook.com/wp-content/uploads/watch_command.gif?ssl=1" alt="Watch Command" data-recalc-dims="1"/>


<img aria-describedby="caption-attachment-21311" src="https://www.tecmint.com/wp-content/uploads/2016/07/Kompare-Two-Files-in-Linux.png" alt="Kompare Tool - Compare Two Files in Linux" width="1097" height="701" srcset="https://www.tecmint.com/wp-content/uploads/2016/07/Kompare-Two-Files-in-Linux.png 1097w, https://www.tecmint.com/wp-content/uploads/2016/07/Kompare-Two-Files-in-Linux-768x491.png 768w" sizes="(max-width: 1097px) 100vw, 1097px" />
<img aria-describedby="caption-attachment-21312" src="https://www.tecmint.com/wp-content/uploads/2016/07/DiffMerge-Compare-Files-in-Linux.png" alt="DiffMerge - Compare Files in Linux" width="1078" height="700" srcset="https://www.tecmint.com/wp-content/uploads/2016/07/DiffMerge-Compare-Files-in-Linux.png 1078w, https://www.tecmint.com/wp-content/uploads/2016/07/DiffMerge-Compare-Files-in-Linux-768x499.png 768w" sizes="(max-width: 1078px) 100vw, 1078px" />
<img aria-describedby="caption-attachment-21313" src="https://www.tecmint.com/wp-content/uploads/2016/07/Meld-Diff-Tool-to-Compare-Files-in-Linux.png" alt="Meld - A Diff Tool to Compare File in Linux" width="1028" height="708" srcset="https://www.tecmint.com/wp-content/uploads/2016/07/Meld-Diff-Tool-to-Compare-Files-in-Linux.png 1028w, https://www.tecmint.com/wp-content/uploads/2016/07/Meld-Diff-Tool-to-Compare-Files-in-Linux-768x529.png 768w" sizes="(max-width: 1028px) 100vw, 1028px" />
<img aria-describedby="caption-attachment-21314" src="https://www.tecmint.com/wp-content/uploads/2016/07/DiffUse-Compare-Text-Files-in-Linux.png" alt="DiffUse - A Tool to Compare Text Files in Linux" width="1030" height="795" srcset="https://www.tecmint.com/wp-content/uploads/2016/07/DiffUse-Compare-Text-Files-in-Linux.png 1030w, https://www.tecmint.com/wp-content/uploads/2016/07/DiffUse-Compare-Text-Files-in-Linux-768x593.png 768w" sizes="(max-width: 1030px) 100vw, 1030px" />
<img aria-describedby="caption-attachment-21315" src="https://www.tecmint.com/wp-content/uploads/2016/07/xxdiff-Tool.png" alt="xxdiff Tool" width="718" height="401" />
<img aria-describedby="caption-attachment-21418" src="https://www.tecmint.com/wp-content/uploads/2016/07/KDiff3-Tool-for-Linux.png" alt="KDiff3 Tool for Linux" width="950" height="694" srcset="https://www.tecmint.com/wp-content/uploads/2016/07/KDiff3-Tool-for-Linux.png 950w, https://www.tecmint.com/wp-content/uploads/2016/07/KDiff3-Tool-for-Linux-768x561.png 768w" sizes="(max-width: 950px) 100vw, 950px" />
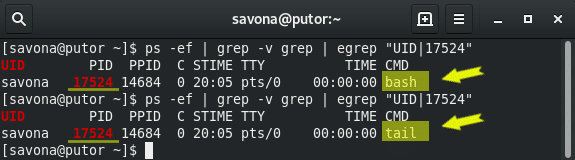


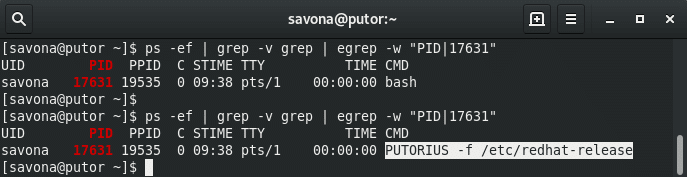
 Open a file as file descriptor 6 for writing:exec 6> file2writeOpen file as file descriptor 8 for reading:exec 8< file2readCopy file descriptor 5 to file descriptor 7:exec 7<&5Close file descriptor 8:exec 8<&-Conclusion


GNU Screen is a terminal multiplexer (window manager). As the name says, Screen multiplexes the physical terminal between multiple interactive shells, so we can perform different tasks in each terminal session. All screen sessions run their programs completely independent. So, a program or process running inside a screen session will keep running even if the session is accidentally closed or disconnected. For instance, when upgrading Ubuntu server via SSH, Screen command will keep running the upgrade process just in case your SSH session is terminated for any reason.
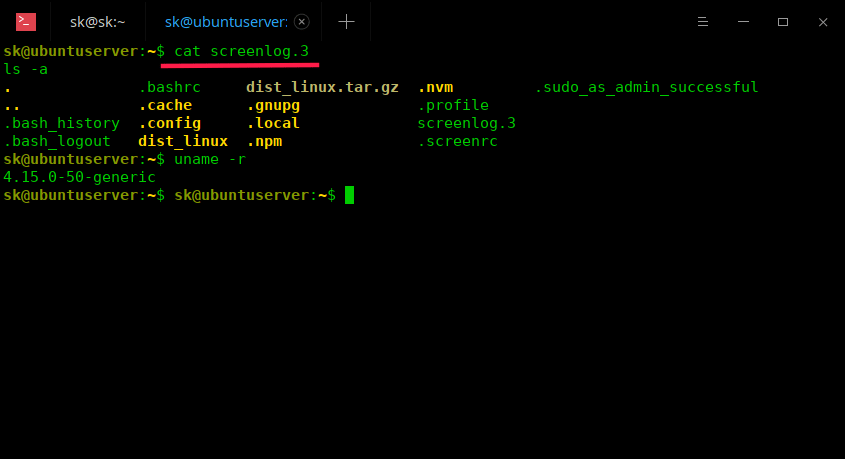
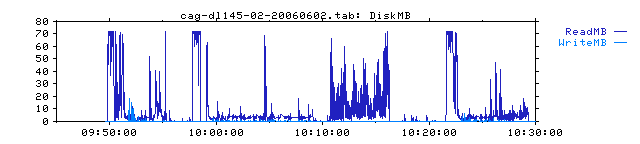
Figure 1
Image by : Paul Lewin . Modified by Opensource.com. CC BY-SA 2.0 x Get the newsletter
David Both - David Both is a Linux and Open Source advocate who resides in Raleigh, North Carolina. He has been in the IT industry for over forty years and taught OS/2 for IBM where he worked for over 20 years. While at IBM, he wrote the first training course for the original IBM PC in 1981. He has taught RHCE classes for Red Hat and has worked at MCI Worldcom, Cisco, and the State of North Carolina. He has been working with Linux and Open Source Software for almost 20 years. David has written articles for...