|
|
Home | Switchboard | Unix Administration | Red Hat | TCP/IP Networks | Neoliberalism | Toxic Managers |
| (slightly skeptical) Educational society promoting "Back to basics" movement against IT overcomplexity and bastardization of classic Unix | |||||||
|
|
|
|
Note: REHL7 is diffest from RHEL6 to the extent that it should be called a separate flavor of Linux (much like RHEL6 and Suse 10 are different flavours of linux), not an upgrade to RHEL6. For dealing with Network Manager idiosyncrasies in RHEL7 see Disabling Network Manager in RHEL7
RHEL 6 configured to use Network Manager, even if we install server. Network Manager is a desktop component, which is semi-useless for rack mounted servers with static IP and cable connection (it can be useful for initial installation, when your switch is not yet configured; you can use instead wireless card to configure server via wireless network or USB to Ethernet adapter which you can connect to desktop DHCP segment).
Moreover Network Manager is essentially a DHCP beast and it overwrites /etc/resolv.conf if you configure static IP parameters (see Network Manager overwrites resolv.conf for details) on reboot. That comes to very unpleasant surprise as servers are not rebooted often and at this point you do not expect this Trojan horse inside your environment ;-)
Functionally Network Manager replaces old /etc/init.d/network script, but its useful functionality is limited mainly to wireless networks and desktops/laptops which use DHCP. It typically causes allergy for sysadmins who get used to static IP stack assignments. And overwriting /etc/resolv.conf is just one of several side effects.
To disable Network Manager please follow instructions below. First you need to disable it from init and shutdown the service:
chkconfig NetworkManager off
service NetworkManager stop
If you need wireless connection on your server, or connection that you need to control similarly, you might try to excluded some Ethernet interfaces from control of network manager. In this case you need
In the /etc/sysconfig/network-scripts/ifcfg-eth0 only one parameter matter: to disable NM you can put NM_CONTROLLED="no"
DEVICE="eth0"
NM_CONTROLLED="no"
ONBOOT="yes"
HWADDR=00:50:56:AB:50:90
TYPE=Ethernet
BOOTPROTO=none
IPADDR=10.12.36.89
PREFIX=22
GATEWAY=10.12.36.1
DNS1=10.12.5.20
DOMAIN="some.company.net"
DEFROUTE=yes
IPV4_FAILURE_FATAL=yes
IPV6INIT=no
NAME="System eth0"
After restarting NeworkManager service verify that Network Manager is successfully disabled for eth1.
nmcli dev statusCommnad nmcli is in /usr/bin. Here is synopsys
nmcli
Usage: nmcli [OPTIONS] OBJECT { COMMAND | help }

OPTIONS
  -t[erse]                                   terse output
  -p[retty]                                  pretty output
  -m[ode] tabular|multiline                  output mode
  -f[ields] |all|common   specify fields to output
  -e[scape] yes|no                           escape columns separators in values
  -v[ersion]                                 show program version
  -h[elp]                                    print this help

OBJECT
  nm          NetworkManager status
  con         NetworkManager connections
  dev         devices managed by NetworkManager
Enable network service so that particular interface (eth0 in our example) is activated by network service automatically upon boot.
Now it make sense that you can specify DNS server /etc/sysconfig/network-scripts/ifcfg-eth0 per interface.
You can also remove NetworkManager completely. For example
rpm -qa | fgrep "Network"
And based on result of the search delete RPMs involved.
rpm -e NetworkManager-0.8.1-66.el6.x86_64 NetworkManager-gnome-0.8.1-66.el6.x86_64Note:
If you specified network parameters during install the GATEWAY info is duplicated in the /etc/sysconfig/network:
NETWORKING=yes
HOSTNAME=box89.some.company.net
GATEWAY=10.12.36.1
If you change gateway manually without using GUI applet you need to change it in all places.
|
|
Switchboard | ||||
| Latest | |||||
| Past week | |||||
| Past month | |||||
# ifconfig OR # ip addr
$ cd /etc/sysconfig/network-scripts $ ls


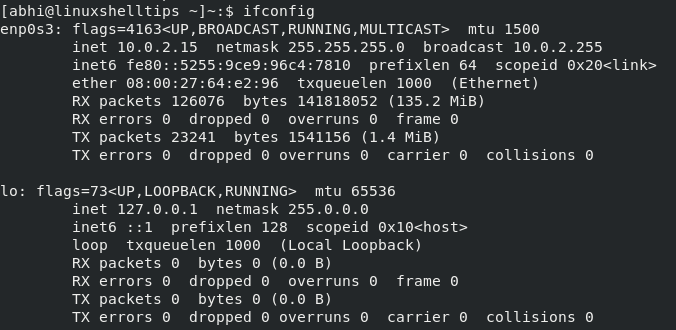
# nmcli networking off # nmcli networking onFinally, run ' ifconfig ' again to verify if static IP has been set. Finally, run ' ifconfig ' again to verify if static IP has been set.
# ifconfig
# ifconfig OR # ip addr
$ cd /etc/sysconfig/network-scripts $ ls
# nmcli networking off # nmcli networking onFinally, run ' ifconfig ' again to verify if static IP has been set. Finally, run ' ifconfig ' again to verify if static IP has been set.
# ifconfig
Mar 12, 2021 | www.linuxshelltips.com
In this article, we saw an easy way to set an IP address in CentOS. The example, in this case, is a static IP on the local network, i.e., it is not a static public IP over the Internet.
To set a static public IP address over the Internet, you need to purchase the IP Address and configure it in the file as shown above, along with other details like DNS server, network prefix, which will be provided by your Internet Service Provider.
Thanks a lot for reading and let us know your thoughts in the comments below!
Apr 06, 2019 | linuxtechlab.com
IP Aliasing : Assigning multiple IP addresses to single NIC
by Shusain · Published April 3, 2019 · Updated April 4, 2019
In this tutorial, we are going to learn to assign multiple IP addresses to a single NIC (Network Interface Card). This process of assigning multiple addresses to a single network interface is called IP aliasing.Main advantage of using IP aliasing is that we don't need multiple NICs to configure multiple IPs, hence saving us cost & configuration time. IP aliasing is most useful when using Apache IP based virtual hosting.
For this tutorial, we are going to use RHEL/CentOS 7 but the same process can also be used older versions of RHEL/CentOS, the only change being the name of the network interfaces other than that process is same.
Recommended Read: Top 7 commands for Linux Network Traffic Monitoring
Also Read: Monitoring network bandwidth with iftop command
Network interfaces files in RHEL/CentOS 7(on older versions as well) are located at ' /etc/sysconfig/network-scripts ' & name of the interfaces are usually ' ifcfg-en0sX ', where ' X ' is the number of the interface. In my case, its ' ifcfg-en0s0' . So we will be using the same for the purpose of this tutorial.
Using Network ManagerWe will be using a tool called 'nmtui' for this method. NMTUI is command line based user interface for Network Manager & even works for the system that does not have GUI installed. Open terminal & enter the command,
$ nmtui
We will get the following window,
<img src="https://i0.wp.com/linuxtechlab.com/wp-content/uploads/2019/04/IP-Alias-1.png?resize=425%2C366&ssl=1" alt="IP aliasing" width="425" height="366" data-recalc-dims="1" />
Click on 'Edit a connection', & then select the network interface from the list of interfaces & press ENTER key,
Manual Method
<img src="https://i1.wp.com/linuxtechlab.com/wp-content/uploads/2019/04/IP-Alias-2.png?resize=795%2C618&ssl=1" alt="IP aliasing" width="795" height="618" srcset="https://i1.wp.com/linuxtechlab.com/wp-content/uploads/2019/04/IP-Alias-2.png?w=795&ssl=1 795w, https://i1.wp.com/linuxtechlab.com/wp-content/uploads/2019/04/IP-Alias-2.png?resize=768%2C597&ssl=1 768w" sizes="(max-width: 795px) 100vw, 795px" data-recalc-dims="1" />
Now we add the required number of IP address here & once done, we can click on 'OK' & then exit from the nmtui menu. Restart the NetworkManager service & we will have our IP aliasing ready.For this method, we will manually create the necessary files needed. We will assign two different IPs in addition to the one we have already assigned to our interface ' ifcfg-en0s0' . To create IP alias, we are going to use our default network interface file & then will create two copies of the file with names 'ifcfg-en0s0:1 ' & 'ifcfg-en0s0:2'
$ cd /etc/sysconfig/network-scripts
$ cp ifcfg- en0s0 ifcfg- en0s0 :1
$ cp ifcfg- en0s0 ifcfg- en0s0 :2Now, let's open primary network interface i.e. eth0, & see its content
$ vi ifcfg- en0s0
DEVICE=" en0s0 "
BOOTPROTO=static
ONBOOT=yes
TYPE="Ethernet"
IPADDR=192.168.1.100
NETMASK=255.255.255.0
GATEWAY=192.168.1.1
HWADDR=32:0A:21:54:ND:6DWe will now configure our other network interfaces, we only need to make changes for 'DEVICE' & 'IPADDR' for aliasing
$ vi ifcfg- en0s0 :1
DEVICE=" en0s0 :1″
BOOTPROTO=static
ONBOOT=yes
TYPE="Ethernet"
IPADDR=192.168.1.110
NETMASK=255.255.255.0
GATEWAY=192.168.1.1
HWADDR=32:0A:21:54:ND:6D& same is to be done for 'ifcfg:eth0:2'
$ vi ifcfg- en0s0 :2
DEVICE=" en0s0 :2″
BOOTPROTO=static
ONBOOT=yes
TYPE="Ethernet"
IPADDR=192.168.1.120
NETMASK=255.255.255.0
GATEWAY=192.168.1.1
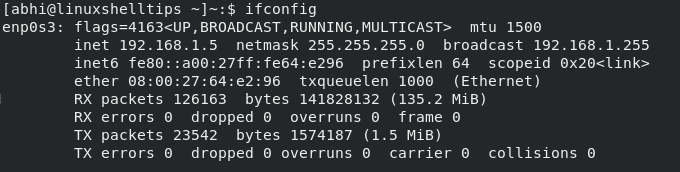
HWADDR=32:0A:21:54:ND:6DSave both files & restart the network service for changes to take effect.
$ systemctl restart network
To check IP addresses have bee assigned or not, run 'ifconfig'
$ ifconfig
<img src="https://i0.wp.com/linuxtechlab.com/wp-content/uploads/2017/03/ifconfig.jpg?resize=545%2C301&ssl=1" alt="ip aliasing" width="545" height="301" srcset="https://i0.wp.com/linuxtechlab.com/wp-content/uploads/2017/03/ifconfig.jpg?w=545&ssl=1 545w, https://i0.wp.com/linuxtechlab.com/wp-content/uploads/2017/03/ifconfig.jpg?resize=300%2C166&ssl=1 300w" sizes="(max-width: 545px) 100vw, 545px" data-recalc-dims="1" />
This completes our tutorial, if you are having any issues/comments, please do mention them in the comment box below.
Feb 04, 2019 | www.thegeekdiary.com
Disabling NetworkManager
The following steps will disable NetworkManager service and allows the interface to be managed only by network service.
1. To check which are the interfaces managed by NetworkManager
# nmcli device statusThis displays a table that lists all network interfaces along with their STATE. If Network Manager is not controlling an interface, its STATE will be listed as unmanaged . Any other value indicates the interface is under Network Manager control.
2. Stop the NetworkManager service:
# systemctl stop NetworkManager3. Disable the service permanently:
# systemctl disable NetworkManager4. To confirm the NetworkManager service has been disabled
# systemctl list-unit-files | grep NetworkManager5. Add the below parameter in /etc/sysconfig/network-scripts/ifcfg-ethX of interfaces that are managed by NetworkManager to make it unmanaged.
NM_CONTROLLED="no"Note: Be sure to change the NM_CONTROLLED="yes" to " no " or the network service may complain about "Connection activation failed" when it cannot find an interface to start Switching to "network" serviceWhen the NetworkManager is disabled, the interface can be configured for use with the network service. Follow the steps below to configure and interface using network services.
1. Set the IP address in the configuration file: /etc/sysconfig/network-scripts/ifcfg-eth0. Set the NM_CONTROLLED value to no and assign a static IP address in the file.
NAME="eth0"
HWADDR=...
ONBOOT=yes
BOOTPROTO=none
IPADDR=...
NETMASK=...
GATEWAY=...
TYPE=Ethernet
NM_CONTROLLED=no
2. Set the DNS servers to be used by adding into the file: /etc/resolv.conf :
nameserver [server 1]
nameserver [server 2]
3. Enable the network service
# systemctl enable network4. Restart the network service
# systemctl restart networkCentOS / RHEL 5, 6 : how to disable NetworkManager
Linux OS Service 'NetworkManager'
Jan 30, 2019 | www.ctrl.blog
Opting-out of NetworkManager
NetworkManager is by far the most common auto-configuration tool for the entire networking stack including DNS resolution. It's responsible for /etc/resolv.conf on many popular distribution including Debian and Fedora. After you've disable other programs that manages resolv.conf, you may also discover that NetworkManager will jump in to fill the job -- as happens on Ubuntu 16.10 and later.
Set the dns option in the main configuration section to none to disable DNS handling in NetworkManager. The below commands sets this option in a new conf.d/no-dns.conf configuration file, restarts the NetworkManager service, and deletes the NetworkManager-generated resolv.conf file.
   echo -e "[main]\ndns=none" > /etc/NetworkManager/conf.d/no-dns.conf
   systemctl restart NetworkManager.service
   rm /etc/resolv.conf
If you discover that NetworkManager is still managing your resolv.conf, then you may have a configuration conflict (usually caused by dnsmasq). Recursively search through your NetworkManager configuration to discover any conflicts.
grep -ir /etc/NetworkManager/Refer to the last section of this article for instructions on recreating a /etc/resolv.conf file with manual configuration
OpenStack networking currently does not work on systems that have the Network Manager (NetworkManager) service enabled. The Network Manager service is currently enabled by default on Red Hat Enterprise Linux installations where one of these package groups was selected during installation:The Network Manager service is not currently enabled by default on Red Hat Enterprise Linux installations where one of these package groups was selected during installation:
- Desktop
- Software Development Workstation
Follow the steps listed in this procedure while logged in as the
- Basic Server
- Database Server
- Web Server
- Identity Management Server
- Virtualization Host
- Minimal Install
rootuser on each system in the environment that will handle network traffic. This includes the system that will host the OpenStack Networking service, all network nodes, and all compute nodes.These steps ensure that the
NetworkManagerservice is disabled and replaced by the standard network service for all interfaces that will be used by OpenStack Networking.The Network Manager service has been disabled. The standard network service has been enabled and configured to control the required network interfaces.
- Verify Network Manager is currently enabled using the
chkconfigcommand.The output displayed by the#chkconfig --list NetworkManagerchkconfigcommand inicates whether or not the Network Manager service is enabled.
- The system displays an error if the Network Manager service is not currently installed:
error reading information on service NetworkManager: No such file or directoryIf this error is displayed then no further action is required to disable the Network Manager service.- The system displays a list of numerical run levels along with a value of
onoroffindicating whether the Network Manager service is enabled when the system is operating in the given run level.NetworkManager 0:off 1:off 2:off 3:off 4:off 5:off 6:offIf the value displayed for all run levels isoffthen the Network Manager service is disabled and no further action is required. If the value displayed for any of the run levels isonthen the Network Manager service is enabled and further action is required.- Ensure that the Network Manager service is stopped using the
servicecommand.#service NetworkManager stop- Ensure that the Network Manager service is disabled using the
chkconfigcommand.#chkconfig NetworkManager off- Open each interface configuration file on the system in a text editor. Interface configuration files are found in the
/etc/sysconfig/network-scripts/directory and have names of the formifcfg-whereXXis replaced by the name of the interface. Valid interface names includeeth0,p1p5, andem1.In each file ensure that the
NM_CONTROLLEDconfiguration key is set tonoand theON_BOOTconfiguration key is set toyes.NM_CONTROLLED=no ONBOOT=yesThis action ensures that the standard network service will take control of the interfaces and automatically activate them on boot.- Ensure that the network service is started using the
servicecommand.#service network start- Ensure that the network service is enabled using the
chkconfigcommand.#chkconfig network on
Aug 01, 2017 | superuser.com
Andrew 46I was setting up a RHEL7 server in vmware vSphere and I'm having trouble getting it on the network without NetworkManager. I configured the server to have a static IP during the install process and it set everything up using NetworkManager. While this does work we do not use NetworkManager in my office, so I went and entered what we usually put the config file to get RHEL6 servers online without NetworkManager.
/etc/sysconfig/network-scripts/ifcfg-ens192 is the following:
NAME=ens192
TYPE=Ethernet
ONBOOT=yes
NM_CONTROLLED=no
BOOTPROTO=static
IPADDR=10.0.2.15
PREFIX=24
GATEWAY=10.0.2.2However when I disable NetworkManager the network service fails to start with the following error
#service network restart
Restarting network (via systemctl): Job for network.service failed. See 'systemctl status network.service' and 'journalctl -xn' for details.
And both commands output the following:
network[1838]: RTNETLINK answers: File exists
network[1838]: RTNETLINK answers: File exists
network[1838]: RTNETLINK answers: File exists
network[1838]: RTNETLINK answers: File exists
network[1838]: RTNETLINK answers: File exists
network[1838]: RTNETLINK answers: File exists
network[1838]: RTNETLINK answers: File exists
systemd[1]: network.service: control process exited, code=exited status=1
systemd[1]: Failed to start LSB: Bring up/down networkingAlso, here's what the command 'ip addr' outputs:
1: lo: mtu 65536 qdisc noqueue state UNKNOWN
link/loopback 00:00:00:00:00:00 brd 00:00:00:00:00:00
inet 127.0.0.1/8 scope host lo
valid_lft forever preferred_lft forever
inet6 ::1/128 scope host
valid_lft forever preferred_lft forever
2: ens192: mtu 1500 qdisc noop state DOWN qlen 1000
link/ether 08:00:27:98:8e:df brd ff:ff:ff:ff:ff:ff
asked Jul 11 '14 at 22:19Pavel Šimerda Apr 5 '15 at 5:40
nickg Oct 25 '14 at 16:46I recently debugged an issue with
network.serviceand the best way to track the ip commands wasstrace. You shouldn't generally get this type of error. It might be worth reporting (ideally via support). –Check your MAC Address for the VM. It should be 08:00:27:98:8e:df since that is what is shown you ran ip addr. If it's anything else, you will need to set it in your ifcfg-ens192 file with the following, but replace the address with the actual.
HWADDR="08:00:27:98:8e:df"I had the same issue and this solved it for me.
Pavel Šimerda Apr 5 '15 at 5:43
The configuration file in the Question apparently relies on NAME=ens192 without any MAC address matching.
Dec 30 '14 at 14:46 0ldd0g
All I found that it takes to resolve this is that MAC in the Configyou should put that information (GATEWAY=10.0.2.2) in /etc/sysconfig/network once it's done, restarting the service should succeedNAME=ens192 TYPE=Ethernet ONBOOT=yes HWADDR="08:00:27:98:8e:df" NM_CONTROLLED=no BOOTPROTO=static IPADDR=10.0.2.15 PREFIX=24 GATEWAY=10.0.2.2If you are not sure of the hardware address you can find it in.
cat /sys/class/net/ens192/addressTry to go to the virtual machine network settings and make sure the network cable is connected and check if you have blocked this with a firewall
NetworkManager dictates the default route ( ip route ) even though your interface has nm disabled, it is just that interface not the whole system.ps aux | grep -I net # will probably find NetworkManager still running. chkconfig NetworkManager off systemctl disable NetworkManager.serviceI too came across "Failed to start LSB: Bring up/down networking" error, since disabling NetworkManager. It took two minutes to be brought up interfaces after boot. The cause of confusion was "... LSB". It turned out the message comes out from just the traditional /etc/rc.d/init.d/network script. In my case, following solved the problem;
systemctl disabledoesn't stop a service, nor doeschkconfig ... offwhich basically translates to the same command anyway. – Pavel ŠimerdaTo network-scripts/ifcfg-eth0 added
NMCONTROLLED=noRemoved unnecessary ifcfg-* files which NetworkManager has left behind
# rm /etc/sysconfig/network-scripts/ifcfg-Wired_connection_?Abdullah May 11 at 10:26This will solve the problem!# rm /etc/udev/rules.d/70-persistent-ipoib.rules # reboot
- Now edit /etc/sysconfig/network-scripts/ifcfg-eth0,
- Add new HWADDR generated or remove it
- Remove UUID line
-Restart the networking service
#systemctl restart network.serviceNOW! Working.
I was having the same issue. So I just delete the backup files I made in
/etc/sysconfig/network-scripts, such asifcfg-Bridge_connection_1.homeandifcfg-Bridge_connection_1.officewhich I created for backup usage. They should not be created there. The/etc/init.d/network restartcould work well after delete those useless ifcfg-*.
Aug 02, 2017 | serverfault.com
cjmaio Jul 2 '14 at 15:14
Okay community, let's see if we can figure this one out, cause I'm out of answers.Where I work I am setting up a bunch of RedHat Enterprise Linux servers. There is a collection of RHEL6 and RHEL7 servers.
On the RHEL6 servers, I am using the standard network configuration tool by configuring it in
/etc/sysconfig/network-scripts/ifcfg-eth0and a dhclient configuration file in/etc/dhclient-eth0.conf. Everything works properly, I am assigned the custom FQDN by our DNS servers (e.g.hostname.ad.company.tld) and when the DHCP lease is up, it is renewed automatically.
Here is the issue:
In RHEL7, NetworkManager is enabled by default. On our Kickstart, I have removed NetworkManager and went back to configuring network and dhcp the way it is done in RHEL6. All of the configuration is the same (sans using
/etc/sysconfig/network-scripts/ifcfg-ens192instead of eth0) and works fine for the first DHCP lease.Once the lease is up, it seemingly doesn't renew it until I issue a
systemctl restart networkcommand.
I have looked and looked and I am coming up short. There must be something different in RHEL7 or something not configured when you disable NetworkManager , but I cannot for the life of me figure it out.
Anyone have any thoughts?
As I know these usually help, I'll post my RHEL7 configuration files, and the snippet from the logs where it loses the DHCP lease.
/etc/sysconfig/network-scripts/ifcfg-ens192
# Generated by dracut initrd
DEVICE="ens192"
ONBOOT=yes
NETBOOT=yes
UUID="c23045ff-7b60-4dff-b052-30a61923a852"
IPV6INIT=yes
BOOTPROTO=dhcp
HWADDR="00:0c:29:b6:d8:cc"
TYPE=Ethernet
NAME="ens192"
NM_CONTROLLED=no
/etc/dhclient-ens192.conf
send host-name "hostname";
send fqdn.fqdn "hostname.ad.company.tld";
send fqdn.server-update off;
/var/log/messages
Jun 27 23:06:09 sa-kbwiki01 avahi-daemon[591]: Withdrawing address record for 129.89.78.221 on ens192.
Jun 27 23:06:09 sa-kbwiki01 avahi-daemon[591]: Leaving mDNS multicast group on interface ens192.IPv4 with address xxx.xx.xx.xxx.
Jun 27 23:06:09 sa-kbwiki01 avahi-daemon[591]: Interface ens192.IPv4 no longer relevant for mDNS.
That log snippet doesn't show your DHCP lease being lost. Keep looking, there should be other more relevant entries. – Michael Hampton ♦ Jul 2 '14 at 15:24
From what I recall hearing pre-launch is that networkManager is not the same PoS it was years ago and Red Hat more or less forces you to learn to live with it. Having said that, the documentation mentions that NetworkManager has been made responsible for starting dhclient, so it could be that without NM, dhclient is run with the
-1option and doesn't become a daemon. – HBruijn ♦ Jul 2 '14 at 15:36@MichaelHampton I do not see anything else in /var/log/messages. Other things that use the network are operating fine until that line, at which point everything starts saying no network available. – cjmaio Jul 2 '14 at 15:59
@HBruijn That gives me somewhere to start... though when doing a
ps aux | grep dhclientI do see that the-1flag is being set... is there anywhere else that dhclient would log to other than/var/log/messages? – cjmaio Jul 2 '14 at 16:00Yeah, NM is fairly safe to use these days unless you have a very complicated setup. I do wonder why you're running Avahi though. – Michael Hampton ♦ Jul 2 '14 at 16:01
|
|
||||
| Bulletin | Latest | Past week | Past month |
|
| Please visit nixCraft site. It has material well
worth your visit.
Dr. Nikolai Bezroukov |
Introducing NetworkManager by Rosanna Yuen January 2005
How to disable Network Manager on Linux - Linux FAQ
nmcli(1) tool for controlling NetworkManager - Linux man page
networkmanager.conf(5) - Linux man page
[ifupdown]
This section contains ifupdown-specific options and thus only has effect when using ifupdown plugin.
- managed=false | true
- Controls whether interfaces listed in the 'interfaces' file are managed by NetworkManager. If set to true, then interfaces listed in /etc/network/interfaces are managed by NetworkManager. If set to false, then any interface listed in /etc/network/interfaces will be ignored by NetworkManager. Remember that NetworkManager controls the default route, so because the interface is ignored, NetworkManager may assign the default route to some other interface. When the option is missing, false value is taken as default.
nm-system-settings.conf(5) - Linux man page
Ubuntu Manpage nmcli - command-line tool for controlling NetworkManager
Society
Groupthink : Two Party System as Polyarchy : Corruption of Regulators : Bureaucracies : Understanding Micromanagers and Control Freaks : Toxic Managers : Harvard Mafia : Diplomatic Communication : Surviving a Bad Performance Review : Insufficient Retirement Funds as Immanent Problem of Neoliberal Regime : PseudoScience : Who Rules America : Neoliberalism : The Iron Law of Oligarchy : Libertarian Philosophy
Quotes
War and Peace : Skeptical Finance : John Kenneth Galbraith :Talleyrand : Oscar Wilde : Otto Von Bismarck : Keynes : George Carlin : Skeptics : Propaganda : SE quotes : Language Design and Programming Quotes : Random IT-related quotes : Somerset Maugham : Marcus Aurelius : Kurt Vonnegut : Eric Hoffer : Winston Churchill : Napoleon Bonaparte : Ambrose Bierce : Bernard Shaw : Mark Twain Quotes
Bulletin:
Vol 25, No.12 (December, 2013) Rational Fools vs. Efficient Crooks The efficient markets hypothesis : Political Skeptic Bulletin, 2013 : Unemployment Bulletin, 2010 : Vol 23, No.10 (October, 2011) An observation about corporate security departments : Slightly Skeptical Euromaydan Chronicles, June 2014 : Greenspan legacy bulletin, 2008 : Vol 25, No.10 (October, 2013) Cryptolocker Trojan (Win32/Crilock.A) : Vol 25, No.08 (August, 2013) Cloud providers as intelligence collection hubs : Financial Humor Bulletin, 2010 : Inequality Bulletin, 2009 : Financial Humor Bulletin, 2008 : Copyleft Problems Bulletin, 2004 : Financial Humor Bulletin, 2011 : Energy Bulletin, 2010 : Malware Protection Bulletin, 2010 : Vol 26, No.1 (January, 2013) Object-Oriented Cult : Political Skeptic Bulletin, 2011 : Vol 23, No.11 (November, 2011) Softpanorama classification of sysadmin horror stories : Vol 25, No.05 (May, 2013) Corporate bullshit as a communication method : Vol 25, No.06 (June, 2013) A Note on the Relationship of Brooks Law and Conway Law
History:
Fifty glorious years (1950-2000): the triumph of the US computer engineering : Donald Knuth : TAoCP and its Influence of Computer Science : Richard Stallman : Linus Torvalds : Larry Wall : John K. Ousterhout : CTSS : Multix OS Unix History : Unix shell history : VI editor : History of pipes concept : Solaris : MS DOS : Programming Languages History : PL/1 : Simula 67 : C : History of GCC development : Scripting Languages : Perl history : OS History : Mail : DNS : SSH : CPU Instruction Sets : SPARC systems 1987-2006 : Norton Commander : Norton Utilities : Norton Ghost : Frontpage history : Malware Defense History : GNU Screen : OSS early history
Classic books:
The Peter Principle : Parkinson Law : 1984 : The Mythical Man-Month : How to Solve It by George Polya : The Art of Computer Programming : The Elements of Programming Style : The Unix Hater’s Handbook : The Jargon file : The True Believer : Programming Pearls : The Good Soldier Svejk : The Power Elite
Most popular humor pages:
Manifest of the Softpanorama IT Slacker Society : Ten Commandments of the IT Slackers Society : Computer Humor Collection : BSD Logo Story : The Cuckoo's Egg : IT Slang : C++ Humor : ARE YOU A BBS ADDICT? : The Perl Purity Test : Object oriented programmers of all nations : Financial Humor : Financial Humor Bulletin, 2008 : Financial Humor Bulletin, 2010 : The Most Comprehensive Collection of Editor-related Humor : Programming Language Humor : Goldman Sachs related humor : Greenspan humor : C Humor : Scripting Humor : Real Programmers Humor : Web Humor : GPL-related Humor : OFM Humor : Politically Incorrect Humor : IDS Humor : "Linux Sucks" Humor : Russian Musical Humor : Best Russian Programmer Humor : Microsoft plans to buy Catholic Church : Richard Stallman Related Humor : Admin Humor : Perl-related Humor : Linus Torvalds Related humor : PseudoScience Related Humor : Networking Humor : Shell Humor : Financial Humor Bulletin, 2011 : Financial Humor Bulletin, 2012 : Financial Humor Bulletin, 2013 : Java Humor : Software Engineering Humor : Sun Solaris Related Humor : Education Humor : IBM Humor : Assembler-related Humor : VIM Humor : Computer Viruses Humor : Bright tomorrow is rescheduled to a day after tomorrow : Classic Computer Humor
The Last but not Least Technology is dominated by two types of people: those who understand what they do not manage and those who manage what they do not understand ~Archibald Putt. Ph.D
Copyright © 1996-2021 by Softpanorama Society. www.softpanorama.org was initially created as a service to the (now defunct) UN Sustainable Development Networking Programme (SDNP) without any remuneration. This document is an industrial compilation designed and created exclusively for educational use and is distributed under the Softpanorama Content License. Original materials copyright belong to respective owners. Quotes are made for educational purposes only in compliance with the fair use doctrine.
FAIR USE NOTICE This site contains copyrighted material the use of which has not always been specifically authorized by the copyright owner. We are making such material available to advance understanding of computer science, IT technology, economic, scientific, and social issues. We believe this constitutes a 'fair use' of any such copyrighted material as provided by section 107 of the US Copyright Law according to which such material can be distributed without profit exclusively for research and educational purposes.
This is a Spartan WHYFF (We Help You For Free) site written by people for whom English is not a native language. Grammar and spelling errors should be expected. The site contain some broken links as it develops like a living tree...
|
|
You can use PayPal to to buy a cup of coffee for authors of this site |
Disclaimer:
The statements, views and opinions presented on this web page are those of the author (or referenced source) and are not endorsed by, nor do they necessarily reflect, the opinions of the Softpanorama society. We do not warrant the correctness of the information provided or its fitness for any purpose. The site uses AdSense so you need to be aware of Google privacy policy. You you do not want to be tracked by Google please disable Javascript for this site. This site is perfectly usable without Javascript.
Last modified: April, 06, 2019