TCP/IP was and is the crown jewel of the US engineering acumen, the technology that changed the civilization as we know
it in less then 50 years.
The Internet protocol suite resulted from research and development conducted by the Defense Advanced Research Projects
Agency (DARPA) in the early 1970s. After initiating the pioneering
ARPANET in 1969, DARPA started work on a number of other
data transmission technologies. In 1972,
Robert E. Kahn joined
the DARPA
Information Processing Technology Office, where he worked on both satellite packet networks and ground-based radio packet
networks, and recognized the value of being able to communicate across both. In the spring of 1973,
Vinton Cerf, the developer
of the existing ARPANET Network
Control Program (NCP) protocol, joined Kahn to work on open-architecture interconnection models with the goal of designing
the next protocol generation for the ARPANET.
The key idea behind TCP and IP was to create "network of networks". That's why Department of Defense (DOD) initialed
the research project to connect a number different networks designed by different vendors into a network of networks (the
"Internet").
The Army puts out a bid on a computer and DEC wins the bid. The Air Force puts out a bid and IBM wins. The Navy bid
is won by Unisys. Then the President decides to invade Grenada and the armed forces discover that their computers cannot
talk to each other. The DOD must build a "network" out of systems each of which, by law, was delivered by the lowest
bidder on a single contract.
And TCP/IP was successful because it was relatively simple and delivered a few basic services that everyone needs (file
transfer, electronic mail, remote logon) across a many different types clients, servers and operating systems. The IP component
provides routing from the local LAN to the enterprise network, then the global Internet. On the battlefield a communications
network will sustain damage, so the DOD designed TCP/IP to be robust and automatically recover from any node or line failure.
This design allows the construction of very large networks with minimal central management.
As with all other communications protocol, TCP/IP is composed of layers:
IP - is responsible for moving packet of data from node to node. IP forwards each packet based on a four
byte destination address (the IP number). The Internet authorities assign ranges of numbers to organizations. The organizations
can split the IP range and subranges to their individual units which in turn assign them to individual machines. At
the beginning there was not internet address translation protocol so each server or workstation was one unique IP address
assigned to it. IP level uses router to move data one organizational unit to another and then around the world.
TCP - is responsible for verifying the correct delivery of data from client to server. Data can be lost in
the intermediate network. TCP adds support to detect errors or lost data and to trigger retransmission until the data
is correctly and completely received.
Sockets - is a name given to the package of subroutines that provide access to TCP/IP on most systems.
To insure that all types of systems from all vendors can communicate, TCP/IP was from the beginning completly standardized
and open. The sudden explosion of high speed microprocessors, fiber optics, and digital phone systems has created a burst
of new options: ISDN, frame relay, FDDI, Asynchronous Transfer Mode (ATM). so on physical level new technologies arise
and become obsolete within a few years. So no single standard can govern citywide, nationwide, or worldwide communications.
But on logical level TCP-IP domainates.
The original design of TCP/IP as a Network of Networks fits nicely within the current technological uncertainty. TCP/IP
data can be sent across a LAN, or it can be carried within an internal corporate network, or it can piggyback on the cable
service. Furthermore, machines connected to any of these networks can communicate to any other network through gateways
supplied by the network vendor.
Early research
The Internet protocol suite resulted from research and development conducted by the Defense Advanced Research Projects
Agency (DARPA) in the early 1970s. After initiating the pioneering
ARPANET in 1969, DARPA started work on a number of other
data transmission technologies. In 1972,
Robert E. Kahn joined
the DARPA
Information Processing Technology Office, where he worked on both satellite packet networks and ground-based radio packet
networks, and recognized the value of being able to communicate across both. In the spring of 1973,
Vinton Cerf, the developer
of the existing ARPANET Network
Control Program (NCP) protocol, joined Kahn to work on open-architecture interconnection models with the goal of designing
the next protocol generation for the ARPANET.
By the summer of 1973, Kahn and Cerf had worked out a fundamental reformulation, where the differences between network
protocols were hidden by using a common
internetwork protocol, and,
instead of the network being responsible for reliability, as in the ARPANET, the hosts became responsible. Cerf credits
Hubert Zimmerman and
Louis Pouzin, designer of the
CYCLADES network, with important influences on this
design.
The network's design included the recognition it should provide only the functions of efficiently transmitting and routing
traffic between end nodes and that all other intelligence should be located at the edge of the network, in the end nodes.
Using a simple design, it became possible to connect almost any network to the ARPANET, irrespective of their local characteristics,
thereby solving Kahn's initial problem. One popular expression is that TCP/IP, the eventual product of Cerf and Kahn's work,
will run over "two tin cans and a string."
A computer, called a router,
is provided with an interface to each network. It forwards
packets back and forth between them. Originally a router was called gateway, but the term was changed to avoid
confusion with other types of gateways.
Specification
From 1973 to 1974, Cerf's networking research group at Stanford worked out details of the idea, resulting in the first
TCP specification.A significant technical influence was the early networking work
at Xerox PARC, which produced
the PARC Universal Packet
protocol suite, much of which existed around that time. DARPA then contracted with
BBN Technologies,
Stanford University, and the
University College London
to develop operational versions of the protocol on different hardware platforms. Four versions were developed: TCP v1, TCP
v2, TCP v3 and IP v3, and TCP/IP v4. The last protocol is still in use today.
In 1975, a two-network TCP/IP communications test was performed between Stanford and University College London (UCL).
In November, 1977, a three-network TCP/IP test was conducted between sites in the US, UK, and Norway. Several other TCP/IP
prototypes were developed at multiple research centers between 1978 and 1983. The migration of the ARPANET to TCP/IP was
officially completed on January 1, 1983.]
Adoption
In March 1982, the US Department of Defense adopted TCP/IP as the standard for all military computer networking. In 1985,
the Internet Architecture
Board held a three-day workshop on TCP/IP for the computer industry, attended by 250 vendor representatives, promoting
the protocol and leading to its increasing commercial use. In 1985 the first
Interop conference was held, focusing on network interoperability
via further adoption of TCP/IP. It was founded by Dan Lynch, an early Internet activist. From the beginning, it was attended
by large corporations, such as IBM and DEC. Interoperability conferences have been held every year since then. Every year
from 1985 through 1993, the number of attendees tripled.
IBM, ATT and DEC were the first major corporations to adopt TCP/IP, despite having competing internal protocols (SNA,
XNS, etc.). In IBM, from 1984, Barry Appelman's
group did TCP/IP development. (Appelman later moved to AOL to
be the head of all its development efforts.) They managed to navigated around the corporate politics to get a stream of
TCP/IP products for various IBM systems, including MVS, VM, and OS/2. At the same time, several smaller companies began
offering TCP/IP stacks for DOS and MS Windows, such as the company
FTP Software.
The first VM/CMS TCP/IP stack came from the University of Wisconsin.
Back then, most of these TCP/IP stacks were written single-handedly by a few talented programmers. For example,
John Romkey of FTP Software was the author of
the MIT PC/IP package. John Romkey's PC/IP implementation was the first IBM PC TCP/IP stack. Jay Elinsky and
Oleg Vishnepolsky of IBM Research
wrote TCP/IP stacks for VM/CMS and OS/2, respectively.
The spread of TCP/IP was fueled further in June 1989, when AT&T agreed to put into the public domain the TCP/IP code
developed for UNIX. Various vendors, including
IBM, included this code in their own TCP/IP stacks. Many companies sold TCP/IP stacks for Windows until Microsoft released
its own TCP/IP stack in Windows 95. This event cemented TCP/IP's dominance over other protocols. These protocols included
IBM's SNA,
OSI, Microsoft's
native NetBIOS (still widely used for file sharing),
and Xerox' XNS.
Each technology has its own convention for transmitting messages between two machines within the same network. On a phycial
level packets are sent between machines by supplying the six byte unique identifier (the "MAC" address). In an SNA network,
every machine has Logical Units with their own network address. DECNET, Appletalk, and Novell IPX all have a scheme for
assigning numbers to each local network and to each workstation attached to the network.
On top of these local or vendor specific network addresses, TCP/IP assigns a unique number to every workstation in the
net. This "IP number" is a four byte value that, by convention, is expressed by converting each byte into a decimal number
(0 to 255) and separating the bytes with a period.
In early days an organization need to send an electronic mail to [email protected] requesting assignment of a network
number. It is still possible for almost anyone to get assignment of a number for a small "Class C" network in which the
first three bytes identify the network and the last byte identifies the individual computer. Before 1996 some people followed
this procedure and were assigned the numbers class C networks for a network of computers at his house.
Large organizations
before 1996 typically got "Class B" network where the first two bytes identify the network and the last two bytes identify
each of up to 64 thousand individual workstations. For example Yale's Class B network is 130.132, so all computers with
IP address 130.132.*.* are connected through Yale.
The organization then connects to the Internet through one of a dozen regional or specialized network suppliers. The
network vendor is given the subscriber network number and adds it to the routing configuration in its own machines and those
of the other major network suppliers.
There is no mathematical formula that translates the numbers 192.35.91 or 130.132 into "Yale University" or "New Haven,
CT." The machines that manage large regional networks or the central Internet routers managed by the National Science Foundation
can only locate these networks by looking each network number up in a table. There are potentially thousands of Class B
networks, and millions of Class C networks, but computer memory costs are low, so the tables are reasonable. Customers that
connect to the Internet, even customers as large as IBM, do not need to maintain any such information. They send all external
data to the regional carrier to which they subscribe, and the regional carrier maintains the tables and does the appropriate
routing.
New Haven is in a border state, split 50-50 between the Yankees and the Red Sox. In this spirit, Yale recently switched
its connection from the Middle Atlantic regional network to the New England carrier. When the switch occurred, tables in
the other regional areas and in the national spine had to be updated, so that traffic for 130.132 was routed through Boston
instead of New Jersey. The large network carriers handle the paperwork and can perform such a switch given sufficient notice.
During a conversion period, the university was connected to both networks so that messages could arrive through either path.
Although the individual subscribers do not need to tabulate network numbers or provide explicit routing, it is convenient
for most Class B networks to be internally managed as a much smaller and simpler version of the larger network organizations.
It is common to subdivide the two bytes available for internal assignment into a one byte department number and a one byte
workstation ID.
The enterprise network is built using commercially available TCP/IP router boxes. Each router has small tables with 255
entries to translate the one byte department number into selection of a destination Ethernet connected to one of the routers.
Messages to the PC Lube and Tune server (130.132.59.234) are sent through the national and New England regional networks
based on the 130.132 part of the number. Arriving at Yale, the 59 department ID selects an Ethernet connector in the C&
IS building. The 234 selects a particular workstation on that LAN. The Yale network must be updated as new Ethernets and
departments are added, but it is not effected by changes outside the university or the movement of machines within the department.
Every time a message arrives at an IP router, it makes an individual decision about where to send it next. There is concept
of a session with a preselected path for all traffic. Consider a company with facilities in New York, Los Angeles, Chicago
and Atlanta. It could build a network from four phone lines forming a loop (NY to Chicago to LA to Atlanta to NY). A message
arriving at the NY router could go to LA via either Chicago or Atlanta. The reply could come back the other way.
How does the router make a decision between routes? There is no correct answer. Traffic could be routed by the "clockwise"
algorithm (go NY to Atlanta, LA to Chicago). The routers could alternate, sending one message to Atlanta and the next to
Chicago. More sophisticated routing measures traffic patterns and sends data through the least busy link.
If one phone line in this network breaks down, traffic can still reach its destination through a roundabout path. After
losing the NY to Chicago line, data can be sent NY to Atlanta to LA to Chicago. This provides continued service though with
degraded performance. This kind of recovery is the primary design feature of IP. The loss of the line is immediately detected
by the routers in NY and Chicago, but somehow this information must be sent to the other nodes. Otherwise, LA could continue
to send NY messages through Chicago, where they arrive at a "dead end." Each network adopts some Router Protocol which periodically
updates the routing tables throughout the network with information about changes in route status.
If the size of the network grows, then the complexity of the routing updates will increase as will the cost of transmitting
them. Building a single network that covers the entire US would be unreasonably complicated. Fortunately, the Internet is
designed as a Network of Networks. This means that loops and redundancy are built into each regional carrier. The regional
network handles its own problems and reroutes messages internally. Its Router Protocol updates the tables in its own routers,
but no routing updates need to propagate from a regional carrier to the NSF spine or to the other regions (unless, of course,
a subscriber switches permanently from one region to another).
IBM designs its SNA networks to be centrally managed. If any error occurs, it is reported to the network authorities.
By design, any error is a problem that should be corrected or repaired. IP networks, however, were designed to be robust.
In battlefield conditions, the loss of a node or line is a normal circumstance. Casualties can be sorted out later on, but
the network must stay up. So IP networks are robust. They automatically (and silently) reconfigure themselves when something
goes wrong. If there is enough redundancy built into the system, then communication is maintained.
In 1975 when SNA was designed, such redundancy would be prohibitively expensive, or it might have been argued that only
the Defense Department could afford it. Today, however, simple routers cost no more than a PC. However, the TCP/IP design
that, "Errors are normal and can be largely ignored," produces problems of its own.
Data traffic is frequently organized around "hubs," much like airline traffic. One could imagine an IP router in Atlanta
routing messages for smaller cities throughout the Southeast. The problem is that data arrives without a reservation. Airline
companies experience the problem around major events, like the Super Bowl. Just before the game, everyone wants to fly into
the city. After the game, everyone wants to fly out. Imbalance occurs on the network when something new gets advertised.
Adam Curry announced the server at "mtv.com" and his regional carrier was swamped with traffic the next day. The problem
is that messages come in from the entire world over high speed lines, but they go out to mtv.com over what was then a slow
speed phone line.
Occasionally a snow storm cancels flights and airports fill up with stranded passengers. Many go off to hotels in town.
When data arrives at a congested router, there is no place to send the overflow. Excess packets are simply discarded. It
becomes the responsibility of the sender to retry the data a few seconds later and to persist until it finally gets through.
This recovery is provided by the TCP component of the Internet protocol.
TCP was designed to recover from node or line failures where the network propagates routing table changes to all router
nodes. Since the update takes some time, TCP is slow to initiate recovery. The TCP algorithms are not tuned to optimally
handle packet loss due to traffic congestion. Instead, the traditional Internet response to traffic problems has been to
increase the speed of lines and equipment in order to say ahead of growth in demand.
TCP treats the data as a stream of bytes. It logically assigns a sequence number to each byte. The TCP packet has a header
that says, in effect, "This packet starts with byte 379642 and contains 200 bytes of data." The receiver can detect missing
or incorrectly sequenced packets. TCP acknowledges data that has been received and retransmits data that has been lost.
The TCP design means that error recovery is done end-to-end between the Client and Server machine. There is no formal standard
for tracking problems in the middle of the network, though each network has adopted some ad hoc tools.
There are three levels of TCP/IP knowledge. Those who administer a regional or national network must design a system
of long distance phone lines, dedicated routing devices, and very large configuration files. They must know the IP numbers
and physical locations of thousands of subscriber networks. They must also have a formal network monitor strategy to detect
problems and respond quickly.
Each large company or university that subscribes to the Internet must have an intermediate level of network organization
and expertise. A half dozen routers might be configured to connect several dozen departmental LANs in several buildings.
All traffic outside the organization would typically be routed to a single connection to a regional network provider.
However, the end user can install TCP/IP on a personal computer without any knowledge of either the corporate or regional
network. Three pieces of information are required:
The IP address assigned to this personal computer
The part of the IP address (the subnet mask) that distinguishes other machines on the same LAN (messages can be
sent to them directly) from machines in other departments or elsewhere in the world (which are sent to a router machine)
The IP address of the router machine that connects this LAN to the rest of the world.
In the case of the PCLT server, the IP address is 130.132.59.234. Since the first three bytes designate this department,
a "subnet mask" is defined as 255.255.255.0 (255 is the largest byte value and represents the number with all bits turned
on). It is a Yale convention (which we recommend to everyone) that the router for each department have station number 1
within the department network. Thus the PCLT router is 130.132.59.1. Thus the PCLT server is configured with the values:
My IP address: 130.132.59.234
Subnet mask: 255.255.255.0
Default router: 130.132.59.1
The subnet mask tells the server that any other machine with an IP address beginning 130.132.59.* is on the same department
LAN, so messages are sent to it directly. Any IP address beginning with a different value is accessed indirectly by sending
the message through the router at 130.132.59.1 (which is on the departmental LAN).
Displays statistics by protocol. By default, statistics are shown for the TCP, UDP, ICMP,
and IP protocols. The -s parameter can be used to specify a set of protocols.
# netstat -s

Ip:
    2461 total packets received
    0 forwarded
    0 incoming packets discarded
    2431 incoming packets delivered
    2049 requests sent out
Icmp:
    0 ICMP messages received
    0 input ICMP message failed.
    ICMP input histogram:
    1 ICMP messages sent
    0 ICMP messages failed
    ICMP output histogram:
        destination unreachable: 1
Tcp:
    159 active connections openings
    1 passive connection openings
    4 failed connection attempts
    0 connection resets received
    1 connections established
    2191 segments received
    1745 segments send out
    24 segments retransmited
    0 bad segments received.
    4 resets sent
Udp:
    243 packets received
    1 packets to unknown port received.
    0 packet receive errors
    281 packets sent
9. Showing Statistics by TCP Protocol
Showing statistics of only TCP protocol by using option netstat -st .
# netstat -st

Tcp:
    2805201 active connections openings
    1597466 passive connection openings
    1522484 failed connection attempts
    37806 connection resets received
    1 connections established
    57718706 segments received
    64280042 segments send out
    3135688 segments retransmited
    74 bad segments received.
    17580 resets sent
10. Showing Statistics by UDP Protocol
# netstat -su

Udp:
    1774823 packets received
    901848 packets to unknown port received.
    0 packet receive errors
    2968722 packets sent
11. Displaying Service name with PID
Displaying service name with their PID number, using option netstat -tp will display
"PID/Program Name".
# netstat -tp

Active Internet connections (w/o servers)
Proto Recv-Q Send-Q Local Address               Foreign Address             State       PID/Program name
tcp        0      0 192.168.0.2:ssh             192.168.0.1:egs             ESTABLISHED 2179/sshd
tcp        1      0 192.168.0.2:59292           www.gov.com:http            CLOSE_WAIT  1939/clock-applet
12. Displaying Promiscuous Mode
Displaying Promiscuous mode with -ac switch, netstat print the selected information or
refresh screen every five second. Default screen refresh in every second.
Finding un-configured address families with some useful information.
# netstat --verbose

netstat: no support for `AF IPX' on this system.
netstat: no support for `AF AX25' on this system.
netstat: no support for `AF X25' on this system.
netstat: no support for `AF NETROM' on this system.
19. Finding Listening Programs
Find out how many listening programs running on a port.
# netstat --statistics --raw

Ip:
    62175683 total packets received
    52970 with invalid addresses
    0 forwarded
Icmp:
    875519 ICMP messages received
        destination unreachable: 901671
        echo request: 8
        echo replies: 16253
IcmpMsg:
        InType0: 83
IpExt:
    InMcastPkts: 117
That's it, If you are looking for more information and options about netstat command, refer
netstat manual docs or use man netstat command to know all the information. If we've missed
anything in the list, please inform us using our comment section below. So, we could keep
updating this list based on your comments.
ss (socket statistics) is a command line tool that monitors socket connections and displays the socket statistics of the Linux
system. It can display stats for PACKET sockets, TCP sockets, UDP sockets, DCCP sockets, RAW sockets, Unix domain sockets, and much
more.
This replaces the deprecated netstat command in the latest version of Linux. The ss command is much faster and prints more detailed
network statistics than the netstat command.
If you are familiar with the netstat command, it will be easier for you to understand the ss command as it uses similar command
line options to display network connections information.
Refer the following link to see other network command tutorials.
The basic ss command without any arguments, which displays all the socket or network connections as shown below:
$ ss
Understanding the output header:
Netid: Type of socket. Common types are TCP, UDP, u_str (Unix stream), and u_seq (Unix sequence).
State: State of the socket. Common states are ESTAB (established), UNCONN (unconnected), LISTEN (listening), CLOSE-WAIT, and
SYN-SENT.
Recv-Q: Number of received packets in the queue.
Send-Q: Number of sent packets in the queue.
Local Address:Port "" Address of local machine and port.
Peer Address:Port "" Address of remote machine and port.
The default output shows thousands of lines at once and part of the output will be not visible on the terminal, so use the "�less'
command for page-wise reporting.
By default the "t"� option reports only the tcp sockets that are "established"� or CONNECTED"�, and doesn't report the tcp sockets
that are "LISTENING"�. Use the "�-a' option together with "�-t', if you want to view them all at once.
To list process name and pid associated to the network connections, run: Make a note, you need to run this command with sudo privilege
to view all process name and associated pid.
To view overall summary of all socket connections, run: It prints the results in a tabular format, which including the number
of TCP & UDP, IPv4 and IPv6 socket connections.
$ ss -s

Total: 1278
TCP:   35 (estab 10, closed 11, orphaned 0, timewait 2)
Transport Total     IP        IPv6
RAW       1         0         1
UDP       11        7         4
TCP       24        13        11
INET      36        20        16
FRAG      0         0         0
10) View extended output of socket connections
To view extended output of socket connections, run. The extended output will display the uid of the socket and socket's inode
number.
The majority of Linux
distributions have adopted systemd, and with it comes the systemd-timesyncd daemon. That
means you have an NTP client already preinstalled, and there is no need to run the full-fledged
ntpd daemon anymore. The built-in systemd-timesyncd can do the basic time synchronization job
just fine.
To check the current status of time and time configuration via timedatectl and timesyncd,
run the following command.
timedatectl status
               Local time: Thu 2021-05-13 15:44:11 UTC
           Universal time: Thu 2021-05-13 15:44:11 UTC
                 RTC time: Thu 2021-05-13 15:44:10
                Time zone: Etc/UTC (UTC, +0000)
System clock synchronized: yes
              NTP service: active
          RTC in local TZ: no
If you see NTP service: active in the output, then your computer clock is
automatically periodically adjusted through NTP.
If you see NTP service: inactive , run the following command to enable NTP time
synchronization.
timedatectl set-ntp true
That's all you have to do. Once that's done, everything should be in place and time should
be kept correctly.
In addition, timesyncd itself is still a normal service, so you can check its status also
more in detail via.
systemctl status systemd-timesyncd
systemd-timesyncd.service - Network Time Synchronization
      Loaded: loaded (/usr/lib/systemd/system/systemd-timesyncd.service; enabled; vendor preset: enabled)
      Active: active (running) since Thu 2021-05-13 18:55:18 EEST; 3min 23s ago
      ...
If it is disabled, you can start and make systemd-timesyncd service active like this:
Before changing your time zone, start by using timedatectl to find out the
currently set time zone.
timedatectl
               Local time: Thu 2021-05-13 16:59:32 UTC
           Universal time: Thu 2021-05-13 16:59:32 UTC
                 RTC time: Thu 2021-05-13 16:59:31
                Time zone: Etc/UTC (UTC, +0000)
System clock synchronized: yes
              NTP service: inactive
          RTC in local TZ: no
Now let's list all the available time zones, so you know the exact name of the time zone
you'll use on your system.
timedatectl list-timezones
The list of time zones is quite large. You do need to know the official time-zone name for
your location. Say you want to change the time zone to New York.
timedatectl set-timezone America/New_York
This command creates a symbolic link for the time zone you choose from
/usr/share/zoneinfo/ to /etc/localtime .
In addition, you can skip the command shown above, create this symbolic link manually and
achieve the same result.
If you've been looking for a way to keep your data safe and secure you've most likely come across NAS. Let's take a look at 3
best in our opinion free NAS software solutions for home users and businesses.
Nowadays, NAS is used by everyday families who simply want to share photos and enjoy access to a digital library of entertainment,
no matter where they're at. So whether you're looking to build your own private network, gather movies, music, and TV shows, or just
to take data backup to the next level, NAS might be what you're looking for.
What is NAS
NAS (Network Attached Storage) is a term used to refer to storage devices that connect to a network and provide file access services
to computer systems. The simplest way to think of NAS is as a type of specialized file server. It allows data storage and retrieval
from a central location for authorized network users and various clients.
In other words, NAS is similar to having your own private cloud in home or in the office. It is faster, less expensive, and offers
all of the benefits of a public cloud on-premises, giving you complete control.
NAS software solutions come in all sorts of flavors. Finding the right one for your needs is the real challenge. There are many
of NAS servers and options available today but how to find the best NAS software for your home or business needs? With that being
said, lets look at 3 best in our opinion free NAS software solutions.
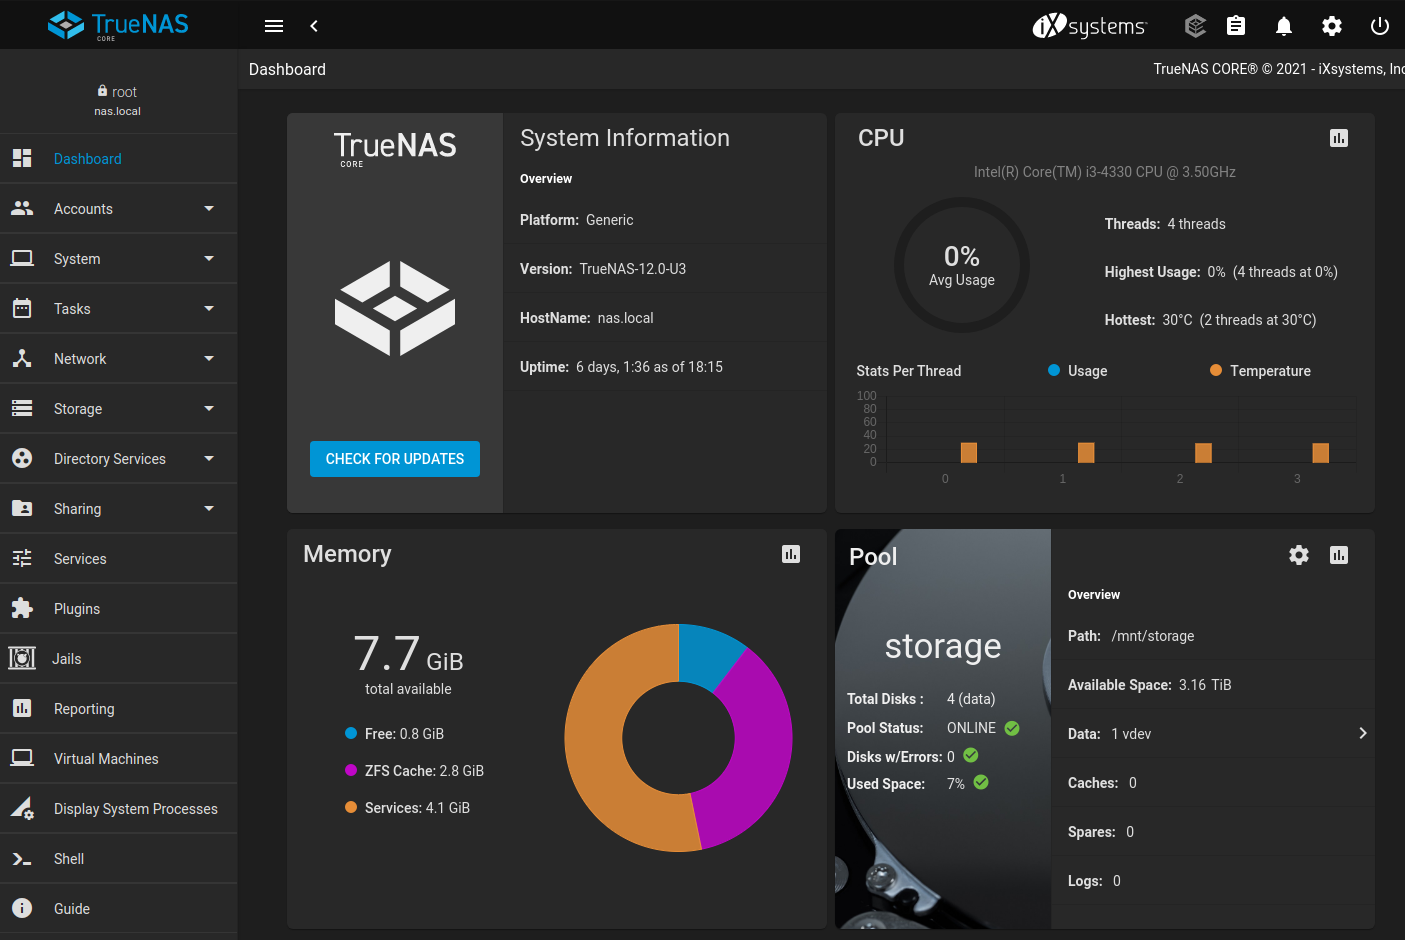
TrueNAS CORE
TrueNAS CORE (previously known as FreeNAS) is a FreeBSD-based operating system which provides free NAS services. It is community-supported,
open source branch of the TrueNAS project, sponsored by iXsystems .
TrueNAS CORE is probably the best known NAS operating system out there. It's been in development since 2005 and has over 10 million
downloads. It is more focused on power users , so this may not be recommended for people who are making a NAS server for the first
time.
OpenZFS
is the heart of TrueNAS CORE. It is an enterprise-ready open source file system, RAID controller, and volume manager with unprecedented
flexibility and an uncompromising commitment to data integrity. It eliminates most, if not all of the shortcomings found in legacy
file systems and hardware RAID devices. Once you go OpenZFS, you will never want to go back.
RAID-Z, the software RAID that is part of OpenZFS, offers single parity redundancy equivalent to RAID 5. The additional levels
RAID-Z2 and RAID-Z3 offer double and triple parity protection respectively. If you want to eliminate almost entirely any possibility
of data loss and stability is the name of the game, OpenZFS is what you're looking for.
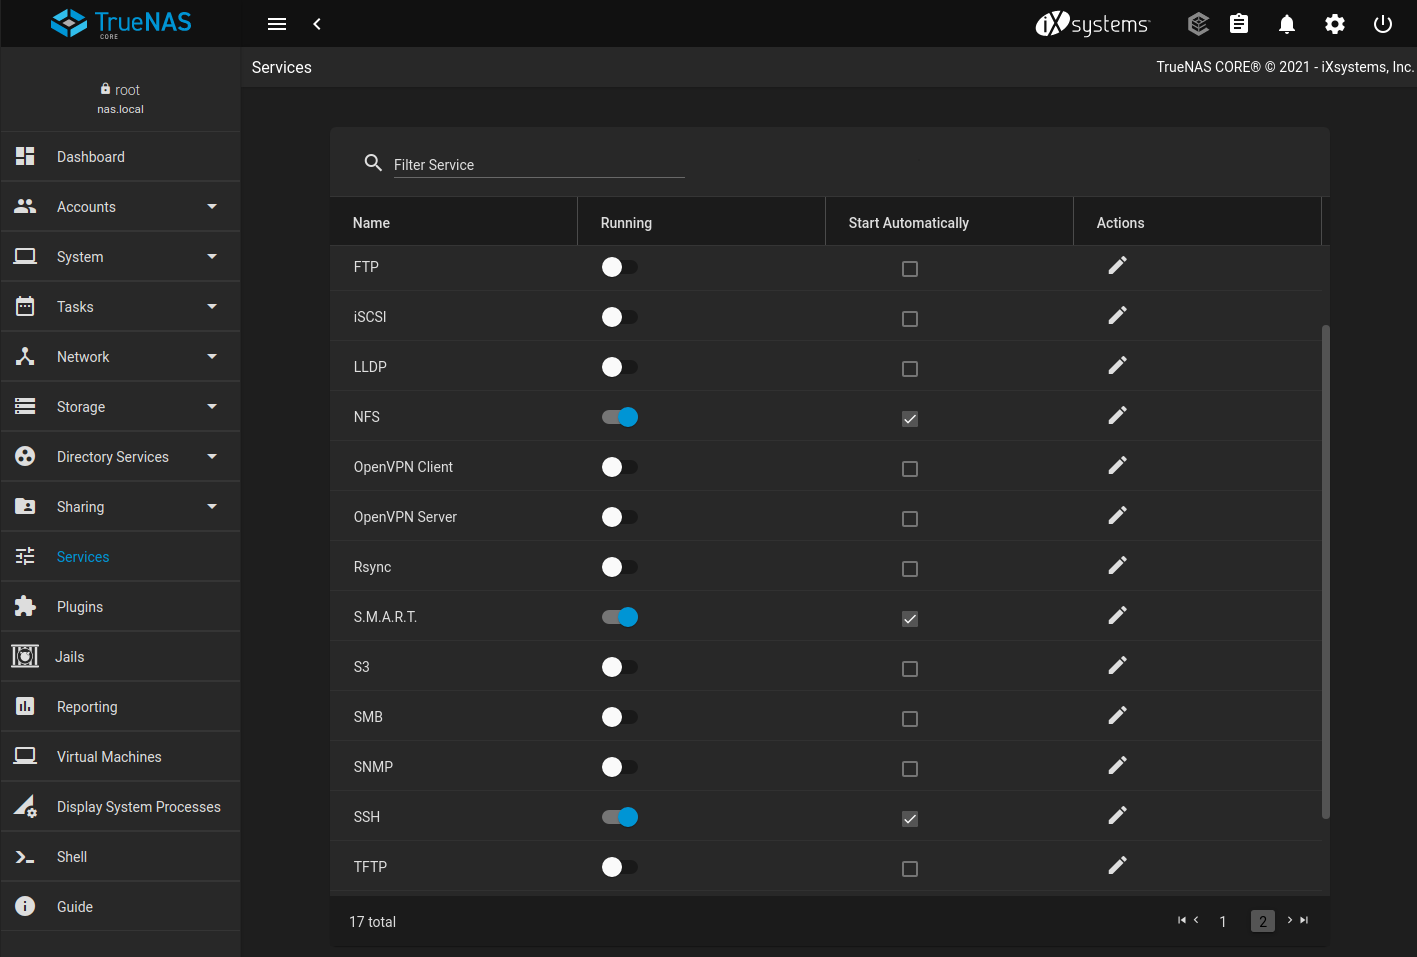
TrueNAS CORE has some of the best features that you can find in NAS devices, such as data snapshots, a self-repair file system,
encryption on their data volumes, and so on. Almost every file sharing is supported via TrueNAS CORE, which includes major file systems
like SMB/CIFS (Windows file shares), NFS (Linux/UNIX files), AFP (Apple file shares), FTP, iSCSI, and WebDAV. It also supports integration
with cloud storage providers like Amazon S3 and Google Cloud out of the box.
If TrueNAS CORE has one goal, it is simplifying complex administrative tasks for users. Every aspect of a system can be managed
from the web-based management interface. Administrative tasks ranging from storage configuration to share and user management to
software updating can all be performed with confidence without missing a critical step or experiencing a silent failure.
Even though storage is its primary feature, there is much more that really makes this product shine. TrueNAS CORE supports plugins
to extend its functionally such as Plex Media Server, Nextcloud, BitTorrent, OpenVPN, MadSonic, GitLab, Jenkins, etc. This means
that it is capable of more than just storage. For example, TrueNAS CORE can be used as part of your home entertainment setup, serving
your media to your Home Theater PC, PSP, iPod, or other network devices.
TrueNAS CORE is recommended if you are making an enterprise-grade server for your home, office or large businesses where data
is stored centrally and share from there. In addition to, TrueNAS CORE is the best choice when you are looking to find some storage
network which is reasonable.
On the other hand, TrueNAS CORE is not perfect for low-RAM users. It is a highly advanced level and feature-rich NAS solution
that recommends at least 8GB of RAM, a multi-core processor as well as a reliable storage drive to keep your data safe.
TrueNAS CORE pros and cons
Pros
OpenZFS support.
Encryption support.
Can be extended with its plugin and jails systems.
Gorgeous web-based management interface.
Very popular with a large following and frequent updates.
Incredible enterprise storage features.
Cons
Many of the features are overkill for home users, especially those looking to build something simple.
It's not the greatest choice for old, low-spec hardware. It wants loads of RAM, particularly if you plan to use OpenZFS. This
is more a OpenZFS thing than a FreeNAS thing, though.
Download TrueNAS CORE
One thing should be noticed before installing TrueNAS CORE on some old specs system is that it needs a good amount of RAM (you
need minimum 8GB RAM) to work, especially when you planning to install a OpenZFS file system. In addition to, for every terabyte
of storage, TrueNAS CORE requires 1 GB of RAM. Because of this, you will need newer hardware to make a server.
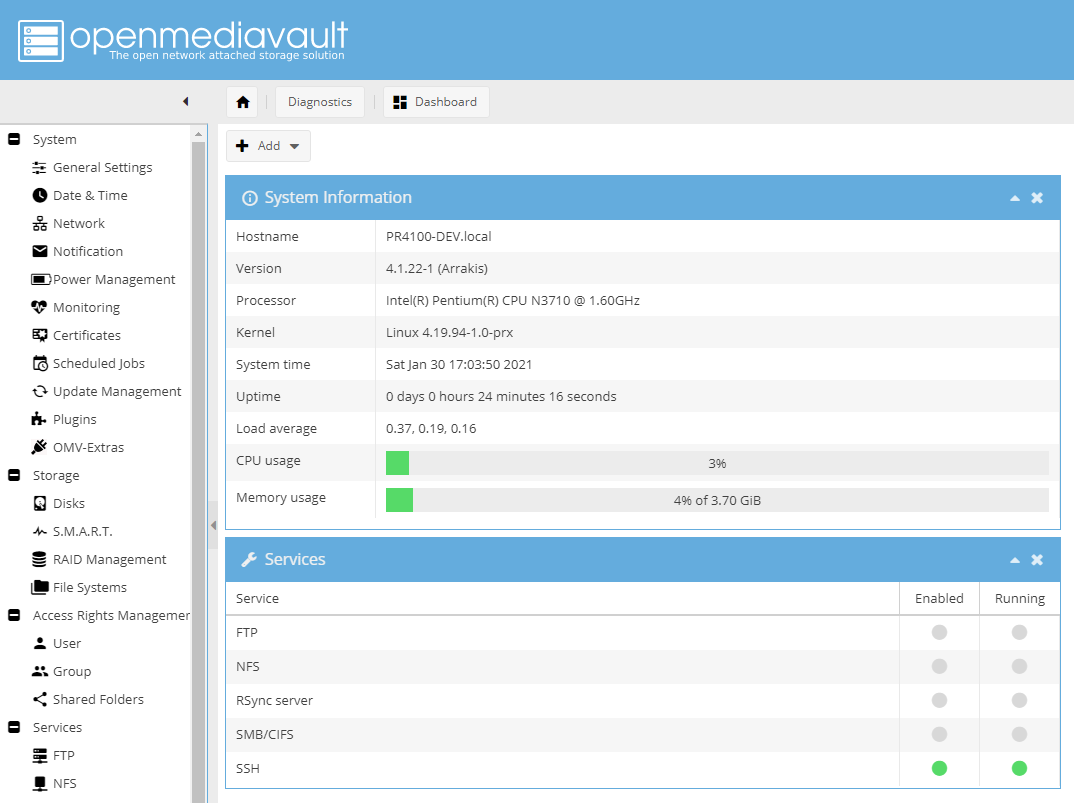
OpenMediaVault is a Debian based
Linux distribution for NAS and well-known for home users
and small businesses. It supports all major protocols such as SSH, (S)FTP, SMB, CIFS, and RSync and offers a straightforward way
to set up NAS servers for home users. In addition, the server is modular and can be extended with a variety of official and third-party
plugins. For example, you can turn your NAS into a torrent client to download data directly into the NAS storage. You can use it
also to stream stored music and videos across the network via Plex Media Server plugin.
OpenMediaVault is straightforward to rollout and simple to manage, thanks to its well designed web-based user interface, which
makes it suitable for even non-technical users. The user interface can further be enhanced by using its plugin directories.
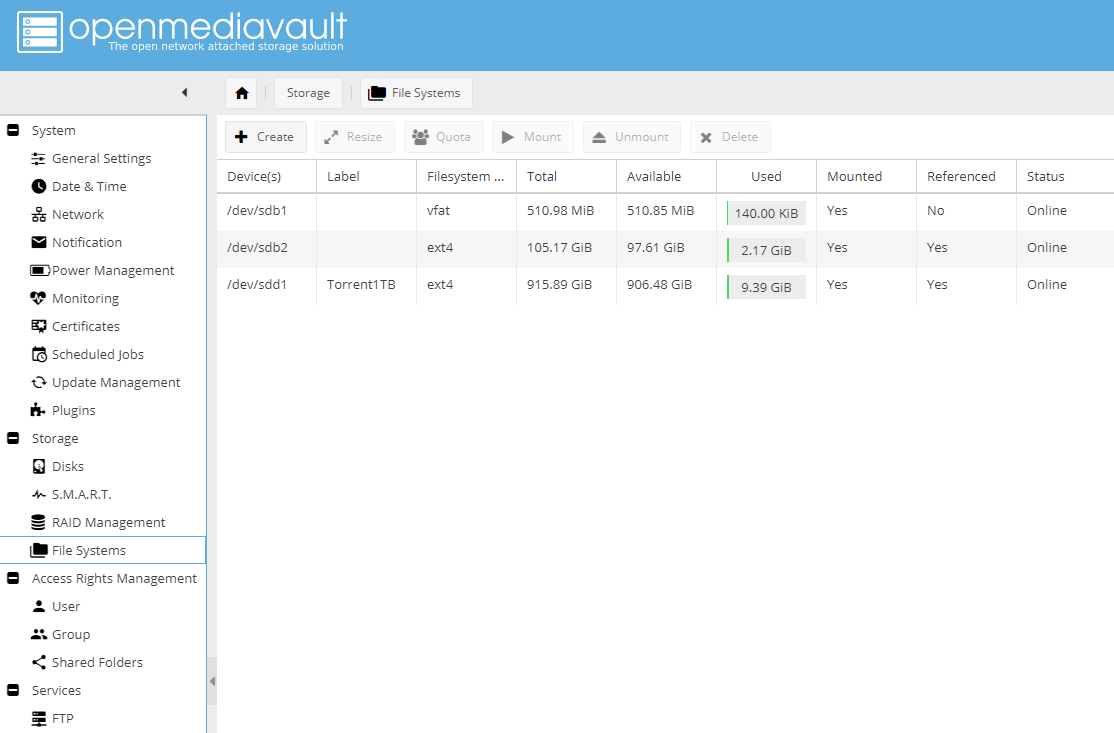
OpenMediaVault supports all the popular deployment mechanisms, including several levels of software RAID, each of which necessitates
a different number of disks. The project shares some features with TrueNAS CORE like storage monitoring, file sharing, and disk management
and supports multiple
file systems like ext4, Btrfs, JFS, and XFS. However, it doesn't have some of the more advanced features that TrueNAS CORE has,
like hot-swapping or the OpenZFS file system.
One of OpenMediaVault's best features compared to TrueNAS CORE is it's low system requirements. You can run OMV on low-powered
devices like the Raspberry Pi.
The project is complimented with an extensive support infrastructure
with plenty of documentation to handhold first time users.
OpenMediaVault is a very capable NAS deployment distro right out of the box. However, it can be made more advanced with tons of
features using plugins integrated into the base system, and even with third party plugins using the
OMV-Extras repository.
OpenMediaVault pros and cons
Pros
Based on Debian, thus easy maintenance of updates using the
apt command .
Easy to install.
Simple and easy to use web-based management interface.
Supports multiple filesystems.
Multi services.
Lots of plugins.
Cons
Dated interface.
File sharing options are limited.
Download OpenMediaVault
OpenMediaVault installable media is available for 64-bit machines. The installation images
can be found here . OMV even supports a number
of ARM architectures, including the one used by the Raspberry Pi. The ISO image can also be used to
create an USB stick
in addition to hard drives and SSDs, which is especially useful if you plan to use a single-board computer like the Raspberry
Pi.
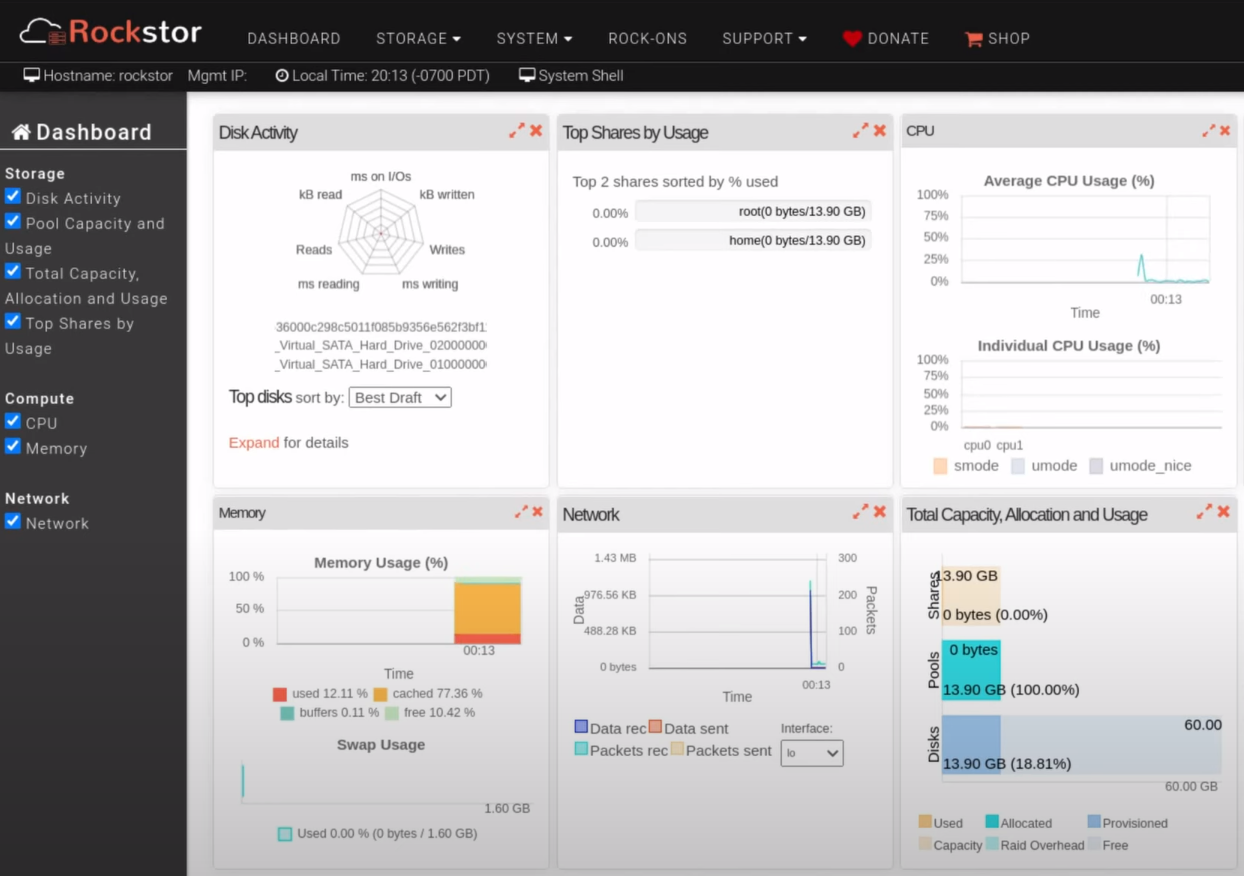
Rockstor
Rockstor is a free NAS management system and probably the best alternative to TrueNAS CORE. It is Linux-based NAS server distro
that's based on a rock-solid openSUSE Leap and focuses solely on the
Btrfs
file system . The previous Rockstor's releases were based on CentOS, however CentOS development considerations have now been
deprecated.
In addition to standard NAS features like file sharing via NFS, Samba, SFTP and AFP, advanced features such as online volume management,
CoW Snapshots, asynchronous replication, compression, and Bitrot protection are also supported.
The biggest difference between TrueNAS CORE and Rockstor is it uses the Btrfs file system , which is very similar to ZFS used
by TrueNAS CORE. Btrfs' big draw is its Copy-on-Write (CoW) nature of the filesystem. Btrfs is the new player among file systems.
It knew how to capture many looks in the community because it comes to compete directly with advanced functions of ZFS.
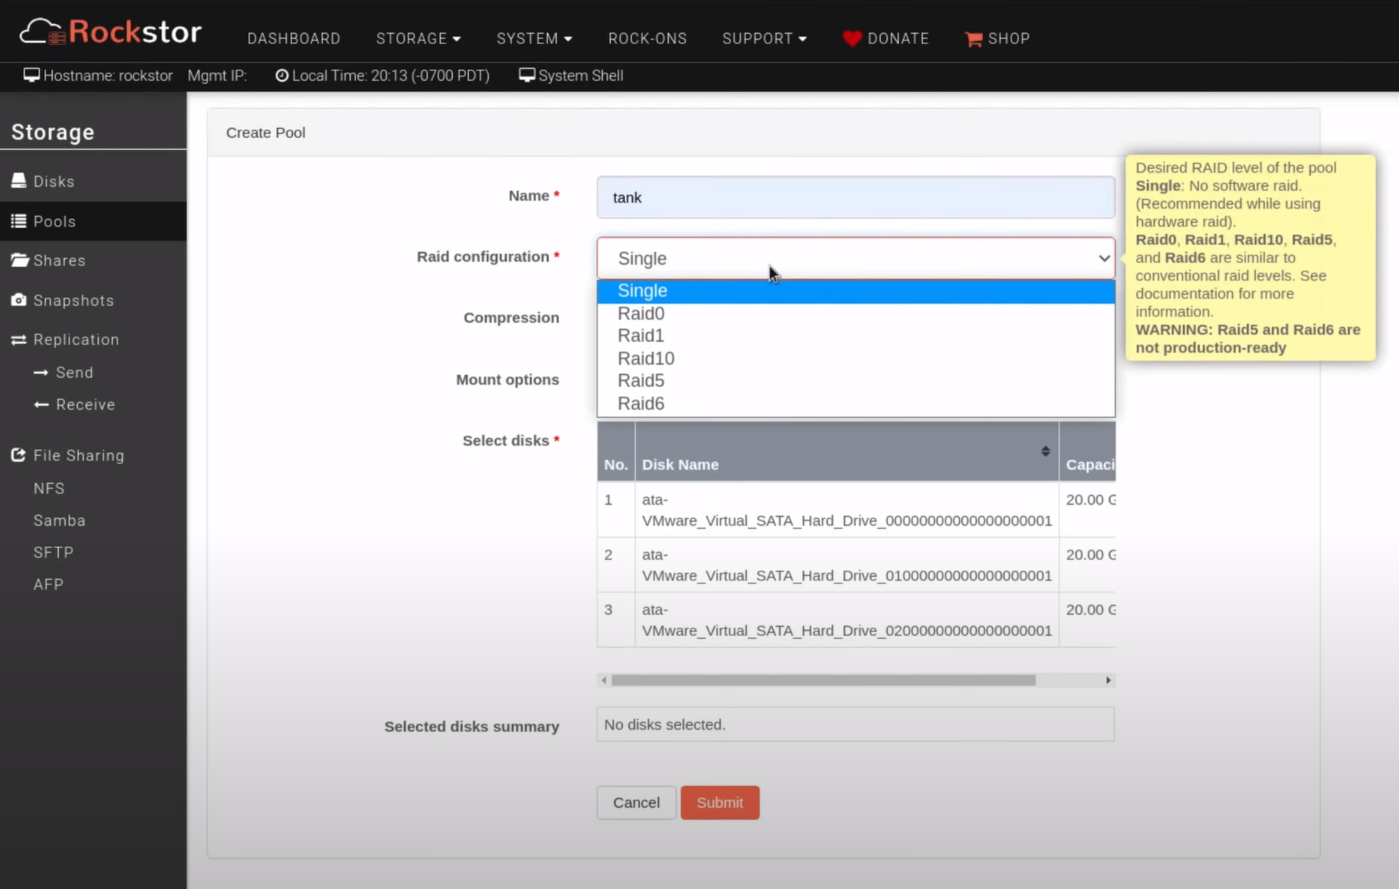
Rockstor lets you arrange the available space into different RAID configurations and give you control over how you want to store
your data. You also get the ability to resize a pool by adding or removing disks and even change its RAID profile without losing
your data and without disrupting access.
Rockstor supports two update channels. There's the freely available Testing Updates channel that gets updates that haven't been
thoroughly tested. Conversely, the updates in the Stable Updates channel have been tested for use in a production environment but
are only available at a yearly subscription fee of �20.
One of the best things that Rocktor provides to its users is its plugin system, which has a variety of different plugins, more
well-known by the name Rock-ons. The plugins are available as containers, which
Docker virtualizes on the
host system. These Rock-ons, combined with advanced NAS features, turn Rockstor into a private cloud storage solution accessible
from anywhere, giving users complete control of cost, ownership, privacy and data security.
If you need a reliable NAS server with no frills, the Rockstor NAS Server is the way to go.
Rockstor pros and cons
Pros
Linux, uses the Btrfs file system, which like BSD's ZFS includes splendid data integrity and security features like snapshots,
pools, checksums, encryption, etc.
More reasonable hardware requirements than TrueNAS CORE, especially when it comes to RAM.
You can download the Rockstor ISO file from Sourceforge. The ISO
image can be used to install Rockstor into a virtual machine like VMWare or Virtualbox directly. To install the software on real
hardware, you need a boot media like a
bootable USB stick . Just
burn the downloaded
ISO image onto USB drive .
Conclusion
With these NAS solutions on hand we have added choices for not only businesses and small offices, but home users as well. Considering
the significance of data in this day and age, you would be wise to take one of these solutions to manage your NAS efficiently.
TrueNAS CORE: Superb enterprise-grade NAS distro. Suitable for experienced Linux admins as well as for power users with BSD's
knowledge, lots of storage, and powerful hardware.
OpenMediaVault: Best for home users and small businesses, especially with low powered equipment. If you don't need enterprise
features like ZFS or you prefer a Debian-based distro, OpenMediaVault is the way to go.
Rockstor: The best of both worlds � Linux OS + the strength of the Btrfs file system. Rockstor is a great NAS solution for
businesses and home users alike.
Whether you choose TrueNAS CORE, OpenMediaVault or Rockstor, you'll have software that's in active development, well supported
and with plenty of available features. When these storage solutions are implemented and maintained properly, they provide the required
safety to data.
The arping command is one of the lesser known commands that works much like the ping
command.
The name stands for "arp ping" and it's a tool that allows you to perform limited ping
requests in that it collects information on local systems only. The reason for this is that it
uses a Layer 2 network protocol and is, therefore, non-routable. The arping command is used for
discovering and probing hosts on your local network.
You can use it much like ping and, as with ping , you can set a count for the packets to be
sent using -c (e.g., arping -c 2 hostname) or allow it to keep sending requests until you type
^c . In this first example, we send two requests to a system:
$ arping -c 2 192.168.0.7
ARPING 192.168.0.7 from 192.168.0.11 enp0s25
Unicast reply from 192.168.0.7 [20:EA:16:01:55:EB]  64.895ms
Unicast reply from 192.168.0.7 [20:EA:16:01:55:EB]  5.423ms
Sent 2 probes (1 broadcast(s))
Received 2 response(s)
Note that the response shows the time it takes to receive replies and the MAC address of the
system being probed.
If you use the -f option, your arping will stop as soon as it has confirmed that the system
is responding. That might sound efficient, but it will never get to the stopping point if the
system -- possibly some non-existent or shut down system -- fails to respond. Using a small
value is generally a better approach. In this next example, the command tried 83 times to reach
the remote system before I killed it with a ^c , and it then provided the count.
$ arping -f 192.168.0.77
ARPING 192.168.0.77 from 192.168.0.11 enp0s25
^CSent 83 probes (83 broadcast(s))
Received 0 response(s)
For a system that is up and ready to respond, the response is quick.
$ arping -f 192.168.0.7
ARPING 192.168.0.7 from 192.168.0.11 enp0s25
Unicast reply from 192.168.0.7 [20:EA:16:01:55:EB]  82.963ms
Sent 1 probes (1 broadcast(s))
Received 1 response(s)
Broadcast – send out for all to receive
The ping command can reach remote systems easily where arping tries but doesn't get any
responses. Compare the responses below.
Only Oracle Cloud VMware Solution provides you with exactly the same experience as running
VMware on-premises. And when they say "the same", they really mean literally the same.
$ arping -c 2 world.std.com
ARPING 192.74.137.5 from 192.168.0.11 enp0s25
Sent 2 probes (2 broadcast(s))
Received 0 response(s)

$ ping -c 2 world.std.com
PING world.std.com (192.74.137.5) 56(84) bytes of data.
64 bytes from world.std.com (192.74.137.5): icmp_seq=1 ttl=48 time=321 ms
64 bytes from world.std.com (192.74.137.5): icmp_seq=2 ttl=48 time=331 ms

 -- - world.std.com ping statistics  -- -
2 packets transmitted, 2 received, 0% packet loss, time 1002ms
rtt min/avg/max/mdev = 321.451/326.068/330.685/4.617 ms
Clearly, arping cannot collect information on the remote server.
If you want to use arping for a range of systems, you can use a command like the following,
which would be fairly quick because it only tries once to reach each host in the range
provided.
$ for num in {1..100}; do arping -c 1 192.168.0.$num; done
ARPING 192.168.0.1 from 192.168.0.11 enp0s25
Unicast reply from 192.168.0.1 [F8:8E:85:35:7F:B9]  5.530ms
Sent 1 probes (1 broadcast(s))
Received 1 response(s)
ARPING 192.168.0.2 from 192.168.0.11 enp0s25
Sent 1 probes (1 broadcast(s))
Received 0 response(s)
ARPING 192.168.0.3 from 192.168.0.11 enp0s25
Unicast reply from 192.168.0.3 [02:0F:B5:22:E5:90]  76.856ms
Sent 1 probes (1 broadcast(s))
Received 1 response(s)
ARPING 192.168.0.4 from 192.168.0.11 enp0s25
Unicast reply from 192.168.0.4 [02:0F:B5:5B:D9:66]  83.000ms
Sent 1 probes (1 broadcast(s))
Received 1 response(s)
Notice that we see some responses that show one response was received and others for which
there were no responses.
Here's a simple script that will provide a list of which systems in a network range respond
and which do not:
HP Care Pack services offer aid to taxed IT groups, with remote device management, coverage
for accidental damage, and on-site support.
#!/bin/bash

for num in {1..255}; do
    echo -n "192.168.0.$num "
    arping -c 1 192.168.0.$num | grep "1 response"
    if [ $? != 0 ]; then
        echo ""
    fi
done
Change the IP address range in the script to match your local network. The output should
look something like this:
$ ./detectIPs
192.168.0.1 Received 1 response(s)
192.168.0.2 Received 1 response(s)
192.168.0.3 Received 1 response(s)
192.168.0.4 Received 1 response(s)
192.168.0.5
192.168.0.6 Received 1 response(s)
192.168.0.7 Received 1 response(s)
192.168.0.8
192.168.0.9 Received 1 response(s)
192.168.0.10
192.168.0.11 Received 1 response(s)
If you only want to see the responding systems, simplify the script like this:
#!/bin/bash

for num in {1..30}; do
    arping -c 1 192.168.0.$num | grep "1 response" > /dev/null
    if [ $? == 0 ]; then
        echo "192.168.0.$num "
    fi
done
Below is what the output will look like with the second script. It lists only responding
systems.
Managing network
traffic is one of the toughest jobs a system administrators has to deal with. He must
configure the firewall in such a way that it will
meet the system and users requirements for both incoming and outgoing connections, without leaving the system vulnerable to attacks.
This is where iptables come in handy. Iptables is a Linux command line firewall that allows system administrators
to manage incoming and outgoing traffic via a set of configurable table rules.
Iptables uses a set of tables which have chains that contain set of built-in or user defined rules. Thanks to them a system administrator
can properly filter the network traffic of his system.
Per iptables manual, there are currently 3 types of tables:
FILTER � this is the default table, which contains the built in chains for:
INPUT � packages destined for local sockets
FORWARD � packets routed through the system
OUTPUT � packets generated locally
NAT � a table that is consulted when a packet tries to create a new connection. It has the following built-in:
PREROUTING � used for altering a packet as soon as it's received
OUTPUT � used for altering locally generated packets
POSTROUTING � used for altering packets as they are about to go out
MANGLE � this table is used for packet altering. Until kernel version 2.4 this table had only two chains,
but they are now 5:
PREROUTING � for altering incoming connections
OUTPUT � for altering locally generated packets
INPUT � for incoming packets
POSTROUTING � for altering packets as they are about to go out
FORWARD � for packets routed through the box
In this article, you will see some useful commands that will help you manage your Linux box firewall through iptables. For the
purpose of this article, I will start with simpler commands and go to more complex to the end.
First, you should know how to manage iptables service in different Linux distributions. This is fairly easy:
On SystemD based Linux Distributions
------------ On Cent/RHEL 7 and Fedora 22+ ------------
# systemctl start iptables
# systemctl stop iptables
# systemctl restart iptables
On SysVinit based Linux Distributions
------------ On Cent/RHEL 6/5 and Fedora ------------
# /etc/init.d/iptables start
# /etc/init.d/iptables stop
# /etc/init.d/iptables restart
2. Check all IPtables Firewall Rules
If you want to check your existing rules, use the following command:
# iptables -L -n -v
This should return output similar to the one below:
Chain FORWARD (policy ACCEPT 0 packets, 0 bytes)
 pkts bytes target prot opt in out source destination
 0 0 ACCEPT all -- * lxcbr0 0.0.0.0/0 0.0.0.0/0
 0 0 ACCEPT all -- lxcbr0 * 0.0.0.0/0 0.0.0.0/0
Chain OUTPUT (policy ACCEPT 354K packets, 185M bytes)
 pkts bytes target prot opt in out source destination
If you prefer to check the rules for a specific table, you can use the -t option followed by the table which you
want to check. For example, to check the rules in the NAT table, you can use:
# iptables -t nat -L -v -n
3. Block Specific IP Address in IPtables Firewall
If you find an unusual or abusive activity from an IP address you can block that IP address with the following rule:
# iptables -A INPUT -s xxx.xxx.xxx.xxx -j DROP
Where you need to change "xxx.xxx.xxx.xxx" with the actual IP address. Be very careful when running this command
as you can accidentally block your own IP address. The -A option appends the rule in the end of the selected chain.
In case you only want to block TCP traffic from that IP address, you can use the -p option that specifies the protocol.
That way the command will look like this:
# iptables -A INPUT -p tcp -s xxx.xxx.xxx.xxx -j DROP
4. Unblock IP Address in IPtables Firewall
If you have decided that you no longer want to block requests from specific IP address, you can delete the blocking rule with
the following command:
# iptables -D INPUT -s xxx.xxx.xxx.xxx -j DROP
The -D option deletes one or more rules from the selected chain. If you prefer to use the longer option you can use
--delete .
5. Block Specific Port on IPtables Firewall
Sometimes you may want to block incoming or outgoing connections on a specific port. It's a good security measure and you should
really think on that matter when setting up your firewall.
To block outgoing connections on a specific port use:
# iptables -A OUTPUT -p tcp --dport xxx -j DROP
To allow incoming connections use:
# iptables -A INPUT -p tcp --dport xxx -j ACCEPT
In both examples change "xxx" with the actual port you wish to allow. If you want to block UDP traffic instead of
TCP , simply change "tcp" with "udp" in the above iptables rule.
6. Allow Multiple Ports on IPtables using Multiport
You can allow multiple ports at once, by using multiport , below you can find such rule for both incoming and outgoing connections:
7. Allow Specific Network Range on Particular Port on IPtables
You may want to limit certain connections on specific port to a given network. Let's say you want to allow outgoing connections
on port 22 to network 192.168.100.0/24 .
The above command forwards all incoming traffic on network interface eth0 , from port 25 to port
2525 . You may change the ports with the ones you need.
10. Block Network Flood on Apache Port with IPtables
Sometimes IP addresses may requests too many connections towards web ports on your website. This can cause number of issues and
to prevent such problems, you can use the following rule:
The above command limits the incoming connections from per minute to 100 and sets a limit burst to 200
. You can edit the limit and limit-burst to your own specific requirements.
11. Block Incoming Ping Requests on IPtables
Some system administrators like to block incoming ping requests due to security concerns. While the threat is not that big, it's
good to know how to block such request:
# iptables -A INPUT -p icmp -i eth0 -j DROP
12. Allow loopback Access
Loopback access (access from 127.0.0.1 ) is important and you should always leave it active:
# iptables -A INPUT -i lo -j ACCEPT
# iptables -A OUTPUT -o lo -j ACCEPT
13. Keep a Log of Dropped Network Packets on IPtables
If you want to log the dropped packets on network interface eth0 , you can use the following command:
You can change the value after "--log-prefix" with something by your choice. The messages are logged in /var/log/messages
and you can search for them with:
The above command allows no more than 3 connections per client. Of course, you can change the port number to match
different service. Also the --connlimit-above should be changed to match your requirement.
16. Search within IPtables Rule
Once you have defined your iptables rules, you will want to search from time to time and may need to alter them. An easy way to
search within your rules is to use:
# iptables -L $table -v -n | grep $string
In the above example, you will need to change $table with the actual table within which you wish to search and
$string with the actual string for which you are looking for.
Here is an example:
# iptables -L INPUT -v -n | grep 192.168.0.100
17. Define New IPTables Chain
With iptables, you can define your own chain and store custom rules in it. To define a chain, use:
If you want to flush your firewall chains, you can use:
# iptables -F
You can flush chains from specific table with:
# iptables -t nat -F
You can change "nat" with the actual table which chains you wish to flush.
19. Save IPtables Rules to a File
If you want to save your firewall rules, you can use the iptables-save command. You can use the following to save
and store your rules in a file:
# iptables-save > ~/iptables.rules
It's up to you where will you store the file and how you will name it.
20. Restore IPtables Rules from a File
If you want to restore a list of iptables rules, you can use iptables-restore . The command looks like this:
# iptables-restore < ~/iptables.rules
Of course the path to your rules file might be different.
21. Setup IPtables Rules for PCI Compliance
Some system administrators might be required to configure their servers to be PCI compiliant. There are many requirements by different
PCI compliance vendors, but there are few common ones.
In many of the cases, you will need to have more than one IP address. You will need to apply the rules below for the site's IP
address. Be extra careful when using the rules below and use them only if you are sure what you are doing:
# iptables -I INPUT -d SITE -p tcp -m multiport --dports 21,25,110,143,465,587,993,995 -j DROP
If you use cPanel or similar control panel, you may need to block it's' ports as well. Here is an example:
Note : To make sure you meet your PCI vendor's requirements, check their report carefully and apply the required rules. In some
cases you may need to block UDP traffic on certain ports as well.
22. Allow Established and Related Connections
As the network traffic is separate on incoming and outgoing, you will want to allow established and related incoming traffic.
For incoming connections do it with:
# iptables -A INPUT -m conntrack --ctstate ESTABLISHED,RELATED -j ACCEPT
For outgoing use:
# iptables -A OUTPUT -m conntrack --ctstate ESTABLISHED -j ACCEPT
23. Drop Invalid Packets in IPtables
It's possible to have some network packets marked as invalid. Some people may prefer to log those packages, but others prefer
to drop them. To drop invalid the packets, you can use:
# iptables -A INPUT -m conntrack --ctstate INVALID -j DROP
24. Block Connection on Network Interface
Some systems may have more than one network interface. You can limit the access to that network interface or block connections
from certain IP address.
For example:
# iptables -A INPUT -i eth0 -s xxx.xxx.xxx.xxx -j DROP
Change "xxx.xxx.xxx.xxx" with the actual IP address (or network) that you wish to block.
25. Disable Outgoing Mails through IPTables
If your system should not be sending any emails, you can block outgoing ports on SMTP ports. For example you can use this:
# iptables -A OUTPUT -p tcp --dports 25,465,587 -j REJECT
Conclusion
Iptables is a powerful firewall that you can easily benefit from. It is vital for every system administrator to learn at least
the basics of iptables
. If you want to find more detailed information about iptables and its options it is highly recommend to read it's manual:
# man iptables
If you think we should add more commands to this list, please share them with us, by submitting them in the comment section below.
Tags Iptables
Network troubleshooting sometimes requires tracking specific network packets based on
complex filter criteria or just determining whether a connection can be made.
... ... ...
Using the ncat command, you will set up a TCP listener, which is a TCP service
that waits for a connection from a remote system on a specified port. The following command
starts a listening socket on TCP port 9999.
$ sudo ncat -l 9999
This command will "hang" your terminal. You can place the command into background mode, to
operate similar to a service daemon using the & (ampersand) signal. Your
prompt will return.
$ sudo ncat -l 8080 &
From a remote system, use the following command to attempt a connection:
$ telnet <IP address of ncat system> 9999
The attempt should fail as shown:
Trying <IP address of ncat system>...
telnet: connect to address <IP address of ncat system>: No route to host
This might be similar to the message you receive when attempting to connect to your original
service. The first thing to try is to add a firewall exception to the ncat
system:
$ sudo firewall-cmd --add-port=9999/tcp
This command allows TCP requests on port 9999 to pass through to a listening daemon on port
9999.
Retry the connection to the ncat system:
$ telnet <IP address of ncat system> 9999

Trying <IP address of ncat system>...
Connected to <IP address of ncat system>.
Escape character is '^]'.
This message means that you are now connected to the listening port, 9999, on the remote
system. To disconnect, use the keyboard combination, CTRL + ] . Type quit to return to a
prompt.
$ telnet <IP address of ncat system> 9999

Trying <IP address of ncat system>...
Connected to <IP address of ncat system>.
Escape character is '^]'.
^]
telnet>quit
Connection closed.
$
Disconnecting will also kill the TCP listening port on the remote (ncat) system, so don't
attempt another connection until you reissue the ncat command. If you want to keep
the listening port open rather than letting it die each time you disconnect, issue the -k (keep
open) option. This option keeps the listening port alive. Some sysadmins don't use this option
because they might leave a listening port open potentially causing security problems or port
conflicts with other services.
$ sudo ncat -k -l 9999 &
What ncat tells you
The success of connecting to the listening port of the ncat system means that
you can bind a port to your system's NIC. You can successfully create a firewall exception. And
you can successfully connect to that listening port from a remote system. Failures along the
path will help narrow down where your problem is.
What ncat doesn't tell you
Unfortunately, there's no solution for connectivity issues in this troubleshooting technique
that isn't related to binding, port listening, or firewall exceptions. This is a limited scope
troubleshooting session, but it's quick, easy, and definitive. What I've found is that most
connectivity issues boil down to one of these three. My next step in the process would be to
remove and reinstall the service package. If that doesn't work, download a different version of
the package and see if that works for you. Try going back at least two revisions until you find
one that works. You can always update to the latest version after you have a working
service.
Wrap up
The ncat command is a useful troubleshooting tool. This article only focused on
one tiny aspect of the many uses for ncat . Troubleshooting is as much of an art
as it is a science. You have to know which answers you have and which ones you don't have. You
don't have to troubleshoot or test things that already work. Explore ncat 's
various uses and see if your connectivity issues go away faster than they did before.
I use Telnet, netcat, Nmap, and other tools to test whether a remote service is up and
whether I can connect to it. These tools are handy, but they aren't installed by default on all
systems.
Fortunately, there is a simple way to test a connection without using external tools. To see
if a remote server is running a web, database, SSH, or any other service, run:
If the connection fails, the Failed to connect message is displayed on your
screen.
Assume serverA is behind a firewall/NAT. I want to see if the firewall is configured to
allow a database connection to serverA , but I haven't installed a database server yet. To
emulate a database port (or any other port), I can use the following:
Netcat (also known as 'nc') is a networking tool used for reading or writing from
TCP and UDP sockets using an easy interface. It is designed as a dependable 'back-end'
device that can be used directly or easily driven by other programs and scripts. Therefore,
this tool is a treat to network administrators, programmers, and pen-testers as it's a feature
rich network debugging and investigation tool.
To open netcat simply go to your shell and enter 'nc':
#nc
CONNECTING TO A HOST WITH NETCAT
Use the -u option to start a TCP
connection to a specified host and port:
#nc -u <host_ip> <port>
LISTEN TO INBOUND
CONNECTIONS
You can set nc to listen on a port using -l option
#nc -l <port>
SCAN PORTS WITH
NETCAT
This can easily be done using the '-z' flag which instructs netcat not to initiate a
connection but just check if the port is open. For example, In the following command we
instruct netcat to check which ports are open between 80 and 100 on ' localhost '
#nc -z <host_ip> <port_range>
ADVANCED PORT SCAN
To run an advanced port scan on a target, use the following command
#nc -v -n -z -w1 -r <target_ip>
This command will attempt to connect to random ports (-r) on the target ip running verbosely
(-v) without resolving names (-n). without sending any data (-z) and waiting no more than 1
second for a connection to occur (-w1)
TCP BANNER GRABBING WITH NETCAT
You can grab the banner of any tcp service running on an ip address using nc:
#echo "" | nc -v -n -w1 <target_ip> <port_range>
TRANSFER FILES WITH NETCAT
For this, you should have nc installed on both sending and receiving machines. First you
have to start the nc in listener mode in receiving host
#nc -l <port> > file.txt
Now run the following command on the sending host:
#nc <target_ip> <port> --send-only < data.txt
In conclusion, Netcat comes with a lot of cool features that we can use to simplify our
day-to-day tasks. Make sure to check out this article to learn
some more interesting features in this tool.
As you know from my previous two
articles,
Linux
troubleshooting: Setting up a TCP listener with ncat
and
The
ncat command is a problematic security tool for Linux sysadmins
,
netcat
is
a command that is both your best friend and your worst enemy. And this article further perpetuates this fact with
a look into how
ncat
delivers
a useful, but potentially dangerous, option for creating a port redirection link. I show you how to set up a port
or site forwarding link so that you can perform maintenance on a site while still serving customers.
The scenario
You need to perform maintenance on an
Apache installation on
server1
, but you don't
want the service to appear offline for your customers, which in this scenario are internal corporate users of the
labor portal that records hours worked for your remote users. Rather than notifying them that the portal will be
offline for six to eight hours, you've decided to create a forwarding service to another system,
server2
,
while you take care of
server1
's needs.
This method is an easy way of keeping a
specific service alive without tinkering with DNS or corporate firewall NAT settings.
Server1: Port 8088
Server2: Port 80
The steps
To set up this site/service forward, you
need to satisfy the following prerequisites:
ncat-nmap
package (should be installed by default)
A functional duplicate of the
server1
portal
on
server2
Root or
sudo
access
to servers 1 and 2 for firewall changes
If you've cleared these hurdles, it's time
to make this change happen.
The implementation
Configuring
ncat
in
this way makes use of named pipes, which is an efficient way to create this two-way communication link by writing
to and reading from a file in your home directory. There are multiple ways to do this, but I'm going to use the
one that works best for this type of port forwarding.
Create the named pipe
Creating the named pipe is easy using the
mkfifo
command.
I used the
file
command
to demonstrate that the file is there and it is a named pipe. This command is not required for the service to
work. I named the file
svr1_to_svr2
,
but you can use any name you want. I chose this name because I'm forwarding from
server1
to
server2
.
Create the forward service
Formally, this was called
setting
up a Listener-to-Client relay
, but it makes a little more sense if you think of this in firewall terms, hence
my "forward" name and description.
Issuing this command drops you back to
your prompt because you put the service into the background with the
&
.
As you can see, the named pipe and the service are both created as a standard user. I discussed the reasons for
this restriction in my previous article,
The
ncat command is a problematic security tool for Linux sysadmins
.
Command breakdown
The first part of the command,
ncat
                  -k -l 8088
, sets up the listener for connections that ordinarily would be answered by the Apache service
on
server1
. That service is offline, so you
create a listener to answer those requests. The
-k
option
is the keep-alive feature, meaning that it can serve multiple requests. The
-l
is
the listen option.
Port
                  8088
is the port you want to mimic, which is that of the customer portal.
The second part, to the right of the pipe
operator (
|
),
accepts and relays the requests to 192.168.1.60 on port 80. The named pipe
(svr1_to_svr2
)
handles the data in and out.
The usage
Now that you have your relay set up, it's
easy to use. Point your browser to the original host and customer portal, which is
http://server1:8088
.
This automatically redirects your browser to
server2
on
port 80. Your browser still displays the original URL and port.
I have found that too many repetitive
requests can cause this service to fail with a broken pipe message on
server1
.
This doesn't always kill the service, but it can. My suggestion is to set up a script to check for the
forward
command,
and if it doesn't exist, restart it. You can't check for the existence of the
svr1_to_svr2
file
because it always exists. Remember, you created it with the
mkfifo
command.
The caveat
The downside of this
ncat
capability
is that a user could forward traffic to their own duplicate site and gather usernames and passwords. The malicious
actor would have to kill the current port listener/web service to make this work, but it's possible to do this
even without root access. Sysadmins have to maintain vigilance through monitoring and alerting to avoid this type
of security loophole.
The wrap up
The
ncat
command
has so many uses that it requires one article per feature to describe each one. This article introduced you to the
concept of Listener-to-Client relay, or service forwarding, as I call it. It's useful for short maintenance
periods but should not be used for permanent redirects. For those, you should edit DNS and corporate firewall NAT
rules to send requests to their new destinations. You should remind yourself to turn off any
ncat
listeners
when you're finished with them as they do open a system to compromise. Never create these services with the root
user account.
[ Make managing your network easier than ever with
Network
automation for everyone
, a free book from Red Hat. ]
Check out these related articles on Enable Sysadmin
How can
I allow traffic from a specific IP address in my private network or allow traffic from a specific private network through
firewalld
,
to a specific port or service on a
Red Hat
Enterprise Linux
(
RHEL
) or
CentOS
server?
In this
short article, you will learn how to open a port for a specific IP address or network range in your RHEL or CentOS server
running a
firewalld
firewall.
The most
appropriate way to solve this is by using a
firewalld
zone.
So, you need to create a new zone that will hold the new configurations (or you can use any of the secure default zones
available).
Open Port for Specific IP Address in Firewalld
First
create an appropriate zone name (in our case, we have used
mariadb-access
to
allow access to the MySQL database server).
Next,
reload the
firewalld
settings to apply
the new change. If you skip this step, you may get an error when you try to use the new zone name. This time around, the new
zone should appear in the list of zones as highlighted in the following screenshot.
Next,
add the source IP address (
10.24.96.5/20
)
and the port (
3306
) you wish to open on
the local server as shown. Then reload the firewalld settings to apply the new changes.
The life of a sysadmin is hectic, rushed,
and often frustrating. So, what you really need is a toolbox filled with tools that you easily recognize and can
use quickly without another learning curve when things are going bad. One such tool is the
ncat
command.
ncat - Concatenate and redirect sockets
The
ncat
command
has many uses, but the one I use it for is troubleshooting network connectivity issues. It is a handy, quick, and
easy to use tool that I can't live without. Follow along and see if you decide to add it to your toolbox as well.
Ncat is a feature-packed networking
utility which reads and writes data across networks from the command line. Ncat was written for the Nmap
Project and is the culmination of the currently splintered family of Netcat incarnations. It is designed to be
a reliable back-end tool to instantly provide network connectivity to other applications and users. Ncat will
not only work with IPv4 and IPv6 but provides the user with a virtually limitless number of potential uses.
Among Ncat's vast number of features
there is the ability to chain Ncats together; redirection of TCP, UDP, and SCTP ports to other sites; SSL
support; and proxy connections via SOCKS4, SOCKS5 or HTTP proxies (with optional proxy authentication as well).
Firewall problem or something else?
You've just installed <insert network
service here>, and you can't connect to it from another computer on the same network. It's frustrating. The
service is enabled. The service is started. You think you've created the correct firewall exception for it, but
yet, it doesn't respond.
Your troubleshooting life begins. In what
can stretch from minutes to days to infinity and beyond, you attempt to troubleshoot the problem. It could be many
things: an improperly configured (or unconfigured) firewall exception, a NIC binding problem, a software problem
somewhere in the service's code, a service misconfiguration, some weird compatibility issue, or something else
unrelated to the network or the service blocking access. This is your scenario. Where do you start when you've
checked all of the obvious places?
The ncat command to the rescue
The
ncat
command
should be part of your basic Linux distribution, but if it isn't, install the
nmap-ncat
package
and you'll have the latest version of it. Check the
ncat
man
page for usage, if you're interested in its many capabilities beyond this simple troubleshooting exercise.
Using the
ncat
command,
you will set up a TCP listener, which is a TCP service that waits for a connection from a remote system on a
specified port. The following command starts a listening socket on TCP port 9999.
$ sudo ncat -l 9999
This command will "hang" your terminal.
You can place the command into background mode, to operate similar to a service daemon using the
&
(ampersand)
signal. Your prompt will return.
$ sudo ncat -l 8080 &
From a remote system, use the following
command to attempt a connection:
$ telnet <IP address of ncat system> 9999
The attempt should fail as shown:
Trying <IP address of ncat system>...
telnet: connect to address <IP address of ncat system>: No route to host
This might be similar to the message you
receive when attempting to connect to your original service. The first thing to try is to add a firewall exception
to the
ncat
system:
$ sudo firewall-cmd --add-port=9999/tcp
This command allows TCP requests on port
9999 to pass through to a listening daemon on port 9999.
Retry the connection to the
ncat
system:
$ telnet <IP address of ncat system> 9999

Trying <IP address of ncat system>...
Connected to <IP address of ncat system>.
Escape character is '^]'.
This message means that you are now
connected to the listening port, 9999, on the remote system. To disconnect, use the keyboard combination,
CTRL
+ ]
. Type
quit
to return to a
prompt.
$ telnet <IP address of ncat system> 9999

Trying <IP address of ncat system>...
Connected to <IP address of ncat system>.
Escape character is '^]'.
^]
telnet>quit
Connection closed.
$
Disconnecting will also kill the TCP
listening port on the remote (ncat) system, so don't attempt another connection until you reissue the
ncat
command.
If you want to keep the listening port open rather than letting it die each time you disconnect, issue the -k
(keep open) option. This option keeps the listening port alive. Some sysadmins don't use this option because they
might leave a listening port open potentially causing security problems or port conflicts with other services.
$ sudo ncat -k -l 9999 &
What ncat tells you
The success of connecting to the listening
port of the
ncat
system
means that you can bind a port to your system's NIC. You can successfully create a firewall exception. And you can
successfully connect to that listening port from a remote system. Failures along the path will help narrow down
where your problem is.
What ncat doesn't tell you
Unfortunately, there's no solution for
connectivity issues in this troubleshooting technique that isn't related to binding, port listening, or firewall
exceptions. This is a limited scope troubleshooting session, but it's quick, easy, and definitive. What I've found
is that most connectivity issues boil down to one of these three. My next step in the process would be to remove
and reinstall the service package. If that doesn't work, download a different version of the package and see if
that works for you. Try going back at least two revisions until you find one that works. You can always update to
the latest version after you have a working service.
Wrap up
The
ncat
command
is a useful troubleshooting tool. This article only focused on one tiny aspect of the many uses for
ncat
.
Troubleshooting is as much of an art as it is a science. You have to know which answers you have and which ones
you don't have. You don't have to troubleshoot or test things that already work. Explore
ncat
's
various uses and see if your connectivity issues go away faster than they did before.
NetworkManager 1.26 has been released as the latest stable series of this powerful and
widely used network connection manager designed for the
GNOME desktop environment .
Numerous GNU/Linux distributions ship with NetworkManager by default to allow users to
manage network connections, whether they're Wi-Fi or wired connections or VPN connections.
In NetworkManager 1.26, there's now automatic connection for Wi-Fi profiles when all
previous activation attempts fail. Previously, if a Wi-Fi profile failed to autoconnect to the
network, the automatism was blocked.
Another cool new feature is a build option called firewalld-zone, which is enabled by
default and lets NetworkManager install a firewalld zone for connection sharing. This also puts
network interfaces that use IPv4 or IPv6 shared mode in this firewalld zone during
activation.
The new firewalld-zone option is more useful on Linux systems that use the firewalld
firewall management tool with the nftables backend. However, it looks like NetworkManager
continues to use iptables for enabling masquerading and open the required ports for DHCP and
DNS.
NetworkManager 1.26 also adds a MUD URL property for connection profiles (RFC 8520) and sets
it for DHCP and DHCPv6 requests, support for the ethtool coalesce and ring options, support for
"local" type routes beside "unicast," support for several bridge options, and adds match for
device path, driver and kernel command-line for connection profiles.
Support for OVS patch interfaces has been improved in this release, which introduces a new
provider in the nm-cloud-setup component for Google Cloud Platform. This is useful to
automatically detect and configure the host to receive network traffic from internal load
balancers.
Among other noteworthy changes, the syntax was extended to 'match' setting properties with
'|', '&', '!' and '\', raw LLDP message is now exposed on D-Bus and the MUD usage
description URL, and team connections are now allowed to work without D-Bus.
New manual pages for the nm-settings-dbus and nm-settings-nmcli components have been
introduced as well, along with support more tc qdiscs: tbf and sfq, as well as the ability for
ifcfg-rh to handle 802-1x.pin properties and "802-1x.{,phase2-}ca-path" (fixes CVE-2020-10754 ).
Last but not least, NetworkManager now marks externally managed devices and profiles on
D-Bus and highlight externally managed devices in nmcli. For Ethernet connections,
NetworkManager now automatically resets the original autonegotiation, duplex and speed settings
when deactivating the device.
NetworkManager 1.26 is available for download here
, but it's only the sources which needs to be compiled. Therefore, I strongly recommend that
you update to this new stable version from the stable software repositories of your favorite
GNU/Linux distribution as it's an important component.
https://tpc.googlesyndication.com/safeframe/1-0-37/html/container.html Report this ad 21
6
On a linux networked machine, i would like to restrict the set of addresses on the "public"
zone (firewalld concept), that are allowed to reach it. So the end result would be no other
machine can access any port or protocol, except those explicitly allowed, sort of a mix of
  --add-rich-rule='rule family="ipv4" source not  address="192.168.56.120" drop'

  --add-rich-rule='rule family="ipv4" source not  address="192.168.56.105" drop'
The problem above is that this is not a real list, it will block everything since if its one
address its blocked by not being the same as the other, generating an accidental "drop all"
effect, how would i "unblock" a specific non contiguous set? does source accept a list of
addresses? i have not see anything in my look at the docs or google result so far.
If you want to restrict a zone to a specific set of IPs, simply define those IPs as sources
for the zone itself (and remove any interface definition that may be present, as they override
source IPs).
You probably don't want to do this to the "public" zone, though, since that's semantically
meant for public facing services to be open to the world.
Instead, try using a different zone such as "internal" for mostly trusted IP addresses to
access potentially sensitive services such as sshd. (You can also create your own zones.)
Warning: don't mistake the special "trusted" zone with the normal "internal" zone. Any
sources added to the "trusted" zone will be allowed through on all ports; adding services to
"trusted" zone is allowed but it doesn't make any sense to do so.
The result of this will be a "internal" zone which permits access to ssh, but only from the
two given IP addresses. To make it persistent, re-run each command with
--permanent appended, or better, by using firewall-cmd
--runtime-to-permanent . share improve this answer follow edited Jun 25 at 17:15 answered Apr 6
'15 at 20:47 Michael
Hampton 202k 31 31 gold badges 395 395 silver badges 757 757 bronze badges
please clarify what you mean by "interface definition that may be present", iv tried your
suggestion, please see my edit. – mike Apr 6 '15 at 21:20
@mike Like I said, you need to remove eth1 from the zone. firewall-cmd
--zone=encrypt --remove-interface=eth1 – Michael Hampton Apr 6 '15 at
21:24
well, the encrypt zone is the new zone, before eth1 was in public, i moved it from public
to encrypt, so encrypt has the source .120, i thought only 120 should be able to reach the
port, what im i missing? – mike Apr 6 '15 at 21:30
1 If you put the interface in the zone, then anything arriving via the interface
can access whatever ports and services are added to the zone, regardless of IP address. So it
probably belongs in public, where it was originally. – Michael Hampton Apr 6 '15 at
21:37
ahh, so the accepted sources will still be allowed in even if the interface is placed in
public, and the accept sources are placed in a different trusted source? – mike Apr 6 '15 at 21:43
https://tpc.googlesyndication.com/safeframe/1-0-37/html/container.html Report this ad 1
As per firewalld.richlanguage :
Source source [not] address="address[/mask]"
   With the source address the origin of a connection attempt can be limited to the source address. An address is either a single IP address, or a network IP address. The address has to match the rule family (IPv4/IPv6). Subnet mask is expressed in either
   dot-decimal (/x.x.x.x) or prefix (/x) notations for IPv4, and in prefix notation (/x) for IPv6 network addresses. It is possible to invert the sense of an address by adding not before address. All but the specified address will match then.
Specify a netmask for the address to allow contiguous blocks.
Other than that, you could try creating an ipset for a non-contiguous list of
allowed IPs.
5.12.1. Configuring IP Set Options with the Command-Line Client IP sets can be used in
firewalld zones as sources and also as sources in rich rules. In Red Hat Enterprise
Linux 7, the preferred method is to use the IP sets created with firewalld in a direct
rule. To list the IP sets known to firewalld in the permanent environment, use the
following command as root :
~]# firewall-cmd --permanent --get-ipsets
To add a new IP set, use the following command using the permanent environment as
root :
The previous command creates a new IP set with the name test and the
hash:net type for IPv4 . To create an IP set for use with
IPv6 , add the --option=family=inet6 option. To make the new setting
effective in the runtime environment, reload firewalld . List the new IP set with the
following command as root :
~]# firewall-cmd --permanent --get-ipsets
test
To get more information about the IP set, use the following command as root :
~]# firewall-cmd --permanent --info-ipset=test
test
type: hash:net
options:
entries:
Note that the IP set does not have any entries at the moment. To add an entry to the
test IP set, use the following command as root :
The previous command adds the IP address 192.168.0.1 to the IP set. To get the list of
current entries in the IP set, use the following command as root :
The file with the list of IP addresses for an IP set should contain an entry per line. Lines
starting with a hash, a semi-colon, or empty lines are ignored. To add the addresses from the
iplist.txt file, use the following command as root :
You can add the IP set as a source to a zone to handle all traffic coming in from any of the
addresses listed in the IP set with a zone. For example, to add the test IP set as a source
to the drop zone to drop all packets coming from all entries listed in the test IP
set, use the following command as root :
The ipset: prefix in the source shows firewalld that the source is
an IP set and not an IP address or an address range. Only the creation and removal of IP sets is
limited to the permanent environment, all other IP set options can be used also in the runtime
environment without the --permanent option. 5.12.2. Configuring a Custom Service
for an IP Set To configure a custom service to create and load the IP set structure before
firewalld starts:
Using an editor running as root , create a file as follows:
~]# vi /etc/firewalld/direct.xml
<?xml version="1.0" encoding="utf-8"?>
<direct>
        <rule ipv="ipv4" table="filter" chain="INPUT" priority="0">-m set --match-set <replaceable>ipset_name</replaceable> src -j DROP</rule>
</direct>
A firewalld reload is required to activate the changes:
~]# firewall-cmd --reload
This reloads the firewall without losing state information (TCP sessions will not be
terminated), but service disruption is possible during the reload.
Warning Red Hat does not recommend using IP sets that are not managed through
firewalld . To use such IP sets, a permanent direct rule is required to reference
the set, and a custom service must be added to create these IP sets. This service needs to be
started before firewalld starts, otherwise firewalld is not able to add the direct
rules using these sets. You can add permanent direct rules with the
/etc/firewalld/direct.xml file.
As a
Linux user, you can opt either to allow or restrict network access to some services or IP addresses using the
firewalld
firewall
which is native to
CentOS/RHEL 8
and
most
RHEL
based distributions such as
Fedora
.
The
output below confirms that the
firewalld
service
is up and running.
Check
Firewalld Status
Configuring Rules using Firewalld
Now that
we have
firewalld
running, we can go
straight to making some configurations. Firewalld allows you to add and block ports, blacklist, as well as whitelist IP,
addresses to provide access to the server. Once done with the configurations, always ensure that you reload the firewall for
the new rules to take effect.
Adding a TCP/UDP Port
To add a
port, say port
443
for
HTTPS
,
use the syntax below. Note that you have to specify whether the port is a TCP or UDP port after the port number:
$ sudo firewall-cmd --add-port=22/tcp --permanent
Similarly, to add a
UDP
port, specify
the
UDP
option as shown:
$ sudo firewall-cmd --add-port=53/tcp --permanent
The
--permanent
flag
ensures that the rules persist even after a reboot.
Blocking a TCP/UDP Port
To block
a TCP port, like port
22
, run the
command.
You can
also allow a range of IPs or an entire subnet using a CIDR (Classless Inter-Domain Routing) notation. For example to allow an
entire subnet in the
255.255.255.0
subnet,
execute.
So far,
we have seen how you can add and remove ports and services as well as whitelisting and removing whitelisted IPs. To block an
IP address, '
rich rules
' are used for
this purpose.
For
example to block the IP
192.168.2.50
run
the command:
One particular concept found in firewalld is that of zones. Zones are predefined sets of rules that specify what traffic should be
allowed, based on trust levels for network connections. For example, you can have zones for home, public, trusted, etc. Zones work
on a one-to-many relation, so a connection can only be part of a single zone, but a zone can be used for many network connections.
Different network interfaces and sources can be assigned to specific zones.
There are a number of zones provided by firewalld:
drop: All incoming connections are dropped without notification, whereas all outgoing
connections are allowed.
block: All incoming connections are rejected with an icmp-host-prohibited message, whereas
all outgoing connections are allowed.
public: This zone is intended to be used in untrusted public areas. Other computers on this
network are not to be trusted.
external: This zone is intended to be used on external networks with NAT masquerading
enabled.
internal: This zone is intended to be used on internal networks when your system acts as a
gateway or router. Other systems on this network are generally trusted.
dmz: This zones is intended to be used for computers located in your demilitarized zone
that will have limited access to the rest of your network.
work: This zone is intended to be used for work machines. Other systems on this network are
generally trusted.
home: This zone is intended to be used for home machines. Other systems on this network are
generally trusted.
trusted: All network connections are accepted and other systems are trusted.
By 2024, AI will have dramatically transformed how we live our lives, conduct business, or run a datacenter.
Read this whitepaper and find out the five most common use cases in hardware, software and services.
White Papers
provided by
IBM
You can easily assign an interface to one of the above zones, but there is one thing to be taken care of first .
Installing firewalld
You might be surprised to find out that firewalld isn't installed by default. To fix that issue, open a terminal window and issue
the following command:
sudo yum install firewalld
Once that installation completes, you'll need to start and enable firewalld with the commands:
The first thing you should do is view the default zone. Issue the command:
sudo firewall-cmd --get-default-zone
You will probably see that the default zone is set to public. If you want more information about that zone, issue the command:
sudo firewall-cmd --zone=public --list-all
You should see all the pertinent details about the public zone (
Figure A
).
Figure A
Information about our default zone.
Let's change the default zone. Say, for instance, you want to change the zone to work. Let's first find out what zones are being
used by our network interface(s). For that, issue the command:
sudo firewall-cmd --get-active-zones
You should see something like that found in
Figure B
.
Firewalld is a firewall management solution available for many Linux distributions which
acts as a frontend for the iptables packet filtering system provided by the Linux kernel. In
this guide, we will cover how to set up a firewall for your server and show you the basics of
managing the firewall with the firewall-cmd administrative tool (if you'd rather
use iptables with CentOS, follow
this guide ).
Note: There is a chance that you may be working with a newer version of firewalld than was
available at the time of this writing, or that your server was set up slightly differently
than the example server used throughout this guide. Thus, the behavior of some of the
commands explained in this guide may vary depending on your specific
configuration.
Basic Concepts in Firewalld
Before we begin talking about how to actually use the firewall-cmd utility to
manage your firewall configuration, we should get familiar with a few basic concepts that the
tool introduces.
Zones
The firewalld daemon manages groups of rules using entities called "zones".
Zones are basically sets of rules dictating what traffic should be allowed depending on the
level of trust you have in the networks your computer is connected to. Network interfaces are
assigned a zone to dictate the behavior that the firewall should allow.
For computers that might move between networks frequently (like laptops), this kind of
flexibility provides a good method of changing your rules depending on your environment. You
may have strict rules in place prohibiting most traffic when operating on a public WiFi
network, while allowing more relaxed restrictions when connected to your home network. For a
server, these zones are not as immediately important because the network environment rarely,
if ever, changes.
Regardless of how dynamic your network environment may be, it is still useful to be
familiar with the general idea behind each of the predefined zones for firewalld
. In order from least trusted to most trusted , the predefined zones within
firewalld are:
drop : The lowest level of trust. All incoming connections are dropped without reply
and only outgoing connections are possible.
block : Similar to the above, but instead of simply dropping connections, incoming
requests are rejected with an icmp-host-prohibited or
icmp6-adm-prohibited message.
public : Represents public, untrusted networks. You don't trust other computers but may
allow selected incoming connections on a case-by-case basis. Generally sshd should not be allowed for this zone, but httpd
can be.
external : External networks in the event that you are using the firewall as your
gateway. It is configured for NAT masquerading so that your internal network remains
private but reachable.
internal : The other side of the external zone, used for the internal portion of a
gateway. The computers are fairly trustworthy and services like sshd are
available. NOTE: This is the zone for which set of allowed IP should be defined --NNB
dmz : Used for computers located in a DMZ (isolated computers that will not have access
to the rest of your network). Only certain incoming connections are allowed.
work : Used for work machines. Trust most of the computers in the network. A few more
services might be allowed.
home : A home environment. It generally implies that you trust most of the other
computers and that a few more services will be accepted.
trusted : Trust all of the machines in the network. The most open of the available
options and should be used sparingly.
To use the firewall, we can create rules and alter the properties of our zones and then
assign our network interfaces to whichever zones are most appropriate.
Rule
Permanence
In firewalld, rules can be designated as either permanent or immediate. If a rule is added
or modified, by default, the behavior of the currently running firewall is modified. At the
next boot, the old rules will be reverted.
Most firewall-cmd operations can take the --permanent flag to
indicate that the non-ephemeral firewall should be targeted. This will affect the rule set
that is reloaded upon boot. This separation means that you can test rules in your active
firewall instance and then reload if there are problems. You can also use the
--permanent flag to build out an entire set of rules over time that will all be
applied at once when the reload command is issued.
Install and Enable Your Firewall to
Start at Boot
firewalld is installed by default on some Linux distributions, including many
images of CentOS 7. However, it may be necessary for you to install firewalld yourself:
sudo yum install firewalld
After you install firewalld , you can enable the service and reboot your
server. Keep in mind that enabling firewalld will cause the service to start up at boot. It
is best practice to create your firewall rules and take the opportunity to test them before
configuring this behavior in order to avoid potential issues.
sudo systemctl enable firewalld
sudo reboot
When the server restarts, your firewall should be brought up, your network interfaces
should be put into the zones you configured (or fall back to the configured default zone),
and any rules associated with the zone(s) will be applied to the associated interfaces.
We can verify that the service is running and reachable by typing:
sudo firewall-cmd --state
output running
This indicates that our firewall is up and running with the default
configuration.
Getting Familiar with the Current Firewall Rules
Before we begin to make modifications, we should familiarize ourselves with the default
environment and rules provided by the daemon.
Exploring the Defaults
We can see which zone is currently selected as the default by typing:
firewall-cmd --get-default-zone
output public
Since we haven't given firewalld any commands to deviate from the default
zone, and none of our interfaces are configured to bind to another zone, that zone will also
be the only "active" zone (the zone that is controlling the traffic for our interfaces). We
can verify that by typing:
firewall-cmd --get-active-zones
output public interfaces: eth0 eth1
Here, we can see that our example server has two network interfaces being controlled by
the firewall ( eth0 and eth1 ). They are both currently being
managed according to the rules defined for the public zone.
How do we know what rules are associated with the public zone though? We can print out the
default zone's configuration by typing:
sudo firewall-cmd --list-all
output public (default, active) target: default icmp-block-inversion: no interfaces:
eth0 eth1 sources: services: ssh dhcpv6-client ports: protocols: masquerade: no
forward-ports: source-ports: icmp-blocks: rich rules:
We can tell from the output that this zone is both the default and active and that the
eth0 and eth1 interfaces are associated with this zone (we already
knew all of this from our previous inquiries). However, we can also see that this zone allows
for the normal operations associated with a DHCP client (for IP address assignment) and SSH
(for remote administration).
Exploring Alternative Zones
Now we have a good idea about the configuration for the default and active zone. We can
find out information about other zones as well.
To get a list of the available zones, type:
firewall-cmd --get-zones
output block dmz drop external home internal public trusted work
We can see the specific configuration associated with a zone by including the
--zone= parameter in our --list-all command:
sudo firewall-cmd --zone= home --list-all
output home interfaces: sources: services: dhcpv6-client ipp-client mdns samba-client
ssh ports: masquerade: no forward-ports: icmp-blocks: rich rules:
You can output all of the zone definitions by using the --list-all-zones
option. You will probably want to pipe the output into a pager for easier viewing:
sudo firewall-cmd --list-all-zones | less
Selecting Zones for your Interfaces
Unless you have configured your network interfaces otherwise, each interface will be put
in the default zone when the firewall is booted.
Changing the Zone of an Interface
You can transition an interface between zones during a session by using the
--zone= parameter in combination with the --change-interface=
parameter. As with all commands that modify the firewall, you will need to use
sudo .
For instance, we can transition our eth0 interface to the "home" zone by
typing this:
output success Note Whenever you are transitioning an interface to a new zone, be aware
that you are probably modifying the services that will be operational. For instance, here we
are moving to the "home" zone, which has SSH available. This means that our connection
shouldn't drop. Some other zones do not have SSH enabled by default and if your connection is
dropped while using one of these zones, you could find yourself unable to log back in.
We can verify that this was successful by asking for the active zones again:
firewall-cmd --get-active-zones
output home interfaces: eth0 public interfaces: eth1 Adjusting the Default Zone
If all of your interfaces can best be handled by a single zone, it's probably easier to
just select the best default zone and then use that for your configuration.
You can change the default zone with the --set-default-zone= parameter. This
will immediately change any interface that had fallen back on the default to the new
zone:
sudo firewall-cmd --set-default-zone= home
output success Setting Rules for your Applications
The basic way of defining firewall exceptions for the services you wish to make available
is easy. We'll run through the basic idea here.
Adding a Service to your Zones
The easiest method is to add the services or ports you need to the zones you are using.
Again, you can get a list of the available services with the --get-services
option:
You can get more details about each of these services by looking at their associated
.xml file within the /usr/lib/firewalld/services directory. For
instance, the SSH service is defined like this:
/usr/lib/firewalld/services/ssh.xml
<?xml version="1.0" encoding="utf-8"?>
<service>
  <short>SSH</short>
  <description>Secure Shell (SSH) is a protocol for logging into and executing commands on remote machines. It provides secure encrypted communications. If you plan on accessing your machine remotely via SSH over a firewalled interface, enable this option. You need the openssh-server package installed for this option to be useful.</description>
  <port protocol="tcp" port="22"/>
</service>
You can enable a service for a zone using the --add-service= parameter. The
operation will target the default zone or whatever zone is specified by the
--zone= parameter. By default, this will only adjust the current firewall
session. You can adjust the permanent firewall configuration by including the
--permanent flag.
For instance, if we are running a web server serving conventional HTTP traffic, we can
allow this traffic for interfaces in our "public" zone for this session by typing:
You can leave out the --zone= if you wish to modify the default zone. We can
verify the operation was successful by using the --list-all or
--list-services operations:
sudo firewall-cmd --zone=public --list-services
output dhcpv6-client http ssh
Once you have tested that everything is working as it should, you will probably want to
modify the permanent firewall rules so that your service will still be available after a
reboot. We can make our "public" zone change permanent by typing:
You can verify that this was successful by adding the --permanent flag to the
--list-services operation. You need to use sudo for any
--permanent operations:
Your "public" zone will now allow HTTP web traffic on port 80. If your web server is
configured to use SSL/TLS, you'll also want to add the https service. We can add
that to the current session and the permanent rule-set by typing:
The firewall services that are included with the firewalld installation represent many of
the most common requirements for applications that you may wish to allow access to. However,
there will likely be scenarios where these services do not fit your requirements.
In this situation, you have two options.
Opening a Port for your Zones
The easiest way to add support for your specific application is to open up the ports that
it uses in the appropriate zone(s). This is as easy as specifying the port or port range, and
the associated protocol for the ports you need to open.
For instance, if our application runs on port 5000 and uses TCP, we could add this to the
"public" zone for this session using the --add-port= parameter. Protocols can be
either tcp or udp :
We can verify that this was successful using the --list-ports operation:
sudo firewall-cmd --zone=public --list-ports
output 5000/tcp
It is also possible to specify a sequential range of ports by separating the beginning and
ending port in the range with a dash. For instance, if our application uses UDP ports 4990 to
4999, we could open these up on "public" by typing:
Opening ports for your zones is easy, but it can be difficult to keep track of what each
one is for. If you ever decommission a service on your server, you may have a hard time
remembering which ports that have been opened are still required. To avoid this situation, it
is possible to define a service.
Services are simply collections of ports with an associated name and description. Using
services is easier to administer than ports, but requires a bit of upfront work. The easiest
way to start is to copy an existing script (found in /usr/lib/firewalld/services
) to the /etc/firewalld/services directory where the firewall looks for
non-standard definitions.
For instance, we could copy the SSH service definition to use for our "example" service
definition like this. The filename minus the .xml suffix will dictate the name
of the service within the firewall services list:
sudo cp /usr/lib/firewalld/services/ssh.xml /etc/firewalld/services/ example .xml
Now, you can adjust the definition found in the file you copied:
sudo vi /etc/firewalld/services/example.xml
To start, the file will contain the SSH definition that you
copied:
/etc/firewalld/services/example.xml
<?xml version="1.0" encoding="utf-8"?>
<service>
  <short>SSH</short>
  <description>Secure Shell (SSH) is a protocol for logging into and executing commands on remote machines. It provides secure encrypted communications. If you plan on accessing your machine remotely via SSH over a firewalled interface, enable this option. You need the openssh-server package installed for this option to be useful.</description>
  <port protocol="tcp" port="22"/>
</service>
The majority of this definition is actually metadata. You will want to change the short
name for the service within the <short> tags. This is a human-readable
name for your service. You should also add a description so that you have more information if
you ever need to audit the service. The only configuration you need to make that actually
affects the functionality of the service will likely be the port definition where you
identify the port number and protocol you wish to open. This can be specified multiple
times.
For our "example" service, imagine that we need to open up port 7777 for TCP and 8888 for
UDP. By entering INSERT mode by pressing i , we can modify the existing
definition with something like this:
/etc/firewalld/services/example.xml
<?xml version="1.0" encoding="utf-8"?>
<service>
  <short>Example Service</short>
  <description>This is just an example service.  It probably shouldn't be used on a real system.</description>
  <port protocol="tcp" port="7777"/>
  <port protocol="udp" port="8888"/>
</service>
Press ESC , then enter :x to save and close the file.
Reload your firewall to get access to your new service:
sudo firewall-cmd --reload
You can see that it is now among the list of available services:
You can now use this service in your zones as you normally would.
Creating Your Own
Zones
While the predefined zones will probably be more than enough for most users, it can be
helpful to define your own zones that are more descriptive of their function.
For instance, you might want to create a zone for your web server, called "publicweb".
However, you might want to have another zone configured for the DNS service you provide on
your private network. You might want a zone called "privateDNS" for that.
When adding a zone, you must add it to the permanent firewall configuration. You can then
reload to bring the configuration into your running session. For instance, we could create
the two zones we discussed above by typing:
You can verify that these are present in your permanent configuration by typing:
sudo firewall-cmd --permanent --get-zones
output block dmz drop external home internal privateDNS public publicweb trusted work
As stated before, these won't be available in the current instance of the firewall
yet:
firewall-cmd --get-zones
output block dmz drop external home internal public trusted work
Reload the firewall to bring these new zones into the active configuration:
sudo firewall-cmd --reload
firewall-cmd --get-zones
output block dmz drop external home internal privateDNS public publicweb trusted work
Now, you can begin assigning the appropriate services and ports to your zones. It's
usually a good idea to adjust the active instance and then transfer those changes to the
permanent configuration after testing. For instance, for the "publicweb" zone, you might want
to add the SSH, HTTP, and HTTPS services:
At this point, you have the opportunity to test your configuration. If these values work
for you, you will want to add the same rules to the permanent configuration. You can do that
by re-applying the rules with the --permanent flag:
You have successfully set up your own zones! If you want to make one of these zones the
default for other interfaces, remember to configure that behavior with the
--set-default-zone= parameter:
sudo firewall-cmd --set-default-zone=publicweb
Conclusion
You should now have a fairly good understanding of how to administer the firewalld service
on your CentOS system for day-to-day use.
The firewalld service allows you to configure maintainable rules and rule-sets that take
into consideration your network environment. It allows you to seamlessly transition between
different firewall policies through the use of zones and gives administrators the ability to
abstract the port management into more friendly service definitions. Acquiring a working
knowledge of this system will allow you to take advantage of the flexibility and power that
this tool provides.
I would appreciate some assistance with configuring firewalld please. Here's a bit of
background. All I want to do is prevent all access- except whitelisted IP addresses to a web
application running on https.
I have done much googling. learnt a number of things but none has worked yet. Here's what
I have done:
I can tell firewalld is running
# systemctl status firewalld

firewalld.service - firewalld - dynamic     firewall daemon    Loaded: loaded
(/usr/lib/systemd/system/firewalld.service; enabled)    Active: active
(running)
also with
    # firewall-cmd --state
    running
I have the default zones
# firewall-cmd --get-zones
block dmz drop external home internal public trusted work
My active zones include:
# firewall-cmd --get-active-zones
public
sources: 192.72.0.193 192.72.0.0/22 94.27.256.190
My default zone is public:
# firewall-cmd --get-default-zone
public
The details of public are:
public (default)
interfaces:
sources: 192.72.0.193 192.72.0.0/22 94.27.256.190
services: http https ssh
ports:
masquerade: no
forward-ports:
icmp-blocks:
rich rules:
"... The -I option shows the header information and the -s option silences the response body. Checking the endpoint of your database from your local desktop: ..."
curl transfers a URL. Use this command to test an application's endpoint or
connectivity to an upstream service endpoint. c url can be useful for determining if
your application can reach another service, such as a database, or checking if your service is
healthy.
As an example, imagine your application throws an HTTP 500 error indicating it can't reach a
MongoDB database:
The -I option shows the header information and the -s option silences the
response body. Checking the endpoint of your database from your local desktop:
$ curl -I -s
database: 27017
HTTP / 1.0 200 OK
So what could be the problem? Check if your application can get to other places besides the
database from the application host:
This indicates that your application cannot resolve the database because the URL of the
database is unavailable or the host (container or VM) does not have a nameserver it can use to
resolve the hostname.
The socat utility is a relay
for bidirectional data transfers between two independent data channels.
There are many different types of channels socat can connect, including:
Files
Pipes
Devices (serial line, pseudo-terminal, etc)
Sockets (UNIX, IP4, IP6 - raw, UDP, TCP)
SSL sockets
Proxy CONNECT connections
File descriptors (stdin, etc)
The GNU line editor (readline)
Programs
Combinations of two of these
This tool is regarded as the advanced version of netcat . They do similar things, but socat
has more additional functionality, such as permitting multiple clients to listen on a port, or
reusing connections.
Why do we need socat?
There are many ways to use socate effectively. Here are a few examples:
TCP port forwarder (one-shot or daemon)
External socksifier
Tool to attack weak firewalls (security and audit)
Shell interface to Unix sockets
IP6 relay
Redirect TCP-oriented programs to a serial line
Logically connect serial lines on different computers
Establish a relatively secure environment ( su and chroot ) for
running client or server shell scripts with network connections
How do we use socat?
The syntax for socat is fairly simple:
socat [options] <address> <address>
You must provide the source and destination addresses for it to work. The syntax for these
addresses is:
protocol:ip:port
Examples of using socat
Let's get started with some basic examples of using socat for various
connections.
1. Connect to TCP port 80 on the local or remote system:
# socat - TCP4:www.example.com:80
In this case, socat transfers data between STDIO (-) and a TCP4 connection to
port 80 on a host named www.example.com.
2. Use socat as a TCP port forwarder:
For a single connection, enter:
# socat TCP4-LISTEN:81 TCP4:192.168.1.10:80
For multiple connections, use the fork option as used in the examples
below:
In this example, when a client connects to port 3334, a new child process is generated. All
data sent by the clients is appended to the file /tmp/test.log . If the file does
not exist, socat creates it. The option reuseaddr allows an immediate
restart of the server process.
In this case, socat transfers data from stdin to the specified
multicast address using UDP over port 6666 for both the local and remote connections. The
command also tells the interface eth0 to accept multicast packets for the given
group.
Practical uses for socat
Socat is a great tool for troubleshooting. It is also handy for easily making
remote connections. Practically, I have used socat for remote MySQL connections.
In the example below, I demonstrate how I use socat to connect my web application
to a remote MySQL server by connecting over the local socket.
The above command connects to the remote server 192.168.100.5 by using port 3307.
However, all communication will be done on the Unix socket
/var/lib/mysql/mysql.sock , and this makes it appear to be a local
server.
Wrap up
socat is a sophisticated utility and indeed an excellent tool for every
sysadmin to get things done and for troubleshooting. Follow this link to read more examples of
using socat .
Then, run the following to check the common 2000 ports, which handle the common TCP and UDP
services. Here, -Pn is used to skip the ping scan after assuming that
the host is up:
$ sudo nmap -sS -sU -PN <Your-IP>
The results look like this:
...
Note: The -Pn combo is also useful for checking if the host firewall is
blocking ICMP requests or not.
Also, as an extension to the above command, if you need to scan all ports instead of only
the 2000 ports, you can use the following to scan ports from 1-66535:
$ sudo nmap -sS -sU -PN -p 1-65535 <Your-IP>
The results look like this:
...
You can also scan only for TCP ports (default 1000) by using the following:
$ sudo nmap -sT <Your-IP>
The results look like this:
...
Now, after all of these checks, you can also perform the "all" aggressive scans with the
-A option, which tells Nmap to perform OS and version checking using
-T4 as a timing template that tells Nmap how fast to perform this scan (see the
Nmap man page for more information on timing templates):
$ sudo nmap -A -T4 <Your-IP>
The results look like this, and are shown here in two parts:
...
There you go. These are the most common and useful Nmap commands. Together, they provide
sufficient network, OS, and open port information, which is helpful in troubleshooting. Feel
free to comment with your preferred Nmap commands as well.
The ip command is used to assign an address to a network interface and/or configure network interface parameters on Linux operating
systems. This command replaces old good and now deprecated ifconfig command on modern Linux distributions.
Find out which interfaces are configured on the system.
Query the status of a IP interface.
Configure the local loop-back, Ethernet and other IP interfaces.
Mark the interface as up or down.
Configure and modify default and static routing.
Set up tunnel over IP.
Show ARP or NDISC cache entry.
Assign, delete, set up IP address, routes, subnet and other IP information to IP interfaces.
List IP Addresses and property information.
Manage and display the state of all network.
Gather multicast IP addresses info.
Show neighbor objects i.e. ARP cache, invalidate ARP cache, add an entry to ARP cache and more.
Set or delete routing entry.
Find the route an address (say 8.8.8.8 or 192.168.2.24) will take.
Modify the status of interface.
Purpose
Use this command to display and configure the network parameters for host interfaces.
Syntax
ip OBJECT COMMAND
ip [options] OBJECT COMMAND
ip OBJECT help
Understanding ip command OBJECTS syntax
OBJECTS can be any one of the following and may be written in full or abbreviated form:
Object
Abbreviated form
Purpose
link
l
Network device.
address
a addr
Protocol (IP or IPv6) address on a device.
addrlabel
addrl
Label configuration for protocol address selection.
neighbour
n neigh
ARP or NDISC cache entry.
route
r
Routing table entry.
rule
ru
Rule in routing policy database.
maddress
m maddr
Multicast address.
mroute
mr
Multicast routing cache entry.
tunnel
t
Tunnel over IP.
xfrm
x
Framework for IPsec protocol.
To get information about each object use help command as follows:
ip OBJECT help

   ip OBJECT h

   ip a help

   ip r help
Warning : The commands described below must be executed with care. If you make a mistake, you will loos connectivity to the server.
You must take special care while working over the ssh based remote session.
ip command examples
Don't be intimidated by ip command syntax. Let us get started quickly with examples.
Displays info about all network interfaces
Type the following command to list and show all ip address associated on on all network interfaces: ip a
OR ip addr
Sample outputs:
Fig.01 Showing IP address assigned to eth0, eth1, lo using ip command
You can select between IPv4 and IPv6 using the following syntax:
### Only show TCP/IP IPv4  ##
ip -4 a

### Only show TCP/IP IPv6  ###
ip -6 a
It is also possible to specify and list particular interface TCP/IP details:
### Only show eth0 interface ###
ip a show eth0
ip a list eth0
ip a show dev eth0

### Only show running interfaces ###
ip link ls up
Assigns the IP address to the interface
The syntax is as follows to add an IPv4/IPv6 address: ip a add {ip_addr/mask} dev {interface}
To assign 192.168.1.200/255.255.255.0 to eth0, enter: ip a add 192.168.1.200/255.255.255.0 dev eth0
OR ip a add 192.168.1.200/24 dev eth0
ADDING THE BROADCAST ADDRESS ON THE INTERFACE
By default, the ip command does not set any broadcast address unless explicitly requested. So syntax is as follows to set broadcast
ADDRESS: ip addr add brd {ADDDRESS-HERE} dev {interface}
ip addr add broadcast {ADDDRESS-HERE} dev {interface}
ip addr add broadcast 172.20.10.255 dev dummy0
It is possible to use the special symbols such as + and - instead of the broadcast address by setting/resetting
the host bits of the interface pre x. In this example, add the address 192.168.1.50 with netmask 255.255.255.0 (/24) with standard
broadcast and label "eth0Home" to the interface eth0: ip addr add 192.168.1.50/24 brd + dev eth0 label eth0Home
You can set loopback address to the loopback device lo as follows: ip addr add 127.0.0.1/8 dev lo brd + scope host
Remove / Delete the IP address from the interface
The syntax is as follows to remove an IPv4/IPv6 address: ip a del {ipv6_addr_OR_ipv4_addr} dev {interface}
To delete 192.168.1.200/24 from eth0, enter: ip a del 192.168.1.200/24 dev eth0
Flush the IP address from the interface
You can delete or remote an IPv4/IPv6 address one-by-one as
described above . However,
the flush command can remove as flush the IP address as per given condition. For example, you can delete all the IP addresses from
the private network 192.168.2.0/24 using the following command: ip -s -s a f to 192.168.2.0/24
Sample outputs:
2: eth0    inet 192.168.2.201/24 scope global secondary eth0
2: eth0    inet 192.168.2.200/24 scope global eth0

*** Round 1, deleting 2 addresses ***
*** Flush is complete after 1 round ***
You can disable IP address on all the ppp (Point-to-Point) interfaces: ip -4 addr flush label "ppp*"
Here is another example for all the Ethernet interfaces: ip -4 addr flush label "eth*"
How do I change the state of the device to UP or DOWN?
The syntax is as follows: ip link set dev {DEVICE} {up|down}
To make the state of the device eth1 down, enter: ip link set dev eth1 down
To make the state of the device eth1 up, enter: ip link set dev eth1 up
How do I change the txqueuelen of the device?
You can set the
length of the transmit queue of the device using ifconfig command or ip command as follows: ip link set txqueuelen {NUMBER} dev {DEVICE}
In this example, change the default txqueuelen from 1000 to 10000 for the eth0: ip link set txqueuelen 10000 dev eth0
ip a list eth0
How do I change the MTU of the device?
For gigabit networks
you can set maximum transmission units (MTU) sizes (JumboFrames) for better network performance. The syntax is: ip link set mtu {NUMBER} dev {DEVICE}
To change the MTU of the device eth0 to 9000, enter: ip link set mtu 9000 dev eth0
ip a list eth0
Sample outputs:
2: eth0:  mtu 9000 qdisc pfifo_fast state UP qlen 1000
    link/ether 00:08:9b:c4:30:30 brd ff:ff:ff:ff:ff:ff
    inet 192.168.1.10/24 brd 192.168.1.255 scope global eth1
    inet6 fe80::208:9bff:fec4:3030/64 scope link
       valid_lft forever preferred_lft forever
Display neighbour/arp cache
The syntax is: ip n show
ip neigh show
Sample outputs (note: I masked out some data with alphabets):
74.xx.yy.zz dev eth1 lladdr 00:30:48:yy:zz:ww REACHABLE
10.10.29.66 dev eth0 lladdr 00:30:48:c6:0a:d8 REACHABLE
74.ww.yyy.xxx dev eth1 lladdr 00:1a:30:yy:zz:ww REACHABLE
10.10.29.68 dev eth0 lladdr 00:30:48:33:bc:32 REACHABLE
74.fff.uu.cc dev eth1 lladdr 00:30:48:yy:zz:ww STALE
74.rr.ww.fff dev eth1 lladdr 00:30:48:yy:zz:ww DELAY
10.10.29.65 dev eth0 lladdr 00:1a:30:38:a8:00 REACHABLE
10.10.29.74 dev eth0 lladdr 00:30:48:8e:31:ac REACHABLE
The last field show the the state of the " neighbour unreachability detection " machine for this entry:
STALE � The neighbour is valid, but is probably already unreachable, so the kernel will try to check it at the first transmission.
DELAY � A packet has been sent to the stale neighbour and the kernel is waiting for confirmation.
REACHABLE � The neighbour is valid and apparently reachable.
Add a new ARP entry
The syntax is: ip neigh add {IP-HERE} lladdr {MAC/LLADDRESS} dev {DEVICE} nud {STATE}
In this example, add a permanent ARP entry for the neighbour 192.168.1.5 on the device eth0: ip neigh add 192.168.1.5 lladdr 00:1a:30:38:a8:00 dev eth0 nud perm
Where,
neighbour state (nud)
meaning
permanent
The neighbour entry is valid forever and can be only be removed administratively
noarp
The neighbour entry is valid. No attempts to validate this entry will be made but it can be removed when its lifetime expires.
stale
The neighbour entry is valid but suspicious. This option to ip neigh does not change the neighbour state if it was valid
and the address is not changed by this command.
reachable
The neighbour entry is valid until the reachability timeout expires.
Delete a ARP entry
The syntax to invalidate or delete an ARP entry for the neighbour 192.168.1.5 on the device eth1 is as follows. ip neigh del {IPAddress} dev {DEVICE}
ip neigh del 192.168.1.5 dev eth1
CHANGE ARE STATE TO REACHABLE FOR THE NEIGHBOUR 192.168.1.100 ON THE DEVICE ETH1
ip neigh chg 192.168.1.100 dev eth1 nud reachable
Flush ARP entry
This flush or f command flushes neighbour/arp tables, by specifying some condition. The syntax is: ip -s -s n f {IPAddress}
In this example, flush neighbour/arp table ip -s -s n f 192.168.1.5
OR ip -s -s n flush 192.168.1.5
ip route: Routing table management commands
Use the following command to manage or manipulate the kernel routing table.
Show routing table
To display the contents of the routing tables: ip r
ip r list
ip route list
ip r list [options]
ip route
Sample outputs:
default via 192.168.1.254 dev eth1
192.168.1.0/24 dev eth1  proto kernel  scope link  src 192.168.1.10
Display routing for 192.168.1.0/24: ip r list 192.168.1.0/24
Sample outputs:
192.168.1.0/24 dev eth1 proto kernel scope link src 192.168.1.10
Add a new route
The syntax is: ip route add {NETWORK/MASK} via {GATEWAYIP}
ip route add {NETWORK/MASK} dev {DEVICE}
ip route add default {NETWORK/MASK} dev {DEVICE}
ip route add default {NETWORK/MASK} via {GATEWAYIP}
The syntax is as follows to delete default gateway: ip route del default
In this example, delete the route created in
previous subsection : ip route del 192.168.1.0/24 dev eth0
Old vs. new tool
Deprecated Linux command and their replacement cheat sheet:
Old command (Deprecated)
New command
ifconfig -a
ip a
ifconfig enp6s0 down
ip link set enp6s0 down
ifconfig enp6s0 up
ip link set enp6s0 up
ifconfig enp6s0 192.168.2.24
ip addr add 192.168.2.24/24 dev enp6s0
ifconfig enp6s0 netmask 255.255.255.0
ip addr add 192.168.1.1/24 dev enp6s0
ifconfig enp6s0 mtu 9000
ip link set enp6s0 mtu 9000
ifconfig enp6s0:0 192.168.2.25
ip addr add 192.168.2.25/24 dev enp6s0
netstat
ss
netstat -tulpn
ss -tulpn
netstat -neopa
ss -neopa
netstat -g
ip maddr
route
ip r
route add -net 192.168.2.0 netmask 255.255.255.0 dev enp6s0
ip route add 192.168.2.0/24 dev enp6s0
route add default gw 192.168.2.254
ip route add default via 192.168.2.254
arp -a
ip neigh
arp -v
ip -s neigh
arp -s 192.168.2.33 1:2:3:4:5:6
ip neigh add 192.168.3.33 lladdr 1:2:3:4:5:6 dev enp6s0
I have a small favor to ask. More people are reading the nixCraft. Many of you block advertising which is your right, and advertising
revenues are not sufficient to cover my operating costs. So you can see why I need to ask for your help. The nixCraft takes a lot
of my time and hard work to produce. If everyone who reads nixCraft, who likes it, helps fund it, my future would be more secure.
You can donate as little as $1 to support nixCraft:
Can you please comment if it is possible to configure a point-to-point interface using the "ip" command set? I am especially
looking to change the broadcast nature of an eth interface (the link encap and network type) to behave as point-to-point link.
At the same time I don't want to use the PPP, or ay other protocol.
How save configuration for after reboot?
there are for example ip route save, but its in binary and mostly useless.
ip command need to have ip xxx dump, with make valid ip calls to make same configuration. same as iptables have iptables-save.
now, in ages of cloud, we need json interface, so we can all power of ip incorporate in couble easy steps to REST interface.
"... Reading stuff in /proc is a standard mechanism and where appropriate, all the tools are doing the same including 'ss' that you mentioned (which is btw very poorly designed) ..."
I am Linux kernel network and proprietary distributions developer and have actually read
the code.
Reading stuff in /proc is a standard mechanism and where
appropriate, all the tools are doing the same including 'ss' that you mentioned (which is btw
very poorly designed)
Also there are several implementations of the net tools, the one from busybox probably the
most famous alternative one and implementations don't hesitate changing how, when and what is
being presented.
What is true though is that Linux kernel APIs are sometimes messy and tools like e.g.
pyroute2 are struggling with working around limitations and confusions. There is also a big
mess with the whole netfilter package as the only "API" is the iptables command-line tool
itself.
Linux is arguably the biggest and most important project on Earth and should respect all
views, races and opinions. If you would like to implement a more efficient and streamlined
network interface (which I very much beg for and may eventually find time to do) - then I'm
all in with you. I have some ideas of how to make the interface programmable by extending JIT
rules engine and making possible to implement the most demanding network logic in kernel
directly (e.g. protocols like mptcp and algorithms like Google Congestion Control for
WebRTC).
The OP's argument is that netlink sockets are more efficient in theory so we should
abandon anything that uses a pseudo-proc, re-invent the wheel and move even farther from the
UNIX tradition and POSIX compliance? And it may be slower on larger
systems? Define that for me because I've never experienced that. I've worked on single
stove-pipe x86 systems, to the 'SPARC archteciture' generation where everyone thought
Sun/Solaris was the way to go with single entire systems in a 42U rack, IRIX systems, all the
way on hundreds of RPM-base linux distro that are physical, hypervised and containered nodes
in an HPC which are LARGE compute systems (fat and compute nodes).
That's a total shit comment with zero facts to back it up. This is like Good Will Hunting
'the bar scene' revisited...
OP, if you're an old hat like me, I'd fucking LOVE to know how old? You sound like
you've got about 5 days soaking wet under your belt with a Milkshake IPA in your hand. You
sound like a millennial developer-turned-sysadmin-for-a-day who's got all but
cloud-framework-administration under your belt and are being a complete poser. Any true
sys-admin is going to flip-their-shit just like we ALL did with systemd, and that shit still
needs to die. There, I got that off my chest.
I'd say you got two things right, but are completely off on one of them:
* Your description of inefficient is what you got right: you sound like my mother
or grandmother describing their computing experiences to look at Pintrest on a web brower at
times. You mind as well just said slow without any bearing, education guess or reason.
Sigh...
* I would agree that some of these tools need to change, but only to handle deeper kernel
containerization being built into Linux. One example that comes to mind is 'hostnamectl'
where it's more dev-ops centric in terms of 'what' slice or provision you're referencing. A
lot of those tools like ifconfig, route and alike still do work in any Linux environment,
containerized or not --- fuck, they work today .
Anymore, I'm just a disgruntled and I'm sure soon-to-be-modded-down voice on /. that should be taken with a grain of salt. I'm not happy with the way
the movements of Linux have gone, and if this doesn't sound old hat I don't know what
is: At the end of the day, you have to embrace change. I'd say 0.0001% of any of us are in
control of those types of changes, no matter how we feel about is as end-user administrators
of those tools we've grown to be complacent about. I got about 15y left and this thing
called Linux that I've made a good living on will be the-next-guys steaming pile to deal
with.
Yeah. The other day I set up some demo video streaming on a Linux box. Fire up screen,
start my streaming program. Disconnect screen and exit my ssh system, and my streaming
freezes. There're a metric fuckton of reports of systemd killing detached/nohup'd processes,
but I check my config file and it's not that. Although them being that willing to walk away
from expected system behavior is already cause to blow a gasket. But no, something else is
going on here. I tweak the streaming code to catch all catchab
Just to give you guys some color commentary, I was participating quite heavily in Linux
development from 1994-1999, and Linus even added me to the CREDITS file while I was at the
University of Michigan for my fairly modest contributions to the kernel. [I prefer
application development, and I'm still a Linux developer after 24 years. I currently work for
the company Internet Brands.]
What I remember about ip and net is that they came about seemingly out of nowhere two
decades ago and the person who wrote the tools could barely communicate in English. There was
no documentation. net-tools by that time was a well-understood and well-documented package,
and many Linux devs at the time had UNIX experience pre-dating Linux (which was announced in
1991 but not very usable until 1994).
We Linux developers virtually created Internet programming, where most of our effort was
accomplished online, but in those days everybody still used books and of course the Linux
Documentation Project. I have a huge stack of UNIX and Linux books from the 1990's, and I
even wrote a mini-HOWTO. There was no Google. People who used Linux back then may seem like
wizards today because we had to memorize everything, or else waste time looking it up in a
book. Today, even if I'm fairly certain I already know how to do something, I look it up with
Google anyway.
Given that, ip and net were downright offensive. We were supposed to switch from a
well-documented system to programs written by somebody who can barely speak English (the
lingua franca of Linux development)?
Today, the discussion is irrelevant. Solaris, HP-UX, and the other commercial UNIX
versions are dead. Ubuntu has the common user and CentOS has the server. Google has complete
documentation for these tools at a glance. In my mind, there is now no reason to not
switch.
Although, to be fair, I still use ifconfig, even if it is not installed by default.
Systemd looks OK until you get into major troubles and start troubleshooting. After that you are ready to kill systemd
developers and blow up Red Hat headquarters ;-)
Notable quotes:
"... Crap tools written by morons with huge egos and rather mediocre skills. Happens time and again an the only sane answer to these people is "no". Good new tools also do not have to be pushed on anybody, they can compete on merit. As soon as there is pressure to use something new though, you can be sure it is inferior. ..."
In general, it's better for application programs, including scripts to use an
application programming interface (API) such as /proc, rather than a
user interface such as ifconfig, but in reality tons of scripts do use ifconfig and
such.
...and they have no other choice, and shell scripting is a central feature of UNIX.
The problem isn't so much new tools as new tools that suck. If I just type ifconfig it
will show me the state of all the active interfaces on the system. If I type ifconfig
interface I get back pretty much everything I want to know about it. If I want to get the
same data back with the ip tool, not only can't I, but I have to type multiple commands, with
far more complex arguments.
Crap tools written by morons with huge egos and rather mediocre skills. Happens time and
again an the only sane answer to these people is "no". Good new tools also do not have to be
pushed on anybody, they can compete on merit. As soon as there is pressure to use something
new though, you can be sure it is inferior.
The problem isn't new tools. It's not even crap tools. It's the mindset that we need to
get rid of an ~70KB netstat, ~120KB ifconfig, etc. Like others have posted, this has more to
do with the ego of the new tools creators and/or their supporters who see the old tools as
some sort of competition. Well, that's the real problem, then, isn't it? They don't want to
have to face competition and the notion that their tools aren't vastly superior to the user
to justify switching completely, so they must force the issue.
Now, it'd be different if this was 5 years down the road, netstat wasn't being
maintained*, and most scripts/dependents had already been converted over. At that point
there'd be a good, serious reason to consider removing an outdated package. That's obviously
not the debate, though.
* Vs developed. If seven year old stable tools are sufficiently bug free that no further
work is necessary, that's a good thing.
If I type ifconfig interface I get back pretty much everything I want to know about it
How do you tell in ifconfig output which addresses are deprecated? When I run ifconfig
eth0.100 it lists 8 global addreses. I can deduce that the one with fffe in the middle is the
permanent address but I have no idea what the address it will use for outgoing
connections.
ip addr show dev eth0.100 tells me what I need to know. And it's only a few more
keystrokes to type.
"ip" (and "ip2" and whatever that other candidate not-so-better not-so-replacement of
ifconfig was) all have the same problem: They try to be the one tool that does everything
"ip". That's "assign ip address somewhere", "route the table", and all that. But that means
you still need a complete zoo of other tools, like brconfig,
iwconfig/iw/whatever-this-week.
In other words, it's a modeling difference. On sane systems, ifconfig _configures the
interface_, for all protocols and hardware features, bridges, vlans, what-have-you. And then
route _configures the routing table_. On linux... the poor kids didn't understand what they
were doing, couldn't fix their broken ifconfig to save their lives, and so went off to
reinvent the wheel, badly, a couple times over.
And I say the blogposter is just as much an idiot.
Per various people, netstat et al operate by reading various files in
/proc, and doing this is not the most efficient thing in the world
So don't use it. That does not mean you gotta change the user interface too. Sheesh.
However, the deeper issue is the interface that netstat, ifconfig, and company present
to users.
No, that interface is a close match to the hardware. Here is an interface, IOW something
that connects to a radio or a wire, and you can make it ready to talk IP (or back when, IPX,
appletalk, and whatever other networks your system supported). That makes those tools
hardware-centric. At least on sane systems. It's when you want to pretend shit that it all
goes awry. And boy, does linux like to pretend. The linux ifconfig-replacements are
IP-only-stack-centric. Which causes problems.
For example because that only does half the job and you still need the aforementioned zoo
of helper utilities that do things you can have ifconfig do if your system is halfway sane.
Which linux isn't, it's just completely confused. As is this blogposter.
On the other hand, the users expect netstat, ifconfig and so on to have their
traditional interface (in terms of output, command line arguments, and so on); any number
of scripts and tools fish things out of ifconfig output, for example.
linux' ifconfig always was enormously shitty here. It outputs lots of stuff I expect to
find through netstat and it doesn't output stuff I expect to find out through ifconfig.
That's linux, and that is NOT "traditional" compared to, say, the *BSDs.
As the Linux kernel has changed how it does networking, this has presented things like
ifconfig with a deep conflict; their traditional output is no longer necessarily an
accurate representation of reality.
Was it ever? linux is the great pretender here.
But then, "linux" embraced the idiocy oozing out of poettering-land. Everything out of
there so far has caused me problems that were best resolved by getting rid of that crap code.
Point in case: "Network-Manager". Another attempt at "replacing ifconfig" with something that
causes problems and solves very few.
Should the ip rule stuff be part of route or a separate command?
There are things that could be better with ip. IIRC it's very fussy about where the table
selector goes in the argument list but route doesn't support this at all.
I also don't think route has anything like 'nexthop dev $if' which is a godsend for ipv6
configuration.
I stayed with route for years. But ipv6 exposed how incomplete the tool is - and clearly
nobody cares enough to add all the missing functionality.
Perhaps ip addr, ip route, ip rule, ip mroute, ip link should be separate commands. I've
never looked at the sourcecode to see whether it's mostly common or mostly separate.
The people who think the old tools work fine don't understand all the advanced networking
concepts that are only possible with the new tools: interfaces can have multiple IPs, one IP
can be assigned to multiple interfaces, there's more than one routing table, firewall rules
can add metadata to packets that affects routing, etc. These features can't be accommodated
by the old tools without breaking compatibility.
Someone cared enough to implement an entirely different tool to do the same old jobs
plus some new stuff, it's too bad they didn't do the sane thing and add that functionality
to the old tool where it would have made sense.
It's not that simple. The iproute2 suite wasn't written to *replace* anything.
It was written to provide a user interface to the rapidly expanding RTNL API.
The net-tools maintainers (or anyone who cared) could have started porting it if they liked.
They didn't. iproute2 kept growing to provide access to all the new RTNL interfaces, while
net-tools got farther and farther behind.
What happened was organic. If someone brought net-tools up to date tomorrow and everyone
liked the interface, iproute2 would be dead in its tracks. As it sits, myself, and most of
the more advanced level system and network engineers I know have been using iproute2 for just
over a decade now (really, the point where ifconfig became on incomplete and poorly
simplified way to manage the networking stack)
Nope. Kernel authors come up with fancy new netlink interface for better interaction with
the kernel's network stack. They don't give two squirts of piss whether or not a user-space
interface exists for it yet. Some guy decides to write an interface to it. Initially, it only
support things like modifying the routing rule database (something that can't be done with
route) and he is trying to make an implementation of this protocal, not try to hack it into
software that already has its own framework using different APIs.
This source was always freely available for the net-tools guys to take and add to their own
software.
Instead, we get
this. [sourceforge.net]
Nobody is giving a positive spin. This is simply how it happened. This is what happens when
software isn't maintained, and you don't get to tell other people to maintain it. You're
free, right now, today, to port the iproute2 functionality into net-tools. They're unwilling
to, however. That's their right. It's also the right of other people to either fork it, or
move to more functional software. It's your right to help influence that. Or bitch on
slashdot. That probably helps, too.
keep the command names the same but rewrite how they function?
Well, keep the syntax too, so old scripts would still work. The old command name could
just be a script that calls the new commands under the hood. (Perhaps this is just what you
meant, but I thought I'd elaborate.)
What was the reason for replacing "route" anyhow? It's worked for decades and done one
thing.
Idiots that confuse "new" with better and want to put their mark on things. Because they
are so much greater than the people that got the things to work originally, right? Same as
the systemd crowd. Sometimes, they realize decades later they were stupid, but only after
having done a lot of damage for a long time.
I didn't RTFA (this is Slashdot, after all) but from TFS it sounds like exactly the reason
I moved to FreeBSD in the first place: the Linux attitude of 'our implementation is broken,
let's completely change the interface'. ALSA replacing OSS was the instance of this that
pushed me away. On Linux, back around 2002, I had some KDE and some GNOME apps that talked to
their respective sound daemon, and some things like XMMS and BZFlag that used
/dev/dsp directly. Unfortunately, Linux decided to only support s
Unix was founded on the ideas of lots os simple command line tools that do one job well
and don't depend on system idiosyncracies. If you make the tool have to know the lower layers
of the system to exploit them then you break the encapsulation. Polling proc has worked
across eons of linux flavors without breaking. when you make everthing integrated it creates
paralysis to change down the road for backward compatibility. small speed game now for
massive fragility and no portability later.
Gnu may not be unix but it's foundational idea lies in the simple command tool paradigm.
It's why GNU was so popular and it's why people even think that Linux is unix. That idea is
the character of linux. if you want an marvelously smooth, efficient, consistent integrated
system that then after a decade of revisions feels like a knotted tangle of twine in your
junk drawer, try Windows.
The error you're making is thinking that Linux is UNIX.
It's not. It's merely UNIX-like. And with first SystemD and now this nonsense, it's
rapidly becoming less UNIX-like. The Windows of the UNIX(ish) world.
Happily, the BSDs seem to be staying true to their UNIX roots.
In theory netstat, ifconfig, and company could be rewritten to use netlink too; in
practice this doesn't seem to have happened and there may be political issues involving
different groups of developers with different opinions on which way to go.
No, it is far simpler than looking for some mythical "political" issues. It is simply that
hackers - especially amateur ones, who write code as a hobby - dislike trying to work out how
old stuff works. They like writing new stuff, instead.
Partly this is because of the poor documentation: explanations of why things work, what
other code was tried but didn't work out, the reasons for weird-looking constructs,
techniques and the history behind patches. It could even be that many programmers are wedded
to a particular development environment and lack the skill and experience (or find it beyond
their capacity) to do things in ways that are alien to it. I feel that another big part is
that merely rewriting old code does not allow for the " look how clever I am " element
that is present in fresh, new, software. That seems to be a big part of the amateur hacker's
effort-reward equation.
One thing that is imperative however is to keep backwards compatibility. So that the same
options continue to work and that they provide the same content and format. Possibly Unix /
Linux only remaining advantage over Windows for sysadmins is its scripting. If that was lost,
there would be little point keeping it around.
iproute2 exists because ifconfig, netstat, and route do not support the full capabilities
of the linux network stack.
This is because today's network stack is far more complicated than it was in the past. For
very simple networks, the old tools work fine. For complicated ones, you must use the new
ones.
Your post could not be any more wrong. Your moderation amazes me. It seems that slashdot
is full of people who are mostly amateurs.
iproute2 has been the main network management suite for linux amongst higher end sysadmins
for a decade. It wasn't written to sate someone's desire to change for the sake of change, to
make more complicated, to NIH. It was written because the old tools can't encompass new
functionality without being rewritten themselves.
So basically there is a proposal to dump existing terminal utilities that are
cross-platform and create custom Linux utilities - then get rid of the existing
functionality? That would be moronic! I already go nuts remoting into a windows platform and
then an AIX and Linux platform and having different command line utilities / directory
separators / etc. Adding yet another difference between my Linux and macOS/AIX terminals
would absolutely drive me bonkers!
I have no problem with updating or rewriting or adding functionalities to existing
utilities (for all 'nix platforms), but creating a yet another incompatible platform would be
crazily annoying.
(not a sys admin, just a dev who has to deal with multiple different server platforms)
All output for 'ip' is machine readable, not human.
Compare
$ ip route
to
$ route -n
Which is more readable? Fuckers.
Same for
$ ip a
and
$ ifconfig
Which is more readable? Fuckers.
The new commands should generally make the same output as the old, using the same options,
by default. Using additional options to get new behavior. -m is commonly used to get "machine
readable" output. Fuckers.
It is like the systemd interface fuckers took hold of everything. Fuckers.
BTW, I'm a happy person almost always, but change for the sake of change is fucking
stupid.
Want to talk about resolv.conf, anyone? Fuckers! Easier just to purge that shit.
I'm growing increasingly annoyed with Linux' userland instability. Seriously considering a
switch to NetBSD because I'm SICK of having to learn new ways of doing old things.
For those who are advocating the new tools as additions rather than replacements: Remember
that this will lead to some scripts expecting the new tools and some other scripts expecting
the old tools. You'll need to keep both flavors installed to do ONE thing. I don't
know about you, but I HATE to waste disk space on redundant crap.
What pisses me off is when I go to run ifconfig and it isn't there, and then I Google on
it and there doesn't seem to be *any* direct substitute that gives me the same information.
If you want to change the command then fine, but allow the same output from the new commands.
Furthermore, another bitch I have is most systemd installations don't have an easy substitute
for /etc/rc.local.
It does not make any sense that some people spend time and money replacing what is
currently working with some incompatible crap.
Therefore, the only logical alternative is that they are paid (in some way) to break what
is working.
Also, if you rewrite tons of systems tools you have plenty of opportunities to insert
useful bugs that can be used by the various spying agencies.
You do not think that the current CPU Flaws are just by chance, right ?
Immagine the wonder of being able to spy on any machine, regardless of the level of SW
protection.
There is no need to point out that I cannot prove it, I know, it just make sense to
me.
It does not make any sense that some people spend time and money replacing what is
currently working with some incompatible crap. (...) There is no need to point out that I
cannot prove it, I know, it just make sense to me.
Many developers fix problems like a guy about to lose a two week vacation because he can't
find his passport. Rip open every drawer, empty every shelf, spread it all across the tables
and floors until you find it, then rush out the door leaving everything in a mess. It solved
HIS problem.
IP aliases have always and still do appear in ifconfig as separate logical interfaces.
The assertion ifconfig only displays one IP address per interface also demonstrably
false.
Using these false bits of information to advocate for change seems rather ridiculous.
One change I would love to see... "ping" bundled with most Linux distros doesn't support
IPv6. You have to call IPv6 specific analogue which is unworkable. Knowing address family in
advance is not a reasonable expectation and works contrary to how all other IPv6 capable
software any user would actually run work.
Heck for a while traceroute supported both address families. The one by Olaf Kirch eons
ago did then someone decided not invented here and replaced it with one that works like ping6
where you have to call traceroute6 if you want v6.
It seems anymore nobody spends time fixing broken shit... they just spend their time
finding new ways to piss me off. Now I have to type journalctl and wait for hell to freeze
over just to liberate log data I previously could access nearly instantaneously. It almost
feels like Microsoft's event viewer now.
TFA is full of shit. IP aliases have always and still do appear in ifconfig as separate
logical interfaces.
No, you're just ignorant.
Aliases do not appear in ifconfig as separate logical interfaces.
Logical interfaces appear in ifconfig as logical interfaces.
Logical interfaces are one way to add an alias to an interface. A crude way, but a way.
The assertion ifconfig only displays one IP address per interface also demonstrably
false.
Nope. Again, your'e just ignorant.
root@swalker-samtop:~# tunctl
Set 'tap0' persistent and owned by uid 0
root@swalker-samtop:~# ifconfig tap0 10.10.10.1 netmask 255.255.255.0 up
root@swalker-samtop:~# ip addr add 10.10.10.2/24 dev tap0
root@swalker-samtop:~# ifconfig tap0:0 10.10.10.3 netmask 255.255.255.0 up
root@swalker-samtop:~# ip addr add 10.10.1.1/24 scope link dev tap0:0
root@swalker-samtop:~# ifconfig tap0 | grep inet
inet 10.10.1.1 netmask 255.255.255.0 broadcast 0.0.0.0
root@swalker-samtop:~# ifconfig tap0:0 | grep inet
inet 10.10.10.3 netmask 255.255.255.0 broadcast 10.10.10.255
root@swalker-samtop:~# ip addr show dev tap0 | grep inet
inet 10.10.1.1/24 scope link tap0
inet 10.10.10.1/24 brd 10.10.10.255 scope global tap0
inet 10.10.10.2/24 scope global secondary tap0
inet 10.10.10.3/24 brd 10.10.10.255 scope global secondary tap0:0
If you don't understand what the differences are, you really aren't qualified to opine on
the matter.
Ifconfig is fundamentally incapable of displaying the amount of information that can go with
layer-3 addresses, interfaces, and the architecture of the stack in general. This is why
iproute2 exists.
SysD: (v). To force an unnecessary replacement of something that already works well with
an alternative that the majority perceive as fundamentally worse.
Example usage: Wow you really SysD'd that up.
Starting with CentOS 7,
FirewallD
replaces iptables as the default firewall management tool.
FirewallD is a complete firewall solution
that can be controlled with a command-line utility called firewall-cmd. If you are more comfortable with
the Iptables command line syntax, then you can disable FirewallD and go back to the classic iptables
setup.
This tutorial will show you how to disable the FirewallD service and install iptables.
Scenario: You are going to make changes to the iptables policy rules on your company's
primary server. You want to avoid locking yourself -- and potentially everybody else -- out.
(This costs time and money and causes your phone to ring off the wall.)
Tip #1: Take a
backup of your iptables configuration before you start working on it.
Back up your configuration with the command:
/sbin/iptables-save > /root/iptables-works
Tip #2: Even better, include a timestamp in the filename.
Tip #4: Put specific rules at the top of the policy and generic rules at the bottom.
Avoid generic rules like this at the top of the policy rules:
iptables -A INPUT -p tcp --dport 22 -j DROP
The more criteria you specify in the rule, the less chance you will have of locking yourself
out. Instead of the very generic rule above, use something like this:
iptables -A INPUT -p tcp --dport 22 –s 10.0.0.0/8 –d 192.168.100.101 -j DROP
This rule appends ( -A ) to the INPUT chain a rule that will DROP any packets originating
from the CIDR block 10.0.0.0/8 on TCP ( -p tcp ) port 22 ( --dport 22 ) destined for IP address
192.168.100.101 ( -d 192.168.100.101 ).
There are plenty of ways you can be more specific. For example, using -i eth0 will limit the
processing to a single NIC in your server. This way, the filtering actions will not apply the
rule to eth1 .
Tip #5: Whitelist your IP address at the top of your policy rules.
This is a very effective method of not locking yourself out. Everybody else, not so
much.
iptables -I INPUT -s <your IP> -j ACCEPT
You need to put this as the first rule for it to work properly. Remember, -I
inserts it as the first rule; -A appends it to the end of the list.
Tip #6: Know and
understand all the rules in your current policy.
Not making a mistake in the first place is half the battle. If you understand the inner
workings behind your iptables policy, it will make your life easier. Draw a flowchart if you
must. Also remember: What the policy does and what it is supposed to do can be two different
things.
Set up a workstation firewall policy
Scenario: You want to set up a workstation with a restrictive firewall policy.
Tip #1:
Set the default policy as DROP. # Set a default policy of DROP
*filter
:INPUT DROP [0:0]
:FORWARD DROP [0:0]
:OUTPUT DROP [0:0] Tip #2: Allow users the minimum amount of services needed to get their
work done.
The iptables rules need to allow the workstation to get an IP address, netmask, and other
important information via DHCP ( -p udp --dport 67:68 --sport 67:68 ). For remote management,
the rules need to allow inbound SSH ( --dport 22 ), outbound mail ( --dport 25 ), DNS ( --dport
53 ), outbound ping ( -p icmp ), Network Time Protocol ( --dport 123 --sport 123 ), and
outbound HTTP ( --dport 80 ) and HTTPS ( --dport 443 ).
# Set a default policy of DROP
*filter
:INPUT DROP [0:0]
:FORWARD DROP [0:0]
:OUTPUT DROP [0:0]
# Accept any related or established connections
-I INPUT 1 -m state --state RELATED,ESTABLISHED -j ACCEPT
-I OUTPUT 1 -m state --state RELATED,ESTABLISHED -j ACCEPT
# Allow all traffic on the loopback interface
-A INPUT -i lo -j ACCEPT
-A OUTPUT -o lo -j ACCEPT
# Outbound Network Time Protocol (NTP) requests
-A OUTPUT –o eth0 -p udp --dport 123 --sport 123 -j ACCEPT
# Outbound HTTP
-A OUTPUT -o eth0 -p tcp -m tcp --dport 80 -m state --state NEW -j ACCEPT
-A OUTPUT -o eth0 -p tcp -m tcp --dport 443 -m state --state NEW -j ACCEPT
COMMIT
Restrict an IP address range
Scenario: The CEO of your company thinks the employees are spending too much time on
Facebook and not getting any work done. The CEO tells the CIO to do something about the
employees wasting time on Facebook. The CIO tells the CISO to do something about employees
wasting time on Facebook. Eventually, you are told the employees are wasting too much
time on Facebook, and you have to do something about it. You decide to block all access to
Facebook. First, find out Facebook's IP address by using the host and whois commands.
host
-t a www.facebook.com
www.facebook.com is an alias for star.c10r.facebook.com.
star.c10r.facebook.com has address 31.13.65.17
whois 31.13.65.17 | grep inetnum
inetnum: 31.13.64.0 - 31.13.127.255
Then convert that range to CIDR notation by using the CIDR to IPv4 Conversion page. You get 31.13.64.0/18 .
To prevent outgoing access to www.facebook.com , enter:
iptables -A OUTPUT -p tcp -i eth0 –o eth1 –d 31.13.64.0/18 -j DROP
Regulate by time
Scenario: The backlash from the company's employees over denying access to Facebook access
causes the CEO to relent a little (that and his administrative assistant's reminding him that
she keeps HIS Facebook page up-to-date). The CEO decides to allow access to Facebook.com only
at lunchtime (12PM to 1PM). Assuming the default policy is DROP, use iptables' time features to
open up access.
This command sets the policy to allow ( -j ACCEPT ) http and https ( -m multiport --dport
http,https ) between noon ( --timestart 12:00 ) and 13PM ( --timestop 13:00 ) to Facebook.com (
–d 31.13.64.0/18 ).
Regulate by
time -- Take 2
Scenario: During planned downtime for system maintenance, you need to deny all TCP and UDP
traffic between the hours of 2AM and 3AM so maintenance tasks won't be disrupted by incoming
traffic. This will take two iptables rules:
iptables -A INPUT -p tcp -m time --timestart
02:00 --timestop 03:00 -j DROP
iptables -A INPUT -p udp -m time --timestart 02:00 --timestop 03:00 -j DROP
With these rules, TCP and UDP traffic ( -p tcp and -p udp ) are denied ( -j DROP ) between
the hours of 2AM ( --timestart 02:00 ) and 3AM ( --timestop 03:00 ) on input ( -A INPUT
).
Limit connections with iptables
Scenario: Your internet-connected web servers are under attack by bad actors from around the
world attempting to DoS (Denial of Service) them. To mitigate these attacks, you restrict the
number of connections a single IP address can have to your web server:
Let's look at what this rule does. If a host makes more than 20 ( -–connlimit-above 20
) new connections ( –p tcp –syn ) in a minute to the web servers ( -–dport
http,https ), reject the new connection ( –j REJECT ) and tell the connecting host you
are rejecting the connection ( -–reject-with-tcp-reset ).
Monitor iptables
rules
Scenario: Since iptables operates on a "first match wins" basis as packets traverse the
rules in a chain, frequently matched rules should be near the top of the policy and less
frequently matched rules should be near the bottom. How do you know which rules are traversed
the most or the least so they can be ordered nearer the top or the bottom?
Tip #1: See
how many times each rule has been hit.
Use this command:
iptables -L -v -n –line-numbers
The command will list all the rules in the chain ( -L ). Since no chain was specified, all
the chains will be listed with verbose output ( -v ) showing packet and byte counters in
numeric format ( -n ) with line numbers at the beginning of each rule corresponding to that
rule's position in the chain.
Using the packet and bytes counts, you can order the most frequently traversed rules to the
top and the least frequently traversed rules towards the bottom.
Tip #2: Remove
unnecessary rules.
Which rules aren't getting any matches at all? These would be good candidates for removal
from the policy. You can find that out with this command:
iptables -nvL | grep -v "0 0"
Note: that's not a tab between the zeros; there are five spaces between the zeros.
Tip
#3: Monitor what's going on.
You would like to monitor what's going on with iptables in real time, like with top . Use
this command to monitor the activity of iptables activity dynamically and show only the rules
that are actively being traversed:
watch runs 'iptables -nvL | grep -v "0 0"' every five seconds and displays the first screen
of its output. This allows you to watch the packet and byte counts change over
time.
Report on iptables
Scenario: Your manager thinks this iptables firewall stuff is just great, but a daily
activity report would be even better. Sometimes it's more important to write a report than to
do the work.
Use the packet filter/firewall/IDS log analyzer FWLogwatch to create reports based on the iptables
firewall logs. FWLogwatch supports many log formats and offers many analysis options. It
generates daily and monthly summaries of the log files, allowing the security administrator to
free up substantial time, maintain better control over network security, and reduce unnoticed
attacks.
We've covered many facets of iptables, all the way from making sure you don't lock yourself
out when working with iptables to monitoring iptables to visualizing the activity of an
iptables firewall. These will get you started down the path to realizing even more iptables
tips and tricks.
Netstat command is used to check all
incoming and outgoing connections on linux server. Using Grep command you can sort
lines which are matching pattern you defined.
AWk is very important command generally
used for scanning pattern and process it. It is powerful tool for shell scripting. Sort
is used to sort output and sort -n is for sorting output in numeric order.
Uniq -c this help to get uniq output by deleting duplicate lines
from it.
If you are setting this on a Ubuntu server you can use vim or nano to edit smb.conf file, for
Ubuntu desktop just use the default text editor file. Note that all commands (Server or Desktop)
must be run as a root. $ sudo nano /etc/samba/smb.conf Then add the information below to the very
end of the file -
[share]
comment = Ubuntu File Server Share
path = /srv/samba/share
browsable = yes
guest ok = yes
read only = no
create mask = 0755
Comment : is a short description of the share.
Path : the path of the directory to be shared.
This example uses /srv/ samba/share because, according to the Filesystem Hierarchy Standard (FHS),
/srv is where site-specific data should be served. Technically Samba shares can be placed anywhere
on the filesystem as long as the permissions are correct, but adhering to standards is recommended.
browsable : enables Windows clients to browse the shared directory using Windows Explorer.
guest ok : allows clients to connect to the share without supplying a password.
read only : determines if the share is read only or if write privileges are granted. Write privileges
are allowed only when the value is no, as is seen in this example. If the value is yes, then access
to the share is read only.
create mask : determines the permissions new files will have when created.
Now that Samba is configured, the directory /srv/samba/share needs to be created and the permissions
need to be set. Create the directory and change permissions from the terminal - sudo mkdir -p /srv/samba/share
sudo chown nobody:nogroup /srv/samba/share/
The -p switch tells mkdir to create the entire directory
tree if it does not exist.
Finally, restart the samba services to enable the new configuration: sudo systemctl restart smbd.service
nmbd.service From a Windows client, you should now be able to browse to the Ubuntu file server and
see the shared directory. If your client doesn't show your share automatically, try to access your
server by its IP address, e.g. \\192.168.1.1 or hostname in a Windows Explorer window. To check that
everything is working try creating a directory from Windows.
To create additional shares simply create new [dir] sections in /etc/samba/smb.conf , and restart
Samba. Just make sure that the directory you want to share actually exists and the permissions are
correct.
Nicholas Carr's provocative HBR article published five years ago and subsequent books suffer from the lack
of understanding of IT history, electrical transmission networks (which he uses as close historical analogy) and
"in the cloud" software service provider model (SaaS). He cherry-picks historical facts to fit his needs instead
of trying to describe real history of development of each of those three technologies. To be more correct Carr
tortures facts to get them to fit his fantasy. The central idea of the article "IT does not matter" is simply a fallacy.
At best Carr managed to ask a couple of interesting questions, but provided inferior and misleading answers. While Carr
is definitely a gifted writer, ignorance of technology about which he is writing leads him to absurd conclusions which
due to his lucid writing style looks quite plausible for non-specialists and as such influence public opinion about
IT. Still as a writer Carr comes across as a guy who can write engagingly about a variety of topics including those
about which he knows almost nothing. Here lies the danger as only specialists can sense that that "Something Is Deeply
Amiss" while ordinary readers tend to believe his aura of credibility emanating from the "former editor of HBR" title.
Unfortunately the charge of irrelevance of IT made by Carr was perfectly in sync with the higher management desire
to accelerate outsourcing and Carr's 2003 HBR paper served as a kind of "IT outsourcing manifesto". And the fact
that many people were sitting between chairs as for the value of IT outsourcing partially explains why his initial HBR
article, as weak and detached from reality as it was, generated less effective rebuttals then it should. This paper
is an attempt to provide a more coherent analysis of the main components of Carr's fallacious vision five years after
the event.
If one looks closer at what Carr propose, it is evident that this is a pretty reactionary and defeatist framework
which I would call "IT obscurantism" and which is not that different from "creativism". Like with the latter, his justifications
are extremely weak and consist of one hand of usage of fuzzy facts and questionable analogies, on the other putting
forward radical, absurd recommendations ("Spend less", "Follow, don't lead", "Focus on vulnerabilities, not opportunities"
and "move to utility-based 'in the cloud' computing") which can hurt anybody who trusts them or, worse, tries
blindly adopt them. The irony of Carr's position is that for the last five year since the publication of his HBR
article local datacenters actually flourished and until 2008 had shown no signs of impeding demise. In 2008 credit crush
his data centers but they are just collateral damage of financial storm. From 2003 to 2008 Data Centers experienced
just another technological reorganization which increased role of Intel computers in the datacenter (including appearance
of blades, as alternatives to small to midrange servers and laptops as the alternative to desktop), virtualization,
wireless technologies and distributed computing. Moreover there was some trend to the consolidation of datacenters
within the large companies.
The paper contains critique of key aspects of Carr's utopia including but not limited to such typical for Carr's
writings problems as "Frivolous treatment of IT history", "Limited understanding of enterprise IT", " "Idealization
of 'in the cloud' computing model". and "Compete absence of discussion of competing technologies".
The author argues that the level of hype about "utility computing" makes prudent treating all promoters of this interesting
new technology, especially those who severely lack technical depth, with extreme skepticism. Junk science is and always
was based on cherry-picked evidence which has carefully been selected or edited to support a pre-selected, absurd "truth".
The article claims that Carr's doom-and-gloom predictions about IT and datacenters are based on cherry-picked evidence
and while future is unpredictable by definition, the total switch to the Internet based remote "in the cloud"
computing probably will never materialize. Private and hybrid models are definitely more viable. There is
no free lunch and moving computation to the cloud increases the load on the remote servers as well as drastically increases
security requirements. Both factors increases costs. Achieving the same reliability for the cloud computing as in local
solution is another problem. Outages of large datacenter are usually more severe and more difficult to recover
then outages of small local datacenter. The information flow about outage has severe restrictions that additionally
hurt the clients.
Twitter lost its data through a hack on Google Docs. Learn from this to be very careful how much trust you place
on cloud apps and Web 2.0, says Eric Lundquist
Here's the background. A hacker apparently was able to
access the Google account of a Twitter employee. Twitter uses Google Docs as a method to create and share information.
The hacker apparently got at the docs and sent them to TechCrunch, which decided to
publish much of the information.
The entire event - not
the first time Twitter has been hacked into through cloud apps - sent the Web world into a frenzy. How smart was
Twitter to rely on Google applications? How can Google build up business-to-business trust when one hack opens the gates
on corporate secrets? Were TechCrunch journalists right to publish stolen documents? Whatever happened to journalists
using documents as a starting point for a story rather than the end point story in itself?
Alongside all this, what are the serious lessons that business execs and information technology professionals can
learn from the Twitter/TechCrunch episode? Here are my suggestions:
1. Don't confuse the cloud with secure, locked-down environments.
Cloud computing is all the rage. It makes it easy to scale up applications, design around flexible demand and make content
widely accessible [in the UK,
the Tory party is proposing more use of it by Government, and the Labour Government has appointed a
Tsar of Twitter - Editor]. But the same attributes that make the cloud easy for everyone to access makes it,
well, easy for everyone to access.
2. Cloud computing requires more, not less, stringent security procedures.>br /> In your own network
would you defend your most vital corporate information with only a username and user-created password? I don't think
so. Recent surveys have found that
Web 2.0 users are slack on security.
3. Putting security procedures in place after a hack is dumb.
Security should be a tiered approach. Non-vital information requires less security than, say, your company's five-year
plan, financials or salaries. If you don't think about this stuff in advance you will pay for it when it appears on
the evening news.
4. Don't rely on the good will of others to build your security.
Take the initiative. I like the ease and access of Google applications, but I would never include those capabilities
in a corporate security framework without a lengthy discussion about rights, procedures and responsibilities. I'd also
think about having a white hat hacker take a look at what I was planning.
5. The older IT generation has something to teach the youngsters.
The world of business 2.0 is cool, exciting... and full of holes. Those grey haired guys in the server room grew up
with procedures that might seem antiquated, but were designed to protect a company's most important assets.
6. Consider compliance.
Compliance issues have to be considered whether you are going to keep your information on a local server you keep in
a safe or a cloud computing platform. Finger-pointing will not satisfy corporate stakeholders or government enforcers.
AMERICANS today spend almost as much on bandwidth - the capacity to move information - as we do on energy. A family
of four likely spends several hundred dollars a month on cellphones, cable television and Internet connections, which
is about what we spend on gas and heating oil.
Just as the industrial revolution depended on oil and other energy sources, the information revolution is fueled
by bandwidth. If we aren't careful, we're going to repeat the history of the oil industry by creating a bandwidth cartel.
Like energy, bandwidth is an essential economic input. You can't run an engine without gas, or a cellphone without
bandwidth. Both are also resources controlled by a tight group of producers, whether oil companies and Middle Eastern
nations or communications companies like AT&T, Comcast and Vodafone. That's why, as with energy, we need to develop
alternative sources of bandwidth.
Wired connections to the home - cable and telephone lines - are the major way that Americans move information. In
the United States and in most of the world, a monopoly or duopoly controls the pipes that supply homes with information.
These companies, primarily phone and cable companies, have a natural interest in controlling supply
to maintain price levels and extract maximum profit from their investments - similar to how OPEC sets production
quotas to guarantee high prices.
But just as with oil, there are alternatives. Amsterdam and some cities in Utah have deployed their own fiber to
carry bandwidth as a public utility. A future possibility is to buy your own fiber, the way you might buy a solar panel
for your home.
Encouraging competition is another path, though not an easy one: most of the much-hyped competitors from earlier
this decade, like businesses that would provide broadband Internet over power lines, are dead or moribund. But alternatives
are important. Relying on monopoly producers for the transmission of information is a dangerous path.
After physical wires, the other major way to move information is through the airwaves, a natural resource with enormous
potential. But that potential is untapped because of a false scarcity created by bad government policy.
Our current approach is a command and control system dating from the 1920s. The federal government dictates exactly
what licensees of the airwaves may do with their part of the spectrum. These Soviet-style rules create waste that is
worthy of Brezhnev.
Many "owners" of spectrum either hardly use the stuff or use it in highly inefficient ways. At any given moment,
more than 90 percent of the nation's airwaves are empty.
The solution is to relax the overregulation of the airwaves and allow use of the wasted spaces. Anyone, so long as
he or she complies with a few basic rules to avoid interference, could try to build a better Wi-Fi and become a broadband
billionaire. These wireless entrepreneurs could one day liberate us from wires, cables and rising prices.
Such technologies would not work perfectly right away, but over time clever entrepreneurs would find a way, if we
gave them the chance. The Federal Communications Commission promised this kind of reform nearly a decade ago, but it
continues to drag its heels.
In an information economy, the supply and price of bandwidth matters, in the way that oil prices matter: not just
for gas stations, but for the whole economy.
And that's why there is a pressing need to explore all alternative supplies of bandwidth before it is too late. Americans
are as addicted to bandwidth as they are to oil. The first step is facing the problem.
Tim Wu is a professor at Columbia Law School and the co-author of "Who Controls the Internet?"
If you manage systems and networks, you need Expect.
More precisely, why would you want to be without Expect? It saves hours common tasks otherwise demand. Even if you
already depend on Expect, though, you might not be aware of the capabilities described below.
You don't have to understand all of Expect to begin profiting from the tool; let's start with a concrete example
of how Expect can simplify your work on AIX� or other operating systems:
Suppose you have logins on several UNIX� or UNIX-like hosts and you need to change the passwords of these accounts,
but the accounts are not synchronized by Network Information Service (NIS), Lightweight Directory Access Protocol (LDAP),
or some other mechanism that recognizes you're the same person logging in on each machine. Logging in to a specific
host and running the appropriate passwd command doesn't take long-probably only a minute, in most cases.
And you must log in "by hand," right, because there's no way to script your password?
Wrong. In fact, the standard Expect distribution (full distribution) includes a command-line tool (and a manual page
describing its use!) that precisely takes over this chore. passmass (see Resources)
is a short script written in Expect that makes it as easy to change passwords on twenty machines as on one. Rather than
retyping the same password over and over, you can launch passmass once and let your desktop computer take
care of updating each individual host. You save yourself enough time to get a bit of fresh air, and multiple opportunities
for the frustration of mistyping something you've already entered.
This passmass application is an excellent model-it illustrates many of Expect's general properties:
It's a great return on investment: The utility is already written, freely downloadable, easy to install and
use, and saves time and effort.
Its contribution is "superficial," in some sense. If everything were "by the book"-if you had NIS or some other
domain authentication or single sign-on system in place-or even if login could be scripted, there'd be no need for
passmass. The world isn't polished that way, though, and Expect is very handy for grabbing on to all
sorts of sharp edges that remain. Maybe Expect will help you create enough free time to rationalize your configuration
so that you no longer need Expect. In the meantime, take advantage of it.
As distributed, passmass only logs in by way of telnet, rlogin, or
slogin. I hope all current developerWorks readers have abandoned these protocols for ssh,
which passmasss does not fully support.
On the other hand, almost everything having to do with Expect is clearly written and freely available. It only
takes three simple lines (at most) to enhance passmass to respect ssh and other options.
You probably know enough already to begin to write or modify your own Expect tools. As it turns out, the passmass
distribution actually includes code to log in by means of ssh, but omits the command-line parsing to reach
that code. Here's one way you might modify the distribution source to put ssh on the same footing as
telnet and the other protocols:
In my own code, I actually factor out more of this "boilerplate." For now, though, this cascade of tests, in the
vicinity of line #100 of passmass, gives a good idea of Expect's readability. There's no deep programming
here-no need for object-orientation, monadic application, co-routines, or other subtleties. You just ask the computer
to take over typing you usually do for yourself. As it happens, this small step represents many minutes or hours of
human effort saved.
tutorial articles in this section describe TCP/IP and related protocols as sequence diagrams. (The sequence
diagrams were generated using EventStudio
System Designer 2.5).
WANdoc Open Source is free software that generates interactive documentation for large Cisco networks.
It uses syslog and router configuration files to produce summarized, hyperlinked, and error- checked router information.
It speeds up the WAN troubleshooting process and identifies inconsistencies in router deployment.
Douglas Comer This is the home
page of Douglas Comer, the author of the book "Internetworking with TCP/IP".
Illustrated
TCP/IP Online version of the book "Illustrated TCP/IP", by Matthew G. Naugle, published by Wiley Computer Publishing,
John Wiley & Sons, Inc.
The Internet Companion
Online version of the book "The Internet Companion". This book explains the basics of communication on the Internet and
the applications available
Routing in the Internet
A very comprehensive book on routing, written by Christian Huitema, from the Internet Architecture Board. A must read for
those interested on routing protocols
Troubleshooting TCP/IP
This is a sample chapter from the book "Windows NT TCP/IP Network Administration", published by OґReilly and associates
which explains how to solve problems related to TCP/IP in a Windows NT environment
Wireless
Networking Handbook Online version of the book "Wireless Networking Handbook" by Jim Geier, and published by New
Riders, Macmillan Computer Publishing
MCI Arms ISPs with Means to Counterattack Hackers [October 9]
MCI introduced today a security product designed to help Internet Service
Providers detect network intruders.
The networkMCI DoS (Denial of Service) Tracker constantly monitors the network and then once a denial
of service attack has been detected, the product immediately works to trace the root of the attack.
The product is designed to eliminate the time technical engineers spend manually searching for the
intrusion. MCI claims the product takes little programming knowledge to find the network intruder.
The DoS Tracker combats SYN, ICMP Flood, Bandwidth Saturation, and Concentrated Source, and the newly
detected Smurf hacker attacks.
"Obviously, we can't guarantee the safety of other networks from all hacker activity, but we believe
the networkMCI DoS Tracker provides ISPs and other network operators with a powerful tool that will help them protect
their Internet assets," Rob Hagens, director of Internet Engineering.
The product is available for free from MCI's
Web site.
A web site with support for students and instructors using
William Stallings book entitled "Data and Computer Communications". There are a number of links to sites which have
courses based on the book.
A list of figures from Andrew
Tanenbaum's popular book Computer Networks
3rd Ed. If you use the textbook, then this will save you from photocopying the figures.
Internet On-Line Self Study Courseware from the
Central Institute of Technology (CIT) New Zealand. Contains links to a number of computer science subjects. There are
some good slides for a data communications course.
Lecture notes and
tutorials at the Central Queensland University.
The Network Book at Columbia University. A comprehensive
introduction to networking and distributed computing technologies. Detailed description of application layer. Powerpoint
slides.
The Last but not LeastTechnology is dominated by
two types of people: those who understand what they do not manage and those who manage what they do not understand ~Archibald Putt.
Ph.D
Copyright � 1996-2021 by Softpanorama Society. www.softpanorama.org
was initially created as a service to the (now defunct) UN Sustainable Development Networking Programme (SDNP)
without any remuneration. This document is an industrial compilation designed and created exclusively
for educational use and is distributed under the Softpanorama Content License.
Original materials copyright belong
to respective owners. Quotes are made for educational purposes only
in compliance with the fair use doctrine.
FAIR USE NOTICEThis site contains
copyrighted material the use of which has not always been specifically
authorized by the copyright owner. We are making such material available
to advance understanding of computer science, IT technology, economic, scientific, and social
issues. We believe this constitutes a 'fair use' of any such
copyrighted material as provided by section 107 of the US Copyright Law according to which
such material can be distributed without profit exclusively for research and educational purposes.
This is a Spartan WHYFF (We Help You For Free)
site written by people for whom English is not a native language. Grammar and spelling errors should
be expected. The site contain some broken links as it develops like a living tree...
You can use PayPal to to buy a cup of coffee for authors
of this site
Disclaimer:
The statements, views and opinions presented on this web page are those of the author (or
referenced source) and are
not endorsed by, nor do they necessarily reflect, the opinions of the Softpanorama society.We do not warrant the correctness
of the information provided or its fitness for any purpose. The site uses AdSense so you need to be aware of Google privacy policy. You you do not want to be
tracked by Google please disable Javascript for this site. This site is perfectly usable without
Javascript.


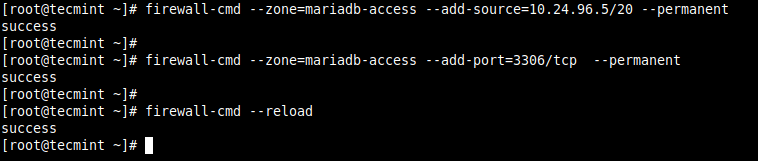
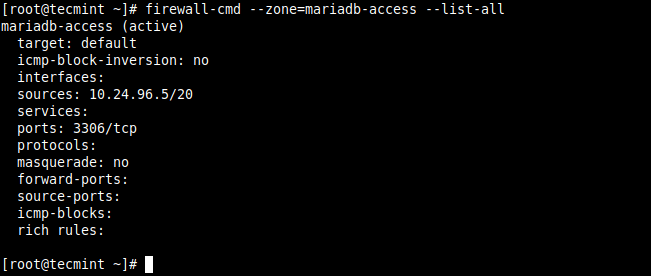
mike 358 1 1 gold badge 2 2 silver badges 10 10 bronze badges add a comment 3 Answers Active Oldest Votes 26
Michael Hampton 202k 31 31 gold badges 395 395 silver badges 757 757 bronze badges
dawud 14.2k 3 3 gold badges 38 38 silver badges 59 59 bronze badges
Ranjeet Ranjan 129 1 1 bronze badge add a comment
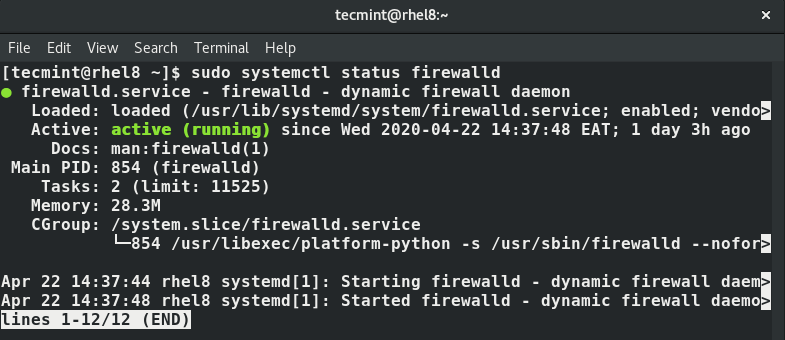
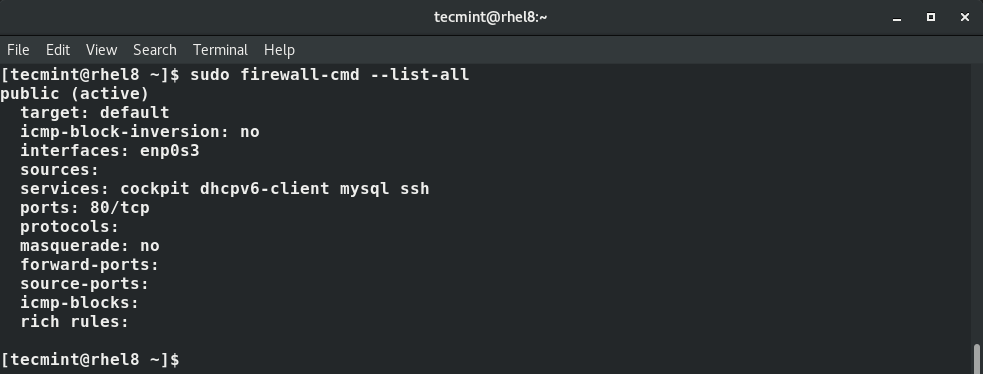


8 comment
cron Error: bad username; while reading /etc/cron.d file on Linux
awk / cut: Skip First Two Fields and Print the Rest of Line
Error while loading shared libraries: libXrender.so.1 on Linux
PHP-fpm Too Many Open Files 24 Error (set open file descriptor limit)
How to use curl command with http/2 on MacOS X
How to use curl command with proxy username/password on Linux/ Unix
How do I unzip multiple / many files under Linux?
PHP Fatal error: Call to undefined function gzinflate()
How to install route command on CentOS / RHEL 7
Bash Shell: Trim Leading White Space From Input Variables
How to install wget on a Debian or Ubuntu Linux
PHP Fatal error: Call to undefined function curl_init() in /home/httpd/a/includes/functions.php(1)

RECENTLY UPDATED
More than just ACCEPT and DROP